Support for

Download InDesign templates for our core product range. Browse to w3pedia > Product Bible or download the template directly from .
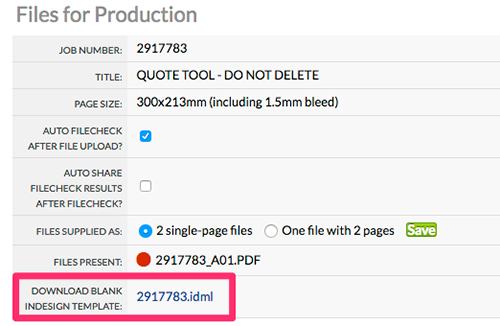
This is the preferred method for creating a template as Flyerlink templates are always up to date.
Setting Up
|
|||||||
Using TGI
|
|||||||
Removal of Designer Mark-up
|
|||||||
Download InDesign templates for our core product range. Browse to w3pedia > Product Bible or download the template directly from .
This is the preferred method for creating a template as Flyerlink templates are always up to date.
We officially support InDesign CS5.5 or later.
| InDesign Version | Does TGI work? |
|---|---|
| CC (2014) | Everything works. |
|
CC (2013) |
Everything works. |
| CS 6 | Everything works. |
| CS 5.5 | Everything works. |
| CS 5 | Everything works. |
| CS 4 | Everything works. |
| CS 3 |
For newer products, complicated shapes and artwork will not be drawn for you. TGI will not check online for updates. |
| CS 2 | As CS 3, and some product searches might not work as expected. |
| CS | Not supported. |
Click on the Tools link below.
This is a walk-through, showing you how to make a document using TGI.
See the links at the bottom of this article.
Show the Scripts palette from the menu:
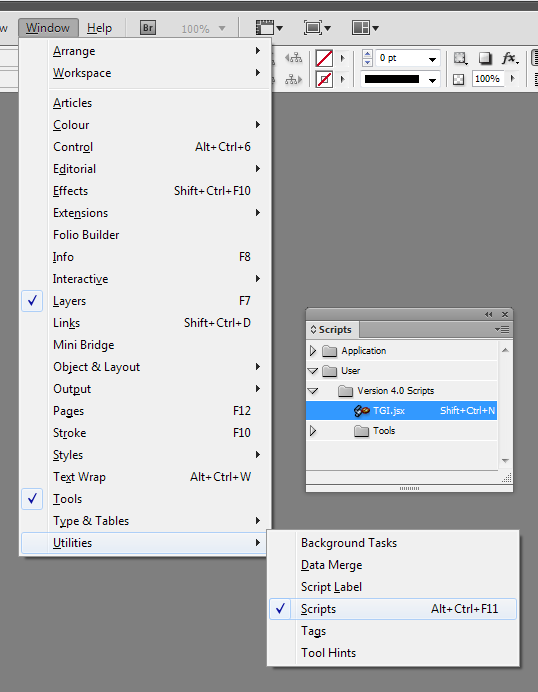
Double-click on the TGI.jsx script in the Scripts palette, or press Shift+Ctrl+N if you have set up the keyboard shortcut.
If you cannot see TGI.jsx, then try expanding the User folder and its sub-folders.
It is recommended that you set your default printer to your chosen PDF printer before you start TGI. This way, TGI sets up all your printer options for professional printing.
If you know the product code, or part of it, type it into the box, then OK:
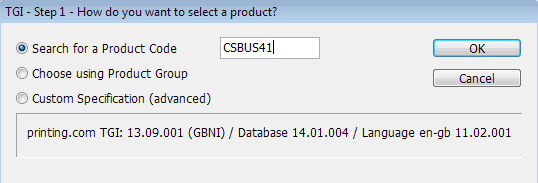
Alternatively, you can browse products by product group.
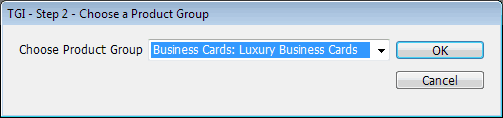
A list of matching products is presented, along with an option to rotate the document.
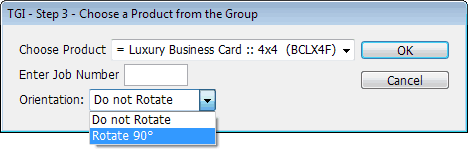
At the left of each product in the list, the orientation is shown as:
You can override this default by selecting Orientation: Rotate 90°
Some products have finishing options that feature in your design document. If you are asked, then check when making choices.
You might be informed of things TGI could not complete for you, or you might be given advice about designing for the product. See TGI Warnings below.
Now, be creative! Your TGI-generated document should be product-compliant, except for your artwork, but when you're done remember to check it against the specification before you submit your print-ready PDFs.
Below is a list of what TGI draws in the documents it generates.
You probably don't need to read this, unless you're looking for something specific.
The required number of pages will be generated in the document, depending on product specification. Where a product has a reverse, the even-numbered pages will be reverses.
TGI places artwork on these layers:
| Layer Name | Notes |
|---|---|
| Foreground | Your regular artwork layer, where you place your design. |
| Dimensions | Shows sizes of some features. |
| QuietZone | Areas that you should leave clear of important elements. |
| FoldCrease | Folds and creases (where there are no die-cut guides). |
| Trim | Trimmed and shaped edges. |
| Messages | Hints about the product or spec. |
| Identity | Job and product information. |
| Finishing | Finishing markings that must be topmost on the artwork, e.g. die-cut, or page frame. |
At the top of the pasteboard area, above Page 1, on the Identity layer, a text box contains basic information about the document: product code, information about TGI, the date and time of creation, and if supplied, the job number.
On all pages, a page frame box of the appropriate thickness and colour, on the Finishing layer.
The first page shows dimension lines on the top and left edges, on the Dimensions layer, detailing the PDF width and height, and the finished width and height.
These are marked in blue QUIET-ZONE colour, on the QuietZone layer, showing areas that should be kept clear of essential design elements. This layer is hidden by default, and can be revealed by clicking on the ‘eye box’ (leftmost column) next to the QuietZone layer in the Layers palette.
These are marked in purple TRIM-GUIDES colour, on the Trim layer, showing where the product will be trimmed.
Any Design Notes stored in Flyerlink® will be shown in the left side of the pasteboard.
Panels are generated for standard Mini Brochure products.
A red page frame is drawn to indicate the front panel on the finished item. Check that this is as you require, particularly with One-Piece Mailers, reverse folds, and roll-folded Mini Brochures.
Where a simple perforation option is specified on leaflet products, the parallel edge closest to the perforation is marked with a dashed green+white line.
This is only to assist with visualisation of the layout.
See Designing for Production to understand why some elements should not run continuously across a spread (3 mm is trimmed from each page at the spine).
TGI has the capability to show the inward creeping of the outer trimmed edge on Booklet products, but we have not yet applied this to our product range. If you need to produce a document for a Booklet product that shows creeping trim guides and quiet zones, then please contact operations@printing.com with your needs.
TGI prompts for ‘short crease’ or ‘long crease’.
A crease line is placed at the centre of the design. Warnings are given for tent-like orientations.
Crystal Credit Cards, Premium (round corner) Cards, and Premium Pocket Calendars, etc., are presented with the required die-cut shape.
Add solid shapes to the Finishing layer, using swatch colours: OPULEAF-GOLD, OPULEAF-SILVER.
Add solid shapes to the Finishing layer, using swatch colour: SPOT-UV.
Add solid shapes to the Finishing layer, using swatch colour: EMBOSSINI.
For Banners having eyelets, TGI will place eyelets with the correct spacing. This also works with custom-sized Banners.
If you chose a Style in Finishing Options, then artwork for the shape is provided by TGI.
If you are modifying an existing folder design, then you will need to unlock and ungroup the elements before editing.
The InDesign Template Generator - Product Support (link below) lists every printing.com printed product, detailing its support level and completeness.
Now that TGI supports nearly all printing.com products, this document is less important than when the TGI project was first started in 2006.
Rather than being a critical document, the Product Support listing is simply an export from our internal quality processes (implementation and version control logs).
This is a measure of our confidence that the generated document meets the production specification:
| Support Level | Notes |
|---|---|
| No Support | Initial state |
| Do Not Show | Deliberately hidden |
| Open Network | Templates provided elsewhere |
| Brand Demand | Private builds only |
| Hide (parked; no support) | For work-in-progress |
| Internal Testing | We're getting it ready |
| Alpha Release | Use with caution |
| Beta Release | Nearly ready; some faults |
| Certified Release | We're confident it'll work! |
For general release, TGI only creates documents for products having a support level of Internal Testing or better (shown bold).
This is a measure of how complete the generated document will be. For example, if elements need to be added manually, then the Completeness will be less than 100%.
TGI automatically sets up your Print settings. However, do check that these are correct before you generate your PDFs, because TGI makes some assumptions about your setup.
Follow the File Check Guide and Designing for Production to help you check that your file meets production specifications.
TGI adds extra information into your design document, for visual guidance to help you with design, and essential production mark-up that is used when making your printed jobs.
| Colour | Notes | |
|---|---|---|
| QUIET-ZONE | No | Shows hidden or near-edge areas |
| FOLDING-GUIDES | No | Shows folding or creasing axes |
| TRIM-GUIDES | No | Shows physical edges |
| DIE-CUT-GUIDE | Yes | (overprint) |
| SPOT-UV | Yes | (overprint) |
| EMBOSSINI | Yes | (overprint) |
| OPULEAF-SILVER | Yes | (overprint) |
| OPULEAF-GOLD | Yes | (overprint) |
It is important that markings are not present in PDFs supplied for print (they would spoil the look of the print). We will not accept responsibility for print that is affected by template mark-up.
Both of our supported preflight solutions (File Check 2.0, and Instant PDF) will automatically strip out the colours that should not be printed.
On the FileCheck Report this will appear as, 'Any InDesign TGI elements have been removed'.
Documentation
|
|||
See also
|
|||
Jump to contents page of
|
|||