Support for

Each template has a specific orientation, either landscape or portrait - don’t change this.
If you want to supply landscape pages on a portrait booklet, just rotate the content of the pages yourself so they fit in the orientation required by the product specification.
While doing this, pay careful attention to the imposition and make a mock-up to be safe.
In a stapled Booklet, the bulk of the paper causes the inner pages to extend (creep) further out than the outer pages when folded.
When trimmed, the inner pages are actually narrower than the outer pages. This also means that some of the content on the outer pages is hidden near the spine.
The amount of creep is dependent on the number of pages and paper thickness e.g. the thicker the Booklet, the more you need to keep important objects away from the edges.
Our general recommendation is that you keep important objects at least 4 mm from the final trimmed size.
As a result of creep (mentioned above), we also advise that you increase your margins to avoid anything being chopped off.
When we design Booklets ourselves, we tend to leave at least 10 mm of ‘quiet zone’ or ‘white space’ on the trimmed edge.
This means that creep isn’t as noticeable and items won’t be chopped off - the more pages your booklet has, the more likely it is to be affected by creep.
These are difficult to get right for any printer and it’s unlikely that objects that cross pages will line up exactly.
It’s best to avoid them or accept that there will be some movement throughout your booklet (NB This means that you must manage your customer’s expectations).
Don’t use borders - they’ll look terrible.
Avoid trying to match colours throughout the booklet.
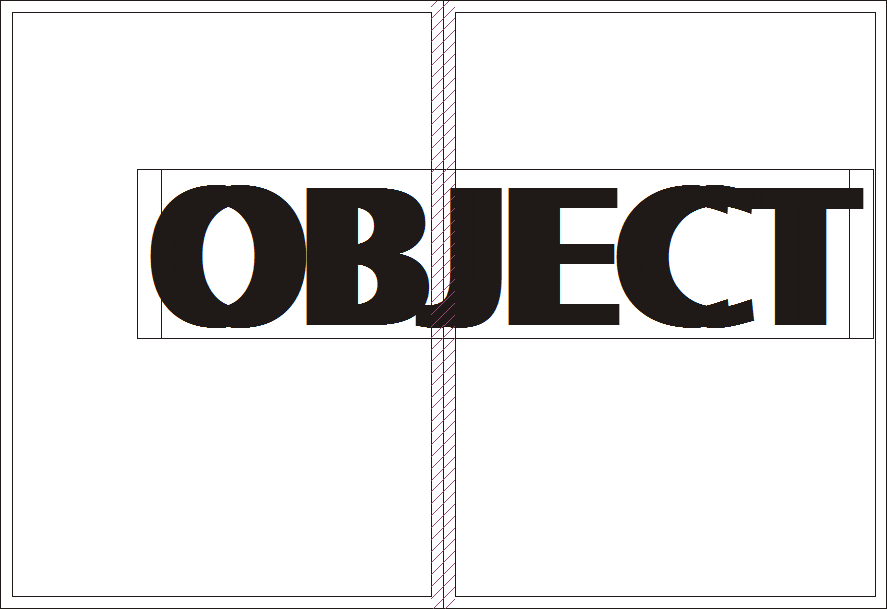
The first diagram shows two facing pages of a booklet, with the text “OBJECT” crossing the spine of the booklet.
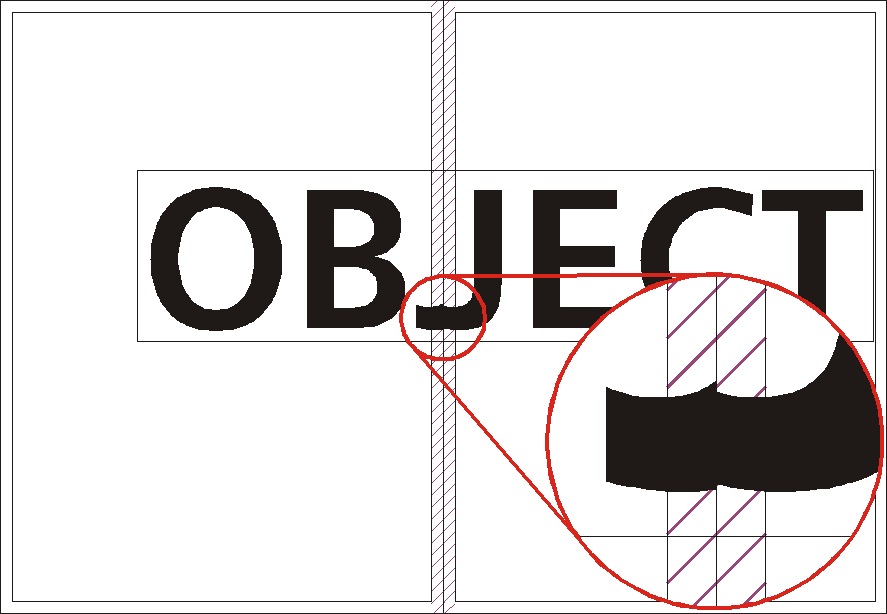
Some of this will be lost in the chevron gap below if left exactly as it is.
The production process trims away 3 mm bleed from all edges of each page, leaving only the inner area (shown here as an inner box, which would not usually be present in your design).
Ordinarily, objects crossing the spine would lose 6 mm into the spine.
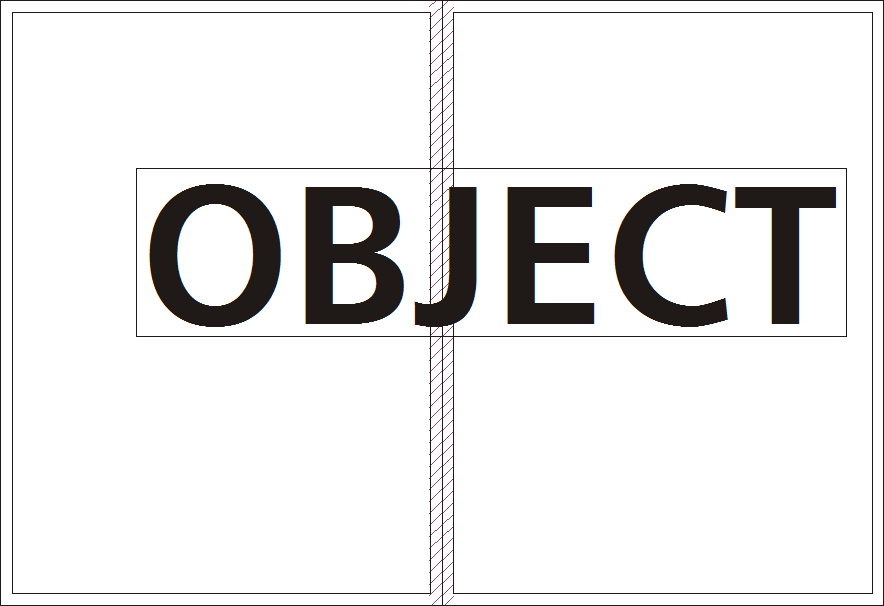
Here’s how to avoid that:
This process should leave you with no white gaps in the spine and a newly staggered image (as indicated below).