Support for

From the WorksThing Dashboard, you can type in the search bar - Create Timeline and press enter.
or under the Home section, you can click the Blue Create Timeline Tile.
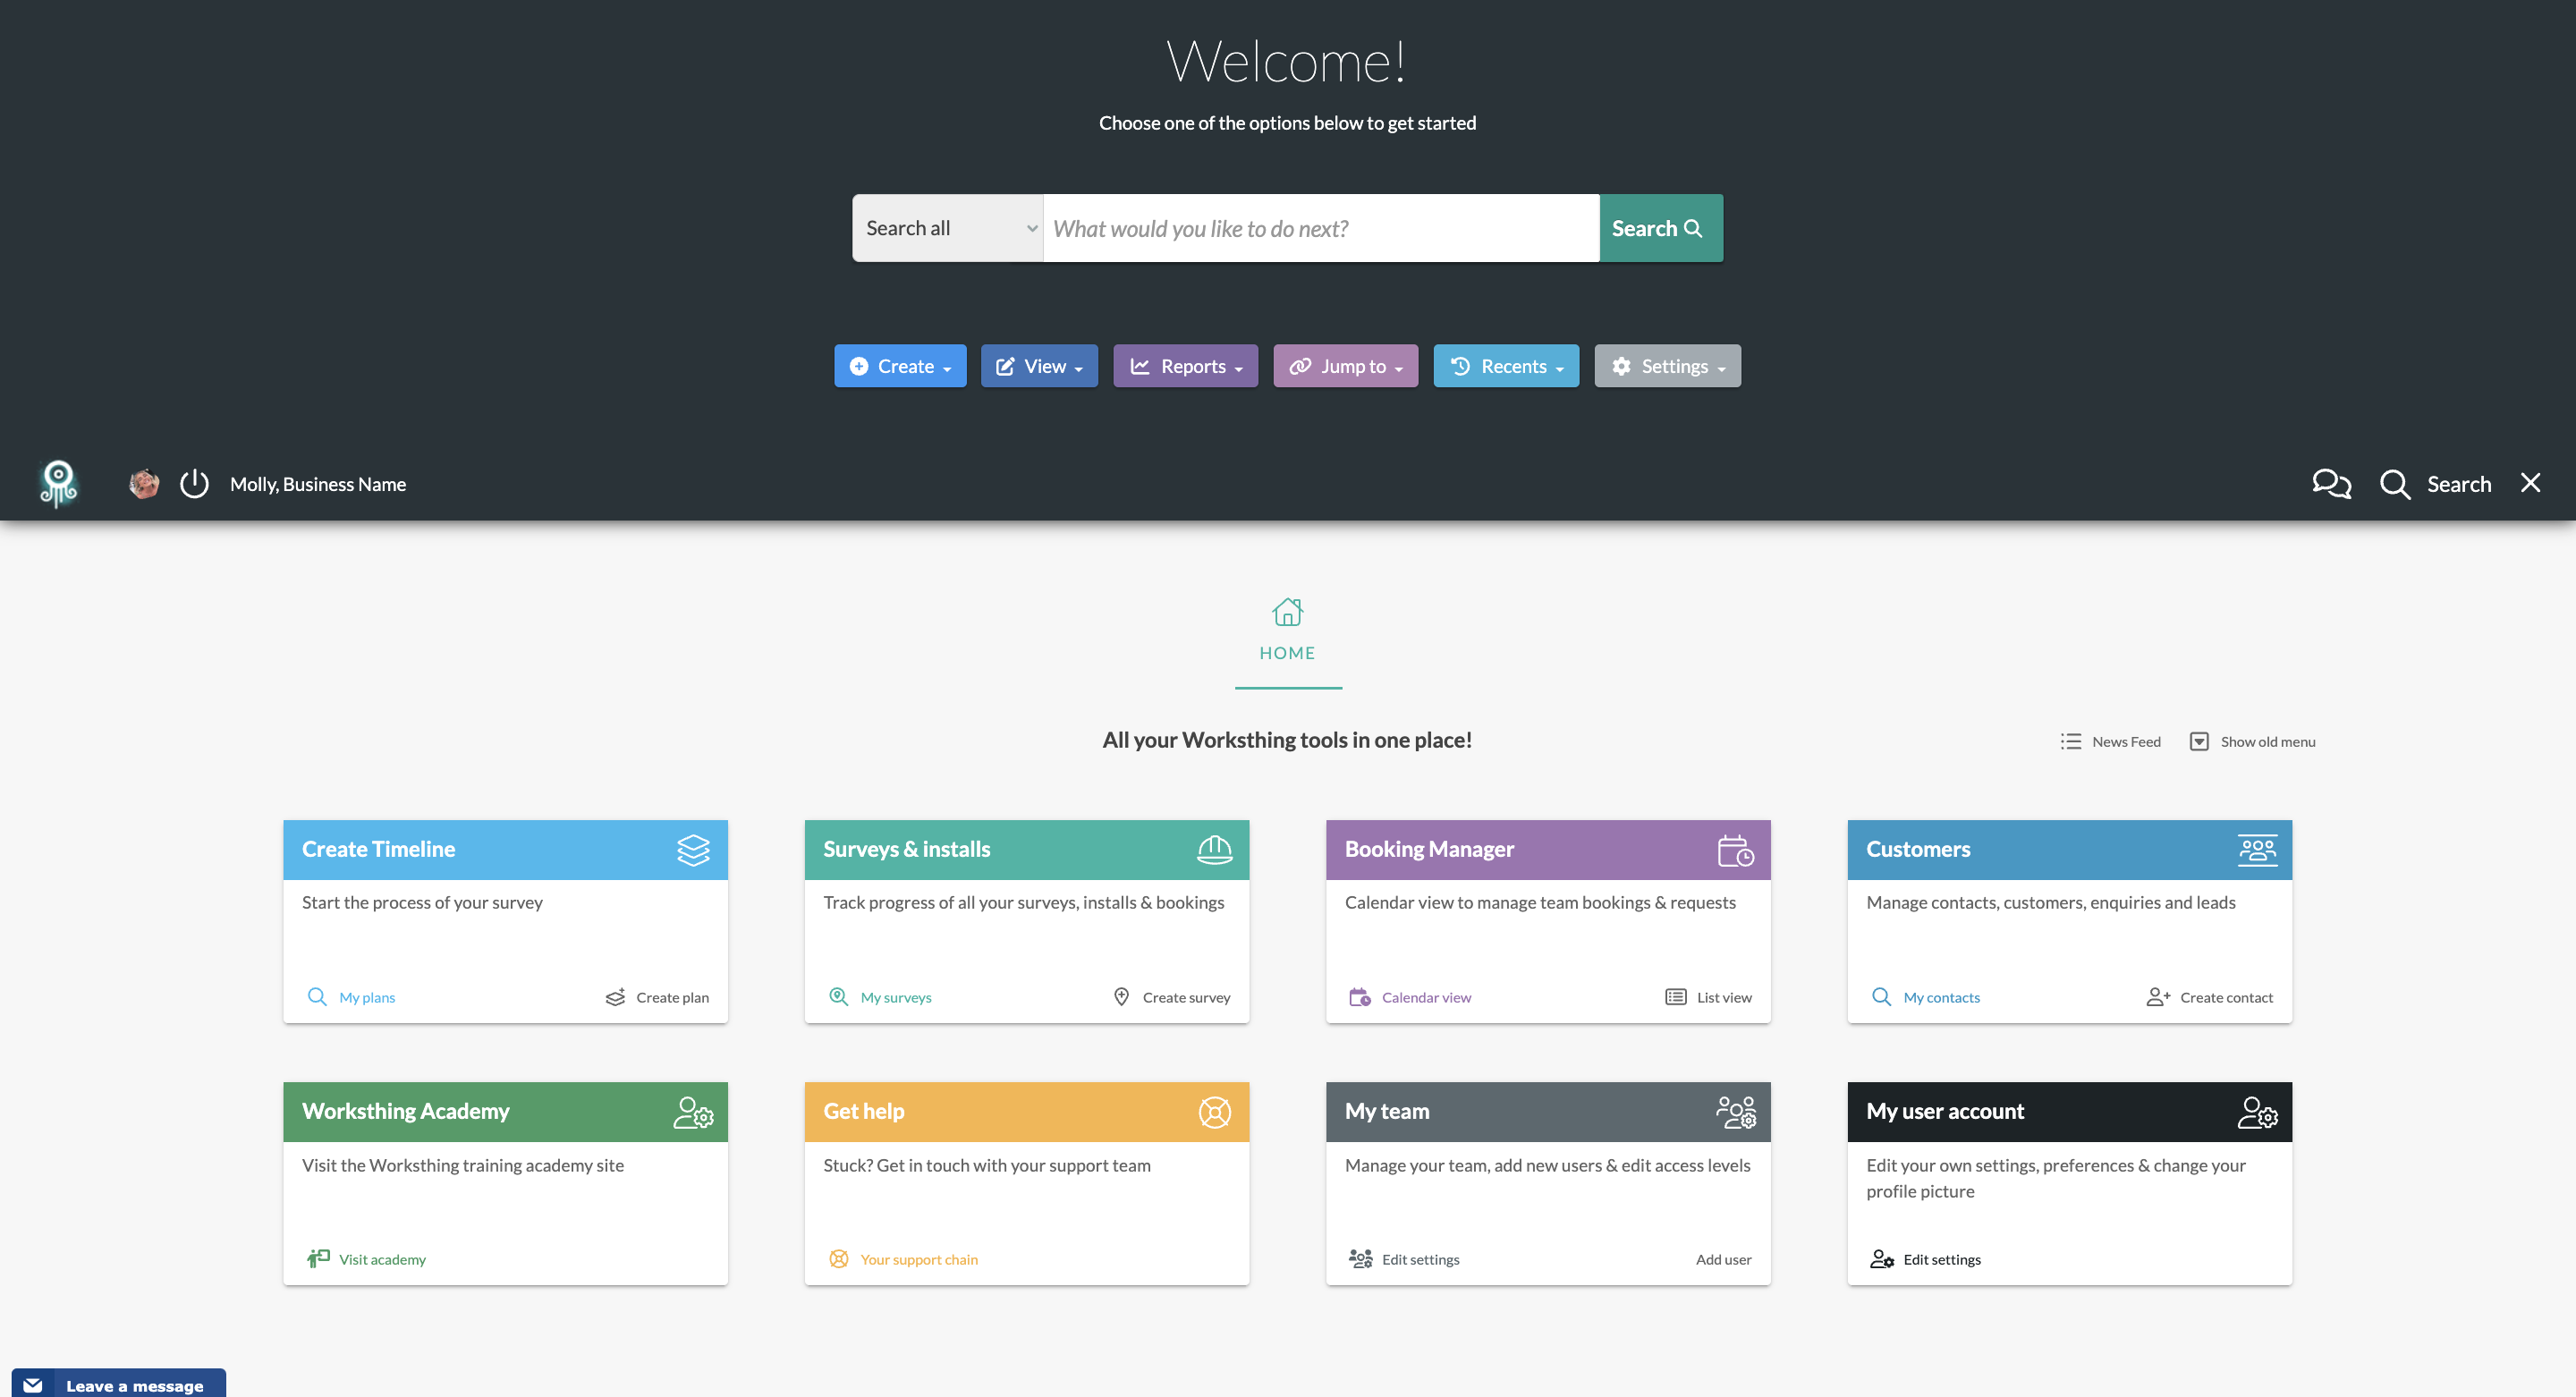
This takes you to the Site Timeline page.
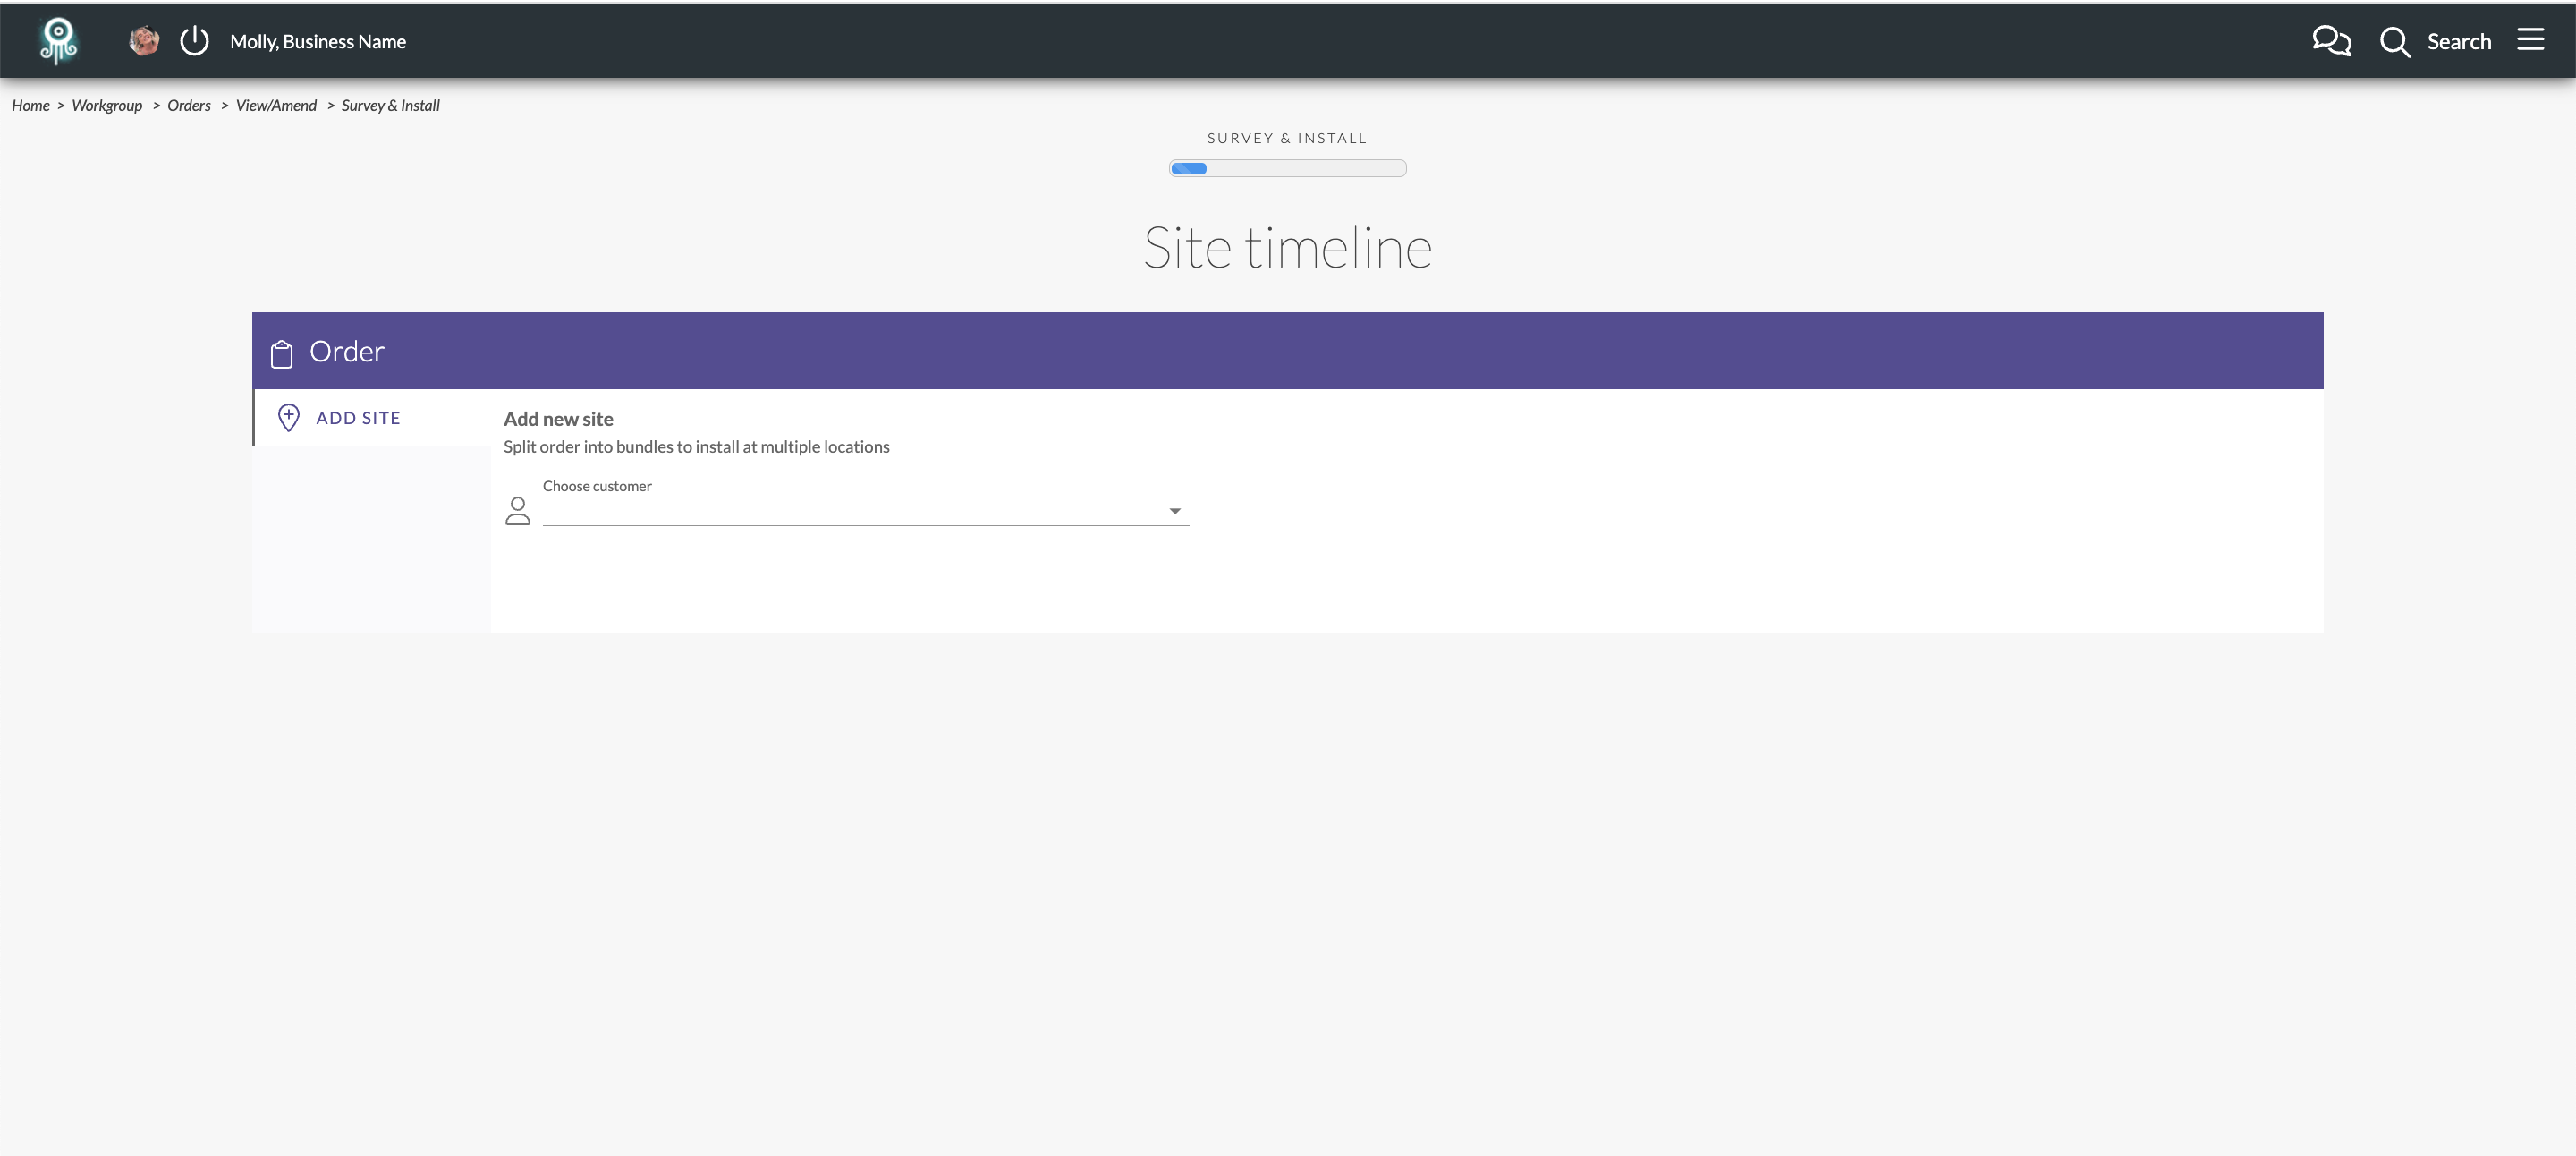 From here you can add the customer and then it will ask you for their address.
 You can also add a reference or location name along with any notes you may have for this order.
Click save site.
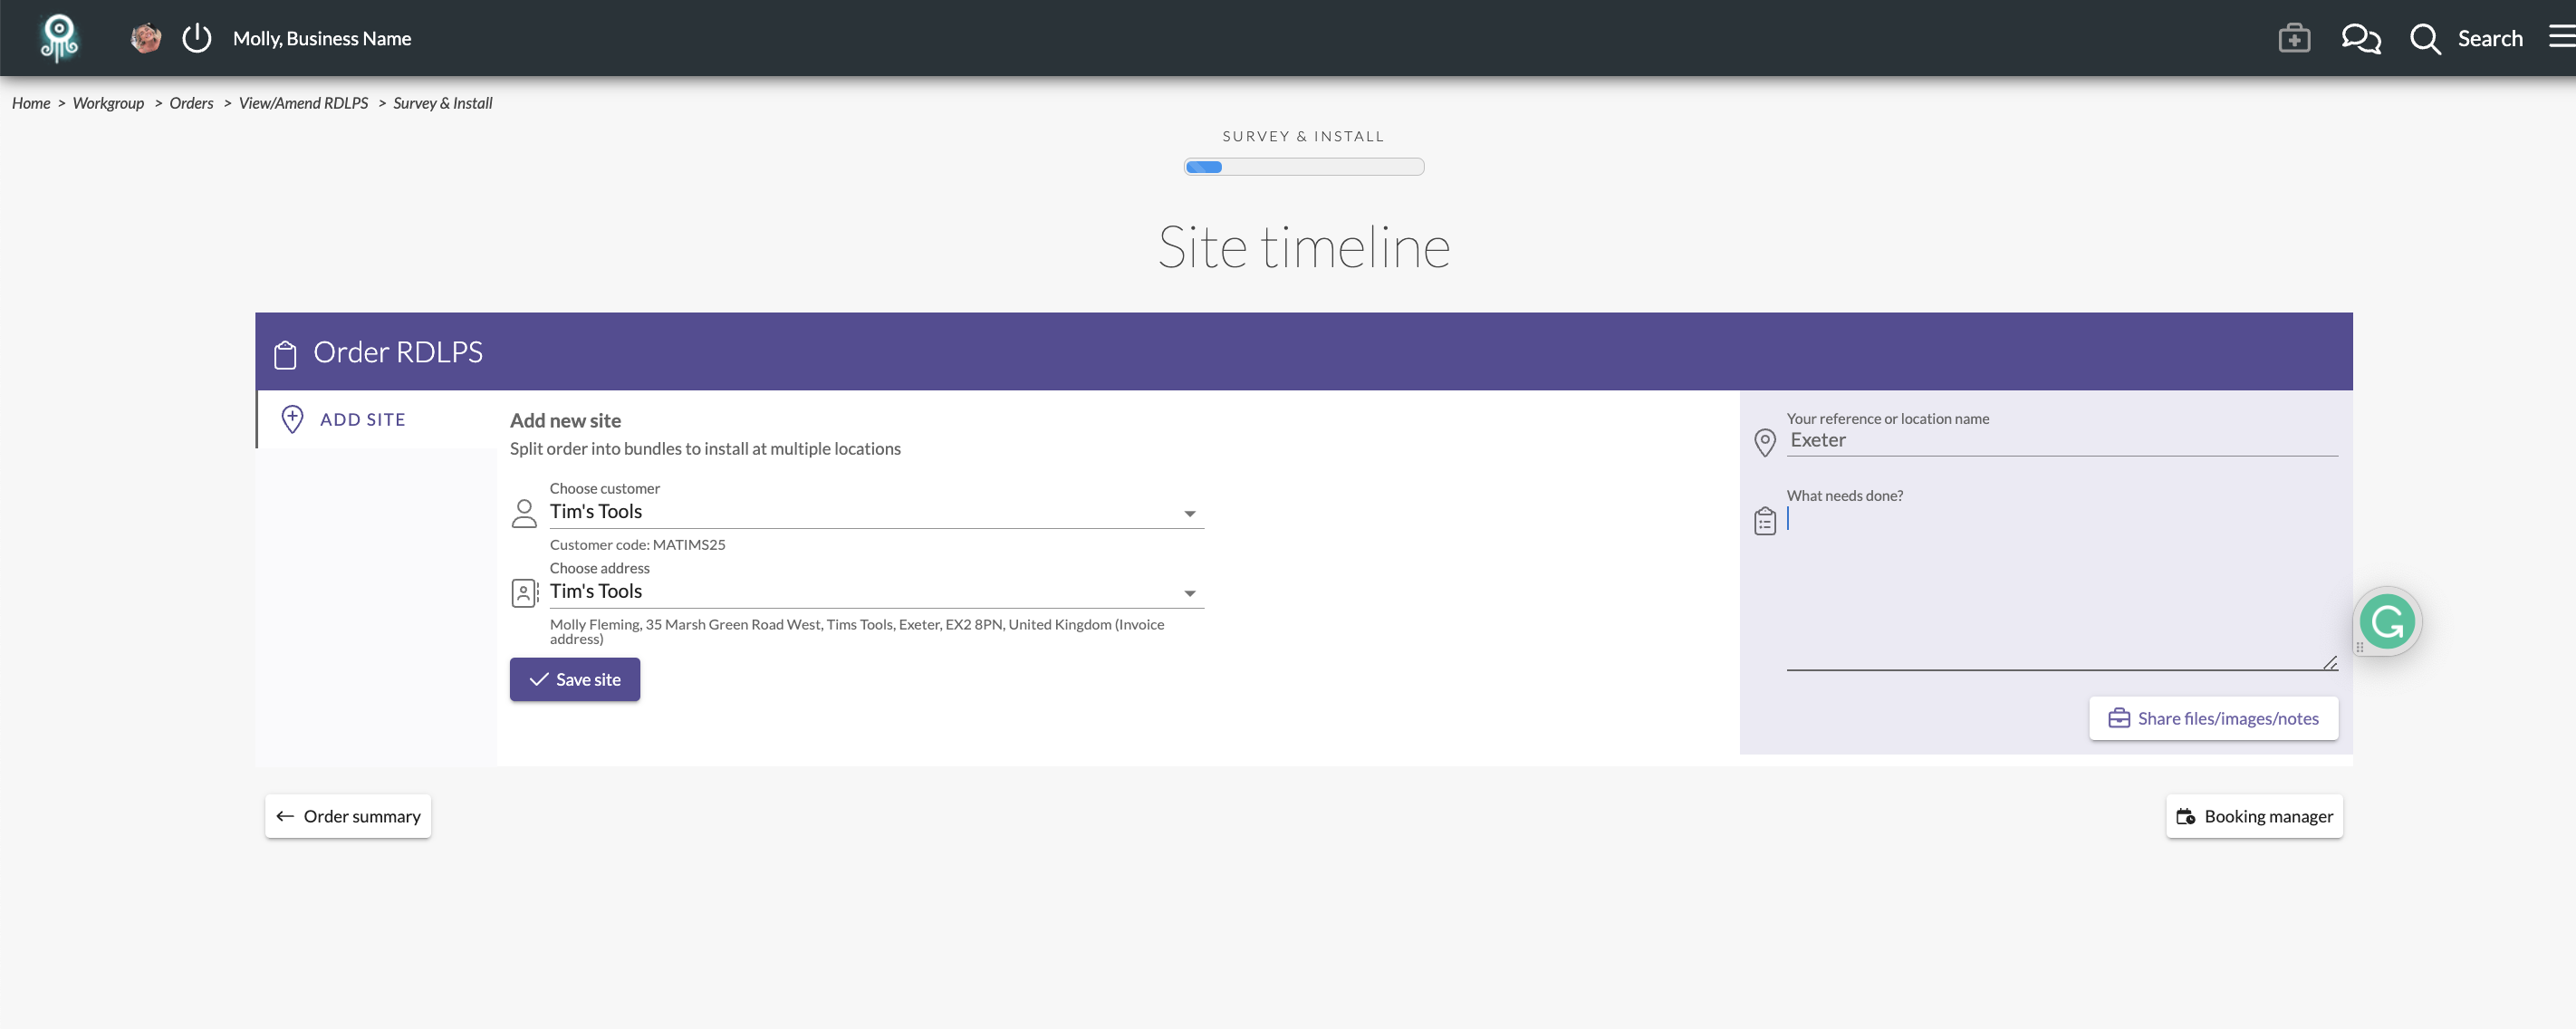
 This will kickstart a timeline for this order. on the left you can also add additional sites if there are multiple locations on a job.
There are multiple great tools for you to use on the timeline such as uploading a risk assessment and booking both the survey and install. You can add notes and images to this order which will be stored for later viewing.
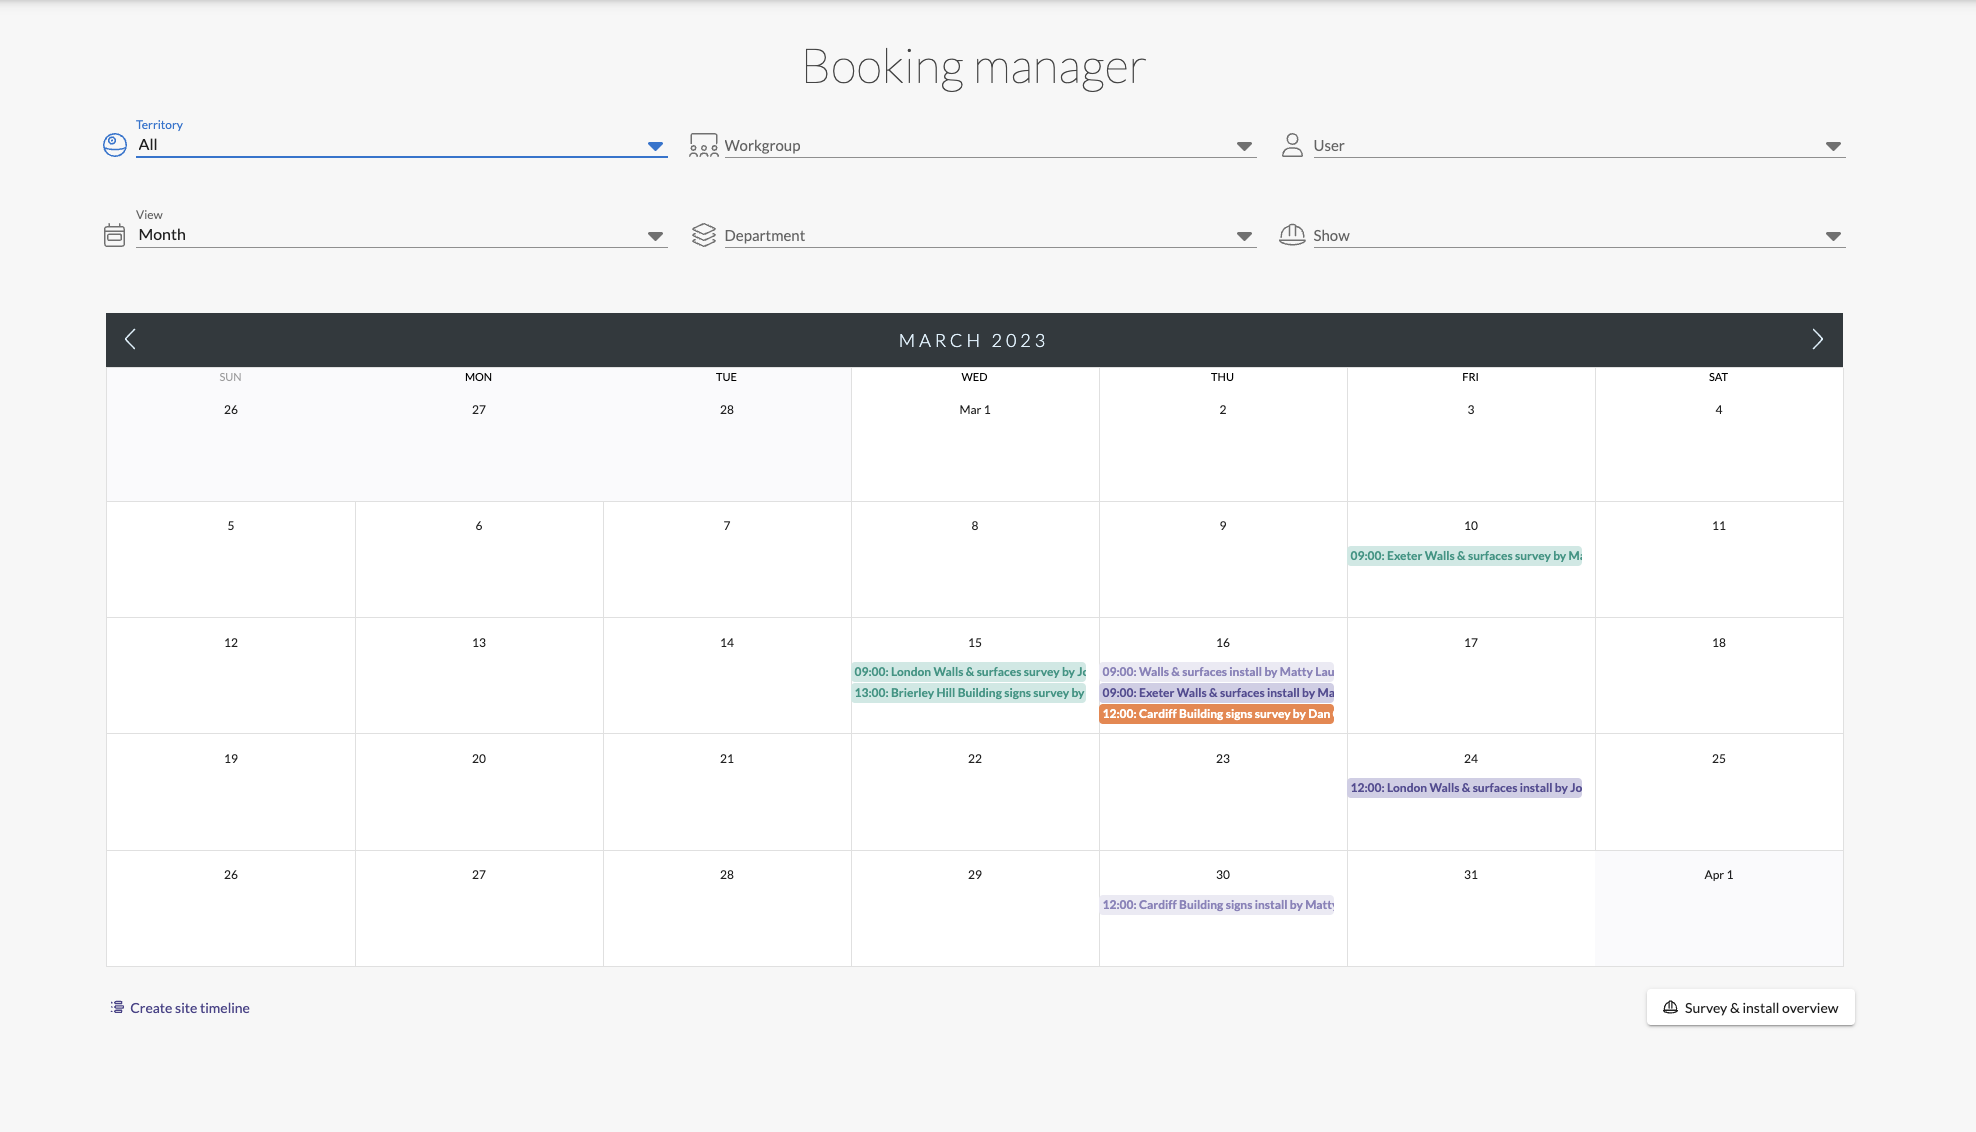
From this screen you can also view the booking manager to where your teams availability and bookings are found.
Jump to contents page of
|
|||