Support for

The Control Desk is a way of visualising your studio work in progress (WIP) and helping you quickly and easily progress jobs with customers and into production.
The page is responsive but designed to work on desktop or landscape iPad, rather than mobile or portrait tablets.
Go to
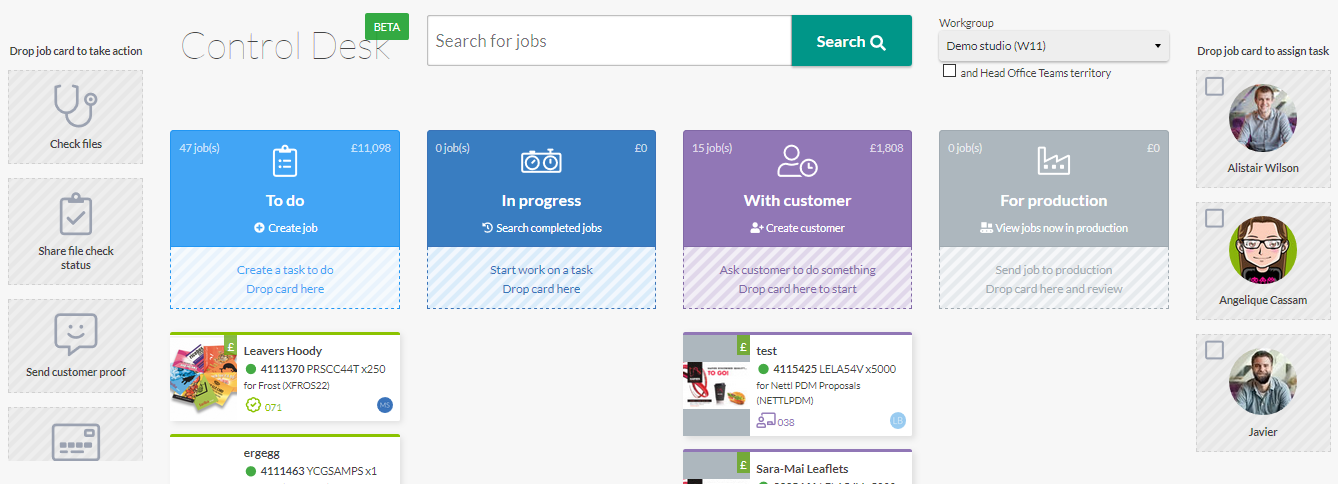
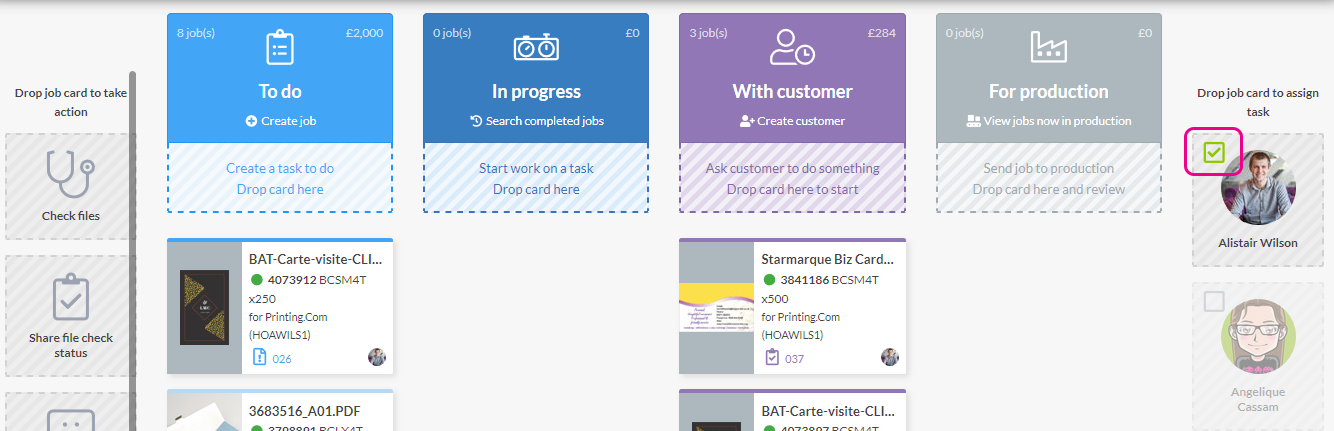
This page shows you each job as a card
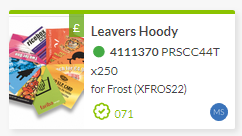 The cards show an image of the product - or a thumbnail if the job files have been uploaded
They also show key information: the job title, product, quantity and customer
The bottom icon shows the job status and the right circle shows the member of your team assigned to the job.
The page is split into 4 sections
To do shows any jobs that aren't being actively worked on by anyone, but are with the studio for progressing. This might include having artwork designed or some aspects of the job spec needing changed.
In progress is anything you've moved into the In progress column
This is a useful way of sharing with your team what you're actively working on at any given time
With customer shows anything that is currently awaiting customer input.
This would include waiting for payment, or waiting for a proof to be approved.
To help progress this column - you can add Chase job emails to give a daily reminder for customers when there are jobs requiring their input to progress
For production shows anything you've just sent into production
You can use this to drag jobs into production
To see more recently sent to production head to
Along the right hand side you'll see members of your team and yourself at the top
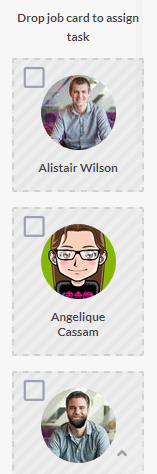
To assign a job to a member of the team, simply drag the job onto their image.
You can add an image to your user here https://www.flyerlink.com/res_people_profile.php
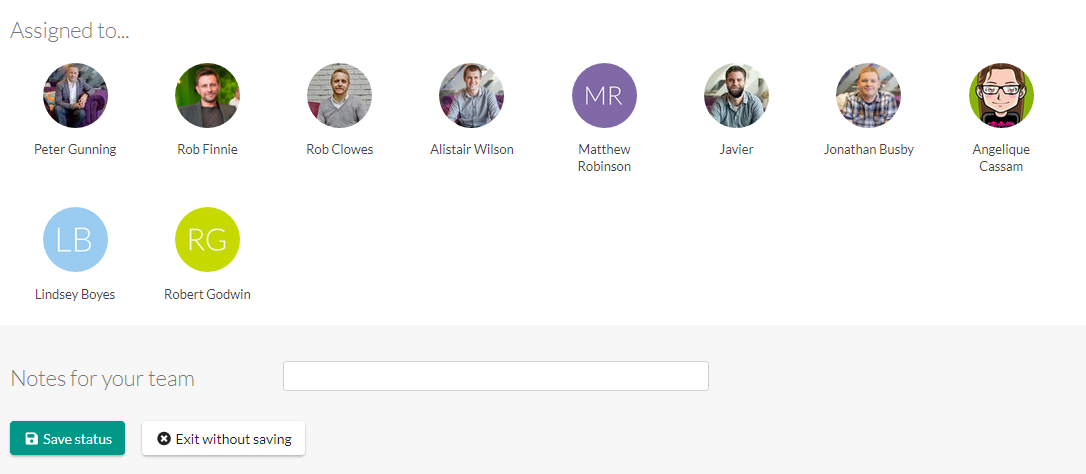
You can also click a job, choose status and assign to a member of your team here.
If you want to just see your own or another persons jobs in progress, tick the user and it will filter out other jobs
Click a card to bring up more details about that job

The Details tab here gives you a more complete overview of the job and shows you the progress so far.
If you need to change the job details choose the Edit links and it will take you to where you can change the customer, product, quantity, financials or anything else you need to edit.
Adjusting the status
You can adjust the job status from the Control Desk in 2 ways
1) Click the job card and choose Status tab

Choose the status you need and then Save changes at the bottom of the popup
2) Drag your job card into the action you want to do
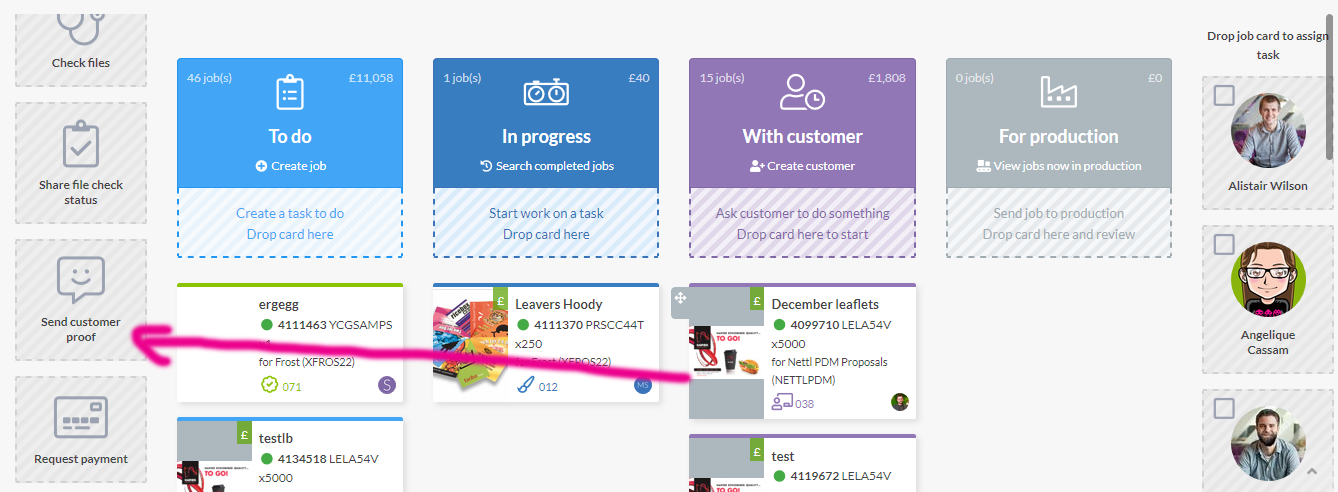
This will update the job status and perform any associated actions for you
If there's a reason why the job is unable to perform that action, or things to be aware of we'll bring up a notice

Click a job card and choose the Financial tab
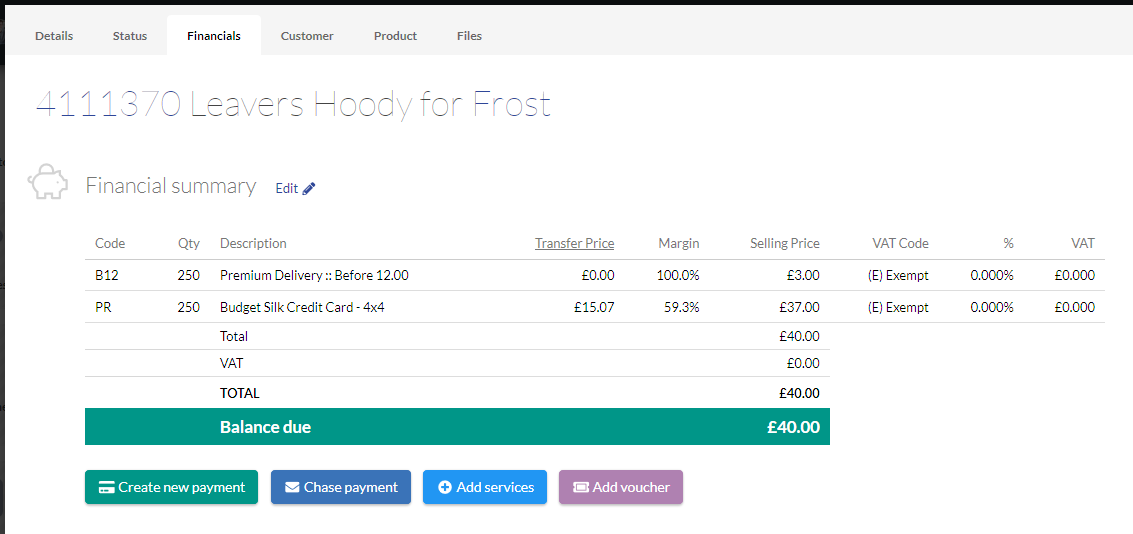 Here you'll see an overview of the job financials including what the job value is and whether it's been paid or not yet.
Click "Transfer Price" to see the cost to you for the job
The buttons at the bottom give you options to adjust the financials, add payment or chase payment from the customer.
Choose Add service or Add voucher to add extra costs or discounts to the job

Choose Create new payment to create and allocate a payment, using the Virtual Terminal for real card payments or just a payment record if the customer paid in cash or by another payment method
Choose Chase payment to show an email template to send to the client asking them to pay online

Click a job and go to Files tab
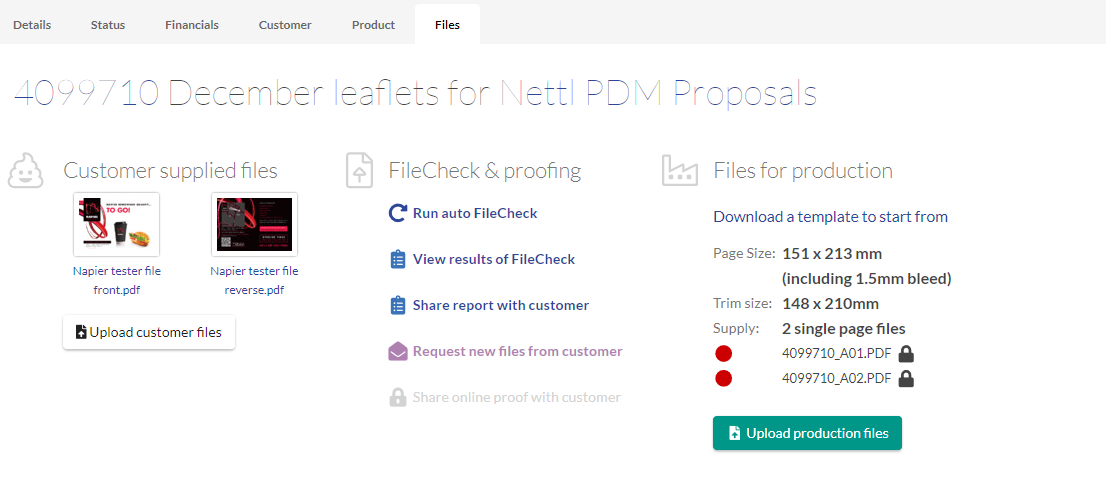 This shows you any files a customer has supplied
And it gives you actions to FileCheck the files, request new files or share a filecheck proof with the customer
You can also download a INDT template for the job and upload the files for production
When the dots in the Files for production section are green then the job has files ready for production and can be progressed into production
To progress jobs through the Control Desk you'll want to follow a standard workflow
Our recommended workflow would be
1) Create a job
 Use the Create Job link on the To Do section to start this off
2) Add artwork
Click a job then use the Files tab
Here you can download client supplied artwork, filecheck it to go into the files for production
Or you can download a INDT template and design from scratch
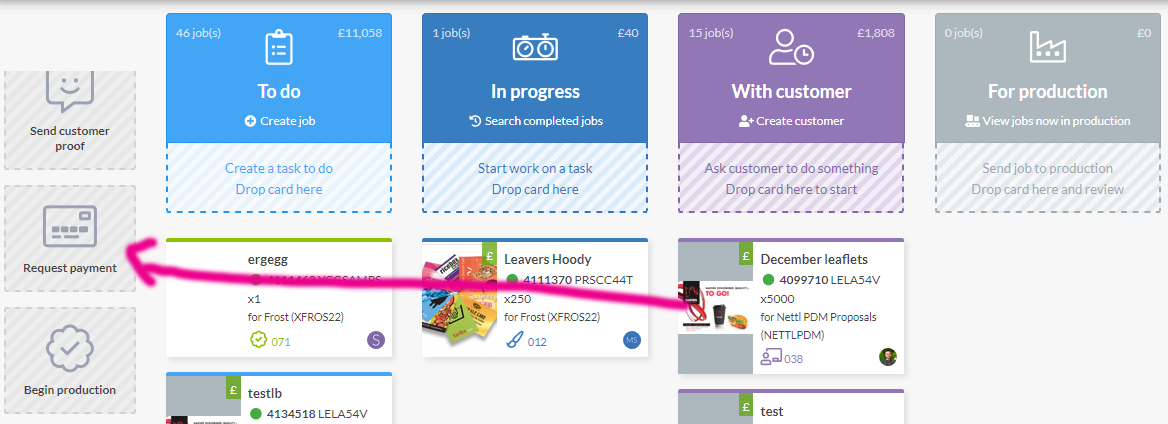
3) Collect payment
Click a job and go to Financials tab
Or drag the card to Chase payment to request payment
4) Send to production
Drag the card into Begin production
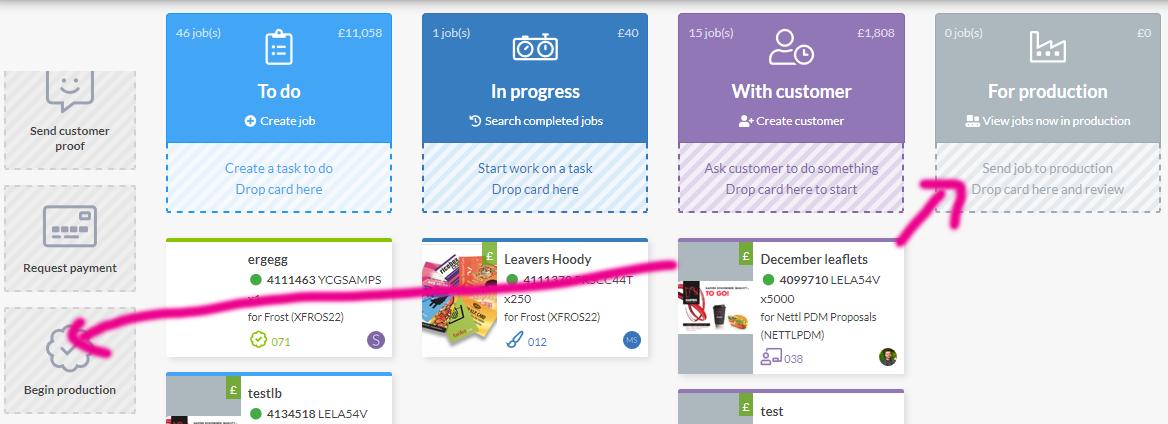
Or into the 4th column