Support for

The w3shop editor has a range of tools available to help you easily update and edit your w3shop. Here's a brief run down of what is available.
.png)
The cut tool allows you to select, then cut content to your computers clipboard.
The copy tool allows you to select, then copy content to your computers clipboard.
The paste tool allows you to paste any content that you have cut or copied to your computers clipboard.
The paste as plain text tool allows you to paste any content as plain text that you have cut or copied to your computers clipboard. This removes all formatting.
The undo tool applies an undo so that you revert backwards through your changes.
The redo tool applies a redo so that you reapply your changes.
There is a built in spellcheck available.
Link text or images using this button. Click and add the relevant link.
Remove an existing hyperlink by selecting the object and clicking this button.
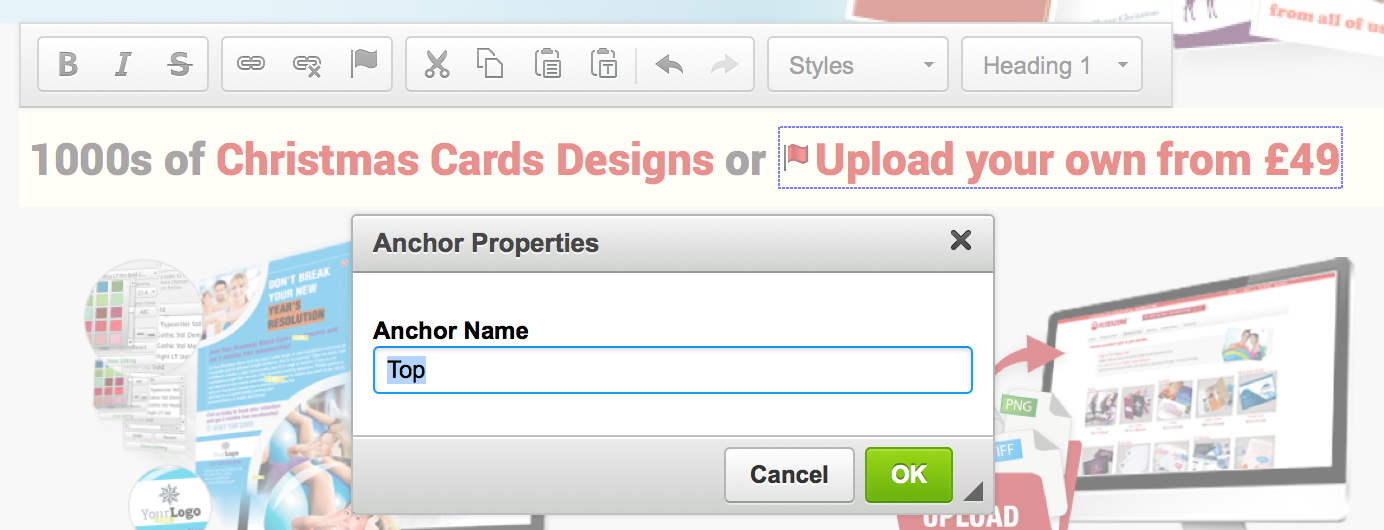
Add an anchor point to your web page. For example, you may have a page loaded with content. At the bottom of the page you could add a link 'Back to top' which sends the user to the top of the page. To do this you need to first set the 'Anchor' this should be the point at which you want your user to be taken.
Click the 'anchor' button, this adds the anchor point. Then give it a name. This is what you will link to next:
Then using the add hyperlink button (8) add the link you want and point to the anchor:
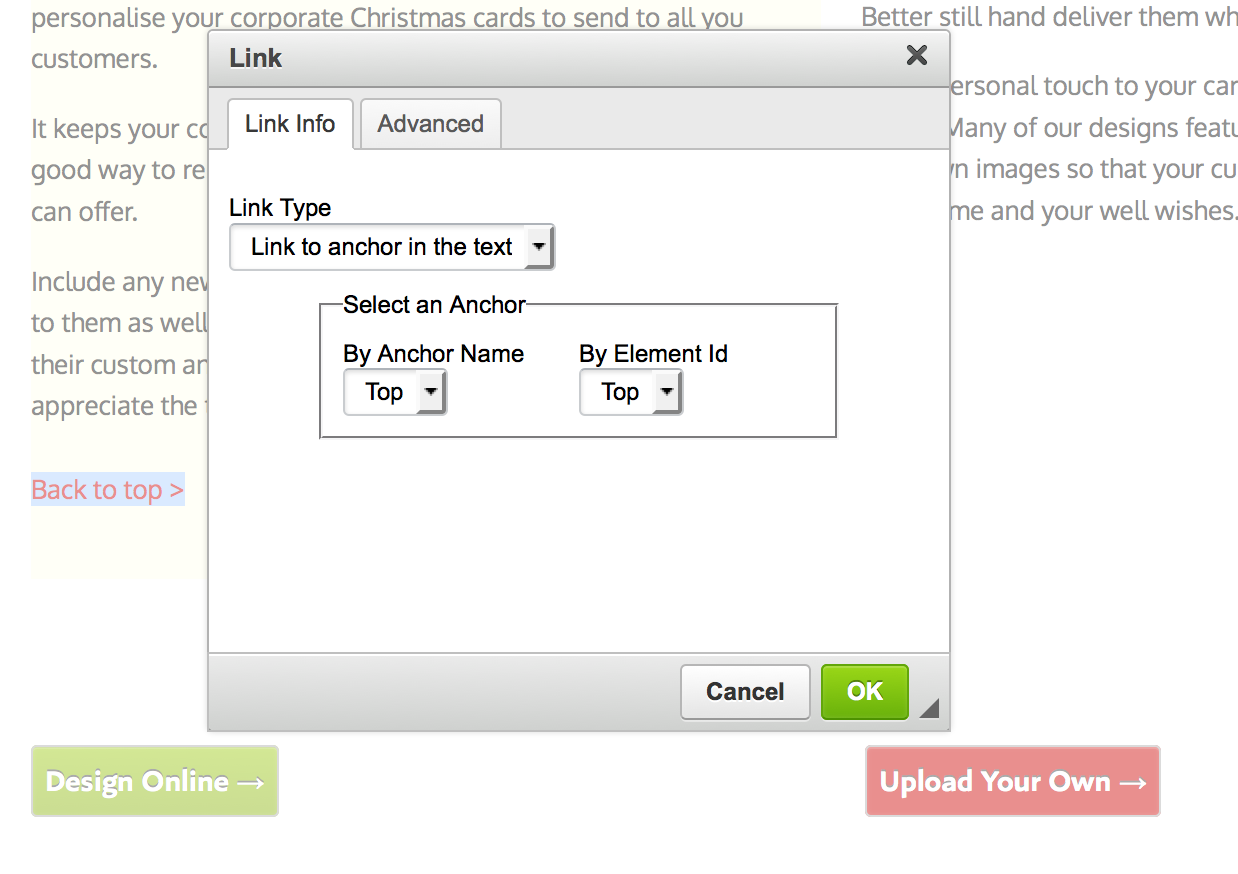
Select Link type - "Link to anchor in text" this will display any anchor points you have created. Just select the one you want.
Then, when the user selects 'back to top' it will take them back to the anchor point.
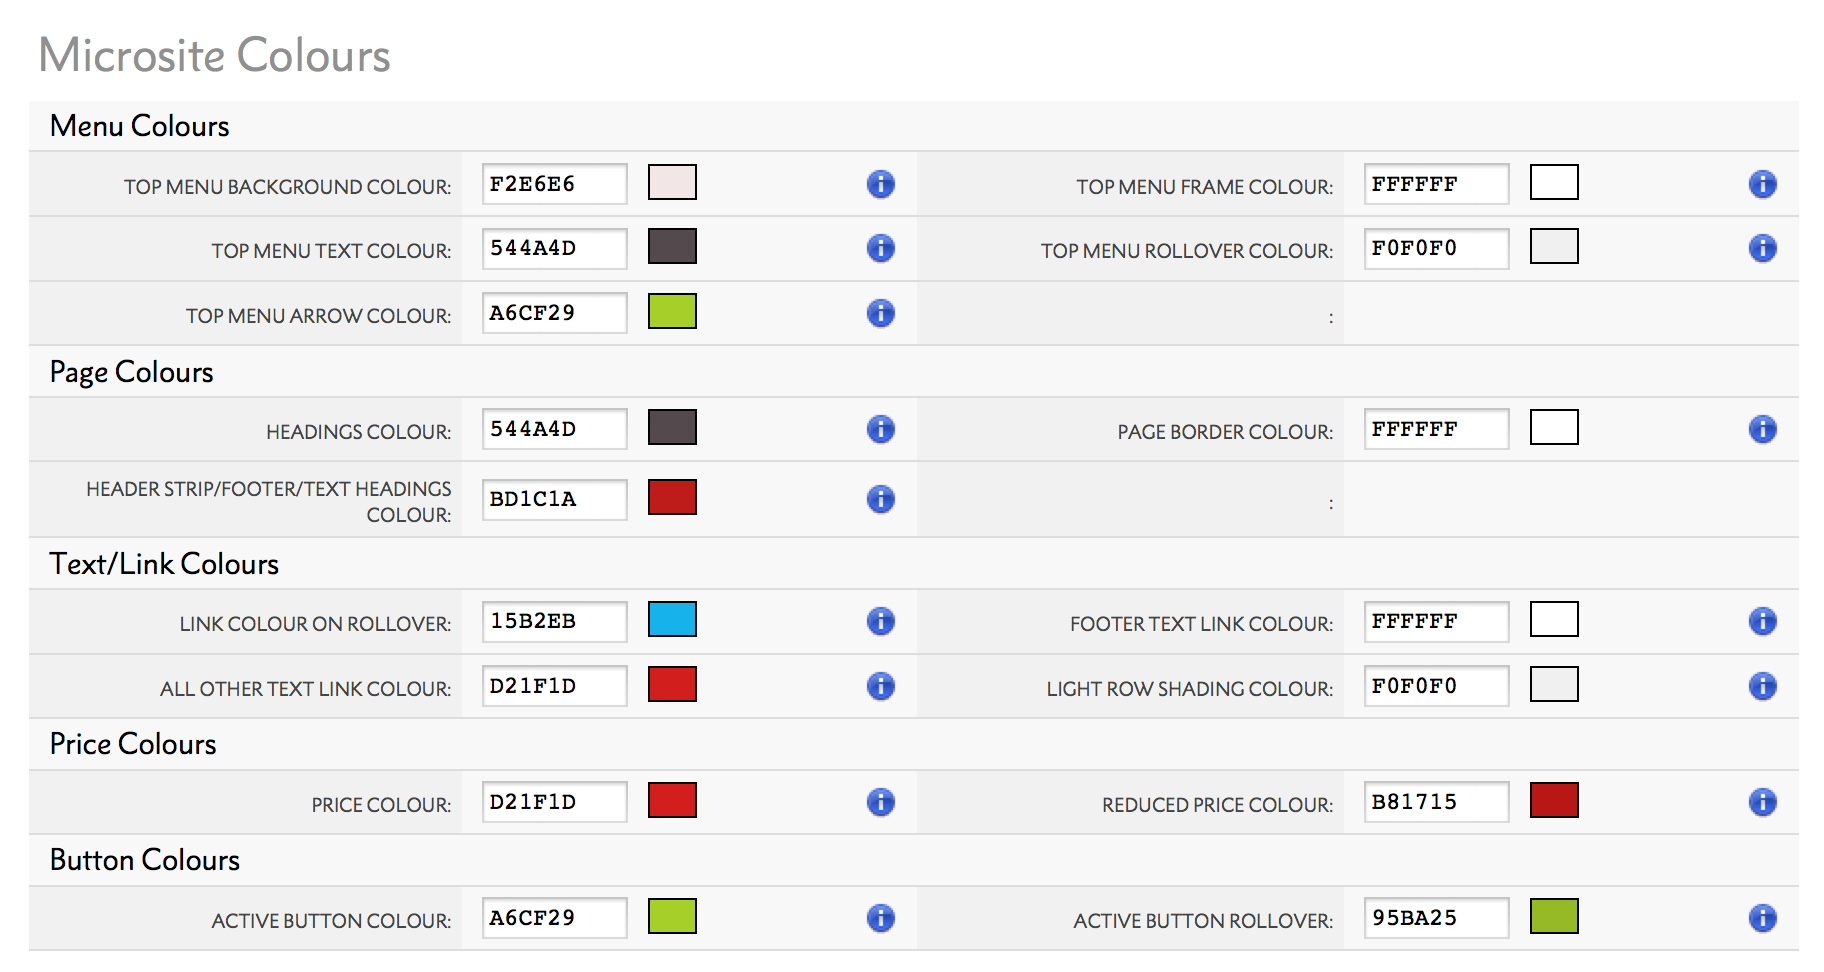
Within the style set of your chosen theme, there will be a particular button style. The colours of which are preset by you selection within the main w3shop control page:
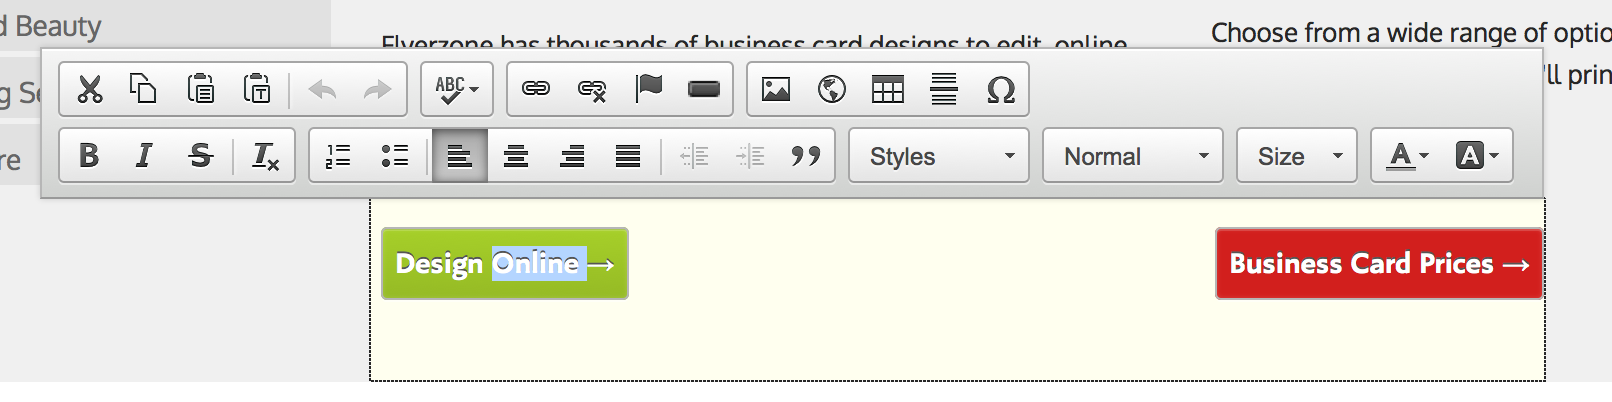
To add a button on a page simply place your cursor when you want the button and click the 'add button' erm... button. You can then edit the text within the button and change the hyperlink.
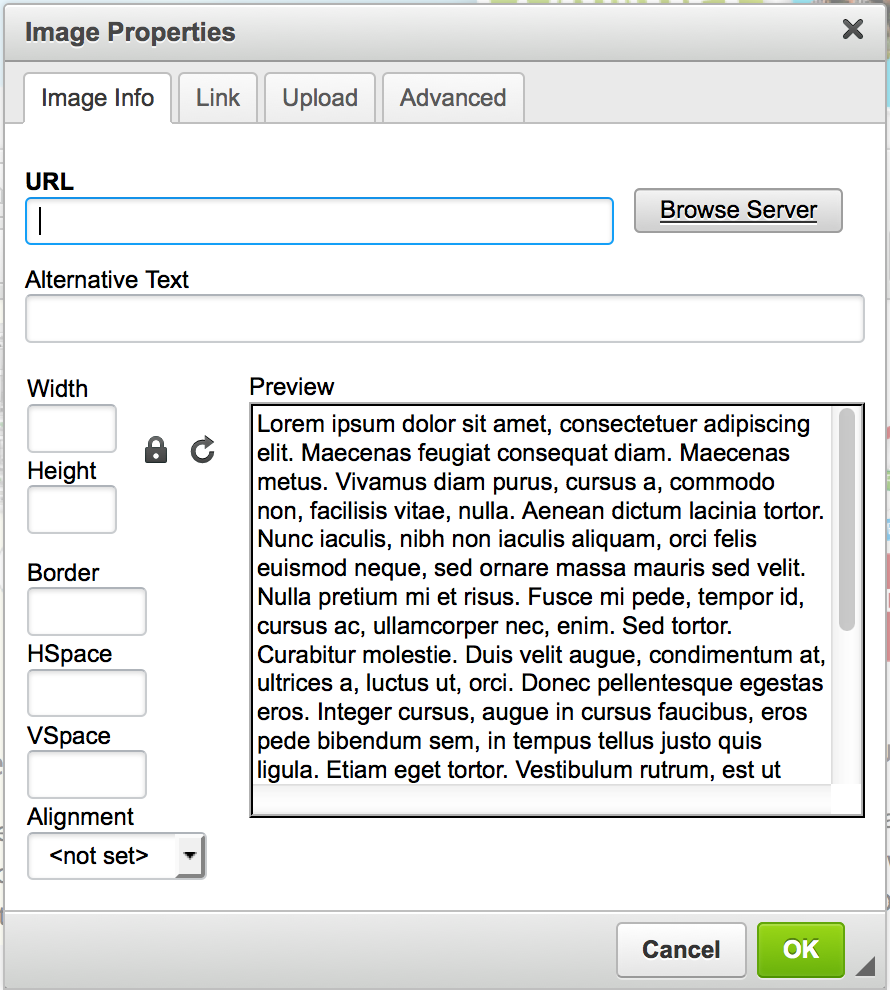
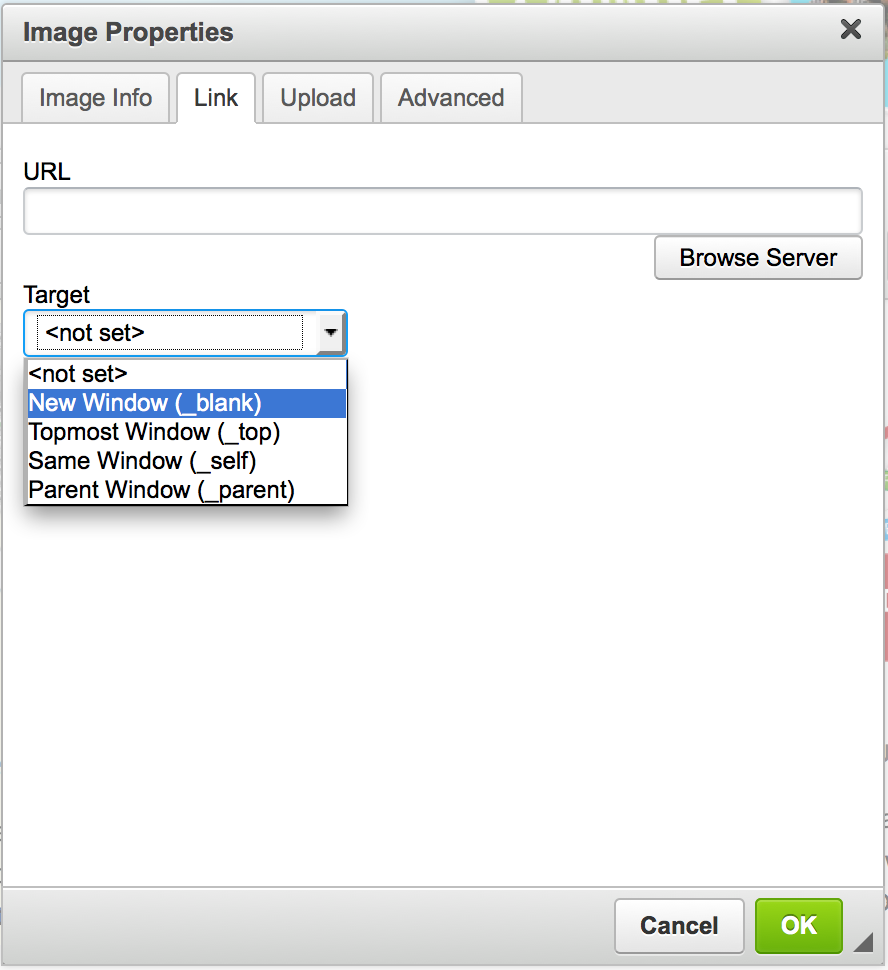
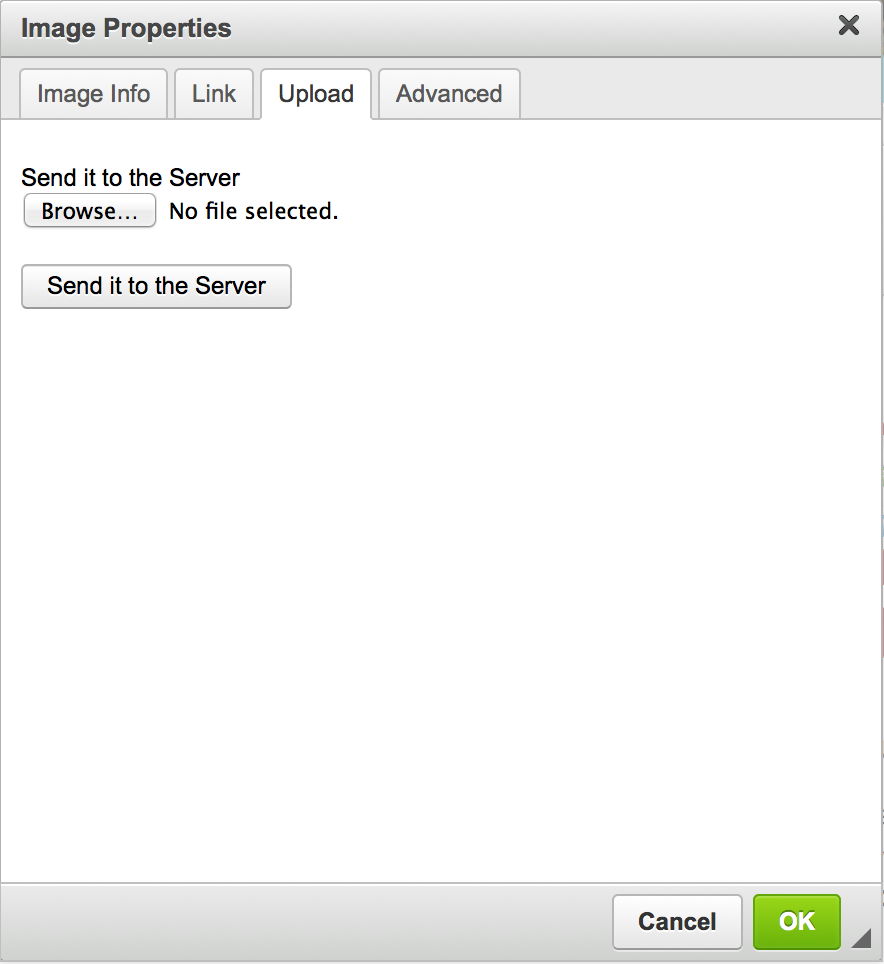
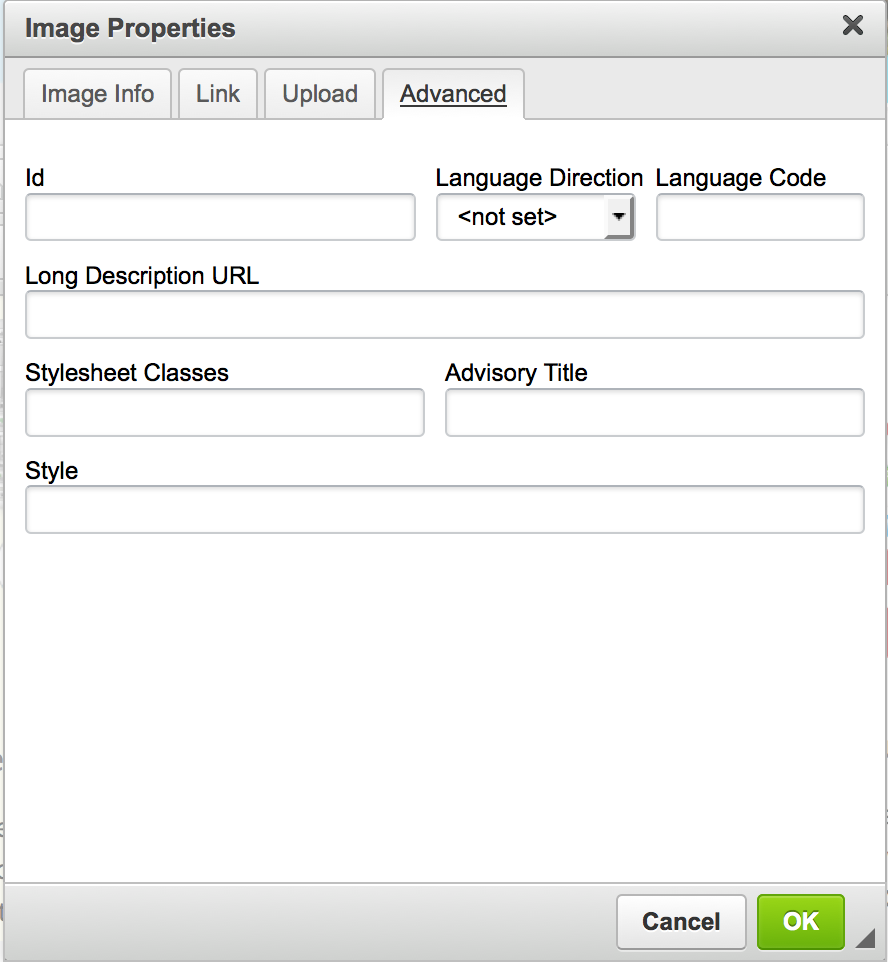
Adding an image into your page theme. Clicking here will bring up image editor tool
There are 4 panels within the Image editor.
Lets you load a website in the middle of your page.
This is useful if you want to load some dynamic contented, as you can host a webpage externally with a gallery or a widget, and then you can use an iframe of that external page to add your gallery/widget/content into the w3shop.
14. Add Table
Lets you add a table to your w3shop
15. Add Hairline
Lets you add a line to page under your text. This hairline is a dark line that acts as a section break between content.
16. Add Special Characters
Provides a grid of special characters like accented letters or the greek alphabet. Choosing a special character adds it to your text box.
Jump to contents page of
|
|||