Support for

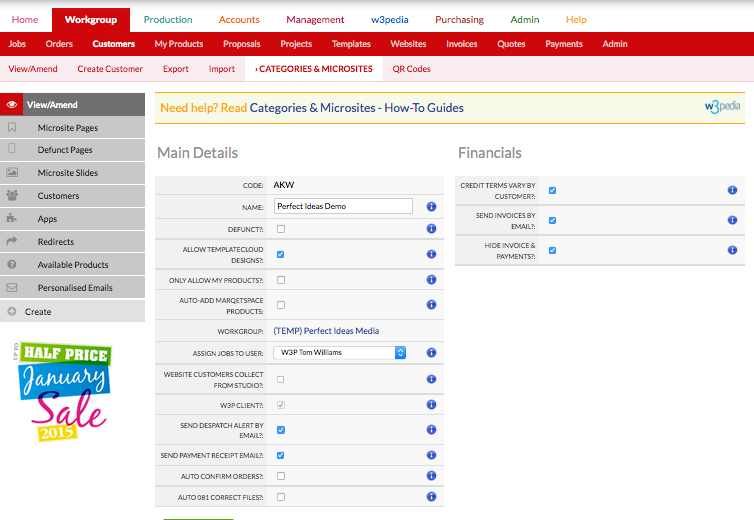
The Categories & Microsites Menu Tab in Flyerlink is the Control Panel for printing.com, nettl, BrandDemand, w3client and w3shop Microsites.
Menu Location:
Customer Account consists of a Main Account Contact and several Additional Contacts who work for the same business.
Each Customer Account is assigned a unique Customer Account Code to differeantiate them from other customers.
All Flyerlink Workgroups are set up with a Default Microsite that all customers are assigned to when first created found under
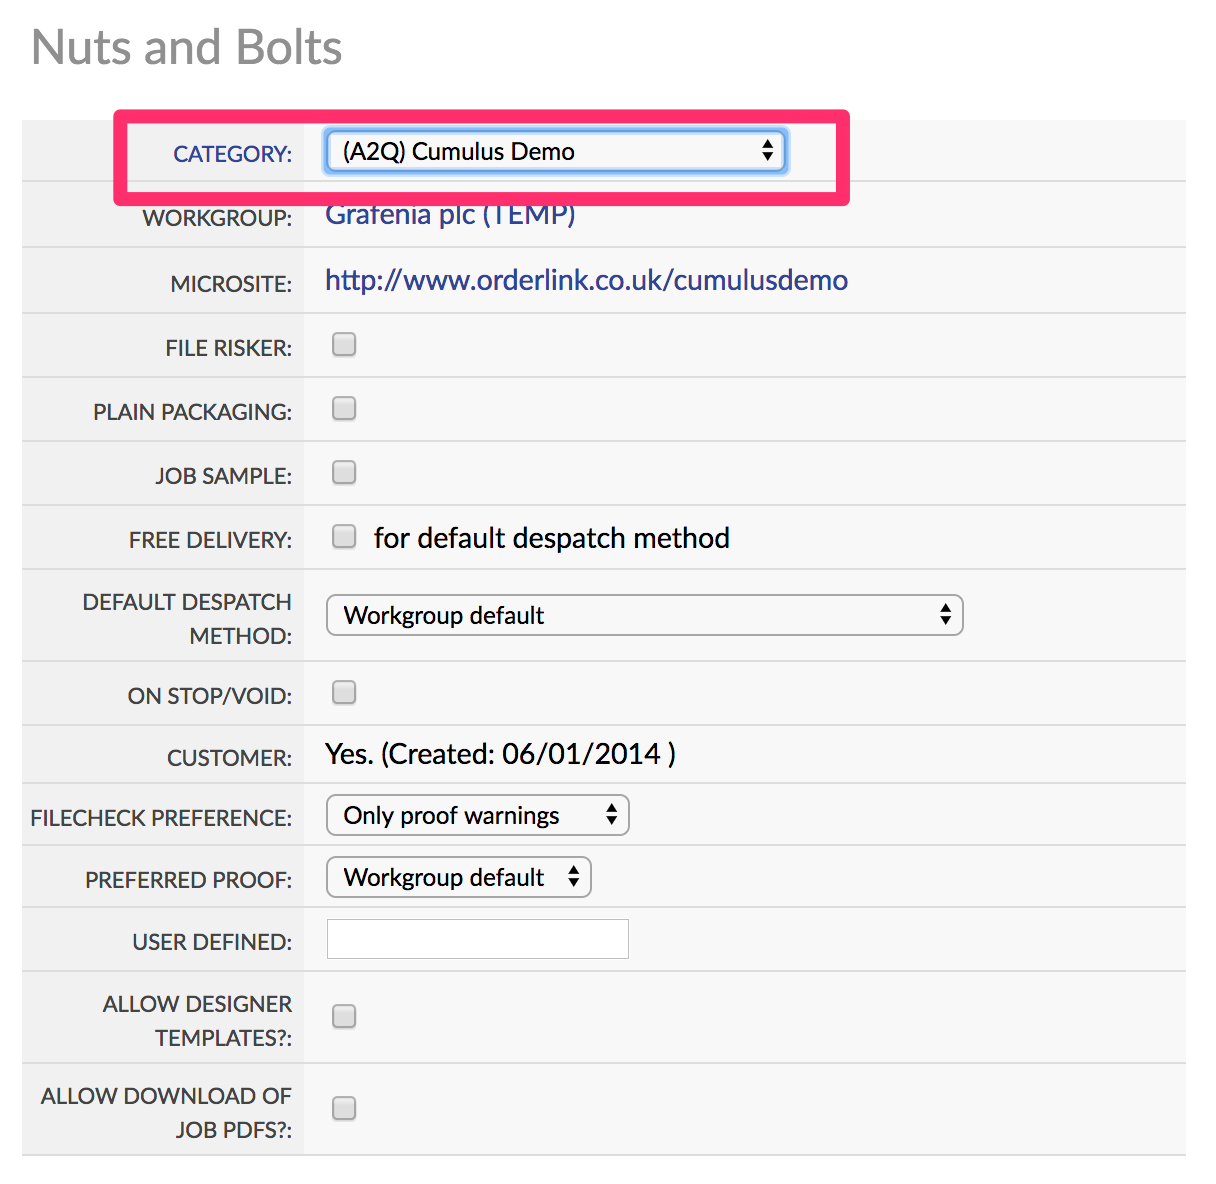
You can move customers to different Categories/Microsites using the dropdown menu under Nuts & Bolts.
my.printing.com |
|||||||||||||
w3shop
|
|||||||||||||
w3client & BrandDemand Microsites |
|||||||||||||
Main Details
|
|||||||||||||
Financial
|
|||||||||||||
Side Menu
|
|||||||||||||
Microsite Images |
|||||||||||||
Everything else... |
|||||||||||||
The Categories & Microsites Menu Tab in Flyerlink is the Control Panel for printing.com, nettl, BrandDemand, w3client and w3shop Microsites.
Menu Location:
Customer Account consists of a Main Account Contact and several Additional Contacts who work for the same business.
Each Customer Account is assigned a unique Customer Account Code to differeantiate them from other customers.
All Flyerlink Workgroups are set up with a Default Microsite that all customers are assigned to when first created found under
You can move customers to different Categories/Microsites using the dropdown menu under Nuts & Bolts.
1. Select your w3shop Category
2. Under Microsite Style, edit your Theme, Fonts, Colours and upload a personalised website header image.
3. Add common web pages to your w3shop website.
4. Add Google Analytics, Meta Data and Descriptions to each page to help Google to find you.
5. Build your own products to sell online.
6. Cherry pick products you wish to sell from the Marqetspace product range.
7. Add a Payment Gateway to accept online payments.
8. Link your Domain Name to your w3shop website.
A cache is a feature that transparently stores data so that future requests for that data can be served faster.
Your w3shop uses a number of caches to make it work as fast as possible. These include a price cache, a voucher cache, an image cache and an html cache.
If you sell designer templates, we automatically scan your w3shop six times each day to look for products which are suitable for templates. If you don't have, say, an A6 double-sided product, then we won't show any designs which are that size. Create a product, and later that day, matching designs will show up.
The vast majority of support queries we receive relate to changes not yet showing. If you've recently updated your products, please wait one hour before reporting missing products, missing images or incorrect prices.
We could just run queries 'live' and load images every time. If you've ever tried to compare flight prices or car insurance quotes, you'll probably have seen a "please wait while we search" message - this is an example of a database query being run live.
If we did that, your w3shop would run very slowly indeed. Instead, we pre-calculate certain things and then serve the 'saved' version to your visitors. This technique is used by many ecommerce sites.
If you're used to editing a blog or a static website, then this concept will be new to you. However, if you've build an ecommerce site or sold via third party sites, you'll know that changes don't appear 'instantly'.
Since the page might have been saved a little while ago, there could be a delay of up to one hour before changes you make to your w3shop become live. That means, if you add products, change prices, replace images, it could be one hour before your site shows them.
You'll notice the cache most strongly on your w3shop Homepage, which can take upto 1 hour to update with new text.
Every time you change your site - adding a product, changing some text or editing images, we need to delete the 'saved' version of your page (or pages, if the change affects many things).
It doesn't matter whether you've drastically changed the page, or just fixed a typo - we need to clear the cached/saved version and create the page again.
This means the next person to view the affected page will trigger a 'redraw' and 'recalculation'. Since that person is probably you, the first time the page is viewed will be the slowest. For the second visitor onwards, the page will feel snappier.
If you make more changes, and save again, you'll be going through this cycle again. So try to make changes in 'batches'.
The more visitors you have, the faster your site will feel. Although that sounds counter-intuitive, the more people that view a page, the less likely they're the first to view it. More visitors mean more people viewing a cached/saved version of the page.
Yes. On 17th February 2014, we upgraded all our caches to run automatically when certain events triggered them. Before then, some caches had to be run manually by administrators.
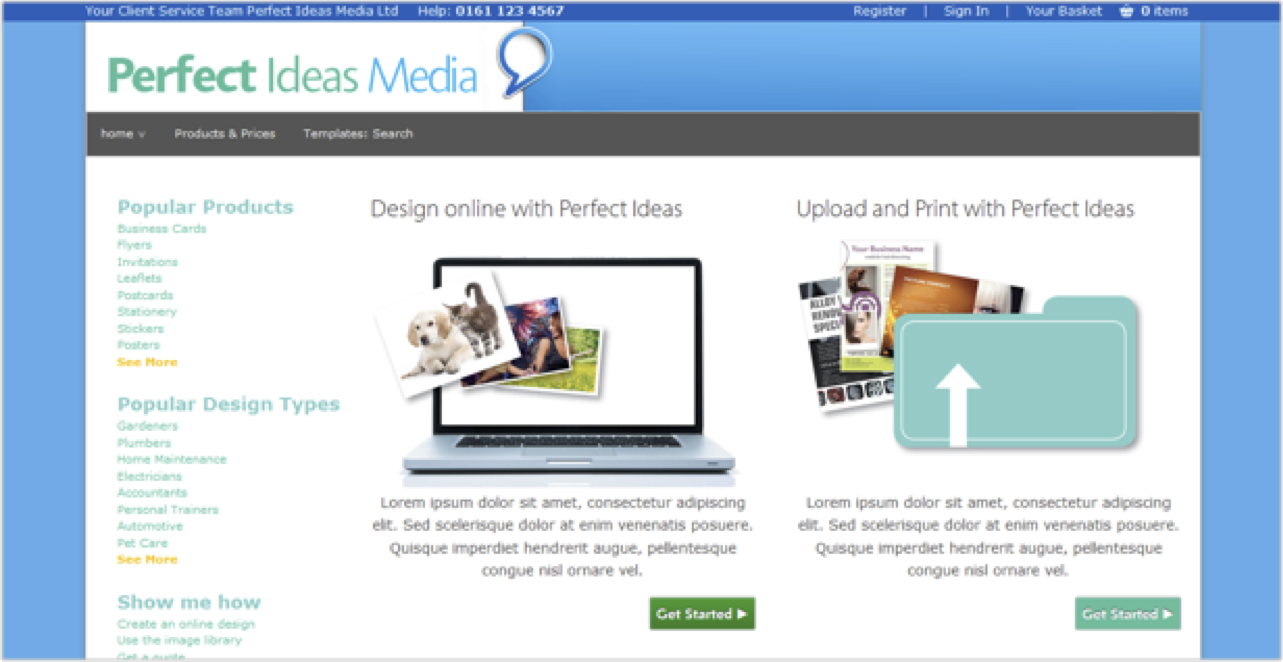
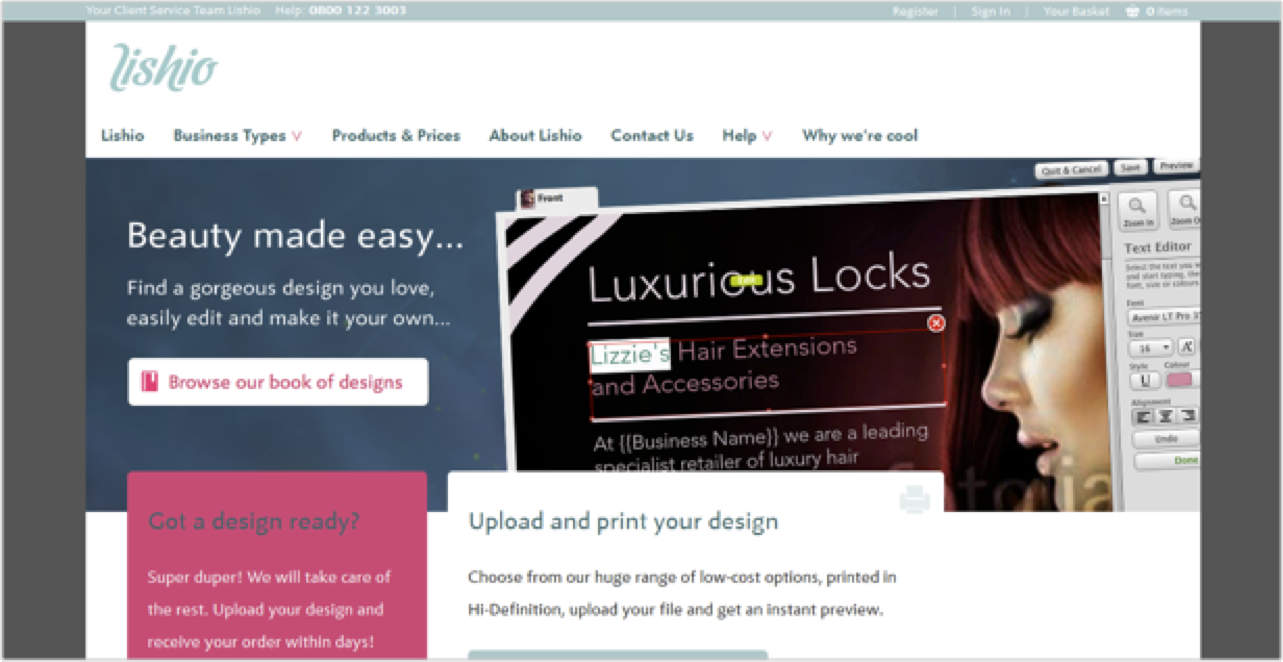
A w3shop Theme is a ‘framework’ or layout to start from. Each theme comes with some basic page layouts which are a ‘starting point’ rather than a blank canvas. Whichever you pick, you can replace text and images with your own, as well as change colours and fonts.
Certain complex pages are the same on all themes, like Design Search pages, product filters, the basket and checkout pages.
We have provided 5 themes: Delicious Metro, Minimal Regular, and Zone Red, Zone Clean and Cumulus.
We strongly recommend using Cumulus, our only responsive theme.
Cumulus is the most flexible theme, with the greatest number of page layout options, and it is responsive on mobile and tablet devices.
You can see an active demo of Cumulus on http://lish.io
Check out the pages underneath the About Us menu to view the different default page layouts available.
The Cumulus theme:

The Minimal Regular theme:
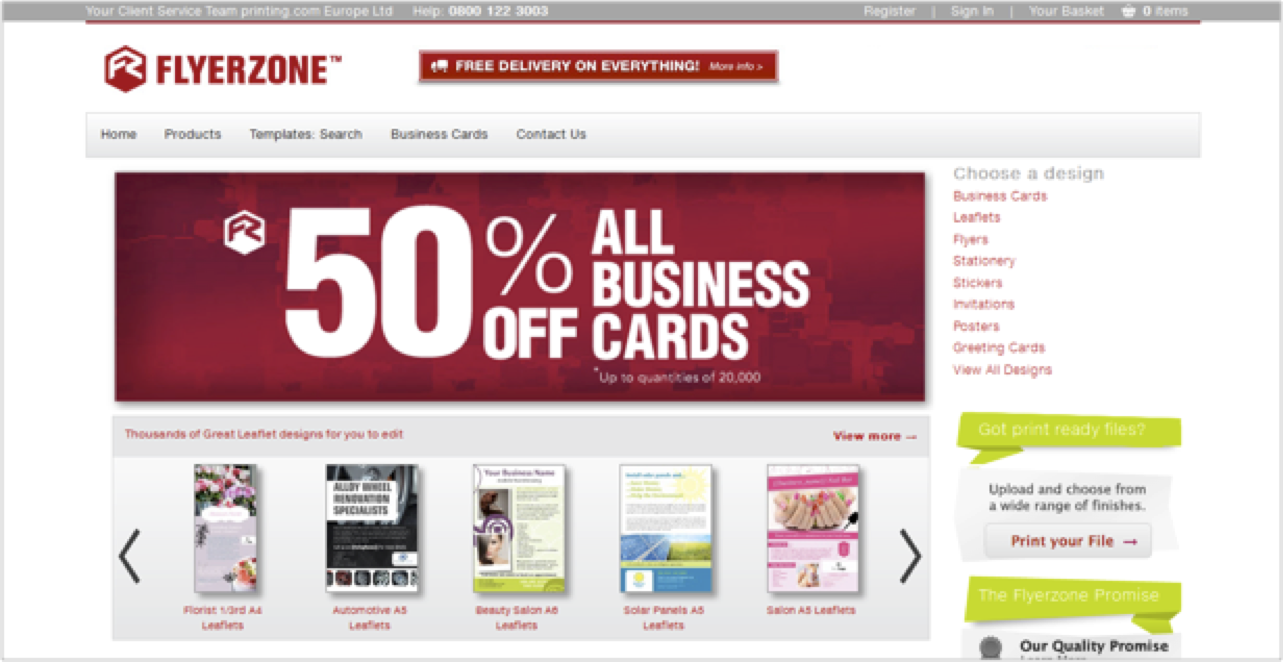
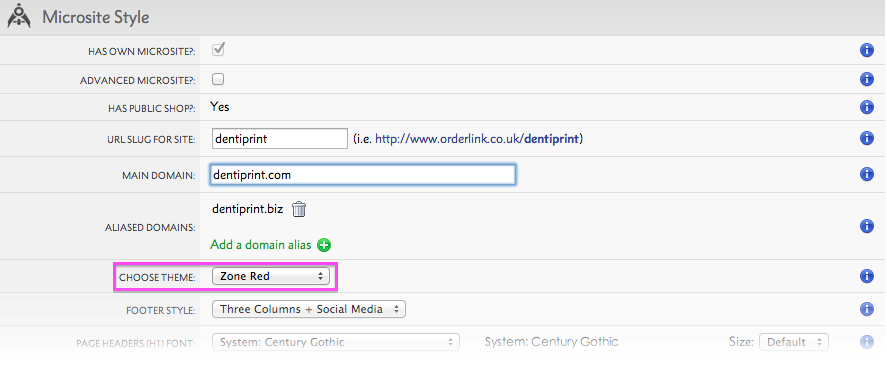
The Zone Red theme:
The Delicious Metro theme:
To set your chosen theme go to scroll down to Microsite Styles and Choose Theme in the drop down menu.
We're working on adding more themes, and an easy way to create your very own themes.
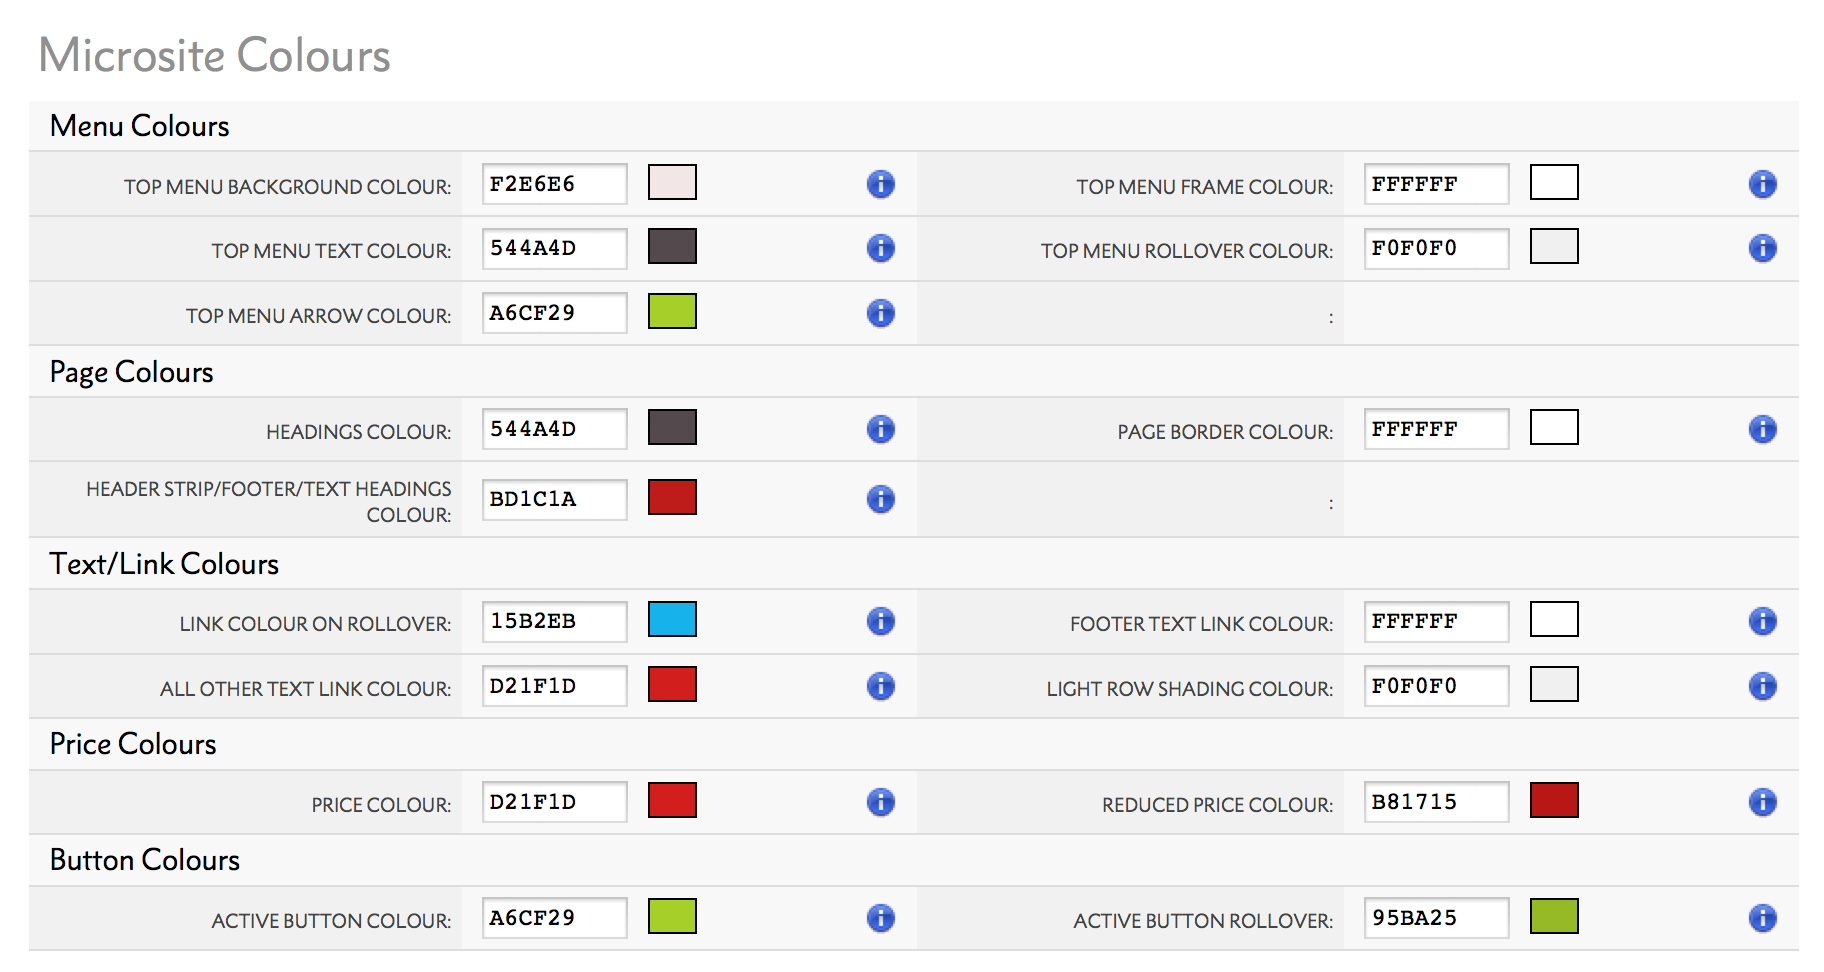
To set change the style of your w3shop, use the Microsite Style and Microsite Colours panels on .
You can customise the look and feel of your w3shop with web fonts. Choose from two font service providers - Google Fonts or fonts.com:
Then you'll be able to choose fonts and style from the dropdowns:
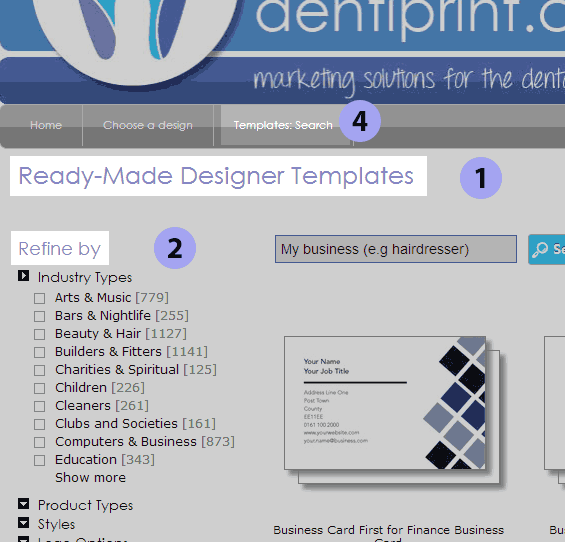 |
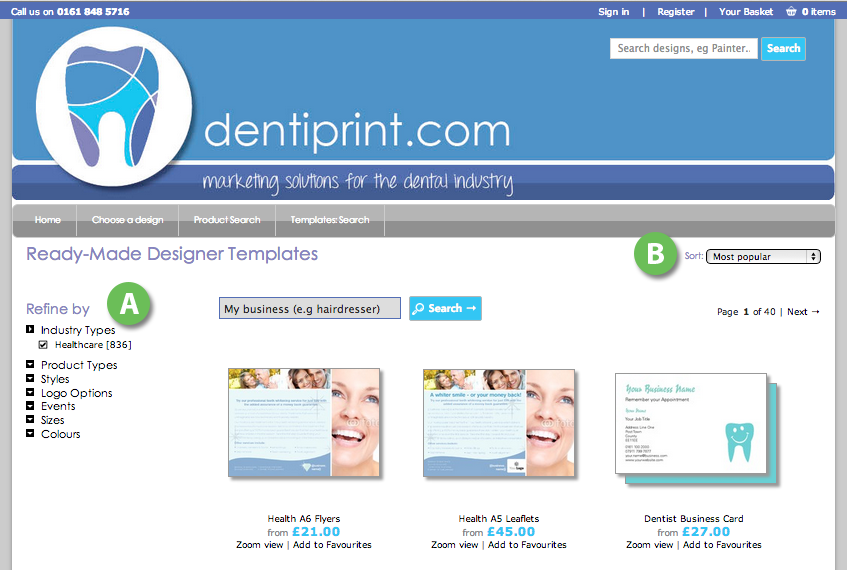
| An example w3shop page. Numbered areas are described below. |
| Option | Where is it used? | |
|---|---|---|
| 1 | Page headers (H1) font | The title that appears immediately under your header, like "Ready-Made Designer Templates" (see example), and any H1 tags that you create in your free text. |
| 2 | Main section headers (H2) font | Smaller titles and group headings, like "Refine by" (see example), and any H2 tags that you create in your free text. |
| 3 | All other header fonts | Other headings, and H3 tags in free text. |
| 4 | Main menu font | Used for the top-level menu items, just below the header image. |
| 5 | Main menu item font | Used for the items that appear when a top-level menu item is clicked. |
| 6 | Body text font | Used for the bulk of your narrative text. |
| 7 | Buttons font | Used on your buttons. Defaults to Metro Office if using fonts.com or Lato if using Google Fonts. |
Google fonts tend to display the most clearly and were 'invented' for screen display, rather than converted from existing print fonts. If you're using Fonts.com, those with eText in the name are designed for body text.
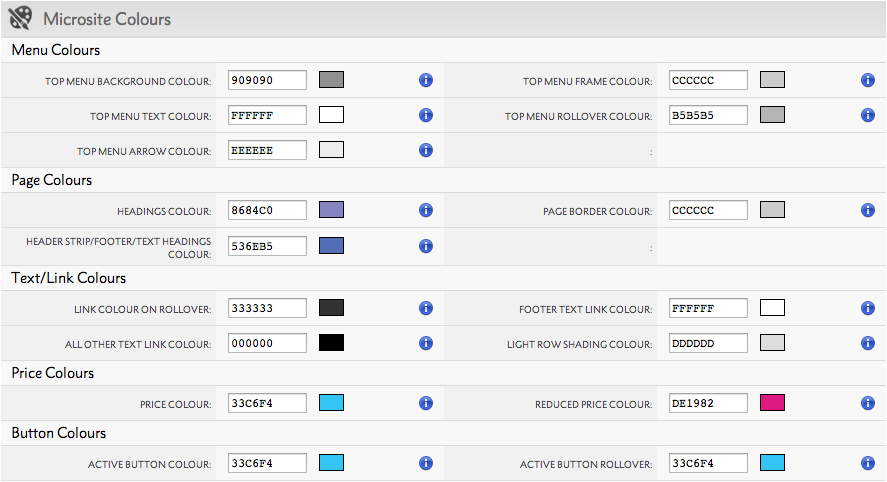
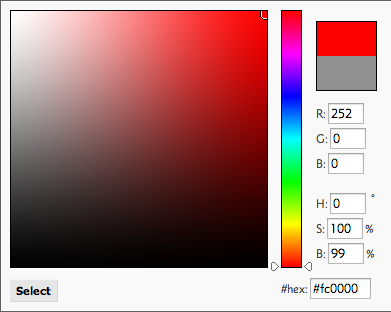
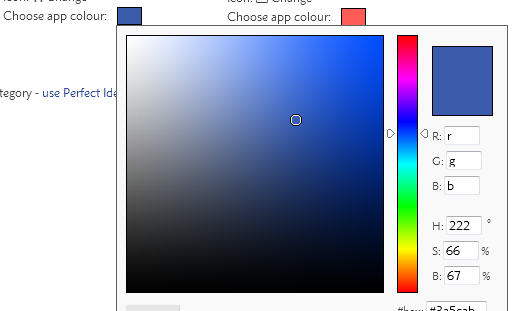
Hexadecimal colours can be entered directly into the boxes provided or the Colour Picker can be used by clicking on the swatch box. RGB or HSB colour formats can also be entered here.
The header image appears at the top of all your Microsite pages and normally cotains your logo and branding.
The image must be 1100 pixels wide and a minimum height of 90 pixels. The file format should be web-friendly e.g. JPEG, PNG or GIF and using RGB colour format.
To upload your Header image go to scroll down to Microsite Styles and click Choose File next to Header Image.
Each w3shop theme comes with a homepage.
There are some special rules for w3shop homepages.
1) Homepage cache
The w3shop homepage page type has a cache to speed up the load time
This means it can sometimes take around one hour for your changes to show after they've been saved.
2) You don't need a url slug for the homepage
The homepage or 1st page sorted is the only page that can have a blank url slug.
This means people can go to http://www.yourdomain.com instead of http://www.yourdomain.com/home
3) You don't have to use the homepage page type
You can use any page type for your actual homepage, provided.
For example http://www.flyerzone.co.uk/ uses the Cumulus theme Homepage B instead of the default Homepage page type to show a different option.
4) Your logo or header image will redirect to the homepage
- Example homepages

A slideshow can be added to any page type within your w3shop. A sideshow should be added to your Homepage and used to highlight your USPs, link directly to important pages, products or services within your w3shop, promote special offers or new features.
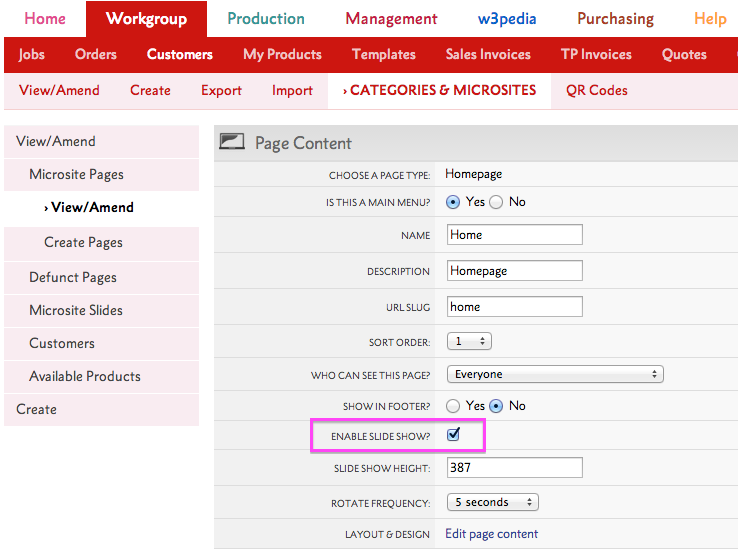
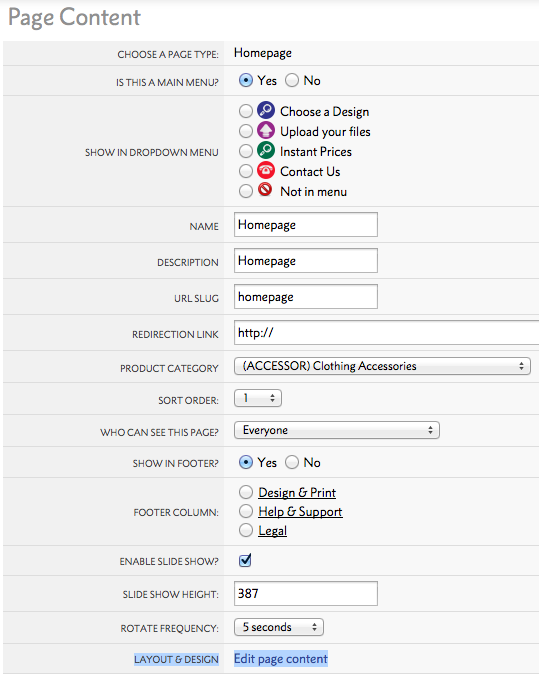
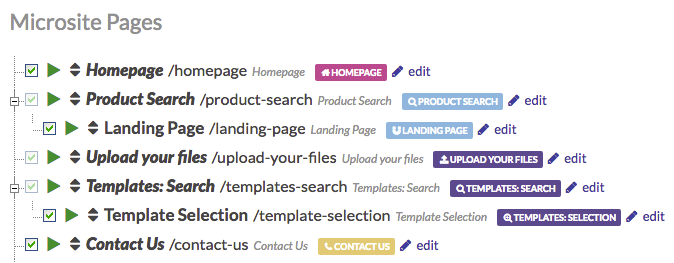
Go to Workgroup > Customers > Categories & Microsites > View/Amend scroll down to Microsite Pages

Click on the edit button for the page you want to add a slideshow to, check the Enable Slideshow tick box and enter the height in pixels.
The image should be 1100 pixels wide as standard (if using the Zone Red theme, images should be 855 pixels wide) and whatever height you choose. The file format should be web-friendly e.g. JPEG, PNG or GIF and using RGB colour format.
.png)
Go to scroll down to Microsite Pages. Select a page that has Enabled slideshow, add Slideshow Height and choose the Rotate Frequency. Scroll down to the Slides menu.
.png)
Use the Sort Order function to sort the order that your image view in the rotation.
If you need stock imagery for your w3shop you can browse and purchase over 14 million images in Flyerlink. All images are available in XXL size for £1.99 each. See Stock Images in Flyerlink for more information.
The slideshow for Cumulus theme scales to fit the browser for mobile and tablet.
You can also choose whether you want a responsive slideshow, that increases in size for larger browsers, or an unresponsive slideshow that keeps a fixed width on larger device widths
We recommend you design your slideshow for a desktop, at 1200px wide.
If you leave "responsive" unticked for your slideshow, on large devices we won't scale up your slider.
Instead we will keep it at 1200px in the middle of the screen and use your slide background colour as a bleed to the edge. This means your slide will look centered, alongside the rest of the theme content.
If you make your slider responsive, we scale it up on larger device widths.
To avoid this looking very odd in relation to the content, you can choose what device widths you want the slider available on.
By default the slide is available on mobile, tablet and desktops upto 2000px
You can increase the minimum width to make it not show on mobile, or adjust the max width to change the desktop size the slider is available.
The default slide recommendations are our recommended option - leaving it unresponsive and having a background colour bleed, but also only showing upto 2000px
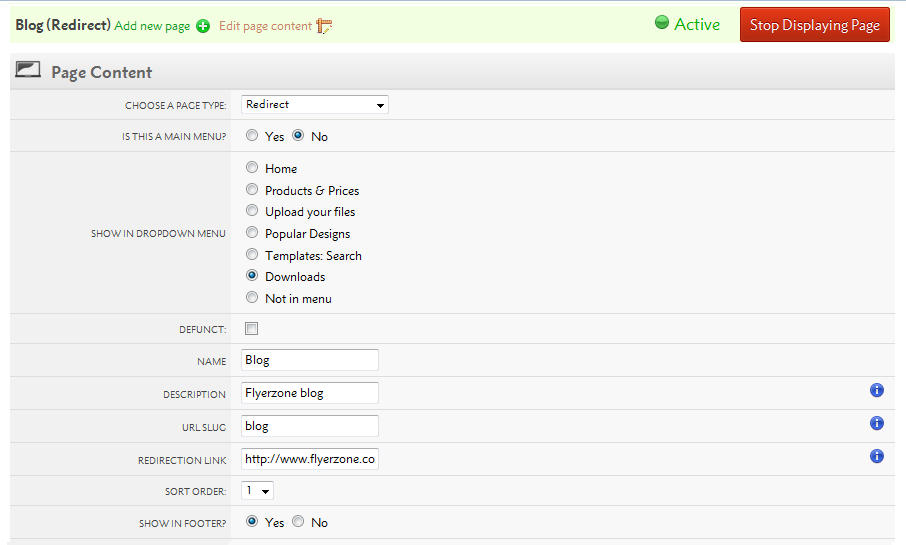
For w3shops, each page you create can be included in your main menu, a dropdown menu or in none of the menus.
You can also include pages in the footer.
If you want to change the menu options for your page, head to your page via
To show the page in your:
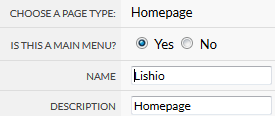
1) Main menu
For "Is this a main menu?", choose Yes
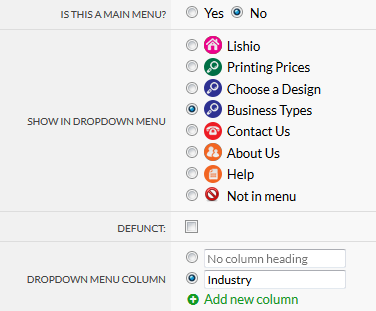
2) Dropdown menu
For "Is this a main menu?", choose No
For "Show in dropdown menu" choose a main menu item you want the page to be a dropdown of.
Note you will only be able to make a page a dropdown menu item of another page if that page is part of your main menu.
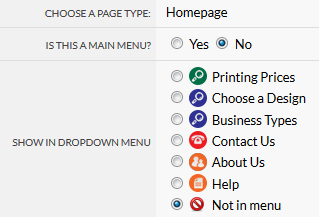
3) No menu
For "Is this a main menu?", choose No
For "Show in dropdown menu", choose No
If you want to create a menu link to something that isn't a page, like a specific product group page or another website, choose the Redirection page type.
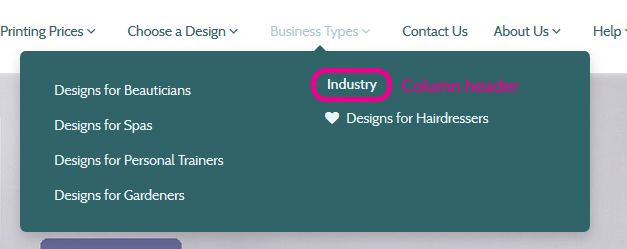
If you choose a dropdown menu, you can make mega menus by choosing extra columns. You can have upto 4 columns, and we will only show the column if there's at least 1 page in that column.
You can also give columns names or titles that aren't clickable.
.png)
The sort order determines how high a page will show in a menu, dropdown menu or footer.
If the page is a part of a dropdown menu, the sort order numbers available suit the order of the dropdown it belongs to.
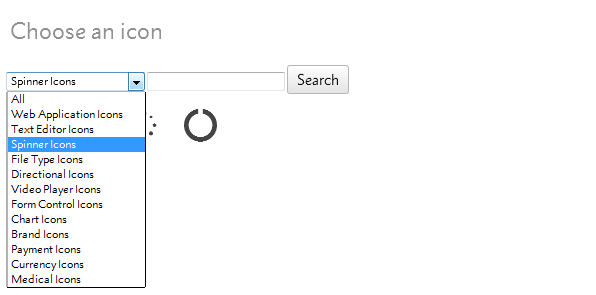
Menu icons are only supported in the cumulus responsive theme.
The icons come from fontsawesome, so you can choose any text from http://fortawesome.github.io/Font-Awesome/icons/
If you choose "heart", we will display a heart icon.

.png)
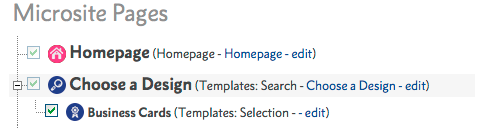
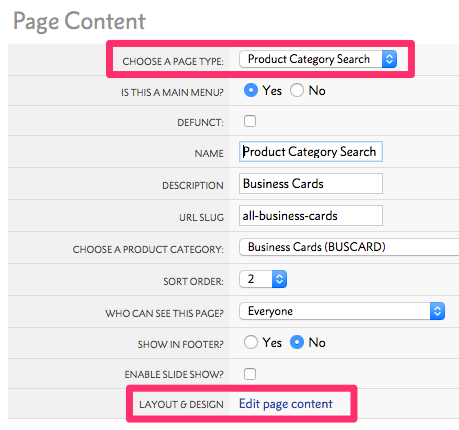
To edit a page on your w3shop, go to . Select your w3shop Category.
Browse to and select the Edit link next to the page that requires amending.
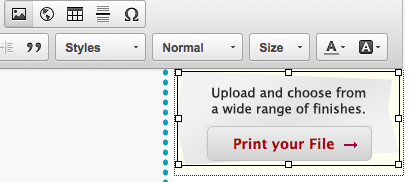
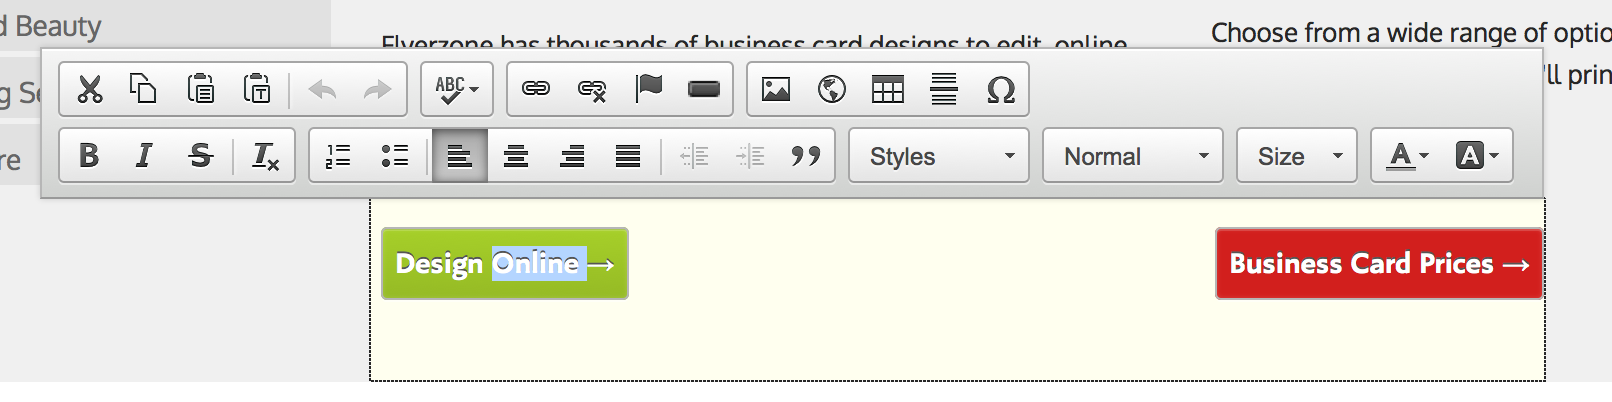
On the Page Content screen select Layout & Design: . This opens the In-Site Editor.
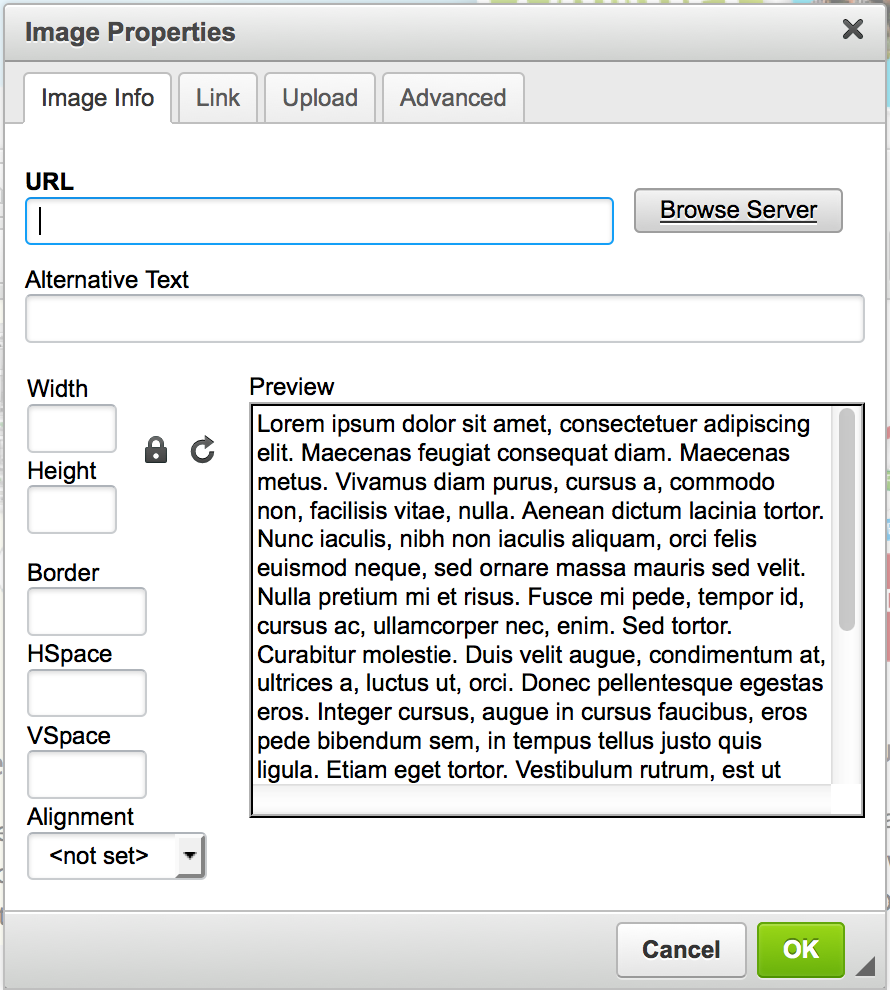
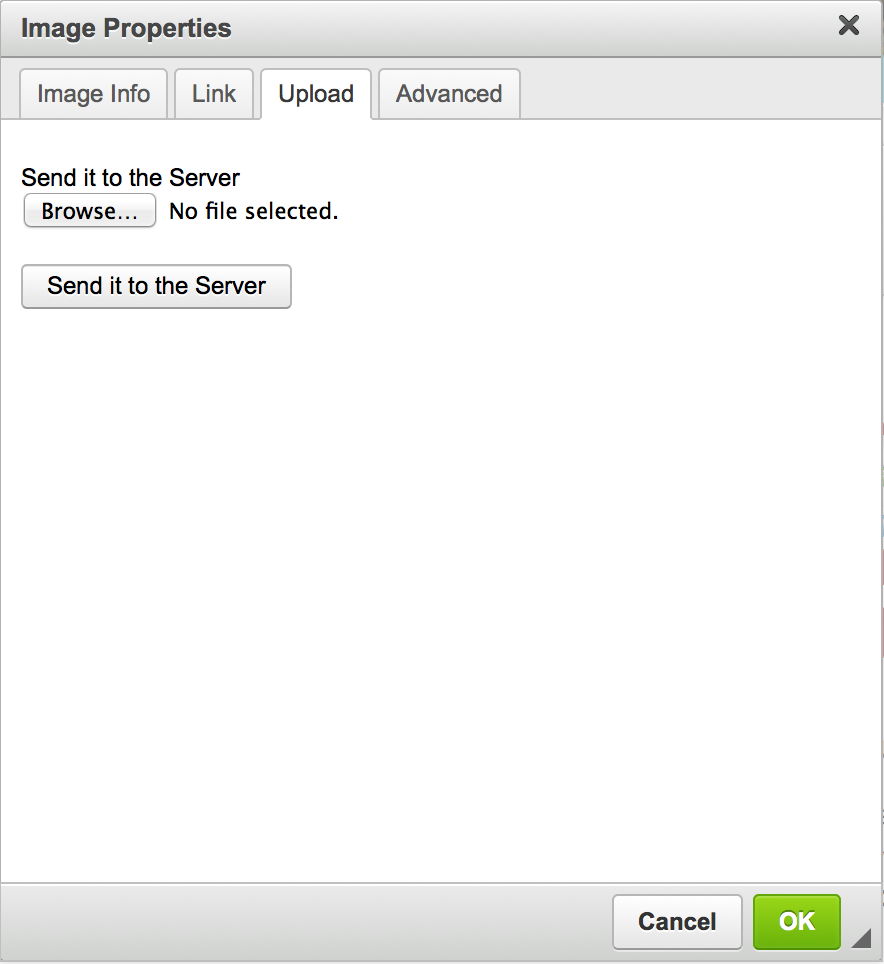
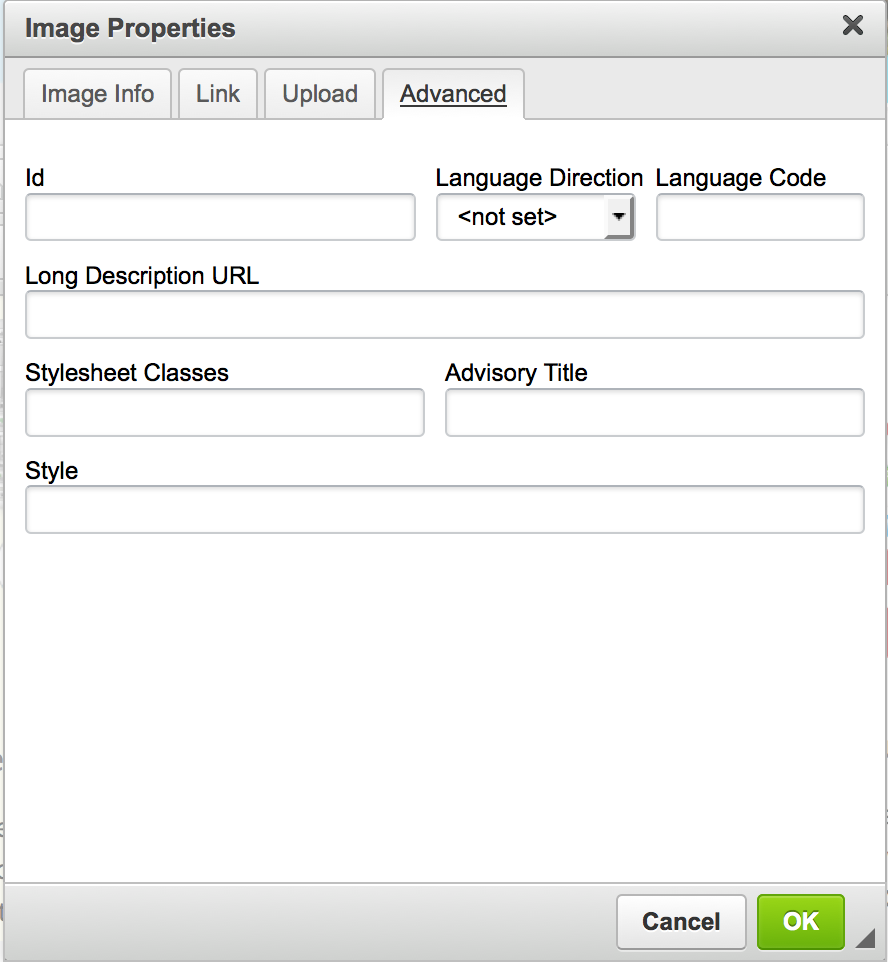
Select an image and use the Toolbar: Image Icon to open the Image Properties dialogue box.
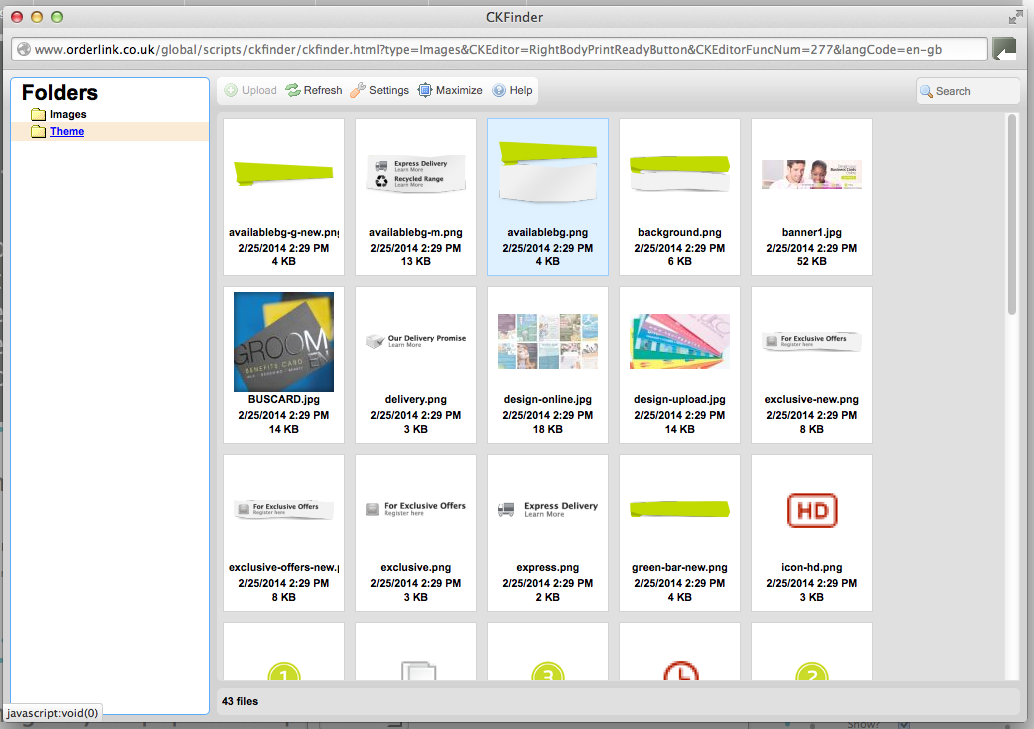
To upload a new image select Browse Server.
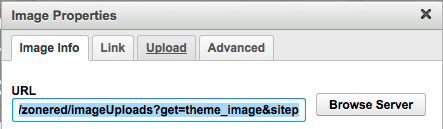
This opens up the CK Finder. Select the images folder and the green Upload button to upload new images.
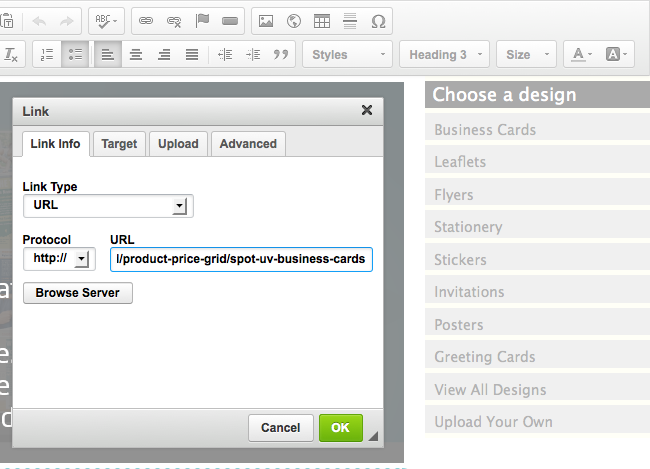
Highlight the word you would like to link to another page e.g Business Cards. Select the Toolbar: Link Icon. Paste the URL you would like to page to go to in the URL box.
The w3shop editor has a range of tools available to help you easily update and edit your w3shop. Here's a brief run down of what is available.
.png)
The cut tool allows you to select, then cut content to your computers clipboard.
The copy tool allows you to select, then copy content to your computers clipboard.
The paste tool allows you to paste any content that you have cut or copied to your computers clipboard.
The paste as plain text tool allows you to paste any content as plain text that you have cut or copied to your computers clipboard. This removes all formatting.
The undo tool applies an undo so that you revert backwards through your changes.
The redo tool applies a redo so that you reapply your changes.
There is a built in spellcheck available.
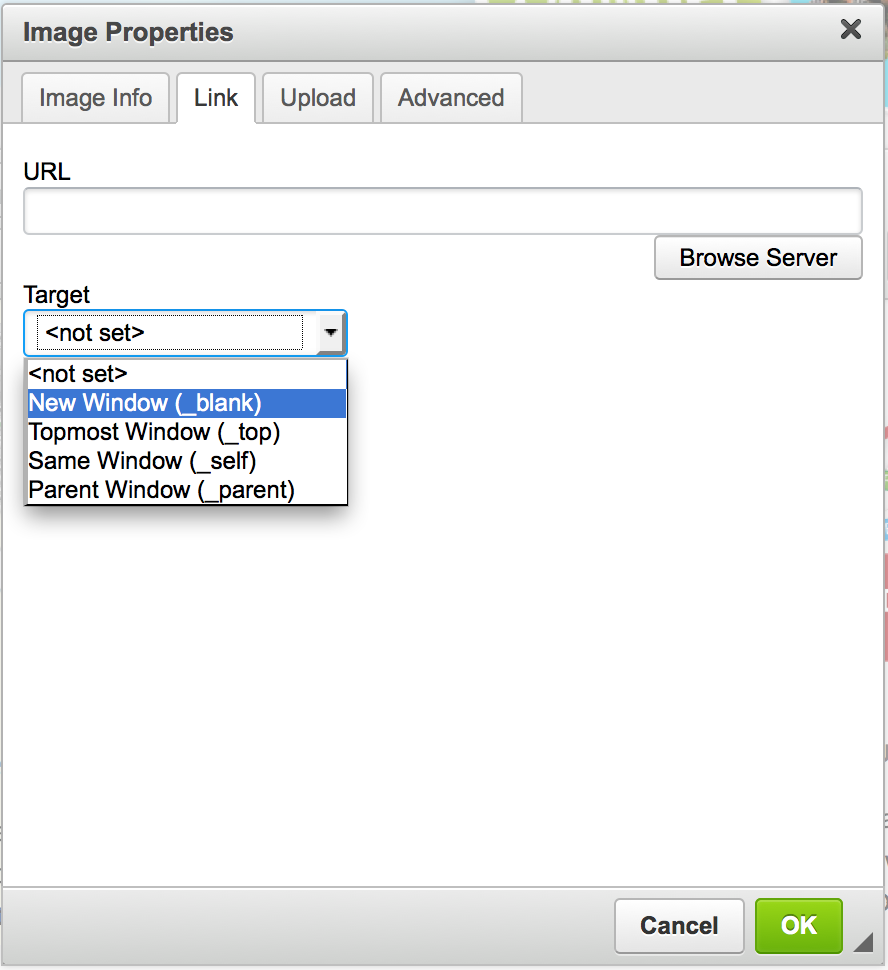
Link text or images using this button. Click and add the relevant link.
Remove an existing hyperlink by selecting the object and clicking this button.
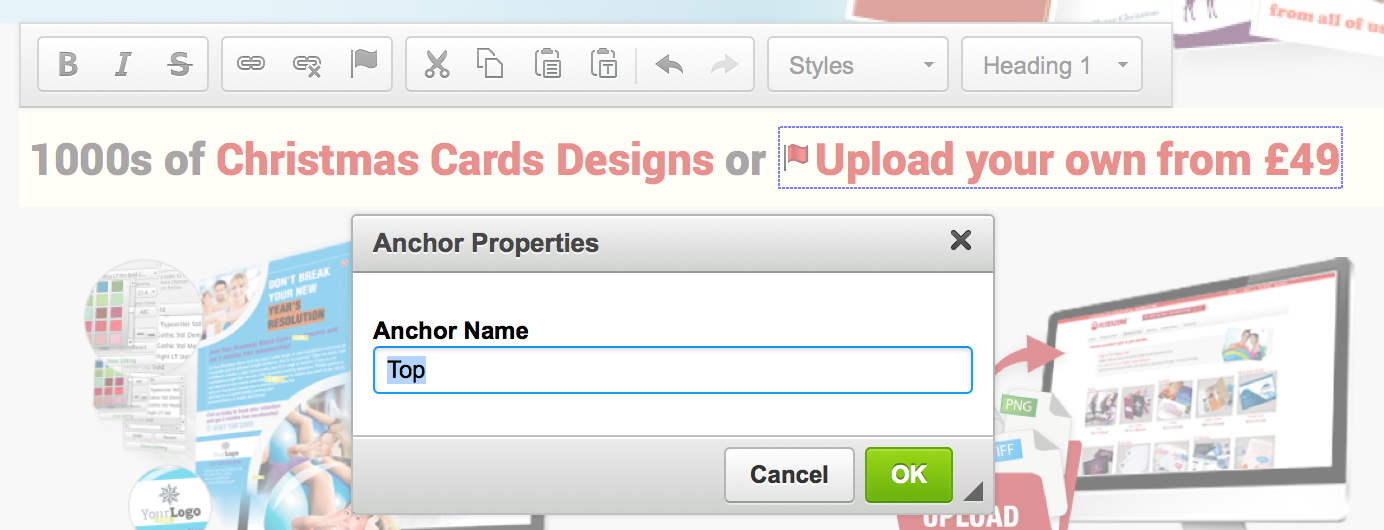
Add an anchor point to your web page. For example, you may have a page loaded with content. At the bottom of the page you could add a link 'Back to top' which sends the user to the top of the page. To do this you need to first set the 'Anchor' this should be the point at which you want your user to be taken.
Click the 'anchor' button, this adds the anchor point. Then give it a name. This is what you will link to next:
Then using the add hyperlink button (8) add the link you want and point to the anchor:
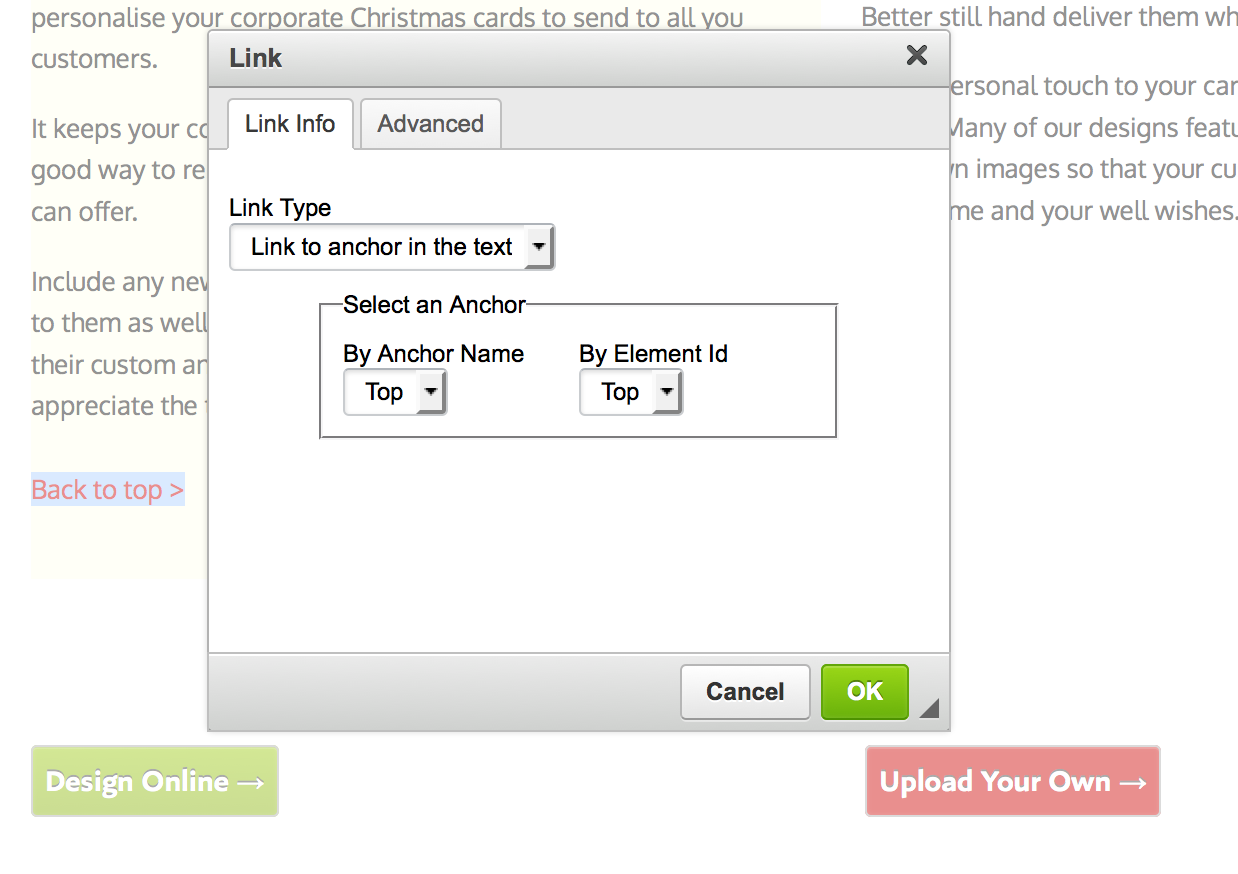
Select Link type - "Link to anchor in text" this will display any anchor points you have created. Just select the one you want.
Then, when the user selects 'back to top' it will take them back to the anchor point.
Within the style set of your chosen theme, there will be a particular button style. The colours of which are preset by you selection within the main w3shop control page:
To add a button on a page simply place your cursor when you want the button and click the 'add button' erm... button. You can then edit the text within the button and change the hyperlink.
Adding an image into your page theme. Clicking here will bring up image editor tool
There are 4 panels within the Image editor.
Lets you load a website in the middle of your page.
This is useful if you want to load some dynamic contented, as you can host a webpage externally with a gallery or a widget, and then you can use an iframe of that external page to add your gallery/widget/content into the w3shop.
14. Add Table
Lets you add a table to your w3shop
15. Add Hairline
Lets you add a line to page under your text. This hairline is a dark line that acts as a section break between content.
16. Add Special Characters
Provides a grid of special characters like accented letters or the greek alphabet. Choosing a special character adds it to your text box.
Each page is special. Some do special things; they need to be there for your w3shop to work.
When you create a new page, you choose a Page Type, we’ll install any plug-ins or widgets that you need to work with that page type.
This article outlines the page types available to add to your w3shop. It explains which are mandatory, what they contain and how they can be used.
http://www.printing.com/uk/christmas-cards/
This page links to a specific Product Category e.g Christmas cards and is usually placed as a submenu under Products & Prices (Page Type: Product Search).
Landing Pages (Helps Google to find relevant product pages)
http://www.orderlink.co.uk/zonered/christmas-cards
This page links to a specific Product Category e.g Christmas Cards and can also be placed as a submenu under Products & Prices.
http://www.printing.com/uk/catalogue/designs/business-card
This page shows the customer a specific set of templates by Product or Industry and is usually placed under the Design Online (Template Search) page.
http://www.printing.com/uk/help/downloads
This page contains InDesign templates for customers supplying their own files.
This article explains how to adjust products and prices within your w3shop or private client microsites.
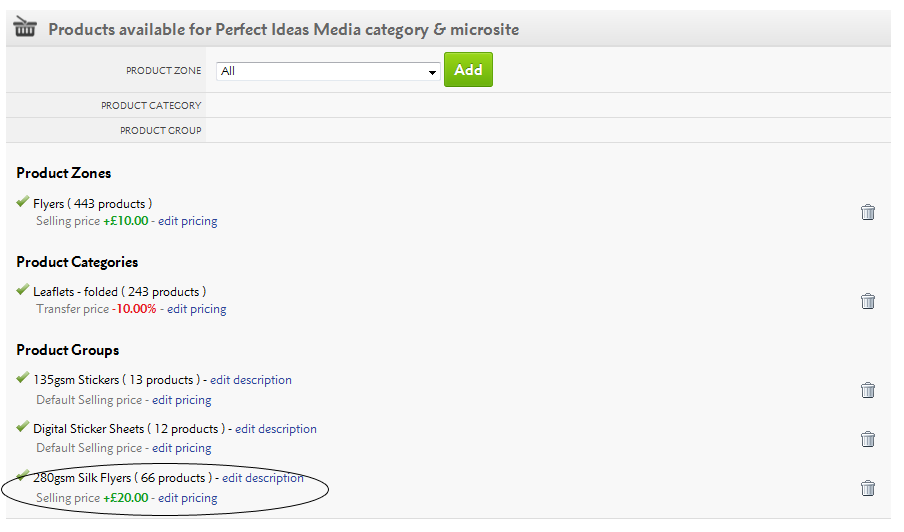
For each Category with an associated microsite, you'll see a menu option . This option will not appear for printing.com studios.
By default all products are available.
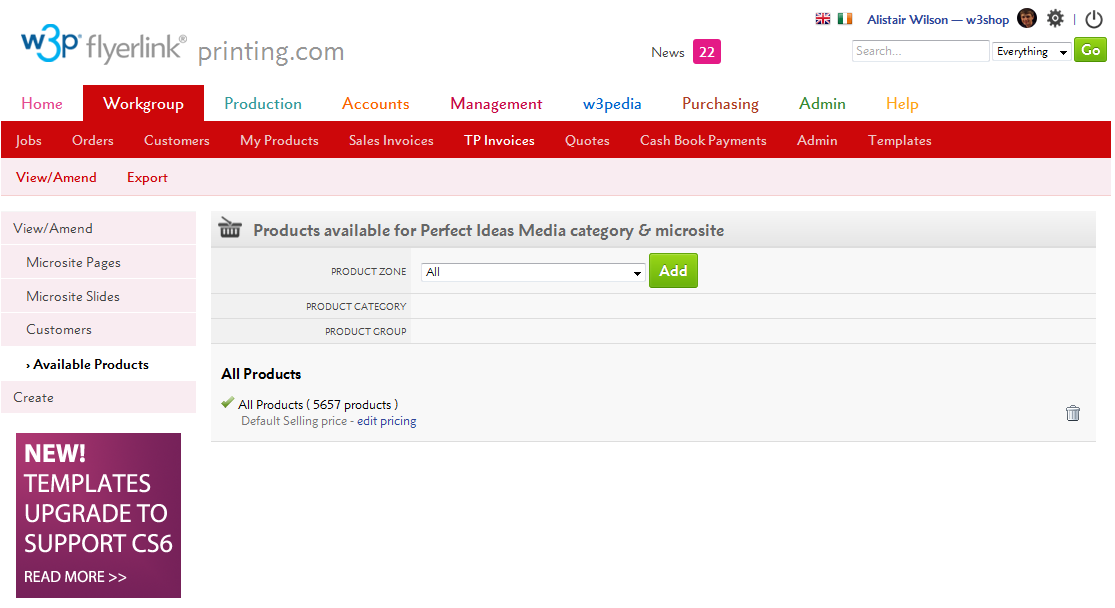
To restrict the product selection:
If you choose a Product Zone, you will list ALL products within that zone. If you restrict the product selection, you'll also need to re-add all the Opensource Products you've set up.
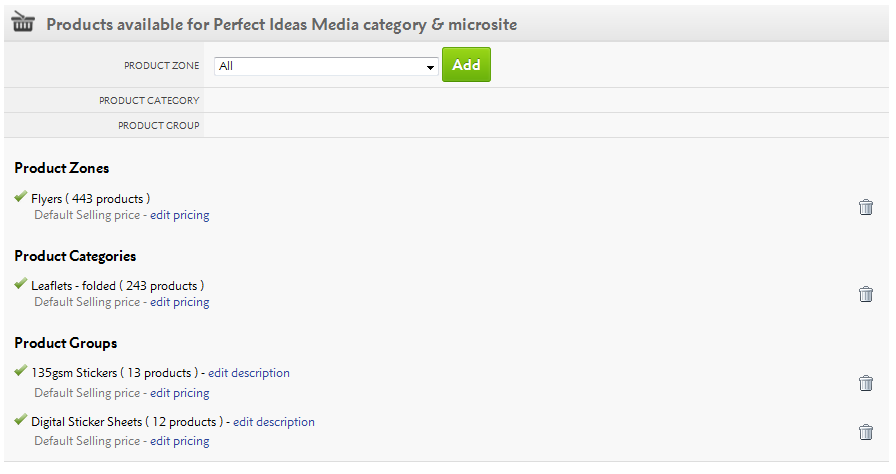
By clicking the "edit pricing" link, a pop-up will appear and you'll be able to adjust the prices for that Product Zone, Product Category or Product Group.
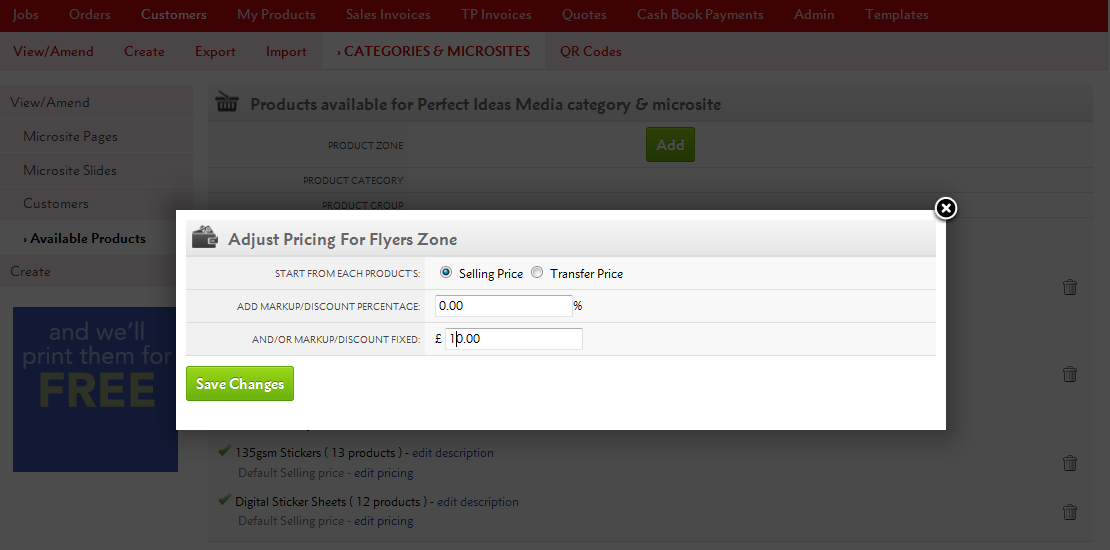
From here, you can either:
a) Make changes to the fixed price or a percentage of the total product Selling Price (RRP), or
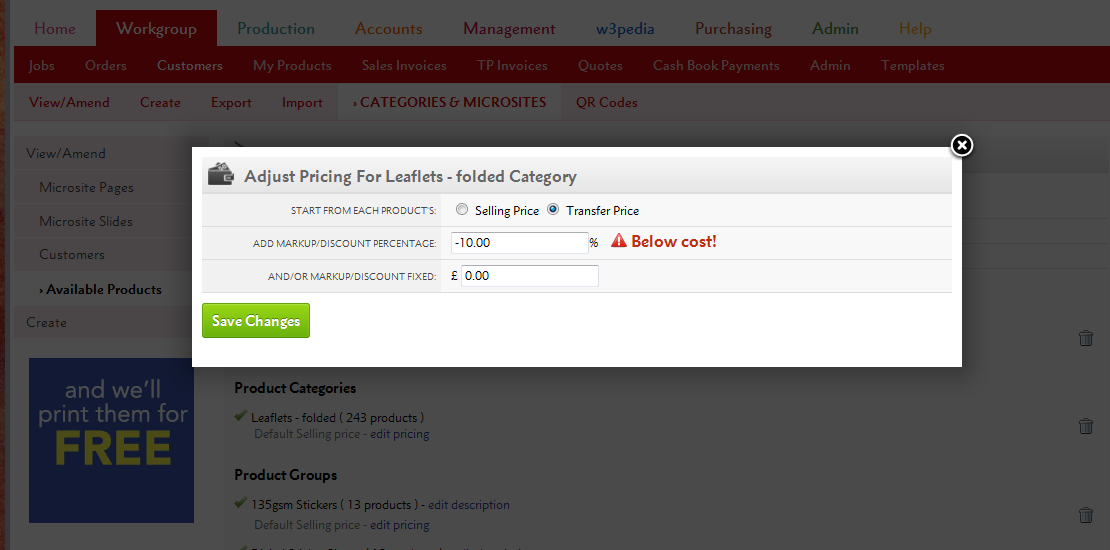
b) You can do the same based on the Transfer Price, which is how much you will be charged for the product.
Remember, any negative discounts (based on Transfer Price) mean that you'll be selling products for less than your cost price.
Price changes for Product Groups or Product Categories override those within the Product Zone. So you can increase all Flyers by, say £10, then choose one Product Group to increase by £20.
Add 100% Markup => 50% Gross Profit Margin
Add 66.66% Markup => 40% Gross Profit Margin
Add 42.86% Markup => 30% Gross Profit Margin
Add 25% Markup => 20% Gross Profit Margin
Add 11.11% Markup => 10% Gross Profit Margin
For Product Groups only, you can also change the descriptions your customers see.
Simply click the "edit description" link.
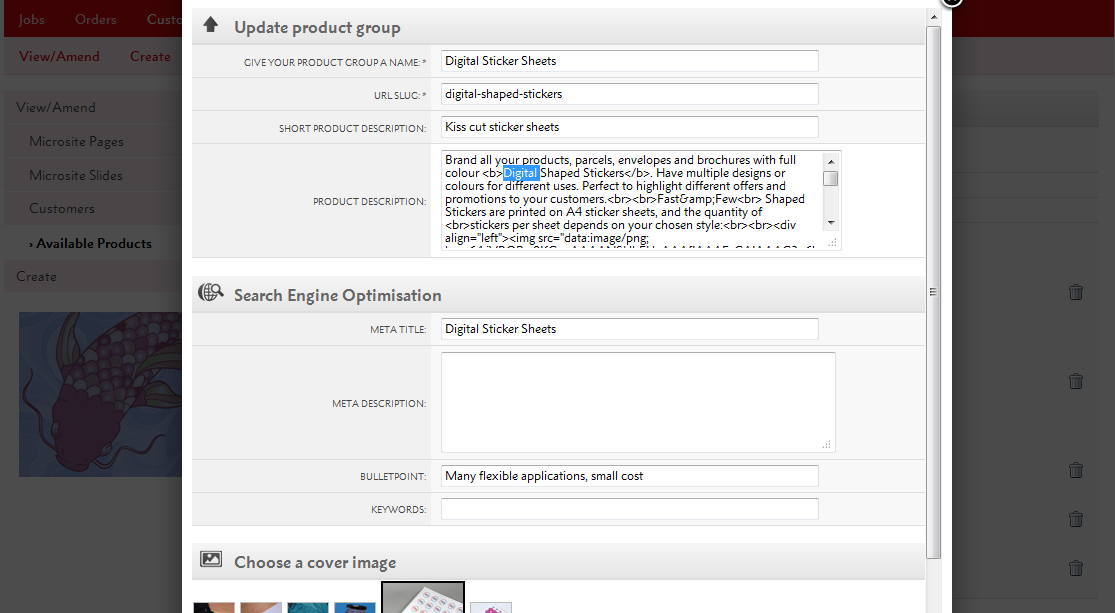
Starting from your supplier's marketing, you'll be able to adjust the Product Group name, url-slug, description and Search Engine Optimisation settings to fit your branding.
Any changes to the text will appear on your microsite.
Your price changes and product restrictions apply across Flyerlink and your microsite.
In Flyerlink, any customers belonging to the microsite will only be able to create jobs for products available to them e.g if you've removed Business Cards, your client won't be able to order them.
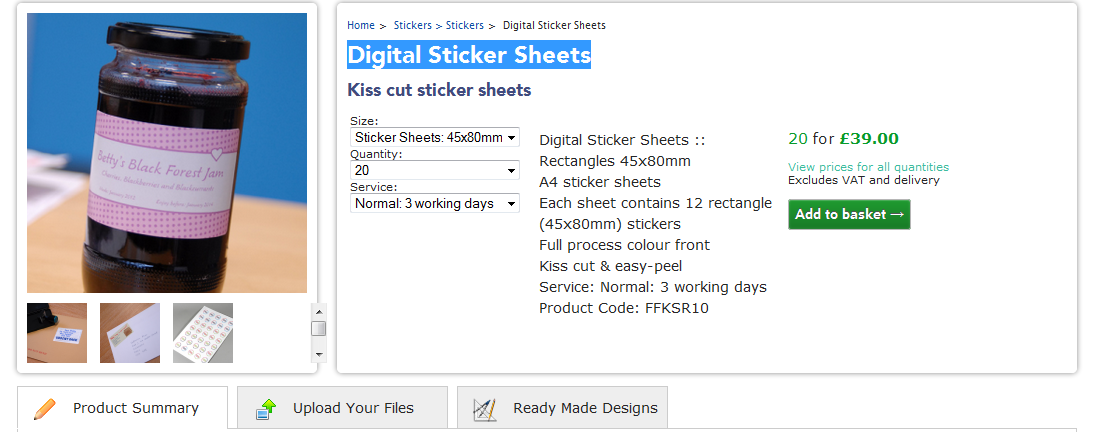
On your microsite, only the Product Groups you've selected will show online and any price changes will appear across the entire site.
You will also only see online Templates compatible with the product range(s) you've made available.
Price & description changes can take an hour before they are fully updated on your site.
Templates will update every day but you may have to wait for all the incompatible templates to disappear.
Please refer to Resource Article 4982 for any questions on update speed.
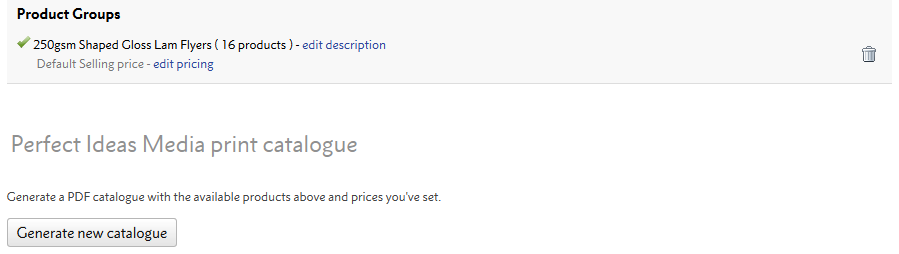
With the Available Products filter, you can quickly and easily adjust the price of products sold on your w3shop.
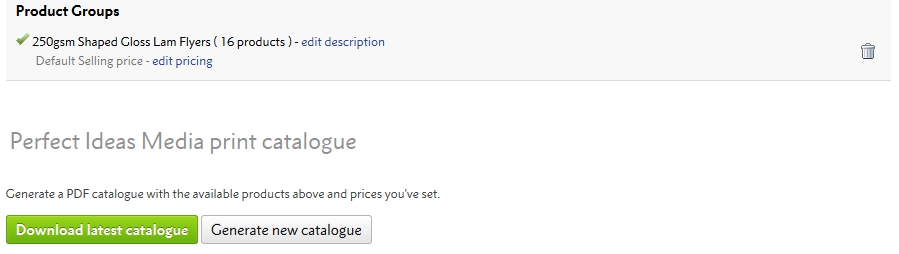
Once you've finished adjusting your prices, you can also print off a catalogue of all the products you sell and the online price when you last generated the catalogue.
To make your own catalogue, head to .
Press Generate new catalogue to start making a multi-page PDF of all your product prices.
Choose whether you would like a contents page to list the product groups you'll show the price grids for, to show the page numbers or to show your microsite's header.
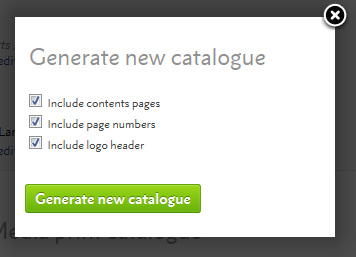
Once your catalogue has finished generating, you'll be able to download a PDF of your latest catalogue.
The catalogue is a multi-page PDF of all the product groups you sell on your microsite.
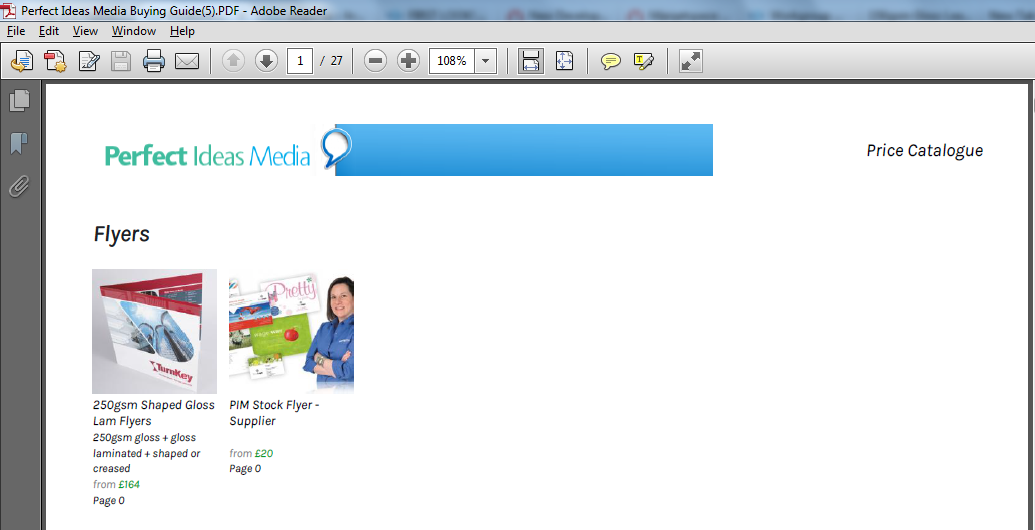
The Catalogue comes with a contents page of all the groups, but you can remove this if you just want the price grids.

Each page of the PDF will show a separate product group, complete with the product group text, images and prices of all the products in that group.
There's also an example specification of one of the products in the group.
* Please note the product group images only show on w3shops, if you're running it for a microsite you're best off removing the contents page
Once you've got your hands on the PDF, your free to adjust it in InDesign or Adobe Acrobat Pro to add a front page, back page, or remove some pages you don't want to list.
One of the advantages of w3shops is that they come pre-built with TemplateCloud and products from Grafenia's production HubM. The Grafenia product range already have hundreds of product images to advertise the print range.
It is possible to change the Granfenia product RRP for your shop using the available products filter. And it is also possible to change the Grafenia product images using the Product Images tool.
Use the Product Images tool to change Grafenia product images.
Head to
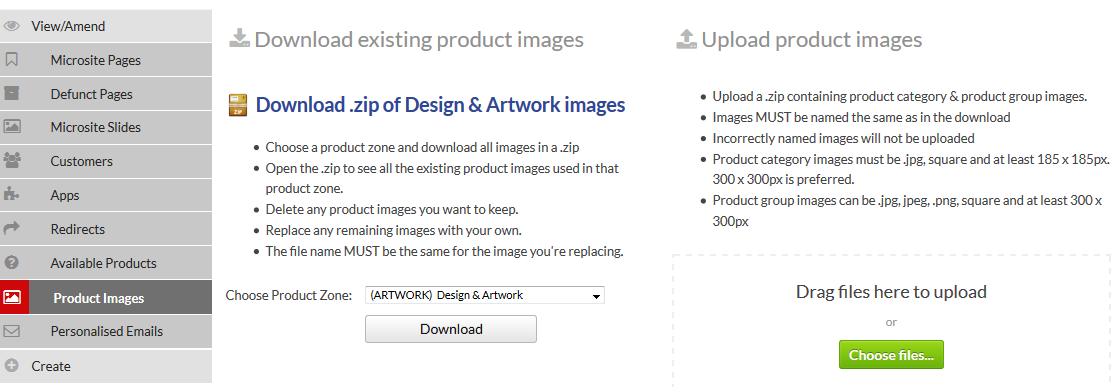
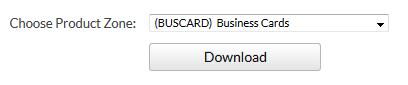
Here you can download the existing product images you have on your site. Choose the product zone you want to download images for.
You'll be given a .zip of the product category images, which appear in the upload your files page type.

And the .zip will also contain all product group images you see on the product search pages.
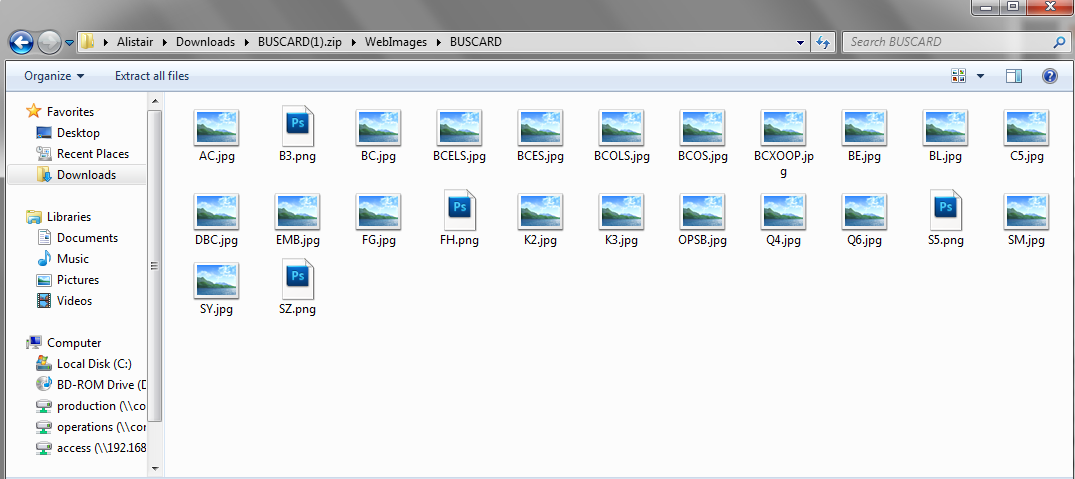
Delete any images you don't need to update.
Then replace the images with your new ones.
You'll need to keep the file name the same, the file name has a special code that helps us know which image is being replaced. For example you'll need a BUSCARD.png or BUSCARD.jpg file to replace the business card product category image.
If you upload a file that hasn't got one of our special file names, we'll reject it as we don't know which image it's designed to replace.
Once you've adjusted the files, you can .zip up the file again and upload it.
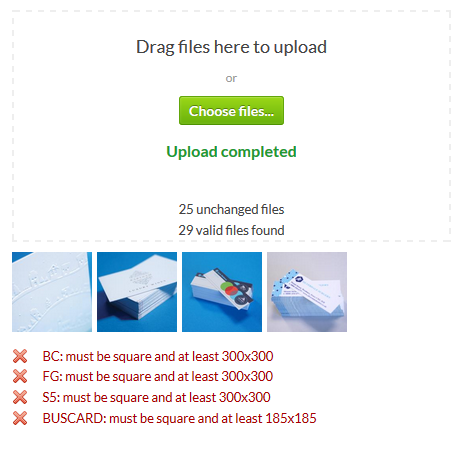
We'll show you if there are any issues we have uploading the files, alongside an image of any files we actually replace.
Product category images show on the upload your files page, which have an hour long cache to improve the page load time.
As a result of this cache, any product category images could take upto an hour before they take affect.
For opensource products, you don't need to use the Product Images tool to replace your product group image.
Simply upload an image for the product you create on
If you've more than 1 product image for a product group, you can choose the cover photo for your product group on
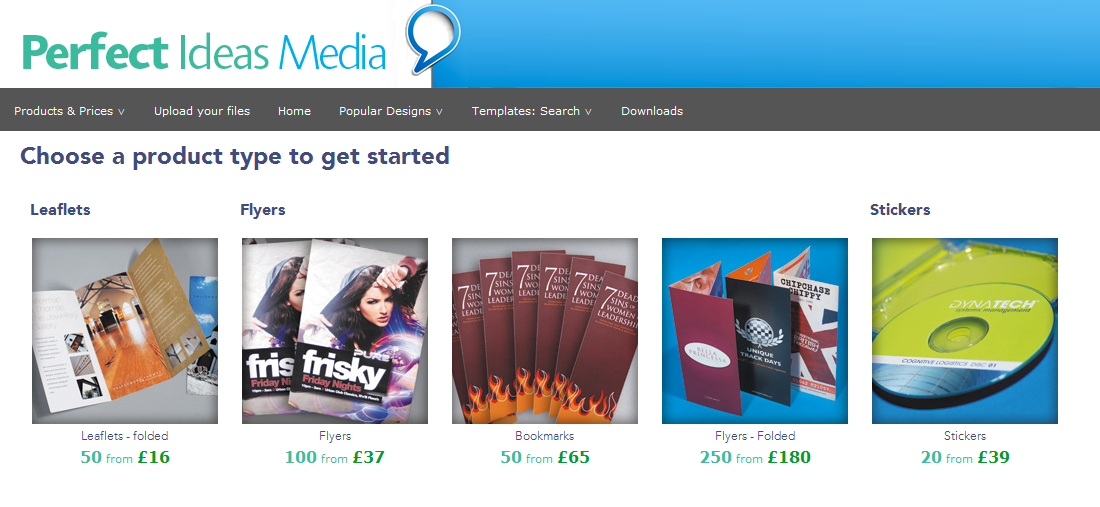
w3shop provides multiple different options for displaying product choices to customers, some of these are necessary pages to ensure the integrity and stability of your w3shop. Others are optional.
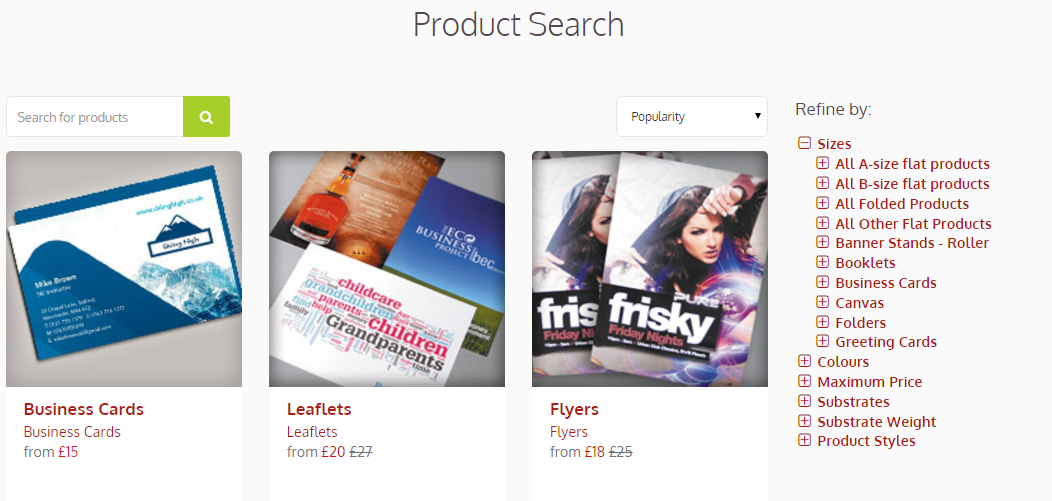
All w3shops have a product search page.
By default a product search page will list product groups to customers, and provide filter options to find the best product group.

With the Cumulus theme only you can also choose for your product search page to show product category results.

The product category results will either link to the product picker grid w3shop page (if you've added that), or it will use the configure your printing page (if you haven't added the product picker grid page)
All w3shops have a product price grid page.
This page shows a quick quote and a price grid for all products within a product group. Product groups are normally based on a paper weight and finishing type, such as 150gsm gloss leaflets, and can show a range of sizes with that size and finishing.

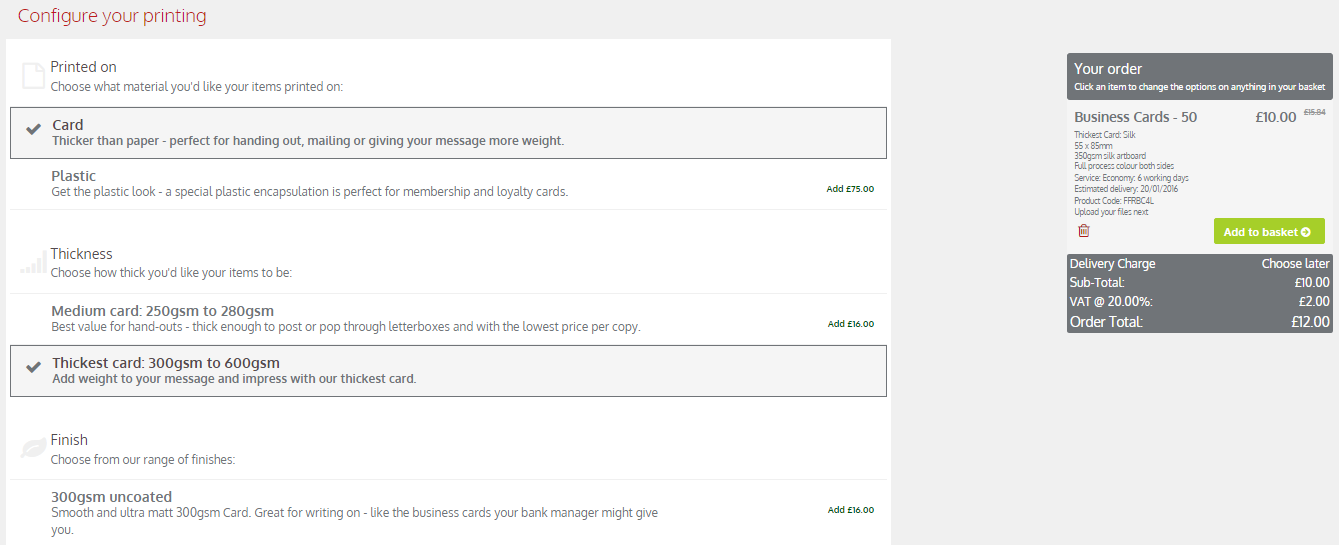
All w3shops have a configure your printing page.
This page shows results for sizes and colour combinations of products in the same category. Once a size and colour type are chosen, we show all products with a matching size and colour type based on their substrate, substrate weight and product style product tags. Each options show price difference of the selected product and the product with the different tag combination.
This helps the customer navigate to find the best price and has a much higher conversion rate than the product group page.
This is an optional page for Cumulus theme and reserved branded websites only. Add the product picker group pagetype to have this on your website.
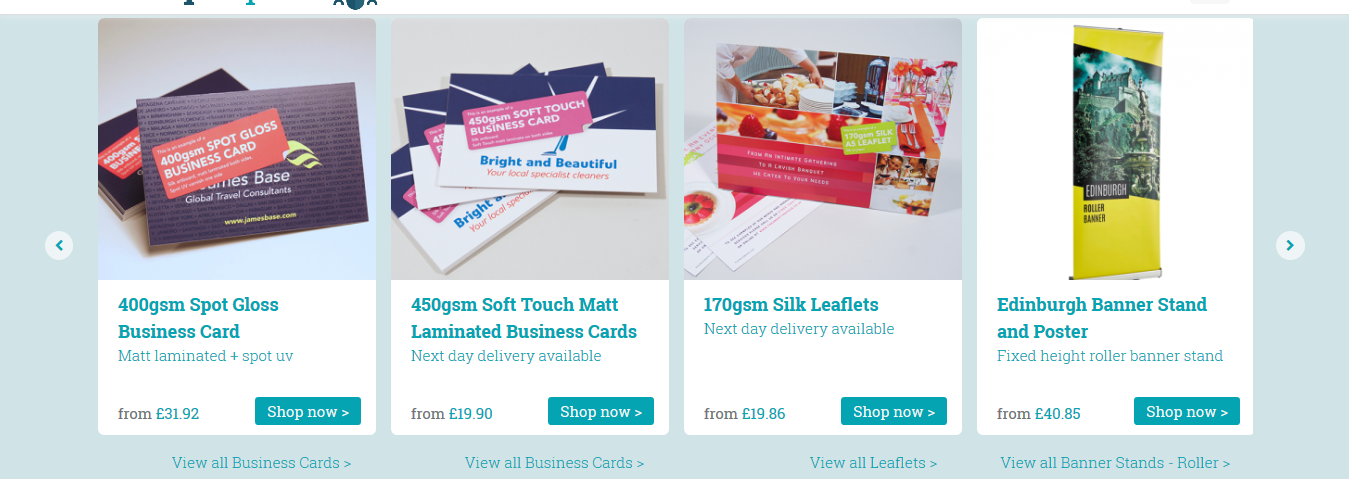
The page shows the same product results as the configure your printing page, but in a different visual way. The size, colour type and tags are displayed above a grid. Once a product is selected using those filters, the quantities and service levels are displayed in a grid to show relative prices.
The page also has links to product groups in the featured side bar or in the product summary tab.
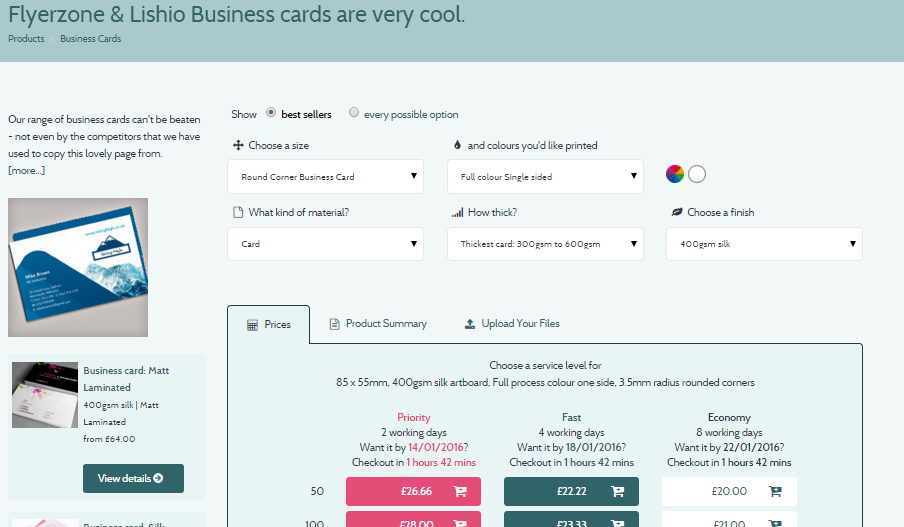
By default the page will show best seller products to the customer, but you can change this default on your product picker price grid page.

Featured products, which list down the side of the page, are normally those with an offer on at the moment, while best sellers are our all time best sellers.
You can add your own products as featured products, or as best seller product groups.
To add a featured product, simply head to
Tick "Featured products"
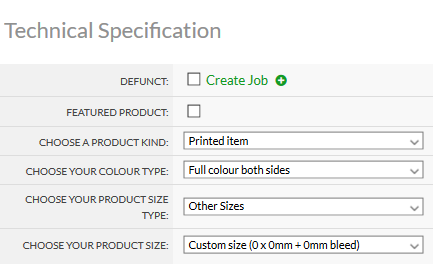
This will promote all products in that group as being featured.
Featured product are also used for the cumulus homepage featured products slideshows.
To add a best seller, head to
Tick "Best Seller"
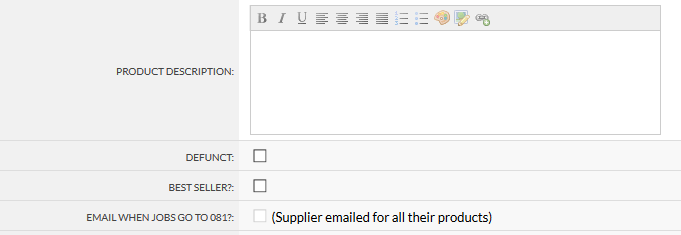
Now all products in that product group will be included in the best seller radiobutton group.
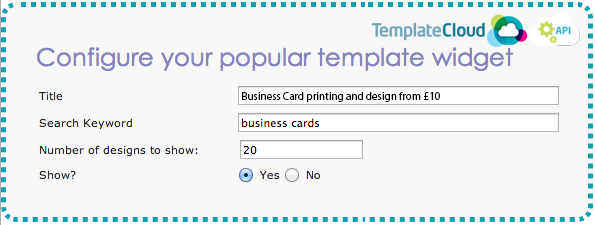
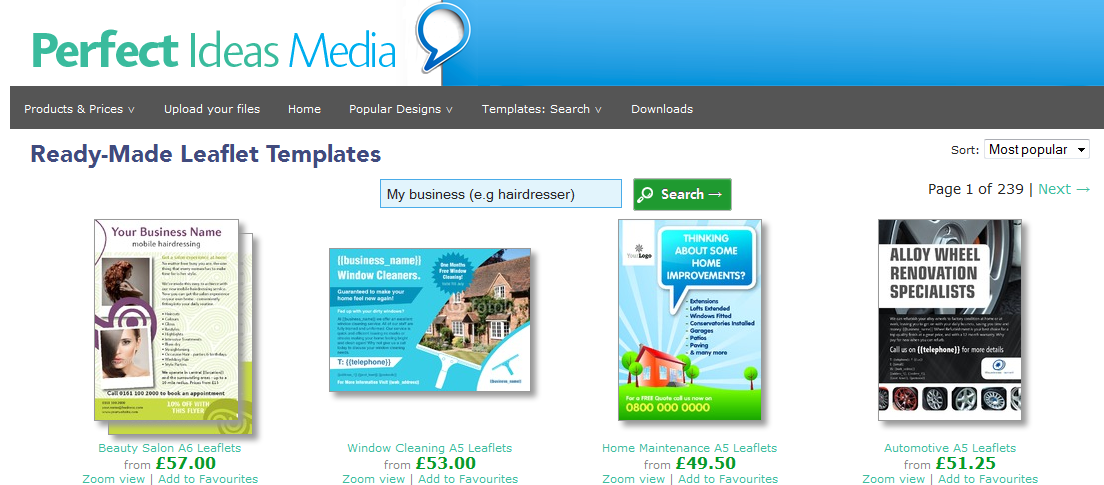
This widget displays a selection of Template Designs based on a keyword search.
Example of the Popular Template widget:
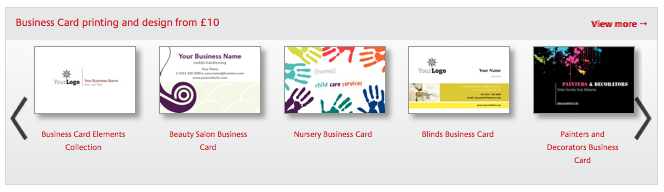
Only one keyword should be added to the Search Keyword field. This could be a specific product type e.g. Business Cards (as above), or a specific industry type e.g. Hairdressers
Keywords are added to your Flyerlink Template using Template Tags (Search Keywords). These templates tags are broken up into Industry Types, Client, Product Types, Colours, Styles, Collections, Events, Other.

Marqetspace widgets are fixed, they draw down data regarding your product range. You choose which Product Groups and Product Types are made available to customers. These products could be your own in-house product range, OpenSource products (from your own suppliers) or Marqetspace products (external suppliers), or a combination of all three.
See Building Products Training Pack for more information.
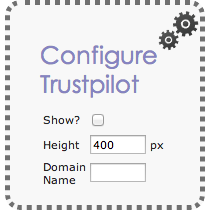 Trustpilot is the largest online review portal in Europe. Allowing customer to view and provide impartial feedback builds trust. If you have an account set up with Trustpilot use this widget to link your customer reviews to your w3shop.
The Trustpilot widget is available on the Zone Red theme in the Homepage & Landing Page sidebars.
"Ever noticed on Google searches that some companies have four or five orange stars next to them? It certainly looks impressive and can convince hesitant buyers, but why do some companies have it and others don’t?
These orange stars hail from review sites such as TrustPilot. Look closer and you’ll also notice they (usually) only appear on the paid-for advertisements - a small concession to Google’s paying customers.
TrustPilot is one of a number of sites that offer a public client feedback mechanism. It works in a similar way to TripAdvisor for hotels. Depending on the site, a score between 1-5 or 1-10 is given which Google then translates into a ‘1-5 star’ rating.
Our direct observation supports the Google view that these stars enhance your ‘click-through-rate’ (CTR) materially (see page 103).
TrustPilot charges for its service, and a minimum of 30 reviews is required before Google will index your hard-won stars.
(Purchase WEB2PRINT MD2MD)
.png)
The Contact form widget determines who receives the contact forms completed online by customers and enquiries. Simply enter the appropriate email address.
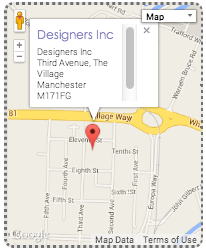
The map widget adds your google map location and address details. Your address and locations details are taken from Flyerlink. Make sure to complete your location details by adding in you Latitude and Longitude information here .
(Look up your postcode at Google maps, the longitude and latitude can be found in the url)
.png)
This widget can be customised to show a specific selection of Templates or if you want all Templates to be made available leave the fields as All.
A: Show filter if you want the Refine by tool to view in your w3shop and you require your client to have the ability to refine their search (see below).
B: Choose how you want the Templates to be sorted.
Only ONE keyword should be added to the Search Keyword field. This could be a specific product type e.g. Business Cards , or a specific industry type e.g. Dentists.
Example of a Template Search widget:
Find out how to use the SEO options in w3shop
Add links to your facebook page and twitter feed to the footer of your w3shop.
Go to Choose an appropriate Footer style.
Go to
Complete the Social Media Links section.
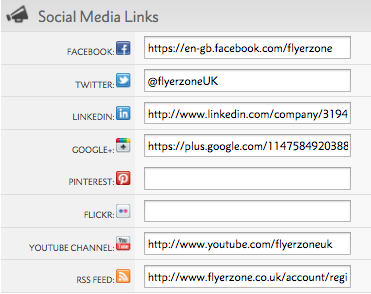
Example of w3shop footer with Social Media links:

Please note: the social media options available to w3shops in the footer are only the Facebook, Google and Twitter
The remaining social media link fields are only used on the printing.com studio pages
"Customer engagement is paramount. Genuine ‘likes’ on Facebook and ‘followers’ on Twitter give you a direct route to engage with your customers, and for them to engage with and comment on your company. The common belief is that this, in turn, adds to your SEO profile.
Like any marketing campaign, social media works best when the individual elements interact and have a common purpose. In practice, this means that, having updated your blog, the link should then be shared as an update on the main social media platforms. And remember, it’s about being disciplined - as most blogs fade out after a measly 3 months! So there’s a real opportunity to be better than your competition. Active, consistent, relevant use of Google+, Facebook, Twitter, LinkedIn, Instagram, etc. forms your social media footprint, and in turn adds to your domain authority and SEO visibility. Like most things in SEO, there’s no direct ‘cause and effect’ - it builds up over time.
In addition to boosting your SEO, activity on social media sites does drive some referral traffic. In the print market to date, we have found that lower value, more consumer-type orders hail from this activity.
Apart from the SEO benefits, today social media allows customers to directly interact with your brand in a very public way. An active engagement here can build a more sticky relationship with your customers."
This articles explains how you can quickly remove templates or products from your w3shop/microsite.
On your microsite, you can use the Available Products filter to choose exactly what products you want to show. But there's another way you can restrict the TemplateCloud Designs or Products on sale for your w3shop.
All w3shops can list the TemplateCloud Design library, they just need to have "Allow TemplateCloud Designs?:" ticked on .

Then your Template Search page type will list all TemplateCloud Designs with a Matching Product.

If you only see a limited selection of TemplateCloud Designs, it's likely the Templates are the only ones that match products available in your Product Search page.


If you untick "Allow TemplateCloud Designs?:", the only templates you'll find are those set up for TemplateCloud Match.
If you want to completely remove all products made from the Production Hub, Network Partners or Marqetspace Sellers, simply tick "Only allow my templates and my products?" on .

Your Available Products filter will then only list the products you've created on .

And your w3shop or microsite will only list the products you've created as well.

Create your own design templates and display them publicly - just like TemplateCloud® designs.
If your w3p subscription allows you to build templates and you have a w3shop® you'll now be able to add your very own design templates and publish them exclusively on your w3shop®.
If you want to add templates for specific designs, niche products or market sectors, TemplateCloud® Match now allows you to do this. Create online design templates for any product available on your w3shop® and publish for sale on your site.
Because they are only visible on your site, you won't earn royalties for these designs like you would through TemplateCloud.com.
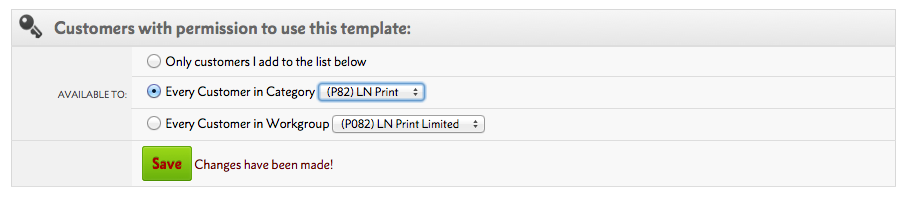
To get started, just create a template in the usual way, then follow these instructions:
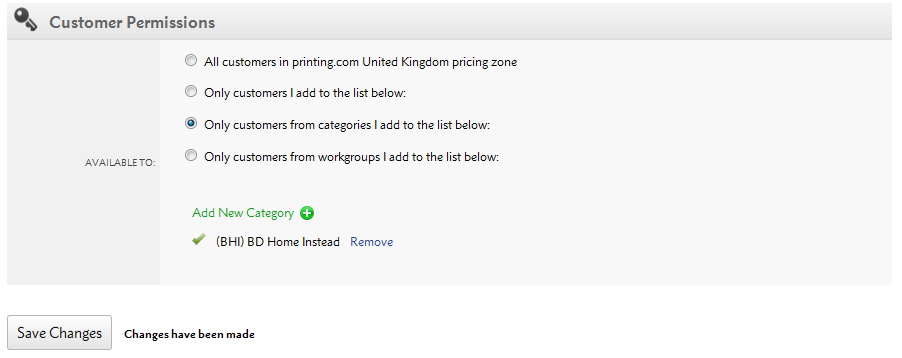
In Customer Permissions, just choose to make the template available to either Every Customer in Category or Every Customer in Workgroup:
For 'client templates' you usually just add a single tag, to determine which folder to put the template in on a microsite. Designer templates are a little different. Tags are the 'meta data' or keywords which your w3shop® uses to know which templates to show.
This is a key element in making sure your templates show up in relevant customer searches. Choose product type, industries, events, colours and other relevant phrases:

These are related to the search functionality on your site. You need to make sure they are related to the content of your design to make it appear in relevant searches. Add tags for the industry you have designed for (eg. Plumber) as well as for content in your design (eg. tap,pipes, heating, water, bathroom etc.).
When you make the template live, your design will be matched with the rest of the TemplateCloud® designs, depending on what the client searches for:
.png)
Your designs will always appear first in search, prioritised ahead of any other TemplateCloud® designs.
When adding designs for TemplateCloud® Match, before publishing it is imperative that you make sure there are matching products availble on your w3shop®.
Your template designs need to match the size and colour type (for example, full colour single sided) of an existing product for it to link automatically with a product. and be availble for a customer to order.
If your design has editable images, you can allow clients to search and replace them with images from the w3photos® library, powered by Fotolia. There are 14 million images to choose from and clients can try as many watermarked images as they like - there's no charge until they checkout:
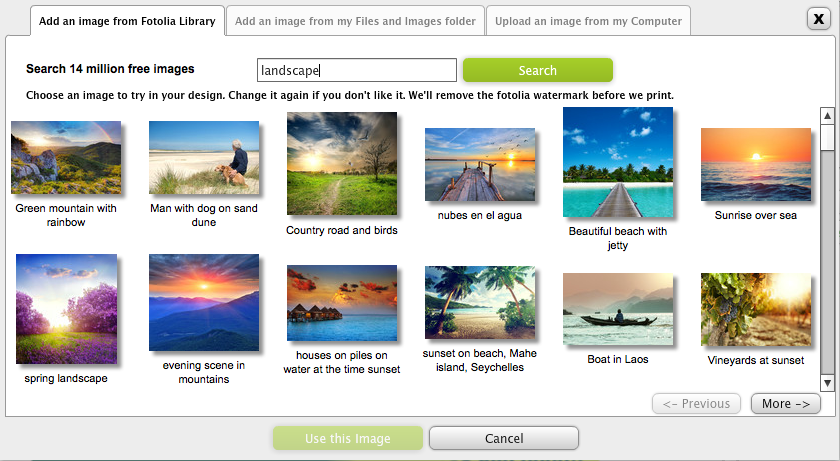
When we make a PDF after checkout, we replace any watermarked images with hi-res versions and charge you £1.99/€2.49 for each we find. Like magic. To allow Fotolia, simply tick the Allow Fotolia Library? box:

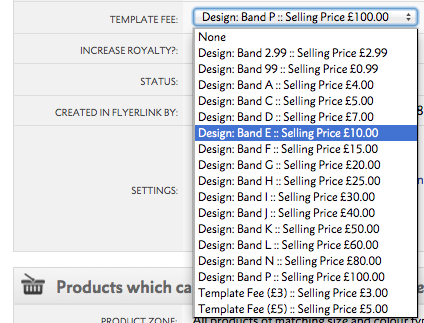
You can give away designs free if you choose, or you can choose to charge a fixed design fee:
When a client buys your design, we'll make a PDF and upload it directly into the job. You'll pay your usual template click charge (watch this space for some exciting news about this). There are no set-up fees, no fees for building templates, no minimum spends and no other charges. You should consider the number of w3photos® in your design when setting a design price.
It may take up to 1 hour for your design to populate your entire site.
TemplateCloud®Match is available for w3plus subscriptions. However, if you upgrade your w3shop® subscription to allow template building functionality before Monday 24th March, you'll get TemplateCloud® Match included for FREE.
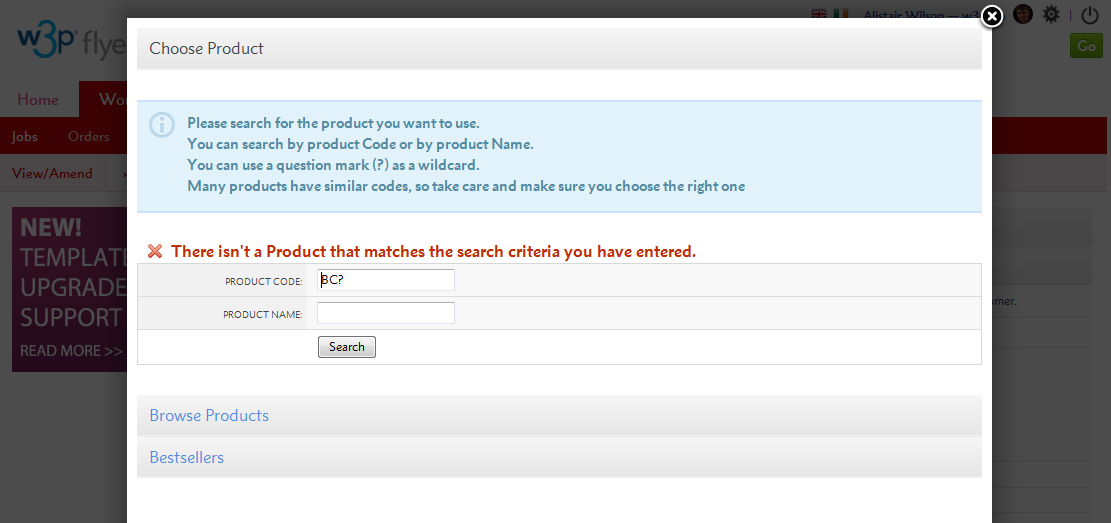
This article explains how to link Products to Templates.
When you build a Template via . You're asked what Product Size & Colour Type you want.
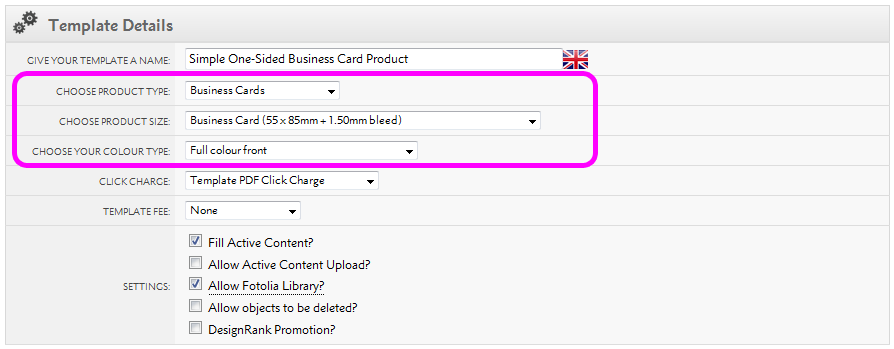
Every Product in Flyerlink also has a Product Size & Colour Type.
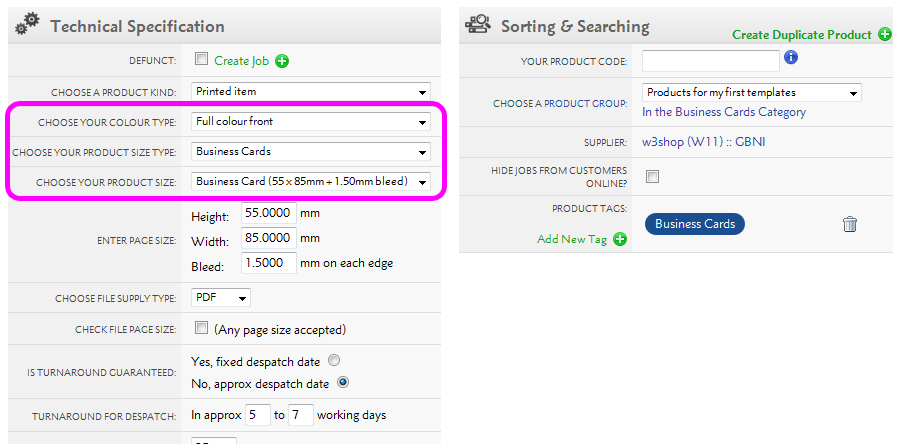
For a Product to be eligible to a Template, the Product Size & Colour Type need to match.
Product Types are groups of Product Sizes to help you find an appropriate size. If you can't find the Product Size you're looking for, you may need to change the Product Type.
Flyerlink has hundreds of Product Sizes to choose from when you're building your Template. But if your Template and Product are of an irregular size, or you can't find the right Product Size; you can chose a Custom size.
When you build a Product, the Custom size option enables you to add your own height, width and bleed.
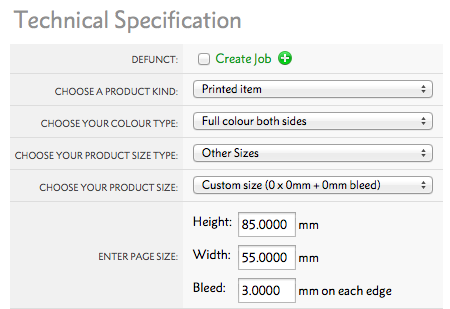
Once you've chosen your Product Size & Colour Type. You need to choose how many Products you want to be available to your Template.
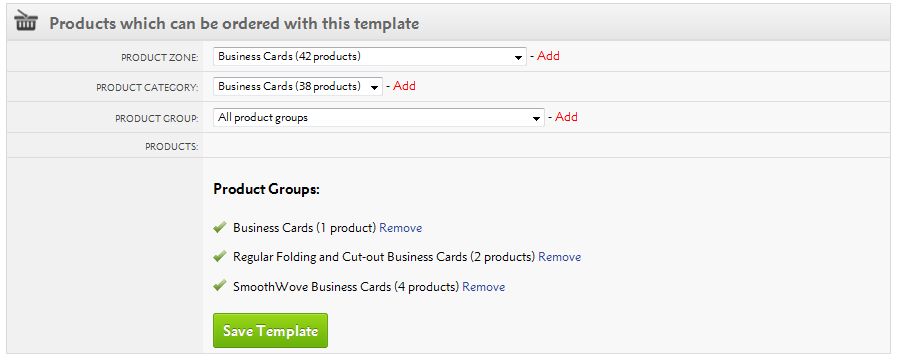
By default, all Matching Products will be mapped to your Template.
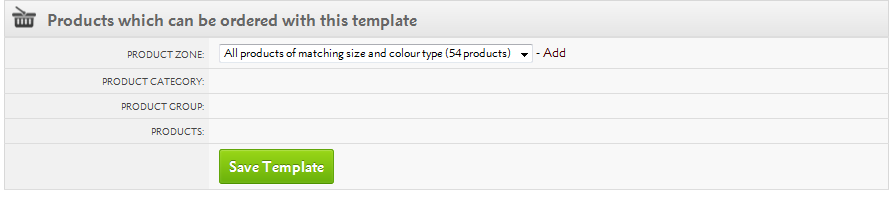
However, you can also restrict to just a few Product Groups, Product Categories or Product Zones.
When you build a Product via , you need to choose Customer Permissions.
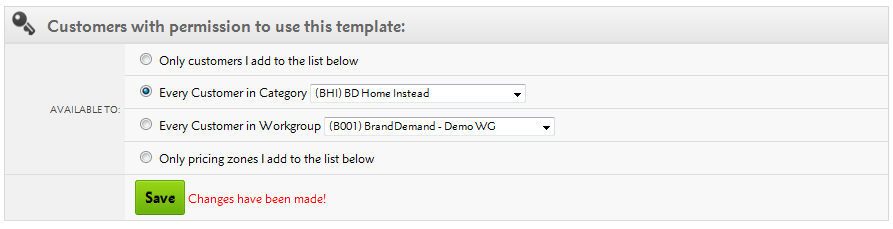
You also need to choose Customer Permissions on your Template via .
Provided there are matching Customer Permissions, you'll be able to see your Product in the filter for which products are available for your Template.
.png)
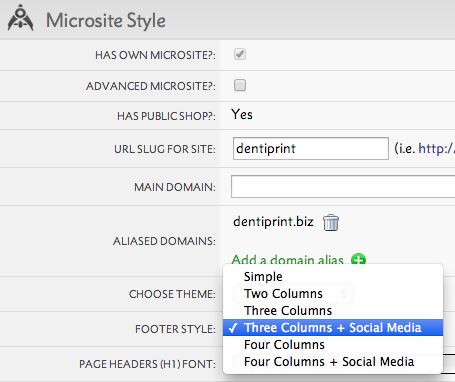
w3shops can be used for any domain name you’ve registered, so if you’d like to use your own URL for a w3shop, these are the simple steps:
1. Locate your w3shop Category Page under .
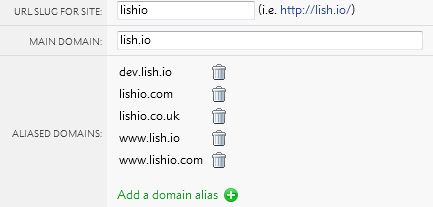
2. Scroll down to the Microsite Style section and enter the URL for you new domain name in the Main Domain box:
For example: www.perfectideasdemo.com
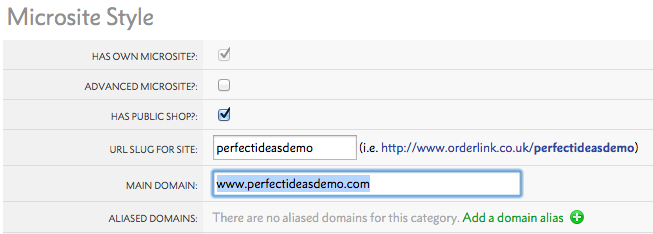
3. Then add http://Perfectideasdemo.com (without the www) under Aliased Domains.
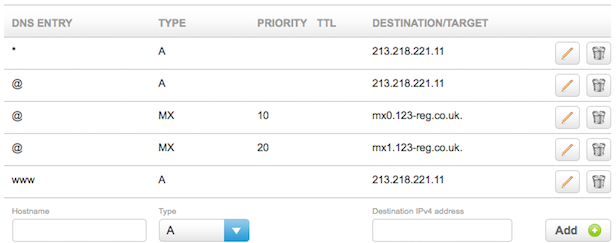
4. At your Domain registrar’s site (e.g 123-Reg), set your DNS settings as A-record, pointing to 213.218.221.11 for the UK, if you're from a different hub check out the table below for the right IP address
| Region | IP Address |
|---|---|
| UK & Europe | 213.218.221.11 |
| US | 213.218.221.32 |
| New Zealand | 213.218.221.33 |
| Australia | 82.163.20.1 |
5. You need to create two A-records:
The non-www A-record configuration varies with DNS registrars, e.g. either:
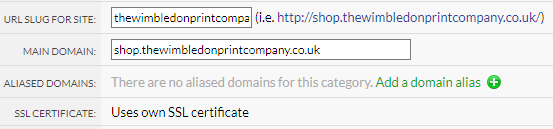
if you want the w3shop to be a subdomain of your main site, such as shop.myweb2printsite.com
Add the subdomain as the main domain in Flyerlink
Then at your Domain registrar’s site (e.g 123-Reg), set your DNS settings as A-record, pointing to 213.218.221.11 for the subdomain
EG
| Host | Type | Destination |
|---|---|---|
| shop (or whatever subdomain you're using) |
A | 213.218.221.11 |
Once you are ready to go live with your w3shop you need to make sure as many people find it. After building the site the hard work begins in letting clients and potential clients know it's there to increase the likelihood of generating new potential clients and orders through Search Engine Optimisation (SEO).
Flyerlink can help.
Meta Data: Found on the page editor under Search Engine Optimisation
Meta title - is the main text that describes a web page. It appears in three key places: browsers, search engine results pages, and external websites (You’ll see it at the top of your browser).
Meta Descriptions are HTML attributes that provide concise explanations of the contents of your web page. Meta descriptions are used on search engine result pages to display preview snippets of your page.
These short paragraphs are your opportunity to advertise content to searchers and to let them know whether the given page contains the information they’re looking for.
For more information about Meta Titles and Descriptions please check in w3pedia.
Social Media – Blogs, Twitter, Google+, Facebook, LinkedIn
Social media works best when the individual elements interact and have a common purpose. This means that, having updated your blog, the link should then be shared as an update on the main social media platforms.
Remember, it’s about being disciplined - as most blogs fade out after 3 months!
Active, consistent, relevant use of Google+, Facebook, Twitter, LinkedIn, Instagram, etc. forms your social media footprint, and in turn adds to your domain authority and SEO visibility. Like most things in SEO, there’s no direct ‘cause and effect’ - it builds up over time.
In addition to boosting your SEO, activity on social media sites does drive some referral traffic. In the print market to date, we have found that lower value, more consumer-type orders hail from this activity. Apart from the SEO benefits, social media allows customers to directly interact with your brand in a very public way. An active engagement here can build a more sticky relationship with your customers.
Other useful 'Digital' activities:
Nettl.com, printing.com, Orderlink and BrandDemand microsites give you the option of allowing clients to add voucher codes in their basket that discount a set £ or % from the order.
Some vouchers are pre-configured by Grafenia to provide a set discount and also a transfer price discount - this is done for promotions like Black Friday and the former Offer of the month. However you can set up your own customisable vouchers using our gift voucher service via
Head to .
Here you can see all vouchers set up for your workgroup, category or indivdual customers.
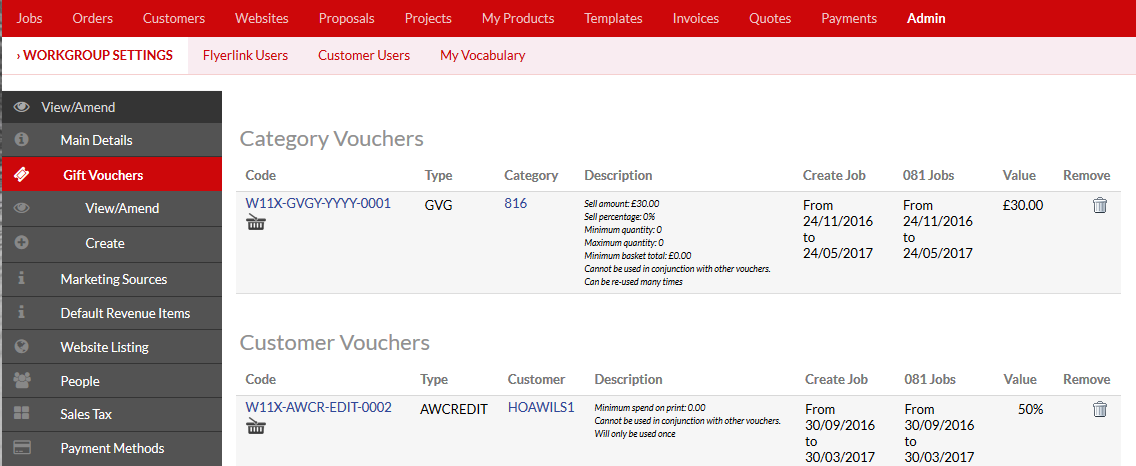
Choose create to create a new voucher.
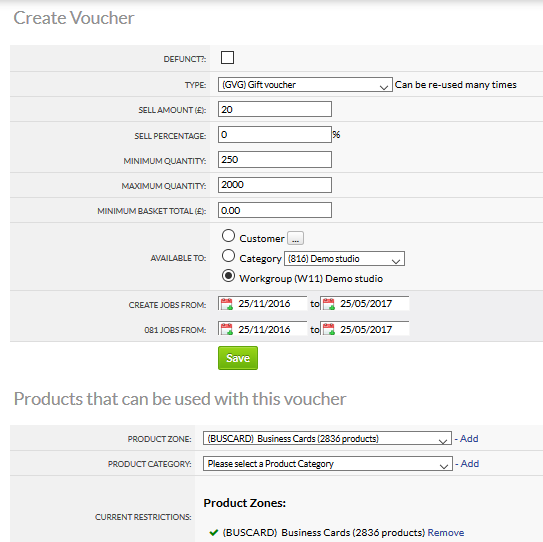
You can set up the rules of your voucher to choose what discount should be applied, and which products, quantities, and minimum basket value is necessary.
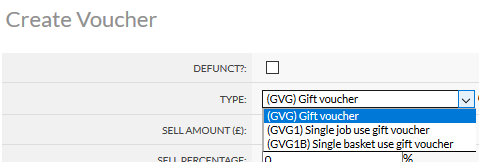
You can choose 3 types of gift vouchers:
Gift vouchers - can be reused until the date expires
Single job use gift vouchers - can only be used once and only on 1 job or basket item
Single basket use gift vouchers - can only be used once but can apply to multiple jobs within a single basket.
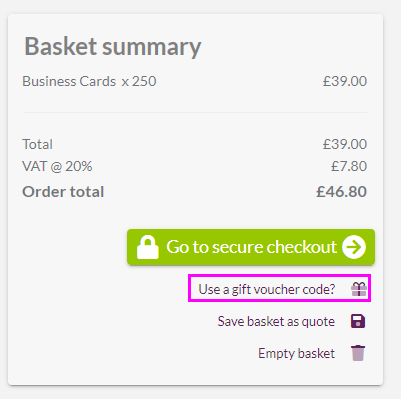
The printing.com website always shows basket coupons, but for microsites you may need to turn it on.
Head to .
Tick the Allow Voucher Codes in basket? box:
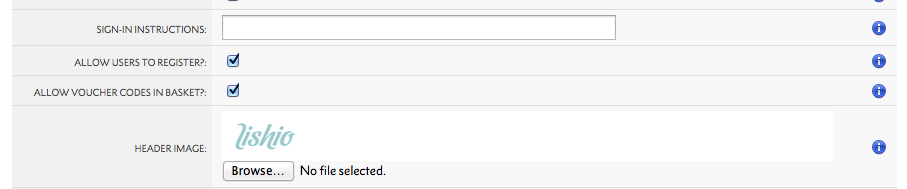
This will reveal a new Do you have a Gift Voucher code? box in the basket page:
We publish a list of standard vouchers which you can give out - £5 off, £10 off, 10% off and so on. Send the voucher codes out and when the client types it in their basket, we apply the discount automatically, and the voucher is recalculated if they change quantity or service level.
If the voucher applies to more than one item in the basket, it gets automatically added to all valid items. If there's a better discount available, we'll always apply the biggest discount.
This discount only applies to the selling price, not the transfer price.
If a voucher is for a selling percentage only, we deduct the % and also round up the spare pennies
Example for a 10% discount on a job worth £37.86
We actually discount £3.86 instead of £3.78 or £3.79
Making the job post-discount exactly £34
This is done to be more generous than necessary to the client about the advertised discount
To avoid the rounding up of pennies you can apply a fixed selling amount of 0.01p
For jobs produced by Grafenia's production HubM, delivery cost is calculated by the weight of the order and number of jobs (due to extra boxes).
Opensource delivery costs are also calculated in a similar way, unless Free Delivery is chosen when the cost of delivery is absorbed into the product total cost.
The delivery options available change depending on the service levels available from our carriers, like TNT, to the customer's delivery address.
To calculate the total delivery cost, we need:
As a result the default time for showing delivery costs is when someone is checking out and reviewing the delivery options before payment.
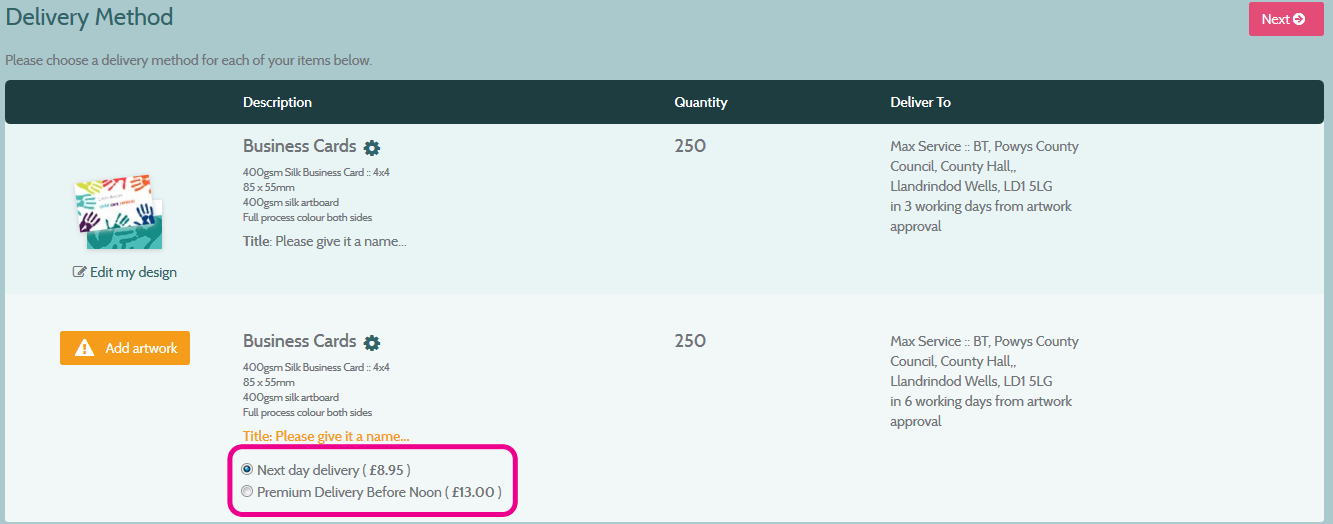
While we need extra details to show the actual delivery cost, it's possible to give an indication to your clients of the estimated delivery cost before they go through the checkout process.
To do this, head to
Tick Show estimated delivery cost online?
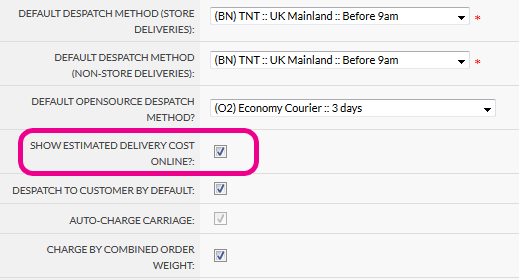
We will then show an Estimated Delivery Cost next to any add to basket button on your shop.
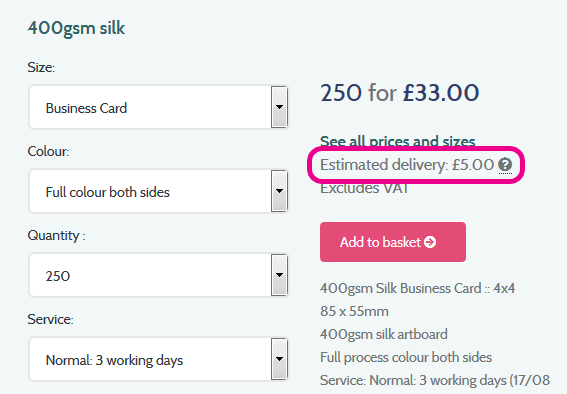
We will also show an Estimated Delivery Cost in the basket and configure your printing page.
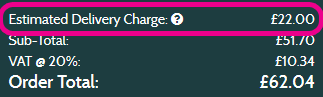
This estimated cost is based off your workgroup's default despatch method service level and your basket weight, so could change if the customer wants to vary their delivery service or if the default despatch service isn't available to your customer's delivery address. The estimated delivery cost will then be replaced with the actual cost in the checkout process.
Please note: estimated delivery is available on w3shop and branddemand sites only. Not available on printing.com
Header links are a special page type you can use on your w3shop to add extra links on the top of your w3shop. These header links use redirections, see Resource Article 5028 for more details.
To add a header link, create a new page on .
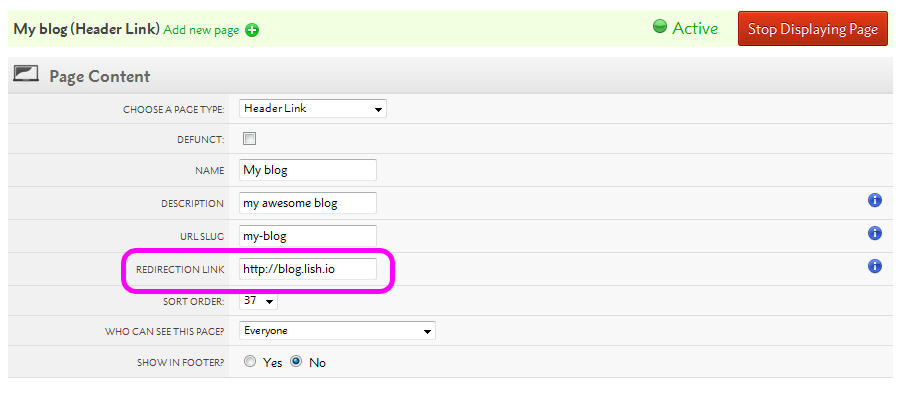
This will then appear on your top menu.

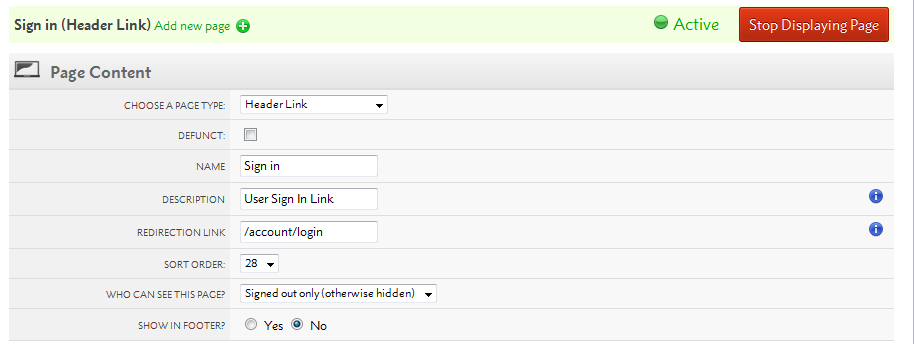
Your Sign in, Sign out and Register links will all appear as pages, giving you the ability to change the sort order, text or link. Be careful making any changes, the automatically generated choice was selected as best practice. Only make changes to these if needed.
To make the most of the header links, you'll want to change the context they can be viewed in.
All Microsite Pages can choose to be available to different sets of users.
By default, your pages and links are available to Everyone. You can also make them only available to Signed in users or Signed out users.
If a link is only available to Signed in users (always visible), a signed out user will be taken to the registration page first.

While your building your w3shop, you'll want to add links between your pages.
These may update to suit a new domain you add or they may stay linked to an old redundant page, depending on how you add links.
This guide seeks to help you make links that update when a new domain is added.
All links automatically created to your w3shop dashboard, products and templates will automatically update when you add a new domain.
It's only a tiny percentage of your w3shop links that may break when you change your domain.
The only links you need to worry about are the ones you add yourself in the w3shop Editor or Redirection links.
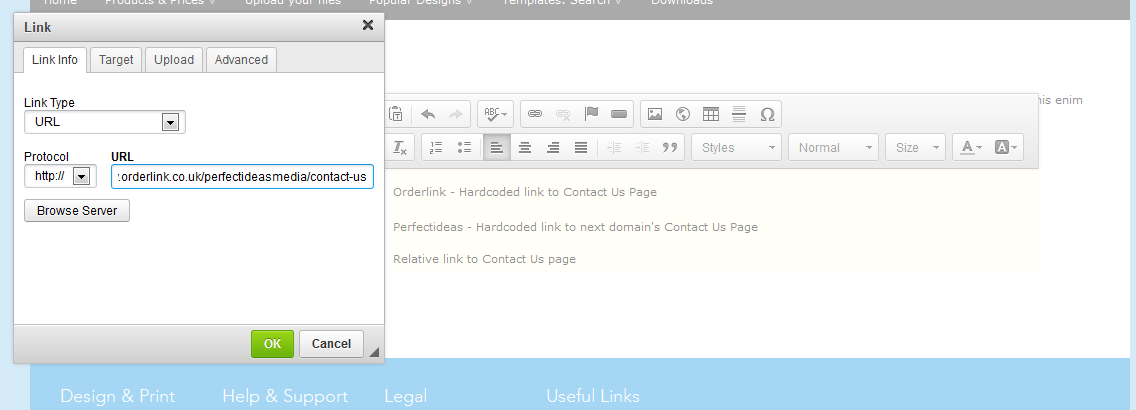
On your w3shop, if you add a link to "http://www.orderlink.co.uk/perfectideasmedia/contact-us" then the link will not automatically update to "http://www.perfectideasmedia.co.uk/contact-us" when you add your domain.
You can build all links in your w3shop anticipating the domain change.
For example you can make all links to the contact us page go to "http://www.perfectideasmedia.co.uk/contact-us".

The links will be broken while you test, but fixed on live. That means you don't have to change all your links when you're site goes live.
If you change your domain a second time, you'll need to replace any links to "http://www.perfectideasmedia.co.uk/contact-us" and make them go to "http://www.perfectideasmedia.com/contact-us".
Instead of going directly to a "http://..." address, you can add relative links to your w3shop that adjust depending on the Domain your site has or it's url.
| Link Type | Link | Page link is on | Page link will go to |
|---|---|---|---|
| Absolute | http://www.orderlink.co.uk/perfectideasmedia/contact-us | www.orderlink.co.uk/ perfectideasmedia/relative-link |
www.orderlink.co.uk/ perfectideasmedia/contact-us |
| Absolute | http://www.perfectideasmedia.co.uk/contact-us | www.orderlink.co.uk/ perfectideasmedia/contact-us |
www.perfectideasmedia.co.uk/ contact-us |
| Relative to Domain | /contact-us | www.orderlink.co.uk/ perfectideasmedia/relative-link |
www.orderlink.co.uk/ contact-us |
| Relative to Domain | /contact-us | www.perfectideasmedia.co.uk/ relative-link |
www.perfectideasmedia.co.uk/ contact-us |
| Relative to Page (back) | ../contact-us | www.orderlink.co.uk/ perfectideasmedia/relative-link |
ww.orderlink.co.uk/ perfectideasmedia/contact-us |
| Relative to Page (back) | ../contact-us | www.perfectideasmedia.co.uk/ relative-link |
www.perfectideasmedia.co.uk/ contact-us |
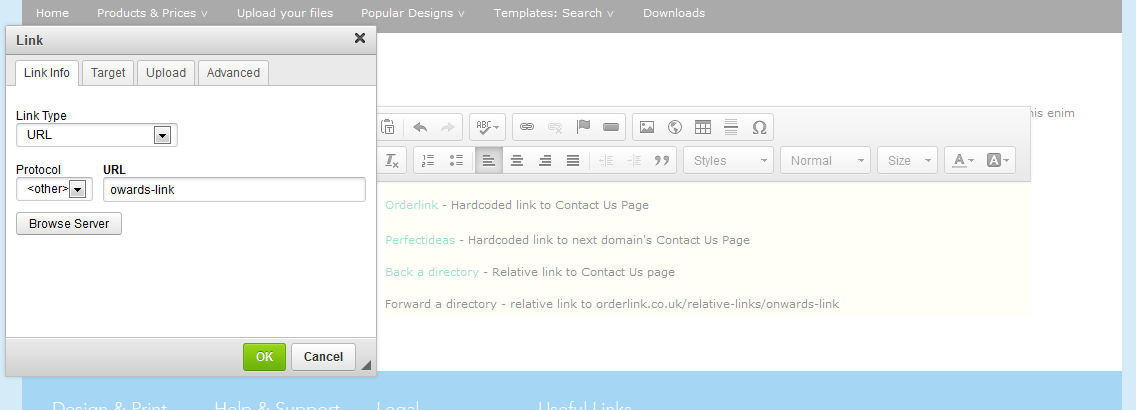
| Relative to Page (forward) | contact-us | ww.orderlink.co.uk/ perfectideasmedia/relative-link |
www.orderlink.co.uk/ perfectideasmedia/relative-link/contact-us |
| Relative to Page (forward) | contact-us | www.perfectideasmedia.co.uk/ relative-link |
www.perfectideasmedia.co.uk/ relative-link/contact-us |
By adding a "/" to your link, the url created will start from your domain.
This will cut off your w3shop url-slug, unless you actively add it.
Use this to make links work on your live site www.perfectideasmedia.co.uk, but not on your www.orderlink.co.uk site.
Adding a "../" to your link will create a url that goes back a url directory. This means the link will replace the "/page/" you're currently editing with the link you add.
For example adding the link '../our-team' to the following about us page www.orderlink.co.uk/about-us/ will result in the following URL www.orderlink.co.uk/our-team
You can go backwards more than one directory by adding "../../" and you can go forwards more than one directory by adding "../page-1/page-2"
For example: use the link "../../help/FAQs" from page "www.orderlink.co.uk/perfectideasmedia/page-1/page-2" takes you to "www.orderlink.co.uk/perfectideasmedia/help/FAQs".
This link goes backwards 2 directories (/page-1/page-2) then goes forward (/help/FAQs).

Adding a link without a forward slash or http:// will append the url to the end of the page you're currently editing.
For example a "contact-us" link from the page www.orderlink.co.uk/perfectideasmedia/help" will go to "www.orderlink.co.uk/perfectideasmedia/help/contact-us"
Due to various intricate redirections:
Relative links to the page will not work on your homepage.
You will either have to update homepage links when the site goes live, or create relative links to the domain.
This article explains how to personalise emails sent to your customers and studios from w3p sites.
w3shops and w3client microsites send a number of emails to customers and your sales team when orders are placed, passwords are changed or important activities are undertaken.
You are able to personalise these emails and adjust the text to suit your brand.
Go to .
Either search for an email template you've already personalised, or Add a new one:

Once you've chosen an email to edit, you'll be given a default email.
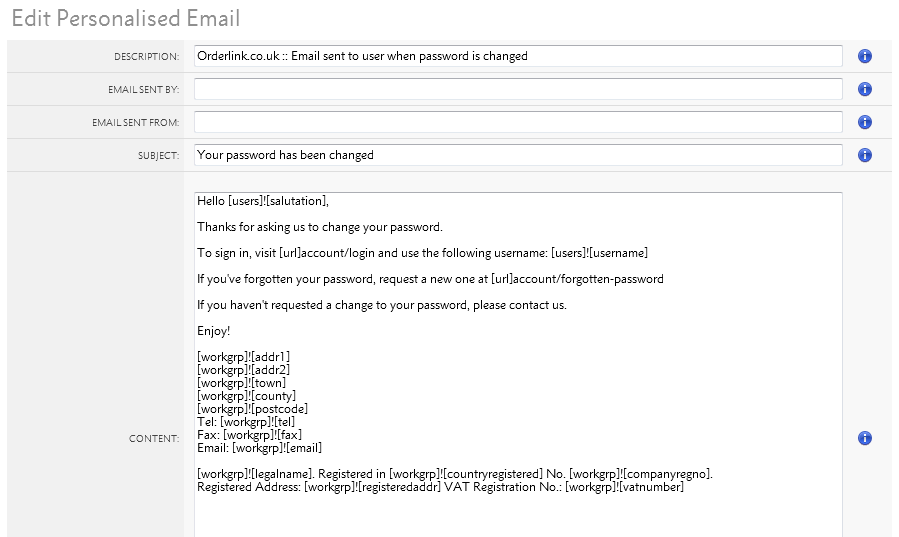
You'll be able to change the description for internal reference of what the email does.
You'll also be able to choose who the email is sent by and which email address it is sent from. If this is blank, a sensible email from your workgroup is chosen.
Then you can change the email's subject line, which is visible to customers, and the email content.
The default emails make extensive use of Active Text Substitutions. These are [square]![brackets] that retrieve information about your customer, their order or your workgroup.
We recommend you continue to use Active Text Substitutions.
Below your email, there'll be an explanation of what information the Text Substitutions retrieve is given.
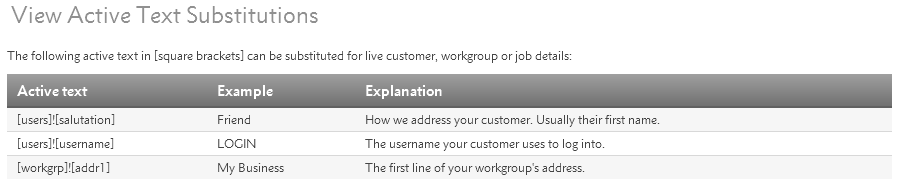
You'll be able to use these Active Text Substitutions anywhere in your email, or you can replace the workgroup information with your own signiture.
Once you've finished personalising your emails, you can send a sample to yourself.
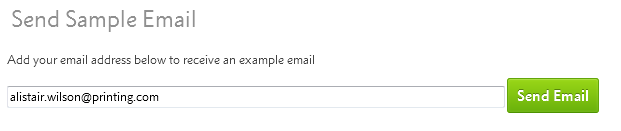
The Sample Email will retrieve your Active Text Substution's example, not a live order. It will make more sense to your customers than to yourself.
When you've finished editing, simply save your changes.
You can also revert to the default email template if you've made a mistake, or you can delete the personalised email and stick to the one created on your behalf.

There are some other emails sent out by flyerlink, mostly workgroup notifications, that cannot be personalised. However, you will be able to personalise all the main emails sent out under your branding.
You will be able to personalise the following types of emails:
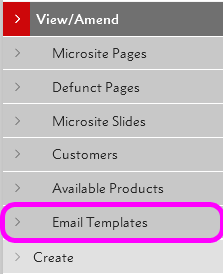
All the emails available for personalisation can be found via .
This guide explains how to set up contextual links, making some pages in your w3shop only available to Signed in or Signed out users.
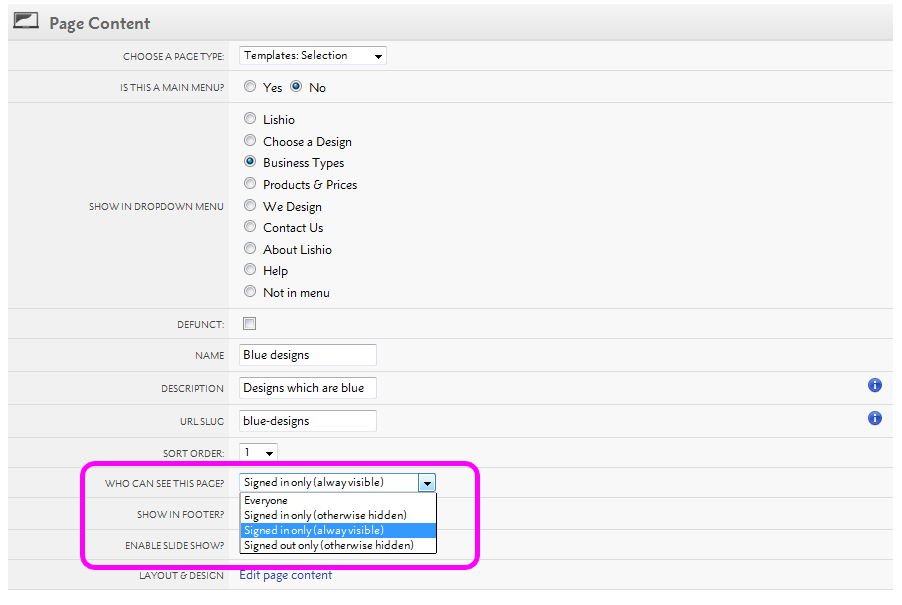
All Microsite Pages can choose to be available to different sets of users.

By default, your pages and links are available to Everyone. You can also make them only available to Signed in users or Signed out users.
If a link is only available to Signed in only (always visible), a signed out user will be taken to the registration page first.

Header and Footer links can also be hidden to Signed in or Signed out users, by choosing the Signed in only (otherwise hidden) or Signed out only (otherwise hidden) option.
Adding Captcha is an easy way to prevent spam emails being sent through a contact form. Captcha requires a someone to enter a letter code, tick a box, or possibly read a letter or number in images before sending a contact message - to confirm they are a real person and not just a robot.
w3shops use Google's reCaptcha to prevent spam messages being sent.
1) Sign up to Google's reCaptcha service
https://www.google.com/recaptcha/admin
Choose the invisible reCaptcha option - this will only ask people to verify their humanity if the browser the user is viewing from looks suspicious
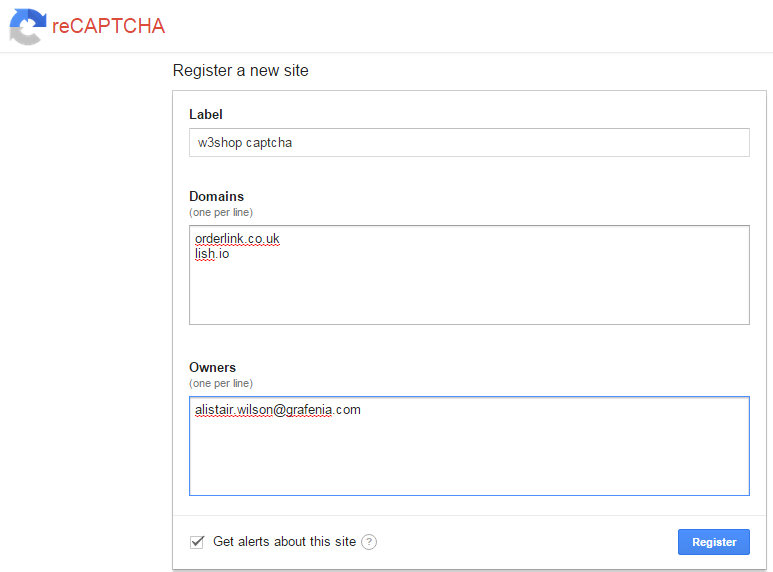
2) Register a new captcha with your w3shop domain, and also with orderlink.co.uk
3) View your new captcha, and copy the Site Key and Secret Key
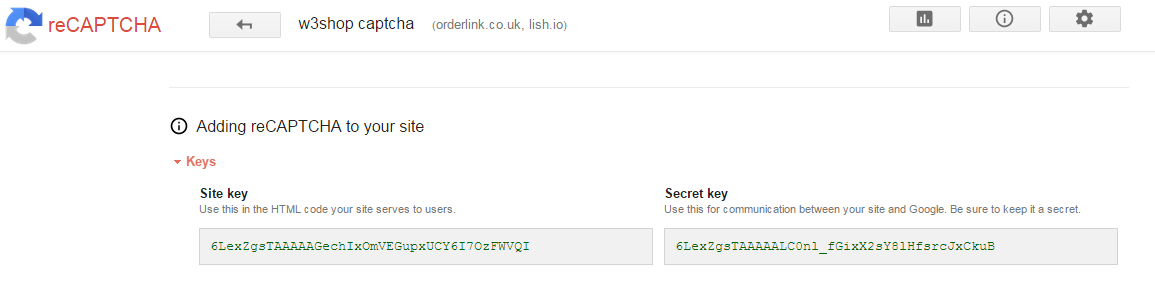
4) Edit your w3shop contact us page
In the contact us widget, you'll see a space for the Site Key and Secret Key. Enter your details from step 3)
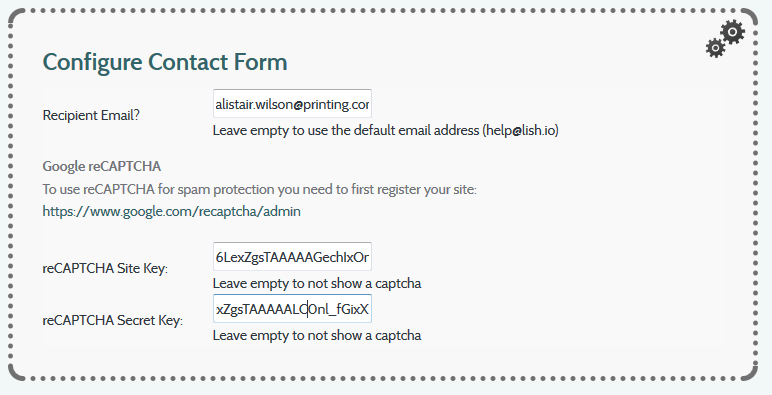
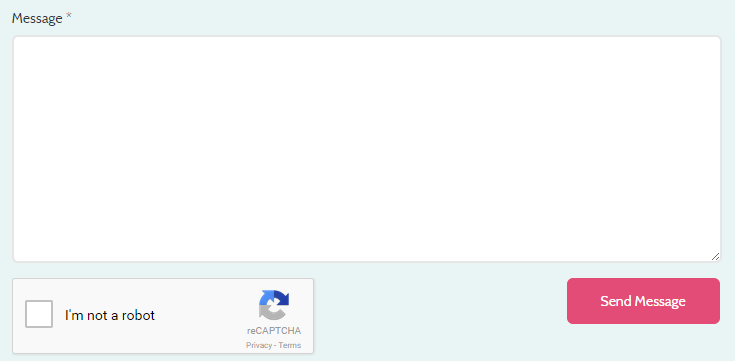
5) View your contact form, you'll see a new captcha box to prevent spam.
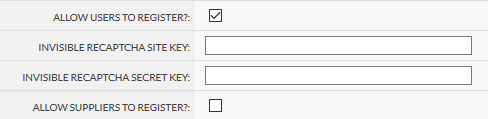
If you're getting spam on your registration page eg http://lish.io/account/register
One way to prevent that is by adding invisible reCaptcha to your registration pages.
To do that
1) Again head to https://www.google.com/recaptcha/admin
2) Choose invisible reCaptcha and ensure your site is verified
3) Copy the Site Key and Secret Key
4) Head to
In the Microsite Style section
Paste in the invisible recaptca site key and secret key
This article contains links to common questions about w3p, w3shops, building templates and creating products, not covered in the How-to guides.
Flyerlink comes inbuilt with credit controls you can set against customers or microsites.
If you want to set up a credit limit for your customer
Head to
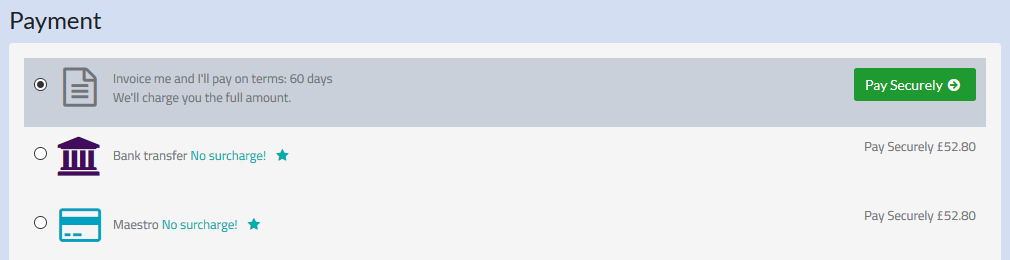
In the Financials section, change the payment terms from CASH to another option.
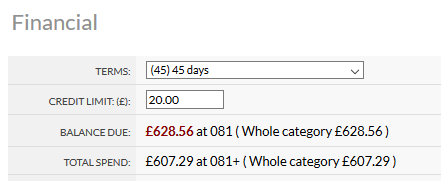
This payment term will be applied to all customer invoices, and will also show an offline payment option on the checkout payment page when they order online.
Once you choose a non-cash payment term, you are able to enter a credit limit.
When that credit limit is exceeded, we apply a job control to all jobs created in Flyerlink or ordered online that exceed the credit limit you've set.
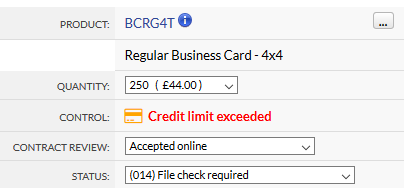
We also email your client explaining the credit limit has been exceeded and payment will be required to progress the job.
We also email the client and apply the credit limit exceeded job control if they exceed credit terms (by ordering with overdue invoices that require payment). As soon as the overdue invoices are paid online, we release the jobs they've just ordered allowing them into production.
You can see if the customer has outstanding invoices requiring payment by going to
You can also add credit limits to your microsites
Choosing the payment terms here will apply to your invoices, but you can set a limit you expect to be spent per customer or category.
If you can't set a limit on an individual customer, you'll need to tick "Credit limits vary by franchisee/licensee/department" on

The automated applying of job controls doesn't happen if your controling credit by microsite.
Offering credit to customers is a risk, as you can incur costs for the order and fail to recoup payment. It is also useful for winning large contracts.
Check out our advice on the Payment Directive to see if you should offer credit to your clients.
There are two payment controls you can add to your jobs via
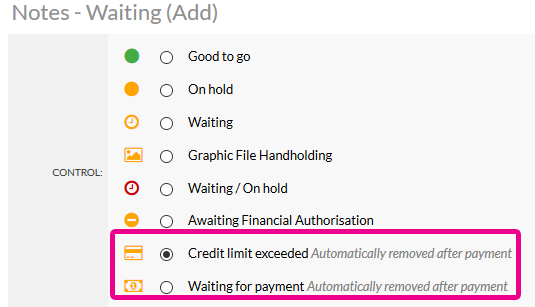
Choosing these opens up an email template to your customer, that you can edit.
After these controls are applied, if your customer pays for the job we will automatically remove the control and send an email to you saying the control has been removed and the job can be progressed.
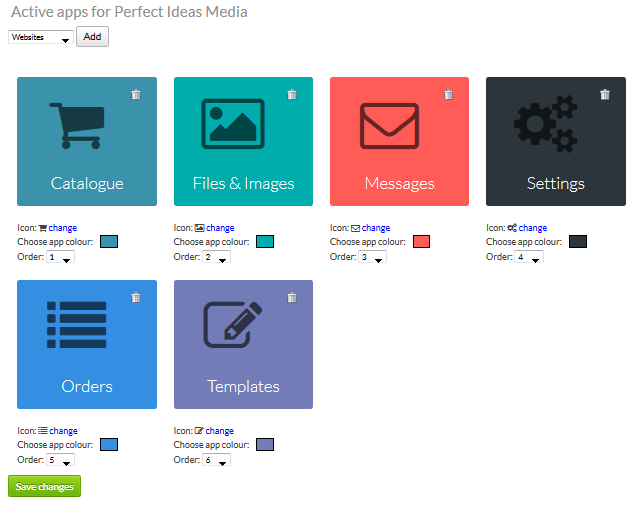
With the V3 responsive version of w3client microsites and w3shop categories, you don't have to use all the apps or menus.

You can choose which apps are available to all customers for your microsite or w3shop, and even vary the apps for individual customers.
To change apps for all your customers head to
.
By default you'll see no apps, this just means you want all of them to show.

If you want all apps apart from the Files & Images app, simply add the ones you want and don't add the Files & Images app.
Then when your customers log into their microsite, they'll only see the apps you've chosen.
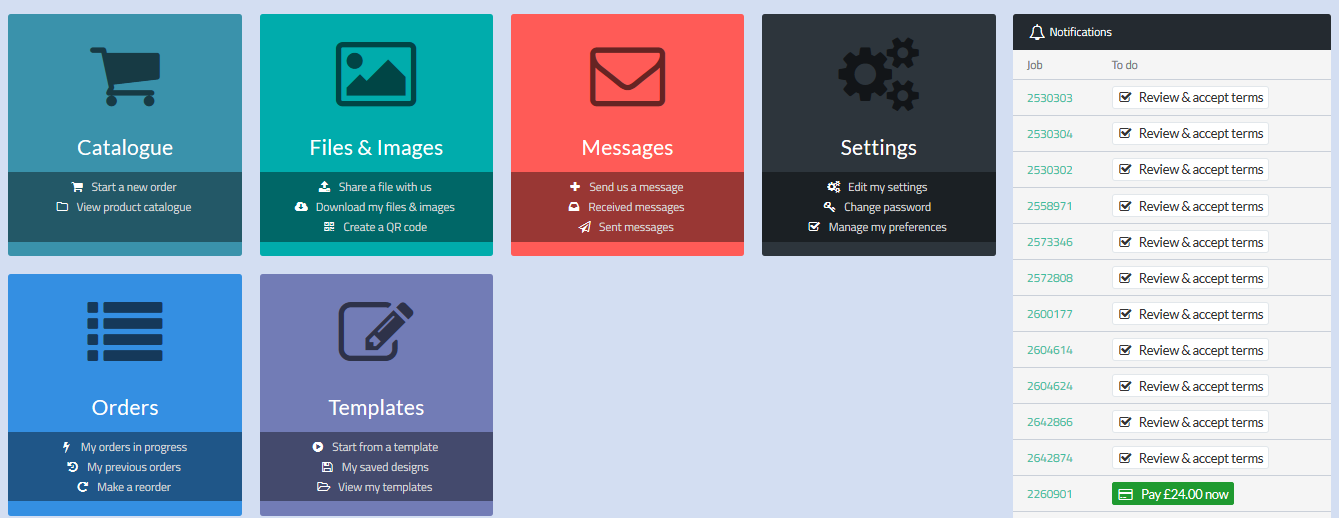
They also won't see any menu links to their missing apps
You can also choose different apps for individual customers from
.
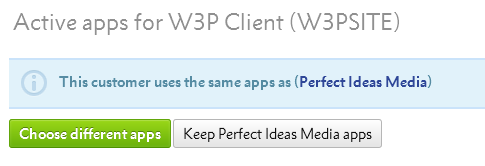
To start off with all your customers will have the same apps as your category. If you want different apps, press Choose different apps.
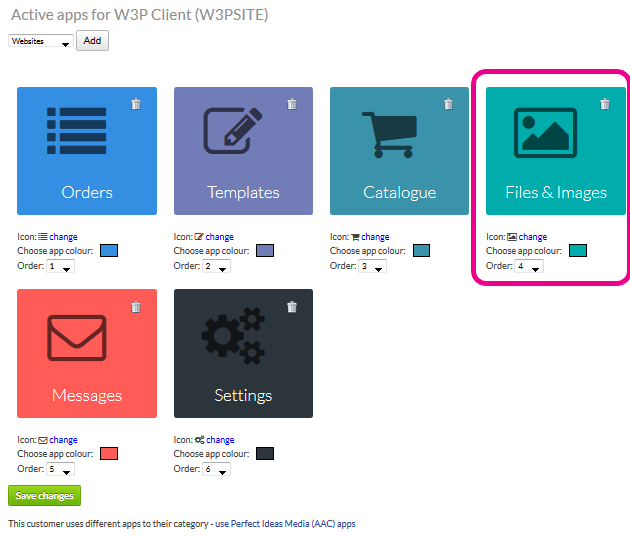
Then you can adjust the apps and add or remove some for just this customer. In this example, 1 customer can have access to the Files & Images app, while all others in the category don't.
If you need that customer to go back to the categories app, you can change them back anytime.
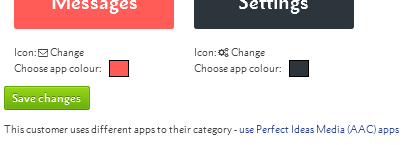
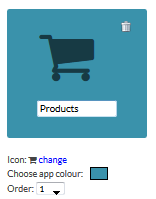
For each app you can change the:
With custom apps you are able to add links to any web page you want. For example, your client may want the microsite to link to some training resources or how-to videos.
The app can link to either an external web page, like a clients own intranet system, or you can use an iframe to show the content within your microsite area.
To add a custom app, choose the Custom App option via or
You'll see new options to add a url, choose the url behaviour or show in an iframe.
.png)
Change the colour and icon, and enter the url of the web page you want to show.
Your new app will then show in your dashboard, and as a menu option.
.png)
If you choose to show the webpage in an iframe, we will load the website within your microsite.
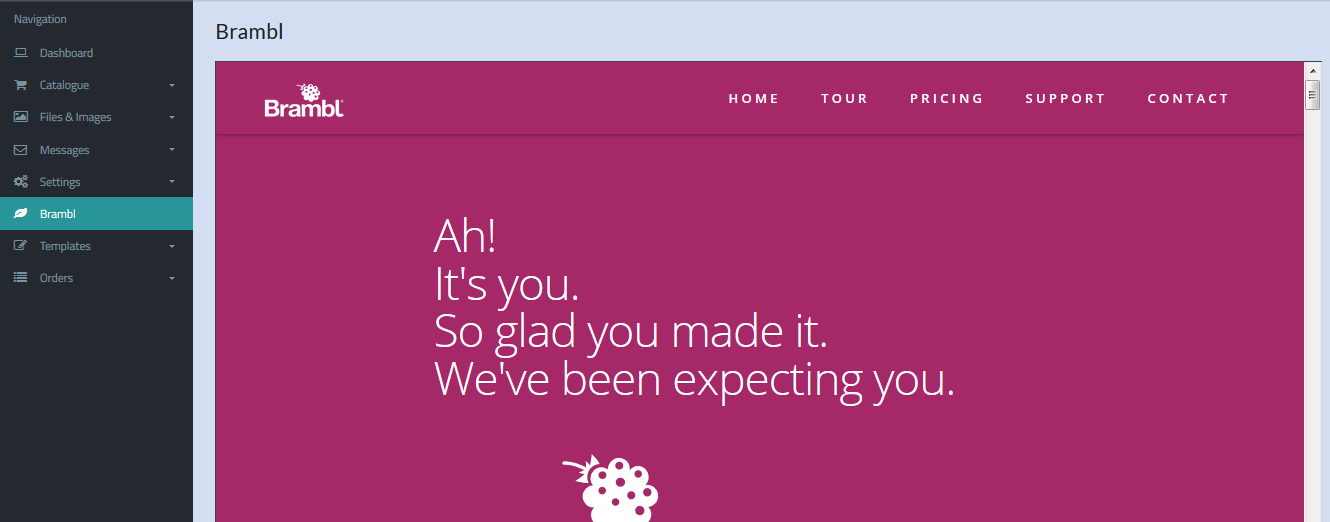
If you'd like to build a web pages quickly and easily to work with your custom apps, ask your support team about upgrading to build websites and webpages with Brambl.
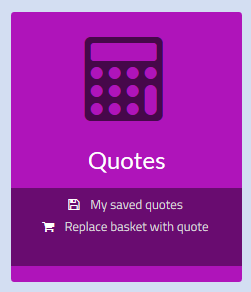
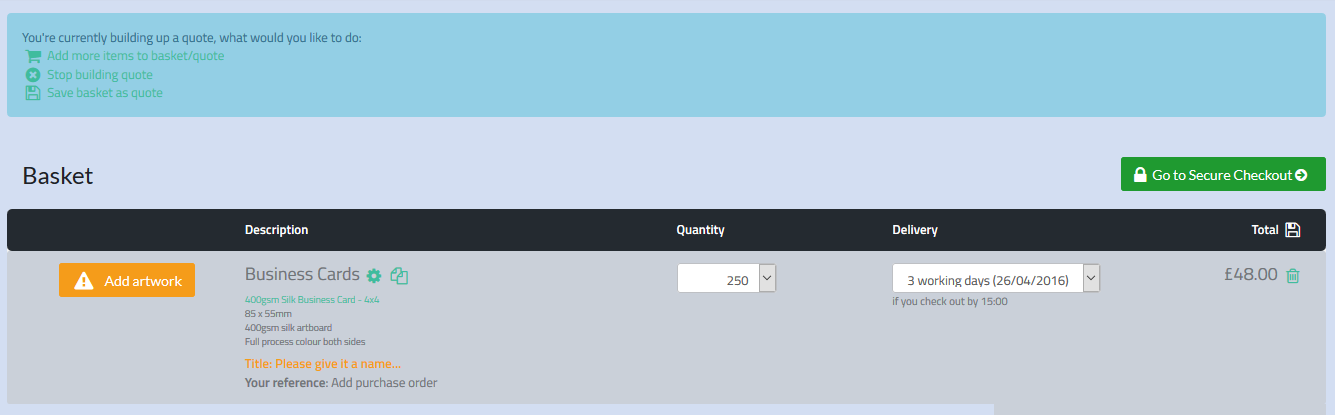
The quotes app allows customer to save multiple different baskets and to swap their basket with an older quote.
It can be used by customers to build up different orders, and leave a quote saved for later if a more immediate requirement for print comes up.
The quotes app appears by default on V3 responsive microsites, and can be removed by choosing other explicit apps - see Microsite Apps - Choosing your menus for more info. If you turn off the quotes app for a customer or category, you won't see a save icon in the basket.
Please note: Basket quotes are not related to the quotes menu in Flyerlink.
The quotes menu in Flyerlink lets Flyerlink users build a quote to check prices and send out a PDF to the client.
Basket quotes allows your customer to save baskets as quotes for later use.
Customers can see a link to all their quotes once they log in and go to their dashboard
The page will show a list of all baskets they've saved
To save a quote, simply head to the basket and press a new save icon.

You will then be redirected back to the quote page where you can see an overview of your quotes
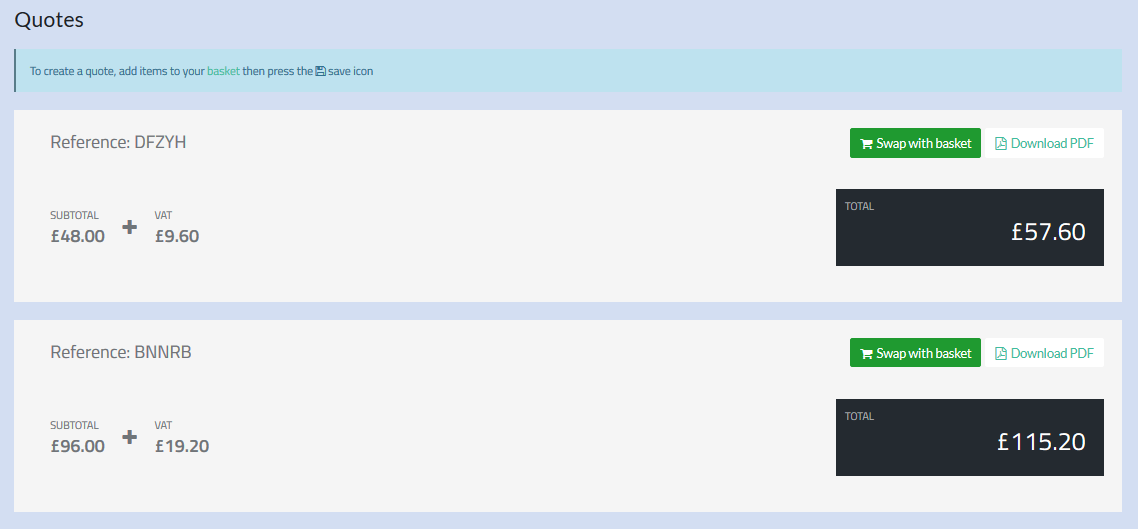
Expand an item to see more details

The quote is active and can be added to within Flyerlink.
Press swap with basket to exchange the existing basket with this quote.
If a client knows they want to build a quote and get prices without having to upload artwork immediately, you can direct them to their quote app.

Here they'll see a note that has a helpful "Start now" link.
When that is pressed, instead of redirecting clients to the artwork options when they add an item to their basket, we will instead direct them straight to the basket.
On the basket we highlight the next steps someone can take. Whether they should keep adding items to their basket, stop quoting or save the quote.
Redirections are URLs that link to another webpage. They are commonly used to help users find webpages, or to replace pages that are now redundant.
You can set up redirections through Flyerlink, using a Short url.
This guide explains how to set up redirections for your w3shop
There are two ways of adding Redirections for your w3shop:
Use permanent redirects to replace now discontinued pages with a more relavent page.
Use the redirection page type to add menus links to Internal pagesor External websites.
You can now view existing and add new permanent redirections for your whole microsite via .
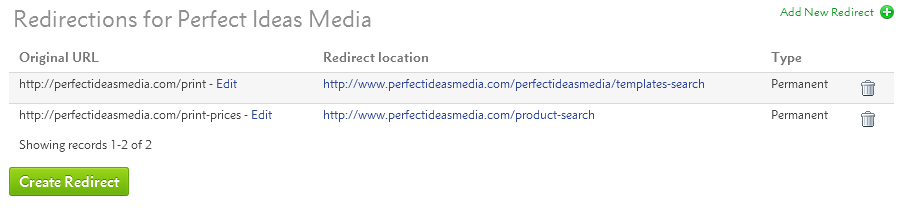
To create a new one, simply press Create Redirect

Add your old redundant url page in the Original URL, then enter the page you'd like it to redirect to in the Redirect Location.
You'll be able to add any link into the Original URL that includes your w3shop main domain or aliased domains.
To try out the redirect, enter the old url to your browser and check it goes where you want.
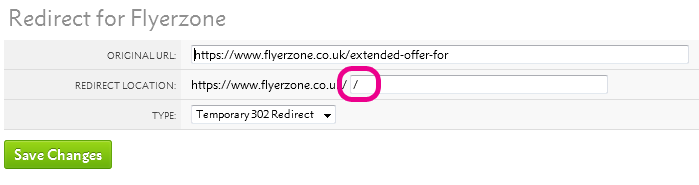
To prevent permanent redirect loops on your homepage, a url slug is required for your redirection location.
If your homepage has no url-slug, you can simply add "/"
Some w3shop pages like Product Group pages are automatically generated, and you don't need to make a new page type for each one.
However, if you'd like to make a header or footer link you can do so using the Redirection page type.

If there is a website you really like, or if part of your w3shop is hosted by another web provider. You can use redirection links to external sites.
The set up is the same, but your URL should be an external webpage.
Search engines prefer 301 redirections to 302 redirections, however we default to 302 redirections.
The difference is that 302 redirections are easier to change.
301 redirections are cached in a browser memory, if you need to change one of these redirections you will need to refresh the browser cache of everyone who's used the link.
While this is good when you know a page will never change, you may want to use 302 while testing to ensure they are correct before making it harder to undo a mistake.
Jump to contents page of
|
|||||||||