Support for

Active Updates is a feature that will save time for the end user, by automatically filling in certain personal details when the template loads.
The use of Active Updates is optional but we’d recommend you use them in your templates wherever possible, instead of using ‘placeholder’ text like “your name” or “your phone number”.
Simply replace ‘placeholder’ text with special field names from this table:
| Active Update text | Corresponding Flyerlink® Field |
|---|---|
|
{{title}} |
Contact's "Title:" |
|
{{first_name}} |
Contact's "First Name: |
|
{{surname}} |
Contact's "Surname:" |
|
{{name}} |
Contact's "First and Surname” |
|
{{job_title}} |
Contact's "Position:" |
|
{{salutation}} |
Contact's "Salutation:" |
|
{{email}} |
Contact's "Email:" |
|
{{telephone}} |
Contact's "Telephone:" |
|
{{direct_tel}} |
Contact's "Direct Tel:" |
|
{{fax}} |
Contact's "Fax:" |
|
{{mobile}} |
Contact's "Mobile:" |
|
{{web_address}} |
Contact's "Website:" |
|
{{business_name}} |
Contact's address "Business Name:" |
|
{{legal_name}} |
Contact's address "Legal Name:" |
|
{{address_1}} |
Contact's address "Address:" line 1 |
|
{{address_2}} |
Contact's address "Address:" line 2 |
|
{{post_town}} |
Contact's address "Post Town:" |
|
{{county}} |
Contact's address "County:" |
|
{{country}} |
Contact's address "Country:" |
|
{{postcode}} |
Contact's address "Postcode:" |
This is how an InDesign® file may look that is using Active Updates:
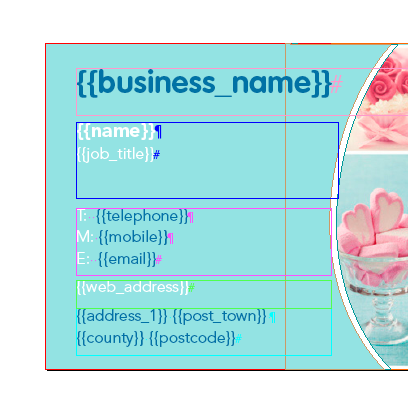
When the template is loaded, the special fields are replaced with the user's details from Flyerlink®, it is therefore important that your customer information present in Flyerlink® is correct.
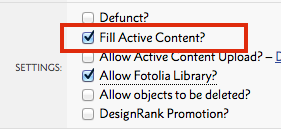
You simply need to tell Flyerlink® to do this by ticking the Fill Active Content? tick box on the Template Summary.
The table above details the field names you use. Each has {{double_curly_brackets}} round it. You must use the text exactly as shown, no caps etc. If you use a field name incorrectly, Flyerlink® won't substitute it. The same will happen if the Flyerlink® field is
blank.
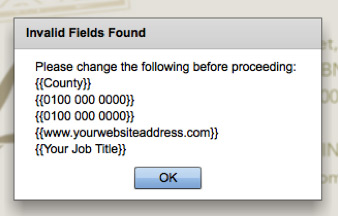
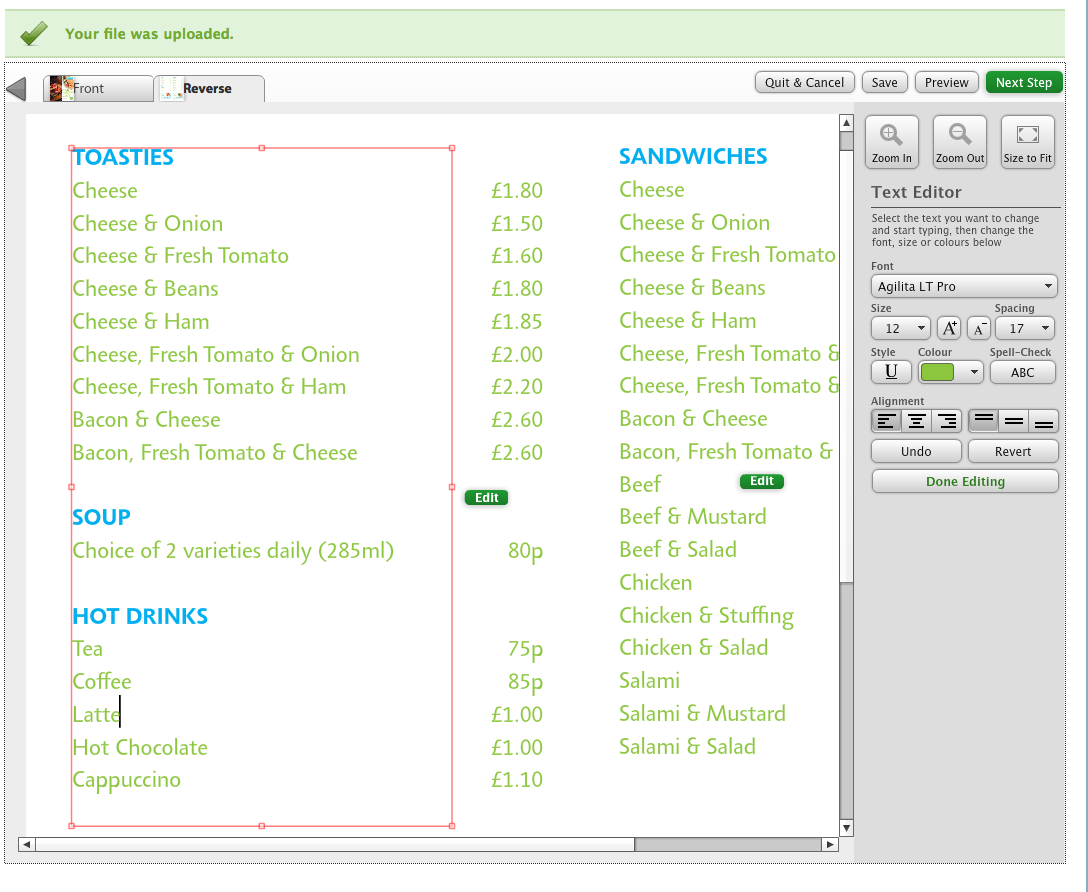
If a user presses Next and there are any {{double curly brackets}} still in the template they will be prompted to edit them with this window.
This means you can also use this feature as a safety net. For example, if there is an editable field that does not relate to an Active Update field (maybe a price that needs to be changed for example), you can add {{double curly brackets}} to the placeholder text to ensure that the client is prompted to fill it in manually before proceeding to print.
If the content is too long for the Text Object, when the fields are filled, the text will truncate or chop the text and produce a warning, informing the user that there is too much text. It is important to allow plenty space for the content, and therefore define the Text Frame sufficiently. Alternately, apply Copyfit to the text box containing the Active Update fields.
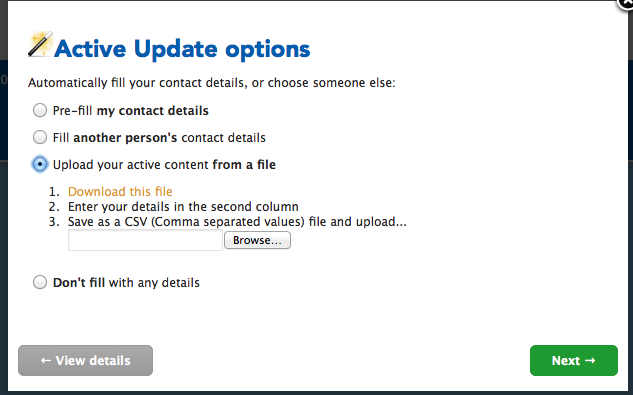
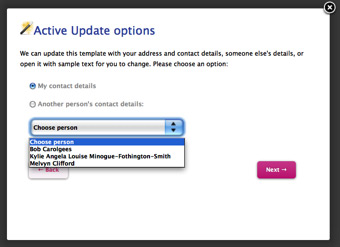 If there's only one contact within a customer, the template will automatically fill any Active Update fields with their details. If there's more than one, the user will be asked whether they want to use their own details or someone else in their team.

For Microsite Administrators, they'll also be able to choose from any Department within their Category, and then any contact within that Department
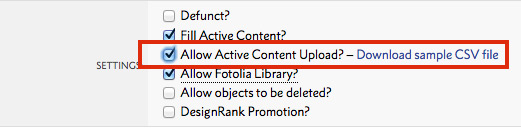
As an extension to the standard Active Update fields, you can also set up custom variable data too. It's simple to set up a template with Active Content upload - just tick a box in Flyerlink Allow Active Content Upload? then download the sample CSV file. When Allow Active Content Upload is ticked, Flyerlink scans the document and makes the list of fields, ready for use.
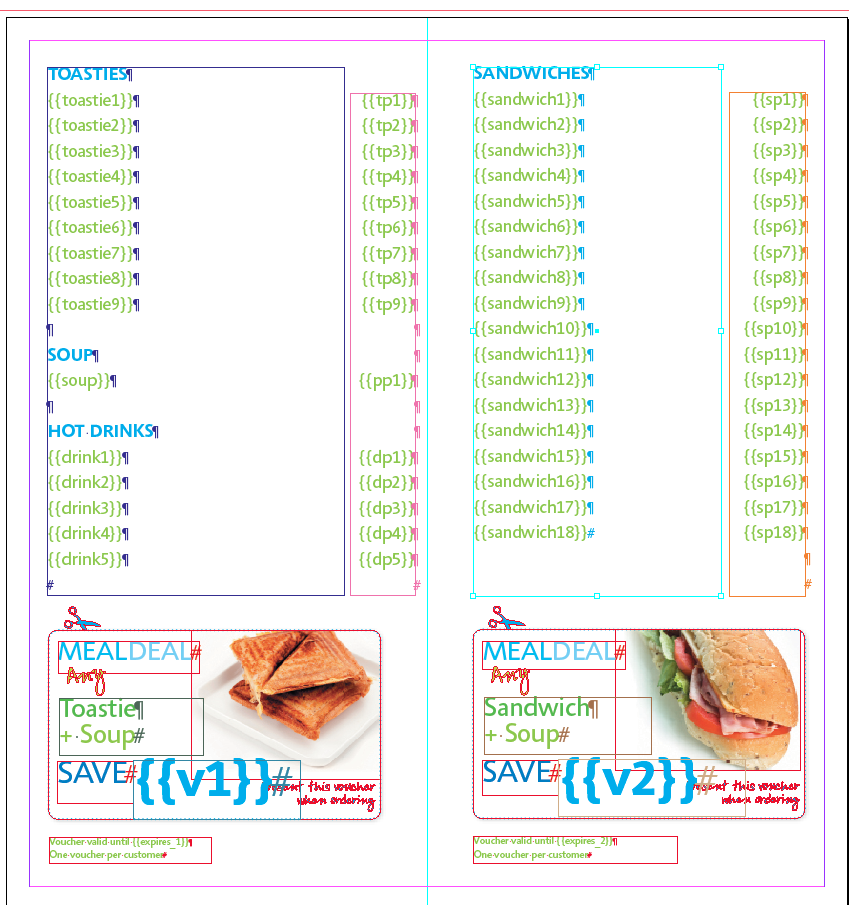
Create your Active Update fields as required in your InDesign® document like this:
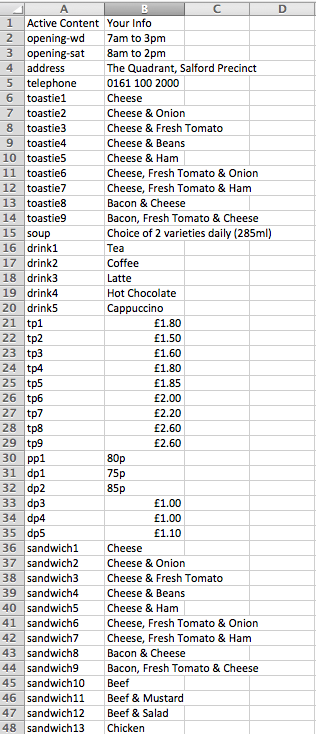
When your client logs into use a template that has the Allow Active Content Upload ticked, they will be asked to upload their spreadsheet and we'll populate the template with their uploaded details for them:
This is now live for printing.com, BrandDemand, Orderlink and w3shop.
Next...
|
|||
Jump to contents page of
|
|||