Support for

Templates Overview |
|
Building Templates Software Requirements |
|
Font Use |
|
A bit about fonts |
|
The Linotype Originals 2.0 Library (Opentype) Catalogue |
|
InDesign Setup Instructions |
|
Before you begin |
|
Step 1 - Fixed Objects |
|
Step 2 - Editable Images |
|
Step 3 - Editable Text Elements |
|
Step 4 - Active Update fields |
|
Step 5 - Colours |
|
Step 6 - Special Use Layers |
|
Step 7 - Template Validation |
|
Extra Reading |
|
Linking Products to Templates |
|
Optimising your InDesign file |
|
Building a template |
|
To build editable online design templates, you will need…
InDesign® files are saved as either InDesign template files, .indt, or .idml which are then used to create an online template.
Please note that if you are using the .indt option that we only support up to CS6. .idml files are supported up to the latest version.
When uploaded to Flyerlink®, InDesign® Server is used to translate the document into an editable template. The template is then opened and edited using the Editor. Once the template has been personalised by the user and approved, InDesign® Server is used again to translate the document into a print ready PDF.
They will need…
Please note that we support the following browsers:
We have purchased an ongoing Server Licence for over 2,700 fonts from the Linotype Originals 2.0 Library, plus 600 or so more from other libraries, for use in our online applications. We have also incorporated the top 100 Google fonts.
Refer to the Template Font List in Flyerlink® to see the complete list of fonts currently available to use within Editable Text Objects in a Template: Template Font List
Fonts that are not on the Template Font List can be used in non-editable areas of a template; however, they must be converted to outlines or used within a rasterised image.
If a client uses a font not found in the Template Font List, we advise that you suggest using an alternative font that is included in the Template Font List. Remember, this font only needs to be used in editable areas of a Template, and their standard font can be used everywhere else. Many clients may also have an acceptable secondary font listed in their brand manual.
If you need to find a similar font for a client to match our library, then try using www.identifont.com - once you find something close, just cross reference it with our Template Font List
When creating a template, if you do not possess the exact version of the fonts featured in the Template Font List (eg. You may have ‘Diverda Sans Com Regular’ but not ‘Diverda Sans LT Std Regular’) then you can use your existing version, and then swap it at the build stage provided that the version that you own is in .otf (Opentype) or TTF (True Type) format. Alternatively, you could purchase the exact version to help with laying out your Template designs.
The font substitution tool will only work with OpenType (OTF) and True Type (TTF) fonts.
Postscript Type 1 fonts are not suitable for substitution. In addition, do not mix Open Type and True Type fonts of the same family, as this will cause the font substitution to fail.
The following guidelines detail the structure and functionality that is supported when preparing an InDesign® file for conversion to an online template. The online templates are intended to be an easy way for someone without design skills to edit and personalise content within a fixed template, similar to editing slides in Powerpoint. The online templates are not intended to function like a browser based design canvas. They do not include every function and feature available in InDesign®. The key to creating an online template is to keep it simple!
The steps in these guidelines detail the required layer naming conventions and rules that are used to identify objects that are either editable or fixed in the final template. When creating the InDesign® file these rules are determined in accordance with the client’s requirements and corporate brand guidelines.
Within the final template, the content of an editable object can be changed, but the position cannot. Objects are locked in place to prevent the end user moving or altering the design layout.
The vast majority of our core product range is available. Special allowances have been made for four page greetings cards, which are also supported. Please refer to Designing for Production for more details on how to set up files for four page greetings cards.
The design file should be set up in accordance with the usual Designing for Production specification. The appropriate Design Template (TGI) (refer to Designing for Production) can be used to indicate the usual page size, bleed, ‘quiet zones’ and folds where appropriate. The Design Template (TGI) Layers should be used as a guide whilst designing. Before saving the InDesign® file ready to be turned into an online template all the Design Template (TGI) Layers must be removed. The Finishing Layer, which includes the 0.25pt key line and red front page indicator key line for folded products, must be merged with the Background Layer, before saving the final file ready to be made into an InDesign® template file (.indt).
Don't use the Facing Pages option when creating your InDesign document. The document needs to be single pages only. Items placed on a Master page aren't supported, your design elements all need to be on an actual document page.
We support up to A2 dimensions with no issues, if you go above that you'll need to keep the artwork as simple as possible with regards to the editable areas.
The main issue is usability of the template, as it can be hard to edit very large dimensions such as over A1 due to the maximum font size being 96pt. Couple of notes:
1) Maximum file size is 145mb.
2) Our largest recommended dimensions are 3,000mm x 1,000mm (We have seen larger, but we don't support them above this size).
3) Maximum editable font size is 96pt within the editor - you can upload artwork with editable areas with larger font sizes but the size menu only goes to 96pt.
4) If an end user is using a small screen it can be tricky to edit very large dimension templates.
5) Keep the editable areas on the template as few and simple as possible.
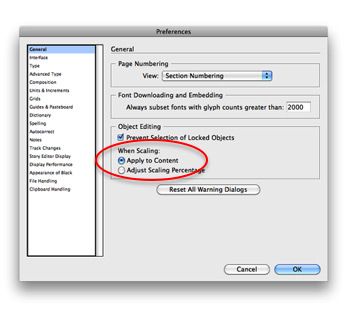
Make sure the following features and settings are selected within InDesign®, they will help during the design process;
| Character | Description |
|---|---|
| # | Illustrates the end of content |
| ¶ | Hard return |
| ¬ | Soft return |
| >> | Tab |
|
. |
Space |
| / | End of Nested Style |
Remember, the key to creating an online template is to keep it simple! Decide what elements of design need to be fixed and which will be editable. Some clients want most of the elements locked down, whilst others allow their users to have more flexibility.
All fixed, non-editable objects must be on the same layer, the Background Layer.
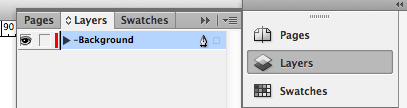
Some files from older versions of InDesign® can fail to build when the -Background layer is locked.
You can use most features and effects within InDesign® on the Background Layer that adhere to Designing for Production e.g. gradients, vectors, drop shadows, tints etc. The only features not supported are open paths (all vector shapes must be closed paths with no stray bezier nodes) and Text Wrap as this can affect Editable Objects within the template . Ensure you do not use any of the Text Wrap options, other than the default.
While templates are normally designed to be editable by clients using INDT or IDML files, you may not want any of the template to be editable.
You can set up a template to be an Uneditable PDF template, instead of the default INDT option.
This article explains how to use this functionality.
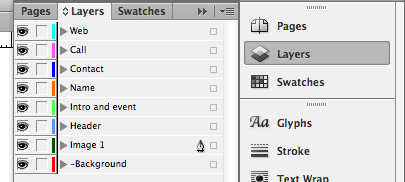
All Editable Objects must be placed:
Name the layer appropriately with its own unique name.
No duplicate layer names should be used.
e.g. Company Name, Text Side 1, Image 1
Editable object frames must be rectangular; they can include a solid border and can be rotated. Don't use the reflect tool or rotate either the image or image frame in InDesign® though, as your image will revert back once built and any imported images may display rotated the wrong way.
Ensure that your editable layers are above your -Background layer from Step 1
The template editor does not fully share the depth of InDesign®’s rich typographic controls.
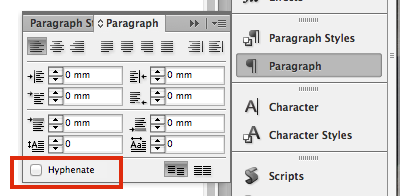
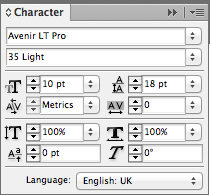
Remember… The key to creating a template is to keep it simple! Before creating a text object you should make sure your settings are as follows:

When you have created a text object you need to:
Allow a minimum of 25% of the height of the font at the bottom of the text box . This allows space for ascending and descending characters in the character set to fit in. Failure to leave enough ‘breathing space’ may result in text frame overflow and missing text in the template. This image shows a red text box that has a defined text frame zone and plenty of 'breathing space' to allow for descending characters:
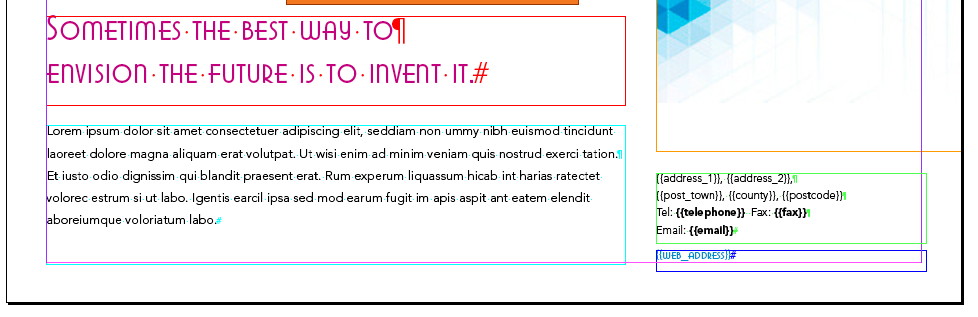
Once you have set your text frames, you need to check that the Hash Tag symbol (#) is visible at the end of the text box and there is no hidden text or returns beyond the text frame, like in this example:
To show the Hidden Characters, will need to be turned on. For templates larger than A3 in size we would recommend a minimum font size of 20pt for Editable Text objects.
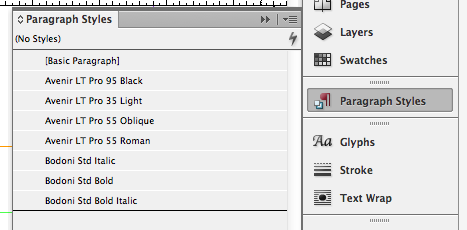
Once you have created a text object, you must make a corresponding Paragraph Style. This will ensure the font is available to use in the editor.
Once you have made all the required Paragraph Styles, go to . If there is a rogue font listed here, locate it in the file and either delete it or convert to outlines. If there is no text present, you may have converted a graphic object into a text object. In this case, select the object and then
DO NOT use any System Fonts anywhere in your template. Not even as a ‘placeholder’ font which you intend to substitute at the build stage. The use of a System Fonts in the template will cause it to fail.
Paragraph styles are not being used in their traditional sense, they are used as a way to 'package' up the fonts you want to make available in the editor.
You only need to create one Paragraph style per font, you don’t need to create a separate one for every variation of size and colour.
Character styles are not supported in online templates. If your document includes any, they will need to be removed prior to uploading to Flyerlink®.
When creating a template, if you do not possess the exact version of the fonts featured in the Template Font List (eg. You may have ‘Diverda Sans Com Regular’ but not ‘Diverda Sans LT Std Regular’) then you can use your existing version, and then swap it at the build stage provided that the version that you own is in .otf (Opentype) or TTF (True Type) format. Alternatively, you could purchase the exact version to help with laying out your Template designs.
The font substitution tool will only work with OpenType (OTF) and True Type (TTF) fonts.
Postscript Type 1 fonts are not suitable for substitution. In addition, do not mix OpenType and True Type fonts of the same family, as this will cause the font substitution to fail.
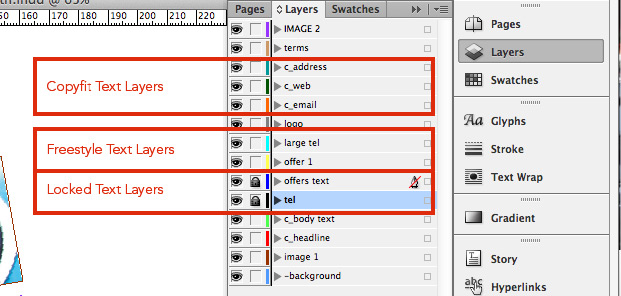
Editable Text objects can be Locked or Freestyle, in both cases the ‘text content’ will be editable in the final template, but the ‘text properties’ e.g. font, colour and font size, can be restricted in accordance with the clients corporate brand guidelines. You must decide which editable text objects will be restricted (Locked) and which will allow more flexibility (Freestyle).
The ‘text content’ of a Locked text object can be edited in the final template, but the ‘text properties’ cannot be changed e.g. font, colour and font size.
To Lock a text object, lock the layer in InDesign®
The content, font, colour and font size of a Freestyle Text object can be edited in the final template. A layer naming convention or prefix is not required on a Freestyle Text layer, just leave it unlocked.
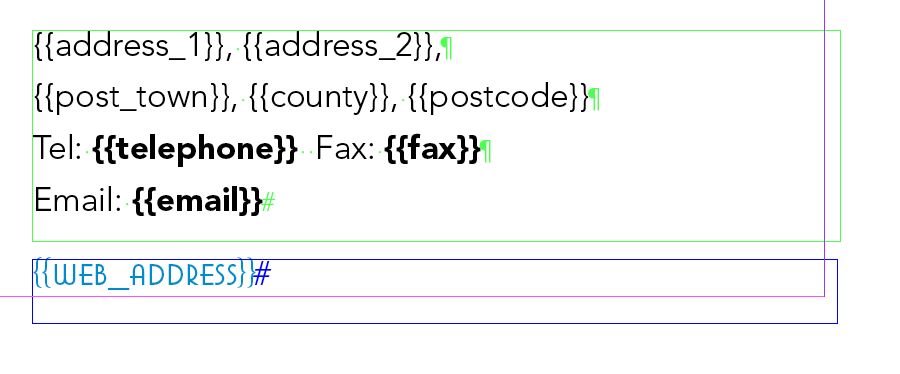
Copyfit automatically resizes text when the user types too much into the text frame. If you want to apply Copyfit to an editable text field, give the layer name a ‘c_’ prefix e.g. c_Now Operating, c_Email.
A text frame that requires Copyfit must only contain one font, font size and font style, if a text frame contains a combination of these then the Copyfit functionality will not work.
 If the feature has not been applied and the user types too much into the text frame, a warning will instruct them to type less.
The Copyfit function can also be added to layers that have Active Update fields on them (Step 4 in this book covers Active Updates).
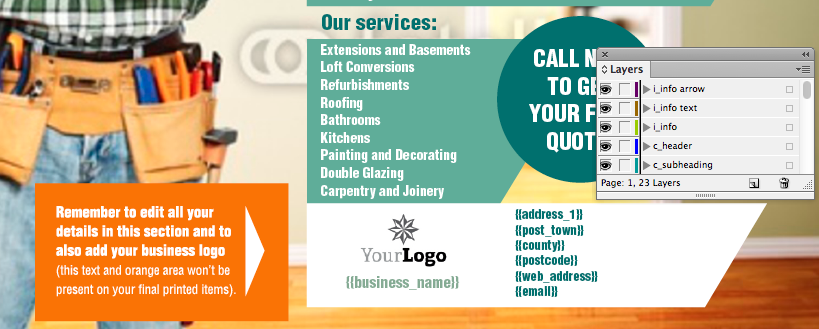
Here is an example of a document using all 3 types of text settings:
If an editable text element has copyfit applied, but the text box doesn't contain enough breathing space, then the text will automatically shrink to fit the available space when the template is initially built.
If you are unsure of how to check for any of the InDesign® features, please refer to
Active Updates is a feature that will save time for the end user, by automatically filling in certain personal details when the template loads.
The use of Active Updates is optional but we’d recommend you use them in your templates wherever possible, instead of using ‘placeholder’ text like “your name” or “your phone number”.
Simply replace ‘placeholder’ text with special field names from this table:
| Active Update text | Corresponding Flyerlink® Field |
|---|---|
|
{{title}} |
Contact's "Title:" |
|
{{first_name}} |
Contact's "First Name: |
|
{{surname}} |
Contact's "Surname:" |
|
{{name}} |
Contact's "First and Surname” |
|
{{job_title}} |
Contact's "Position:" |
|
{{salutation}} |
Contact's "Salutation:" |
|
{{email}} |
Contact's "Email:" |
|
{{telephone}} |
Contact's "Telephone:" |
|
{{direct_tel}} |
Contact's "Direct Tel:" |
|
{{fax}} |
Contact's "Fax:" |
|
{{mobile}} |
Contact's "Mobile:" |
|
{{web_address}} |
Contact's "Website:" |
|
{{business_name}} |
Contact's address "Business Name:" |
|
{{legal_name}} |
Contact's address "Legal Name:" |
|
{{address_1}} |
Contact's address "Address:" line 1 |
|
{{address_2}} |
Contact's address "Address:" line 2 |
|
{{post_town}} |
Contact's address "Post Town:" |
|
{{county}} |
Contact's address "County:" |
|
{{country}} |
Contact's address "Country:" |
|
{{postcode}} |
Contact's address "Postcode:" |
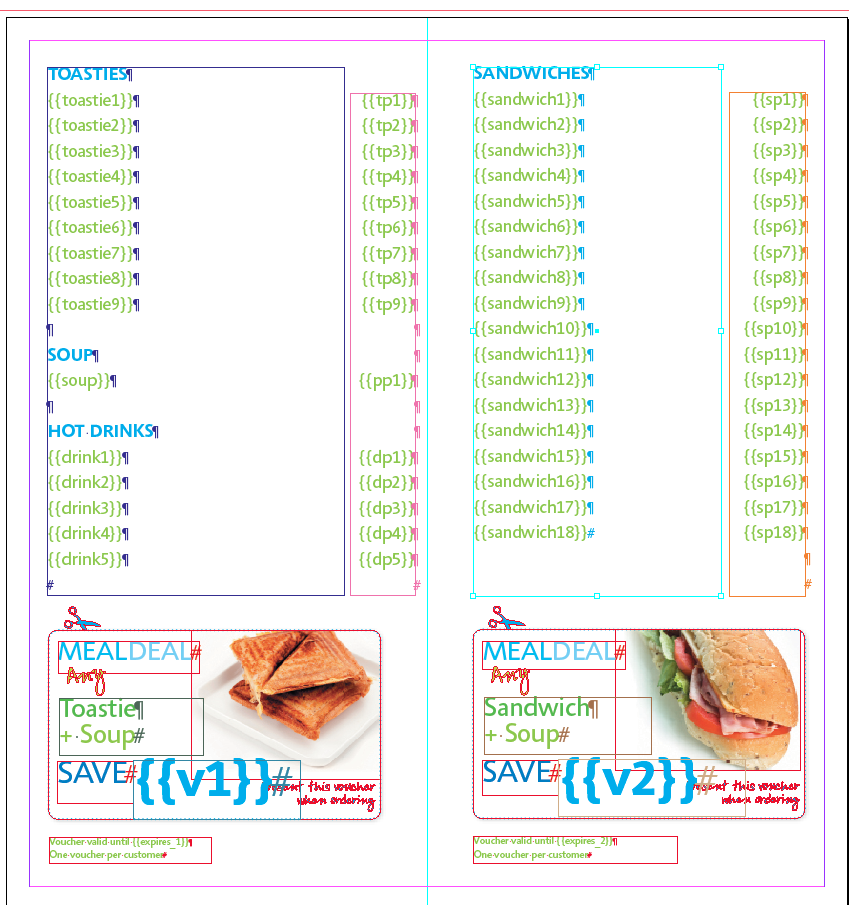
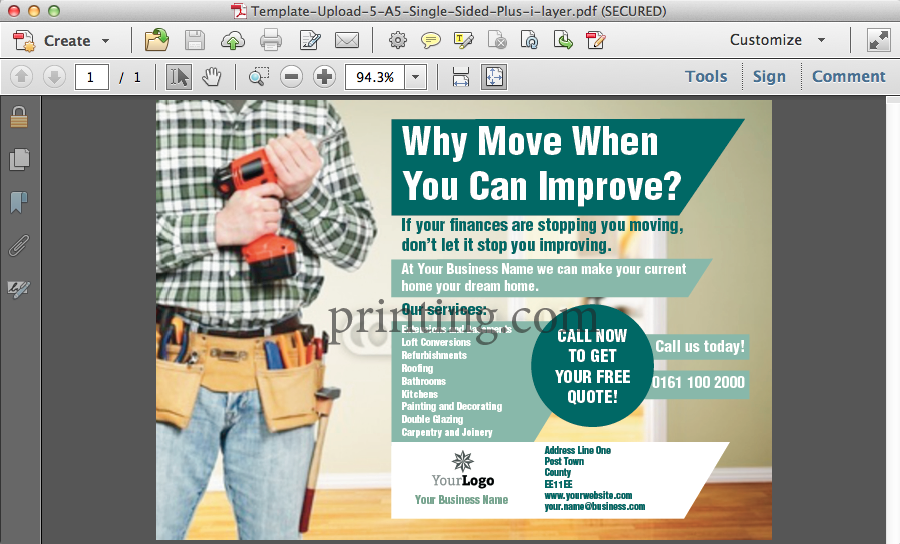
This is how an InDesign® file may look that is using Active Updates:
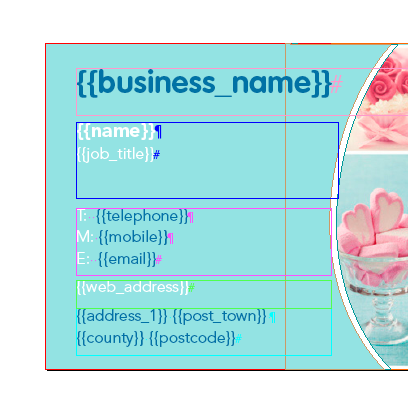
When the template is loaded, the special fields are replaced with the user's details from Flyerlink®, it is therefore important that your customer information present in Flyerlink® is correct.
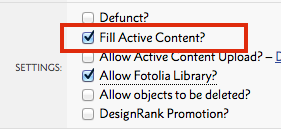
You simply need to tell Flyerlink® to do this by ticking the Fill Active Content? tick box on the Template Summary.
The table above details the field names you use. Each has {{double_curly_brackets}} round it. You must use the text exactly as shown, no caps etc. If you use a field name incorrectly, Flyerlink® won't substitute it. The same will happen if the Flyerlink® field is
blank.
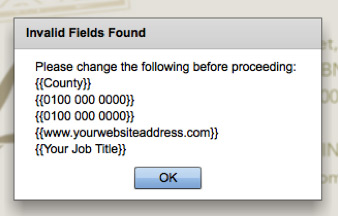
If a user presses Next and there are any {{double curly brackets}} still in the template they will be prompted to edit them with this window.
This means you can also use this feature as a safety net. For example, if there is an editable field that does not relate to an Active Update field (maybe a price that needs to be changed for example), you can add {{double curly brackets}} to the placeholder text to ensure that the client is prompted to fill it in manually before proceeding to print.
If the content is too long for the Text Object, when the fields are filled, the text will truncate or chop the text and produce a warning, informing the user that there is too much text. It is important to allow plenty space for the content, and therefore define the Text Frame sufficiently. Alternately, apply Copyfit to the text box containing the Active Update fields.
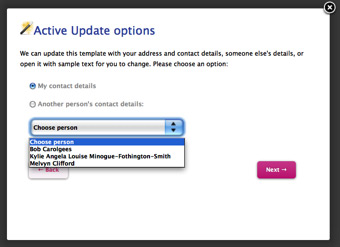 If there's only one contact within a customer, the template will automatically fill any Active Update fields with their details. If there's more than one, the user will be asked whether they want to use their own details or someone else in their team.

For Microsite Administrators, they'll also be able to choose from any Department within their Category, and then any contact within that Department
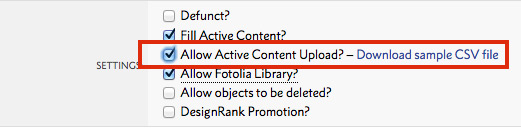
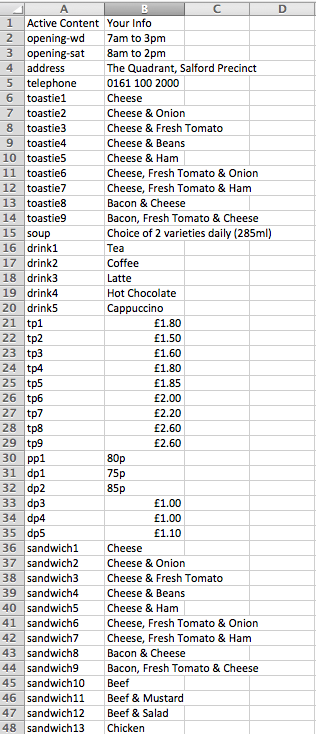
As an extension to the standard Active Update fields, you can also set up custom variable data too. It's simple to set up a template with Active Content upload - just tick a box in Flyerlink Allow Active Content Upload? then download the sample CSV file. When Allow Active Content Upload is ticked, Flyerlink scans the document and makes the list of fields, ready for use.
Create your Active Update fields as required in your InDesign® document like this:
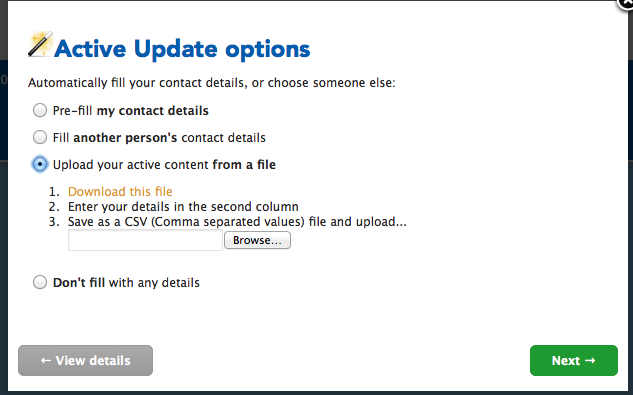
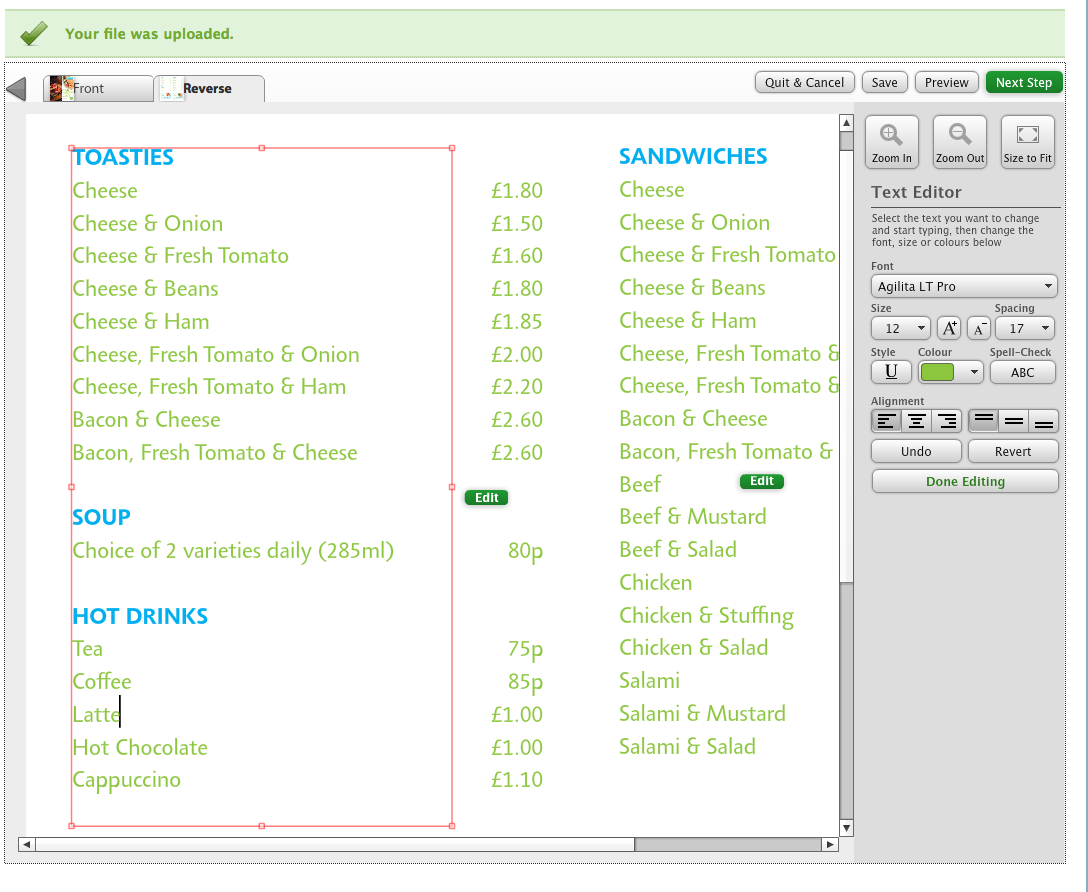
When your client logs into use a template that has the Allow Active Content Upload ticked, they will be asked to upload their spreadsheet and we'll populate the template with their uploaded details for them:
This is now live for printing.com, BrandDemand, Orderlink and w3shop.
All colours used in an Editable Text Layer (including black and white, if used) must be defined within the InDesign® document.
Firstly, create an appropriately named colour (remember the colour names will be visible to the end user) in the Swatch Palette. Colours must be set at 100% tint, if lower tints are required this must be created as its own swatch e.g. 60% cyan should be created as its own swatch containing 60c.
The swatch name must contain an ‘s_’ prefix, e.g.
This is how swatches should look:
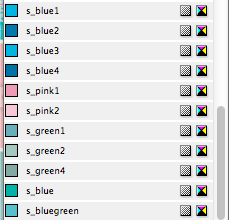
Make sure the corresponding text object is using the colour swatch you’ve created.
To make additional colours available in the final template that are not used in the InDesign® document, follow the instructions above.
Any colours not labelled with the ‘s_’ prefix will not be present in the online template, including InDesign®’s default colour swatches e.g. [Registration], [Paper] and [Black]. Do not use these swatches for any editable text objects.
Don't use LAB colours in your InDesign® file, as this will cause the colours to convert incorrectly.
If your template is going to be used for Pantone® Spot Colour printing then you will still need to add the s_ prefix to each colour to be used. Spot colours cannot have their name changed as standard though, so to work around this select the Spot Colour Required then change it in the Swatch options to be Process CMYK. This will then allow you to add the s_ prefix in the Swatch Name (for example, s_ Pantone 172C). Once added, convert the Process CMYK colour back to a Spot Colour. This will maintain the original colour make up but at the same time it will add the additional Spot Colour as an extra separation named with the correct Pantone® name.
Not Supported within swatches on Editable Text Objects
Die-cuts, Spot UV, Opuleaf and Embossini are supported for use in Templates. If your Template features any of these elements, follow these steps.
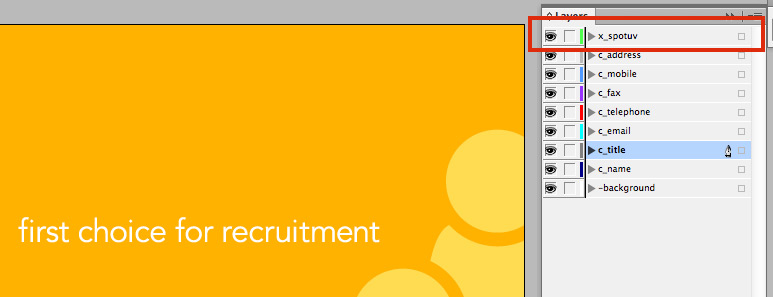
When you upload your .indt file, the editor will hide any layers which begin x_ from the user. So the user won't see the green die-cut lines, yellow Spot-UV or Opuleaf/Embossini swatches.
When the PDF is made, these finishing layers will be present as the topmost layer.
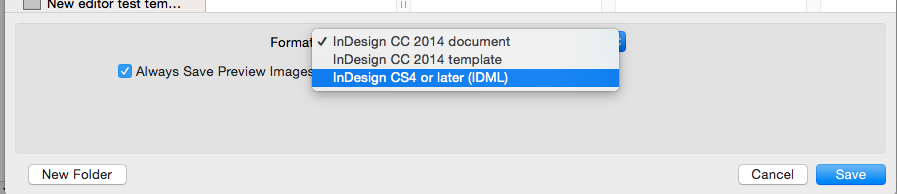
Adobe InDesign® has a print setting that forces all spot colours to be process, it is important that this setting is not active when you are saving your template files. Go to and then use the dropdown menu to select .
.png)
In the dialogue box that opens, ensure that All Spots To Process isn't ticked.
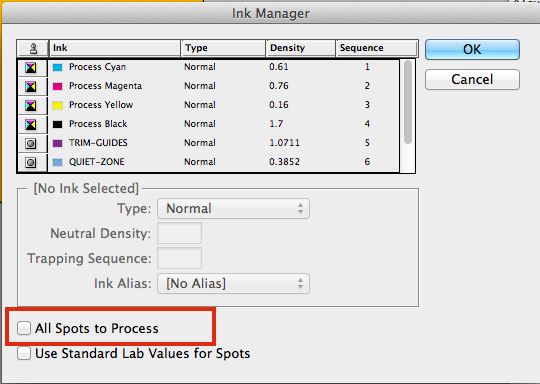
If the All Spots To Process is ticked, then your printing will come back with the 'finishing' objects printed in CMYK.
An Info Layer appears in the template editor, but is stripped out from the final PDF file. It can be used to communicate information to the person editing the template, e.g to remind them to follow some business rules or to use their 'branch email' instead of their personal email. To add an Info Layer to your template, follow these steps:
When setting up your Info layer, you need to use a colour that doesn't use the s_ from any of your editable text elements. If you colour an Info layer in s_red for example, all instances of s_red will be converted to RGB. We'd recommend creating a swatch called Info Layer Colour or something similar.
As well as instructions, you could use the Info layer to show where perforations, cut-out shapes, creases, folds, drill holes, round corners or Spot-UV objects will be.
When the final PDF is generated, anything on an Info layer will be removed.
A Vector layer can contain a non-editable vector element that can sit above or below other editable areas (editable images and editable text boxes). Vector layers can be used in a template to achieve a number of different effects.
The following elements are not supported on Vector layers (v_ layers)
Vector layers can act as a mask to give the illusion of a shaped editable image. To achieve this, create a mask of the shape you want.
Here is a maroon rectangle that has been drawn in InDesign®, with a circle punched out of it using the
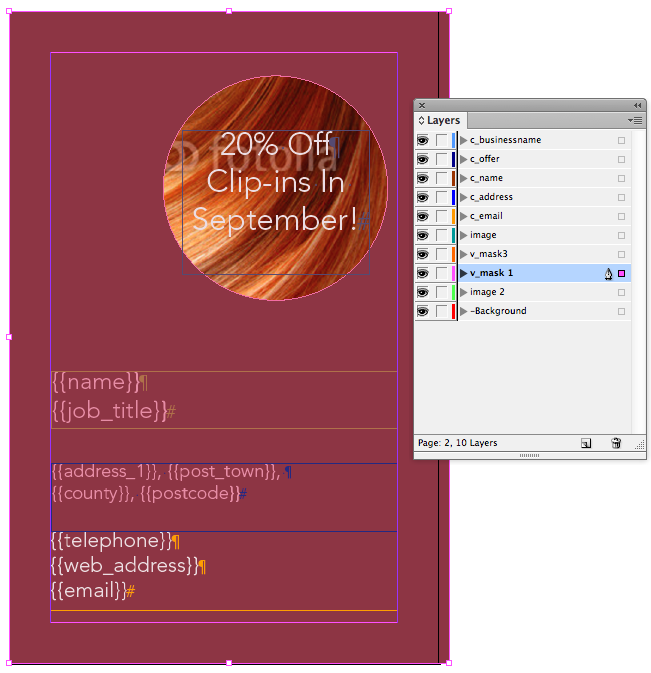
The rectangular image behind the mask remains editable, but appears to be circular in shape.
A Vector layer can also be used for picture captions, stars, shapes and corner flashes over the top of editable images. The example below has multiple v_ layers which have text frames positioned over them.

The graphic file complies with the artwork specification, as detailed in the Designing for Production documentation.
Bleed is included within the document page size (Do not use document bleed settings with templates)
Only fonts from the Template Font List in Flyerlink® are used, all others are converted to outlines or are used within a rasterized image. To check which fonts are being used within your document go to. Use the button to identify where unsupported fonts are used within the document.
System fonts are not being used in the file.
Whilst we list 145MB as our maximum file size, there are other elements that can affect the build and load time of a template. There are no absolute limits on size - it's a combination of:
All non-editable objects are on the -Background layer (the lowest stacking layer within the Layer Palette). Layer should not be locked.
All editable objects are on individual layers with a unique name (use InDesign's Layer Visibility Tool (The eye icon) with Select All to locate rogue artwork elements).
All editable objects (Text and Image boxes) have rectangular frames.
Naming conventions and layers are locked where appropriate; e.g. c_ServicesList
Copyfit layers (c_Name) only contain one font, font size or font style, in a single text frame.
The TGI Finishing layer has been added to the -Background layer.
Unnecessary hidden layers are all deleted, including TGI layers.
All fonts required in the final template have a corresponding paragraph style. All unnecessary paragraph styles are deleted.
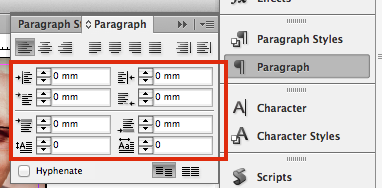
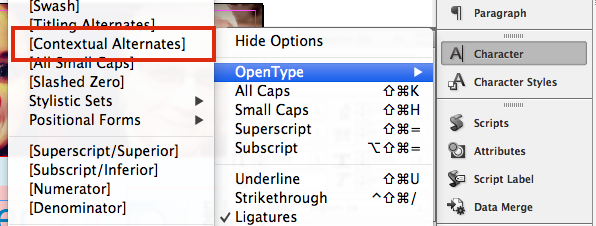
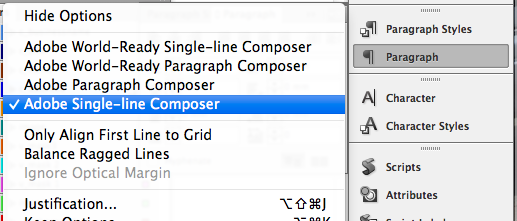
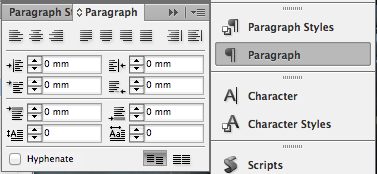
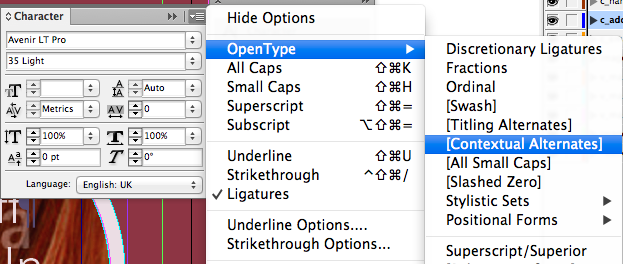
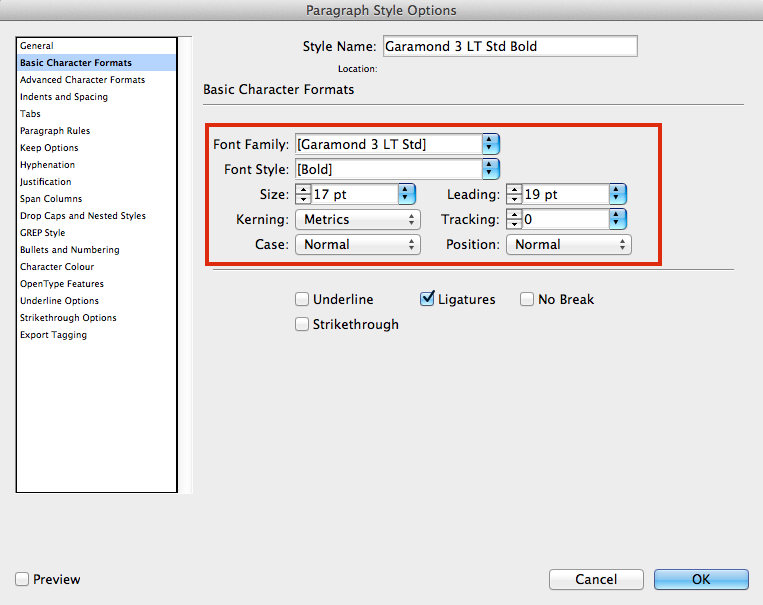
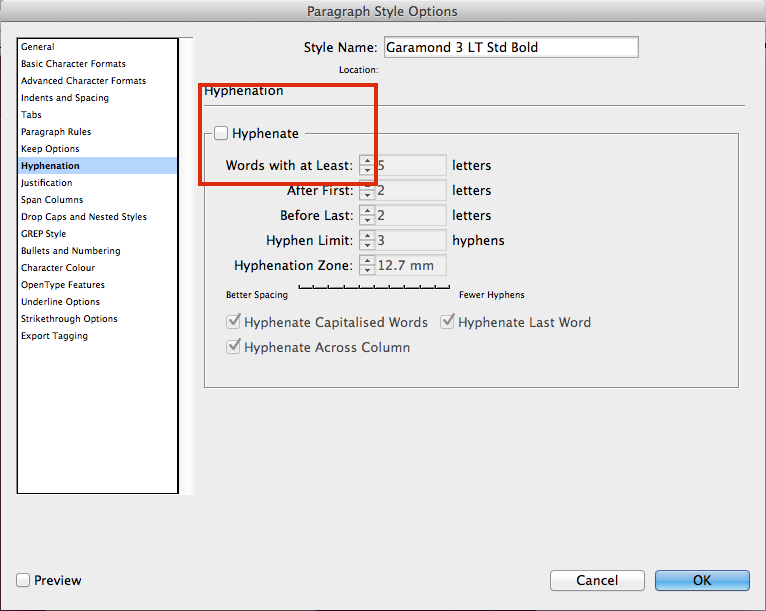
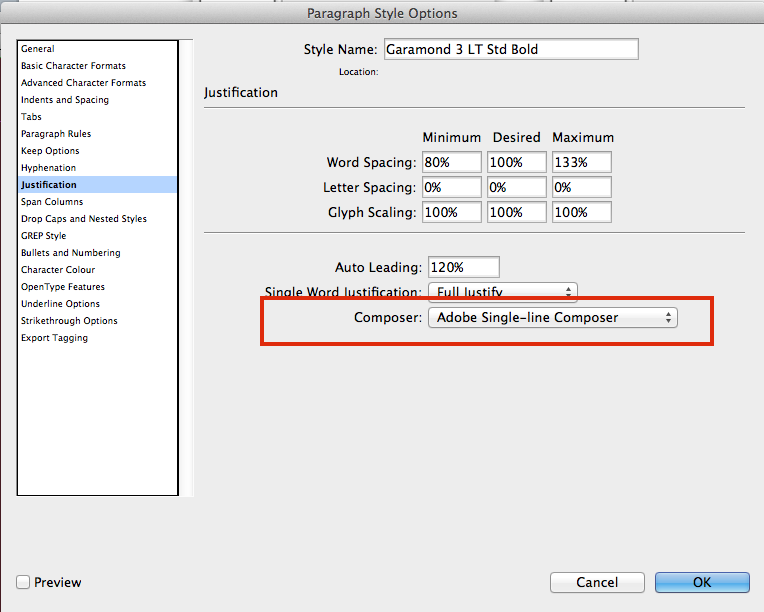
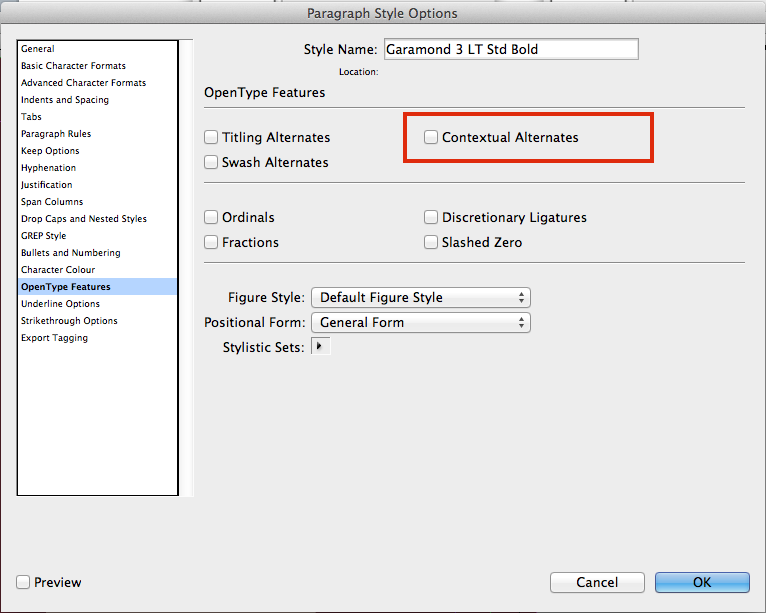
All fonts are set to Adobe Single Line Composer, Hyphenation is not selected and OpenType Contextual Alternatives are switched off (see Things to Avoid for further assistance).
All colours used on Editable Text Objects or any additional colours required as an alternative option, have a named colour in the palette; e.g. s_Black.
The isn't set to Convert All Spot To Process.
All correctly labelled colour swatches are CMYK, and are not tints or gradient swatches.
All images are embedded.
Editable image layers are not locked.
All editable text frame zones are defined appropriately.
All editable text frames include enough 'breathing space' for ascending and descending characters.
The Hash symbol (#) is visible at the end of every editable text frame.
No overlapping editable objects.
Save file as either an InDesign® Template file, .indt or InDesign® IDML file, .idml
Go to

Make sure none of these settings or features are used within Editable Objects. If you are unsure of how to check for any of the InDesign® features, please refer to
Vector images e.g. shapes, outlined text;
EPS files;
Transparency effects on an object, frame, fill or stroke e.g. opacity, drop shadows, feather, glows, blending modes;
Images should be flipped in Photoshop, re-saved and replaced;
Shaped image frames, all image frames must be rectangular;
Embedded images with non-alphanumeric names.
Outlined text (converted to paths);
Empty text frames;
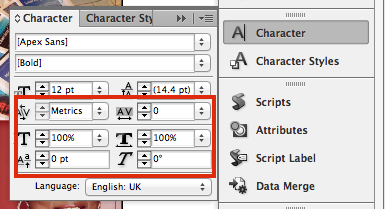
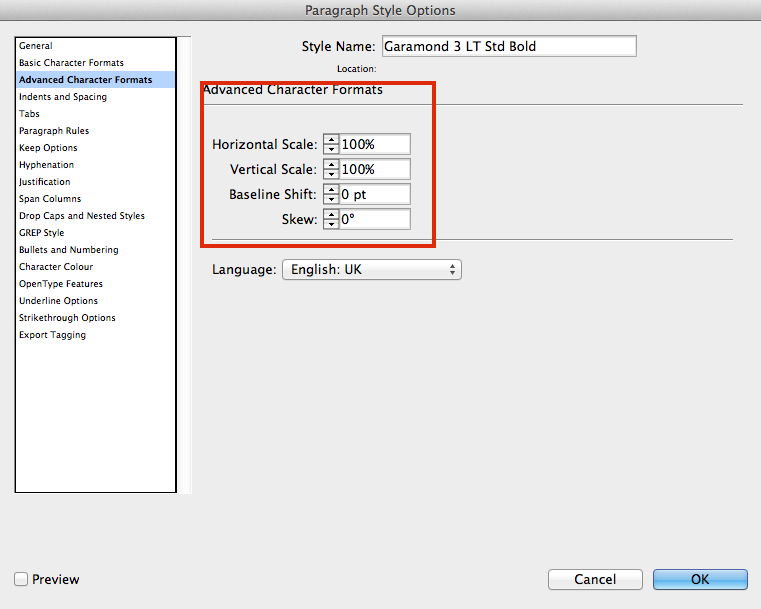
No special character effects e.g. All Caps, Small Caps, Superscript, Subscript, Underline, Baseline shift, Strike-through;
Character styles;
Forced bold, italic or outlined;
Paragraph hyphenation;
Soft returns (also called Forced Line Breaks);
Text attached to paths;
Multi column text frames;
Linked (threaded) text frames;
Tables;
Tabs;
Nested text styles;
Padding;
Text Wrap (not supported on Background layer);
Rotated text within a text frame (rotated text frames are accepted);
Shaped text frames, all text frames must be rectangular;
Colour tint swatches or gradients swatches.
Go to and ensure that Facing Pages isn't selected.
Your Indesign® file should include the bleed within the page size, rather than use the Bleed and Slug options. When the template is presented to the end user, we exclude the bleed from within the editing window.
If creating templates using Adobe CC you must save your templates as a IDML file. If saving from CS4 to CS6 save as INDT.
Go to and check the following settings. Altering these settings may affect content.
Check all your Paragraph Styles settings don't include any of the unsupported features.
This article explains how to link Products to Templates.
When you build a Template via . You're asked what Product Size & Colour Type you want.
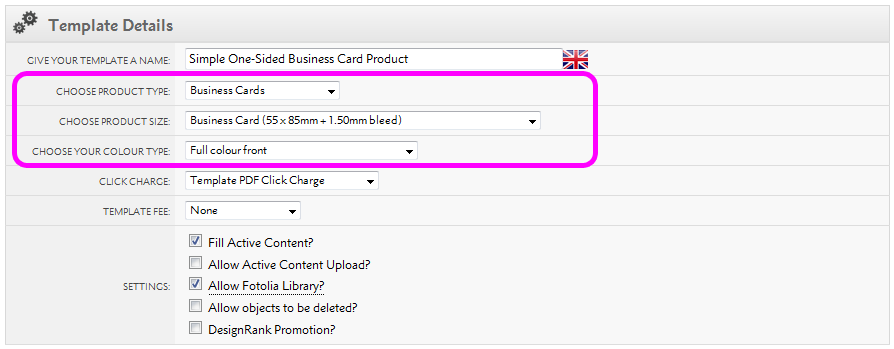
Every Product in Flyerlink also has a Product Size & Colour Type.
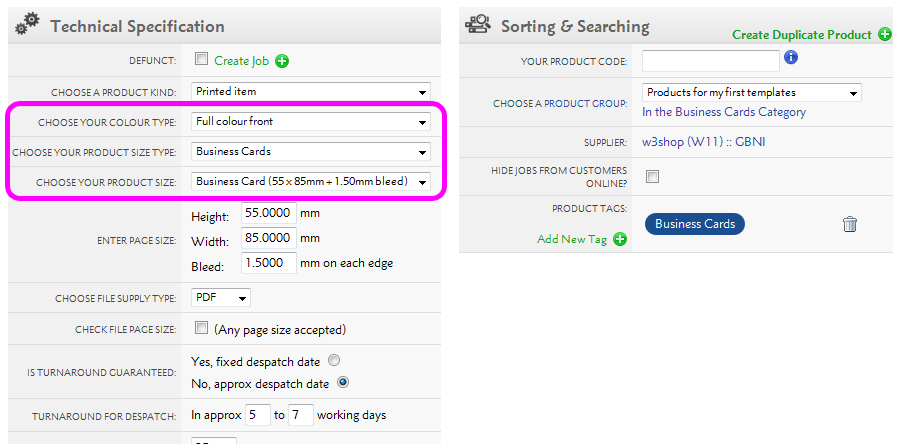
For a Product to be eligible to a Template, the Product Size & Colour Type need to match.
Product Types are groups of Product Sizes to help you find an appropriate size. If you can't find the Product Size you're looking for, you may need to change the Product Type.
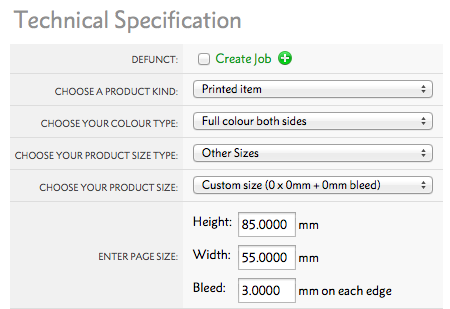
Flyerlink has hundreds of Product Sizes to choose from when you're building your Template. But if your Template and Product are of an irregular size, or you can't find the right Product Size; you can chose a Custom size.
When you build a Product, the Custom size option enables you to add your own height, width and bleed.
Once you've chosen your Product Size & Colour Type. You need to choose how many Products you want to be available to your Template.
By default, all Matching Products will be mapped to your Template.
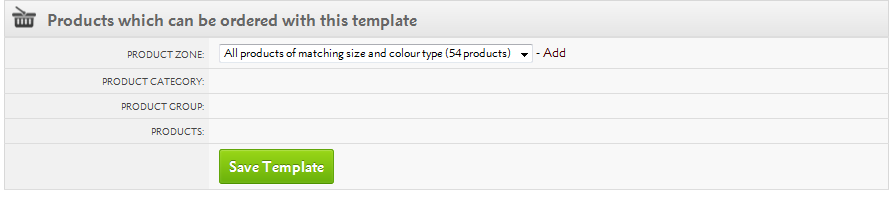
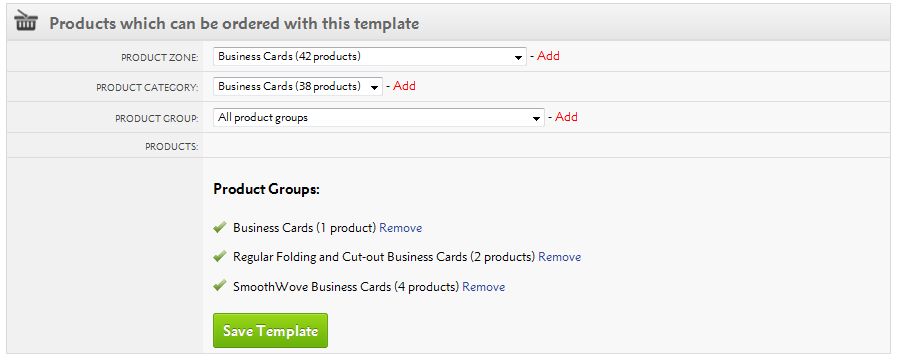
However, you can also restrict to just a few Product Groups, Product Categories or Product Zones.
When you build a Product via , you need to choose Customer Permissions.
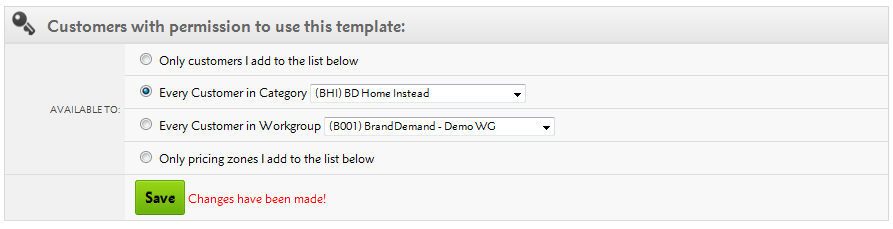
You also need to choose Customer Permissions on your Template via .
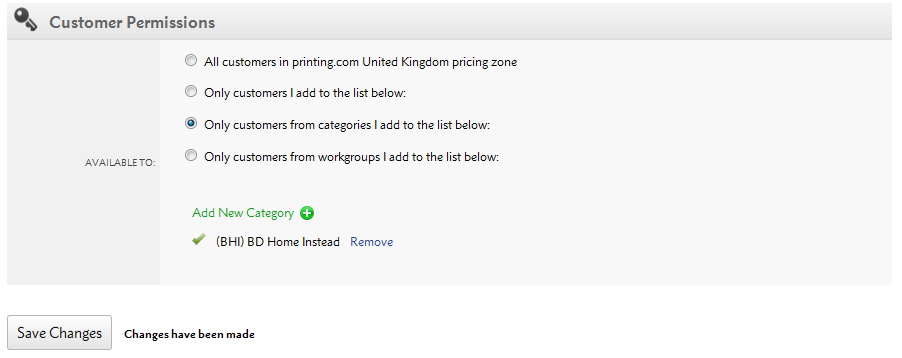
Provided there are matching Customer Permissions, you'll be able to see your Product in the filter for which products are available for your Template.
.png)
Online templates should be built as efficiently as possible, including the upload stage. Follow this advice to ensure that your file can be uploaded quickly.
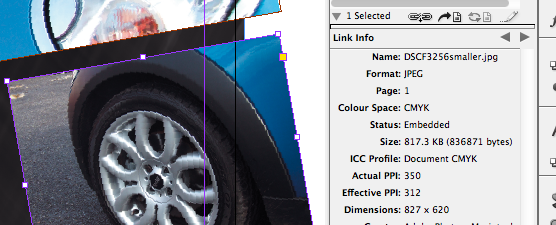
To keep the file size reasonable, ensure that the effective ppi of your images is no more than 350 ppi when importing them into InDesign. Use the window to check:
We support all flattened file types for editable images. We recommend using a JPEG set at maximum quality, as these will print perfectly while maintaining a small file size.
In your InDesign template file, only embed images that are used in the actual file. Delete anything from your pasteboard, both vector and bitmap elements.
For client templates, you should only need to include Paragraph Styles for the fonts and weights that are actually used in the design. Extra unused Paragraph Styles increase the size of the file that you will upload.
You can import and embed PDF files onto the -background layer of your file. Ensure that:
We'd recommmend that you use composite vector graphics in InDesign. Vector elements copied and pasted from other vector applications may cause a build fail if they aren't correctly formatted.
Jump to contents page of
|
|||