Support for

Here are links to the guides that help you to build editable web-2-print templates using InDesign and w3p. Once built, these online templates can then be used by clients to edit artwork and place print orders via their dedicated online ordering system.
Overview
|
|||||||||||
Building a template
|
|||||||||||
Categories & Microsites
|
|||||||||||
Building Products
|
|||||||||||
Here are links to the guides that help you to build editable web-2-print templates using InDesign and w3p. Once built, these online templates can then be used by clients to edit artwork and place print orders via their dedicated online ordering system.
This section covers some background information on web 2 print templates and also some advice on fonts.
To build editable online design templates, you will need…
InDesign® files are saved as either InDesign template files, .indt, or .idml which are then used to create an online template.
Please note that if you are using the .indt option that we only support up to CS6. .idml files are supported up to the latest version.
When uploaded to Flyerlink®, InDesign® Server is used to translate the document into an editable template. The template is then opened and edited using the Editor. Once the template has been personalised by the user and approved, InDesign® Server is used again to translate the document into a print ready PDF.
They will need…
Please note that we support the following browsers:
We have purchased an ongoing Server Licence for over 2,700 fonts from the Linotype Originals 2.0 Library, plus 600 or so more from other libraries, for use in our online applications. We have also incorporated the top 100 Google fonts.
Refer to the Template Font List in Flyerlink® to see the complete list of fonts currently available to use within Editable Text Objects in a Template: Template Font List
Fonts that are not on the Template Font List can be used in non-editable areas of a template; however, they must be converted to outlines or used within a rasterised image.
If a client uses a font not found in the Template Font List, we advise that you suggest using an alternative font that is included in the Template Font List. Remember, this font only needs to be used in editable areas of a Template, and their standard font can be used everywhere else. Many clients may also have an acceptable secondary font listed in their brand manual.
If you need to find a similar font for a client to match our library, then try using www.identifont.com - once you find something close, just cross reference it with our Template Font List
When creating a template, if you do not possess the exact version of the fonts featured in the Template Font List (eg. You may have ‘Diverda Sans Com Regular’ but not ‘Diverda Sans LT Std Regular’) then you can use your existing version, and then swap it at the build stage provided that the version that you own is in .otf (Opentype) or TTF (True Type) format. Alternatively, you could purchase the exact version to help with laying out your Template designs.
The font substitution tool will only work with OpenType (OTF) and True Type (TTF) fonts.
Postscript Type 1 fonts are not suitable for substitution. In addition, do not mix Open Type and True Type fonts of the same family, as this will cause the font substitution to fail.
| Roboto | Open Sans |
| Slabo 27px | Lato |
| Oswald | Roboto Condensed |
| Source Sans Pro | Montserrat |
| Raleway | PT Sans |
| Merriweather | Roboto Slab |
| Open Sans Condensed | Lora |
| Droid Sans | Ubuntu |
| Droid Serif | Arimo |
| Playfair Display | PT Serif |
| Noto Sans | PT Sans Narrow |
| Titillium Web | Muli |
| Poppins | Indie Flower |
| Bitter | Fjalla One |
| Dosis | Hind |
| Catamaran | Oxygen |
| Inconsolata | Cabin |
| Noto Serif | Arvo |
| Crimson Text | Anton |
| Lobster | Ubuntu Condensed |
| Yanone Kaffeesatz | Nunito |
| Libre Baskerville | Press Start 2P |
| Bree Serif | Merriweather Sans |
| Josefin Sans | Fira Sans |
| Abel | Roboto Mono |
| Abril Fatface | Asap |
| Gloria Hallelujah | Pacifico |
|
Quicksand |
Karla |
|
Varela Round |
Play |
| Work Sans | Dancing Script |
| Signika | Questrial |
| Rubik | Cuprum |
| Alegreya | Shadows Into_light |
| Archivo Narrow | Francois One |
| Rokkitt | PT Sans Caption |
| Amatic SC | Maven Pro |
| Vollkorn | Acme |
| EB Garamond | Exo 2 |
| Eco | Ropa Sans |
| Crete Round | Libre Franklin |
| News Cycle | Pathway Gothic One |
| Patua One | Source Serif Pro |
| Josefin Slab | Russo One |
| Architects Daughter | Source Code Pro |
| Lobster Two | Comfortaa |
| Orbitron |
Google fonts are only available on HTML5 templates, they aren't available on our historic Flash based templates.
The full archive of all current Google fonts can be downloaded from https://github.com/google/fonts
(320mb .zip file - fonts are in a folder called OFL once uncompressed)
The following guidelines detail the structure and functionality that is supported when preparing an InDesign® file for conversion to an online template. The online templates are intended to be an easy way for someone without design skills to edit and personalise content within a fixed template, similar to editing slides in Powerpoint. The online templates are not intended to function like a browser based design canvas. They do not include every function and feature available in InDesign®. The key to creating an online template is to keep it simple!
The steps in these guidelines detail the required layer naming conventions and rules that are used to identify objects that are either editable or fixed in the final template. When creating the InDesign® file these rules are determined in accordance with the client’s requirements and corporate brand guidelines.
Within the final template, the content of an editable object can be changed, but the position cannot. Objects are locked in place to prevent the end user moving or altering the design layout.
The vast majority of our core product range is available. Special allowances have been made for four page greetings cards, which are also supported. Please refer to Designing for Production for more details on how to set up files for four page greetings cards.
The design file should be set up in accordance with the usual Designing for Production specification. The appropriate Design Template (TGI) (refer to Designing for Production) can be used to indicate the usual page size, bleed, ‘quiet zones’ and folds where appropriate. The Design Template (TGI) Layers should be used as a guide whilst designing. Before saving the InDesign® file ready to be turned into an online template all the Design Template (TGI) Layers must be removed. The Finishing Layer, which includes the 0.25pt key line and red front page indicator key line for folded products, must be merged with the Background Layer, before saving the final file ready to be made into an InDesign® template file (.indt).
Don't use the Facing Pages option when creating your InDesign document. The document needs to be single pages only. Items placed on a Master page aren't supported, your design elements all need to be on an actual document page.
We support up to A2 dimensions with no issues, if you go above that you'll need to keep the artwork as simple as possible with regards to the editable areas.
The main issue is usability of the template, as it can be hard to edit very large dimensions such as over A1 due to the maximum font size being 96pt. Couple of notes:
1) Maximum file size is 145mb.
2) Our largest recommended dimensions are 3,000mm x 1,000mm (We have seen larger, but we don't support them above this size).
3) Maximum editable font size is 96pt within the editor - you can upload artwork with editable areas with larger font sizes but the size menu only goes to 96pt.
4) If an end user is using a small screen it can be tricky to edit very large dimension templates.
5) Keep the editable areas on the template as few and simple as possible.
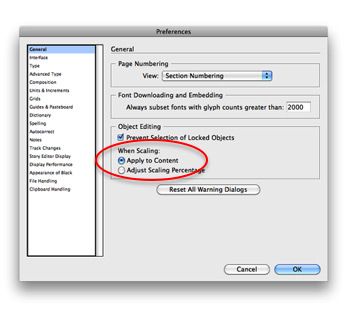
Make sure the following features and settings are selected within InDesign®, they will help during the design process;
| Character | Description |
|---|---|
| # | Illustrates the end of content |
| ¶ | Hard return |
| ¬ | Soft return |
| >> | Tab |
|
. |
Space |
| / | End of Nested Style |
Remember, the key to creating an online template is to keep it simple! Decide what elements of design need to be fixed and which will be editable. Some clients want most of the elements locked down, whilst others allow their users to have more flexibility.
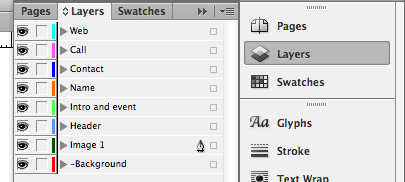
All fixed, non-editable objects must be on the same layer, the Background Layer.
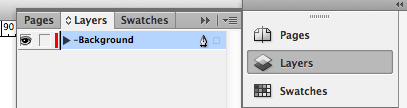
Some files from older versions of InDesign® can fail to build when the -Background layer is locked.
You can use most features and effects within InDesign® on the Background Layer that adhere to Designing for Production e.g. gradients, vectors, drop shadows, tints etc. The only features not supported are open paths (all vector shapes must be closed paths with no stray bezier nodes) and Text Wrap as this can affect Editable Objects within the template . Ensure you do not use any of the Text Wrap options, other than the default.
While templates are normally designed to be editable by clients using INDT or IDML files, you may not want any of the template to be editable.
You can set up a template to be an Uneditable PDF template, instead of the default INDT option.
This article explains how to use this functionality.
All Editable Objects must be placed:
Name the layer appropriately with its own unique name.
No duplicate layer names should be used.
e.g. Company Name, Text Side 1, Image 1
Editable object frames must be rectangular; they can include a solid border and can be rotated. Don't use the reflect tool or rotate either the image or image frame in InDesign® though, as your image will revert back once built and any imported images may display rotated the wrong way.
Ensure that your editable layers are above your -Background layer from Step 1
The template editor does not fully share the depth of InDesign®’s rich typographic controls.
Remember… The key to creating a template is to keep it simple! Before creating a text object you should make sure your settings are as follows:

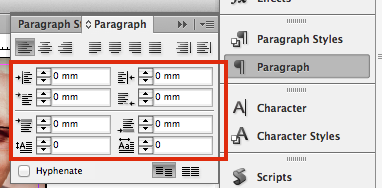
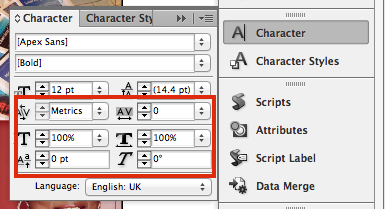
When you have created a text object you need to:
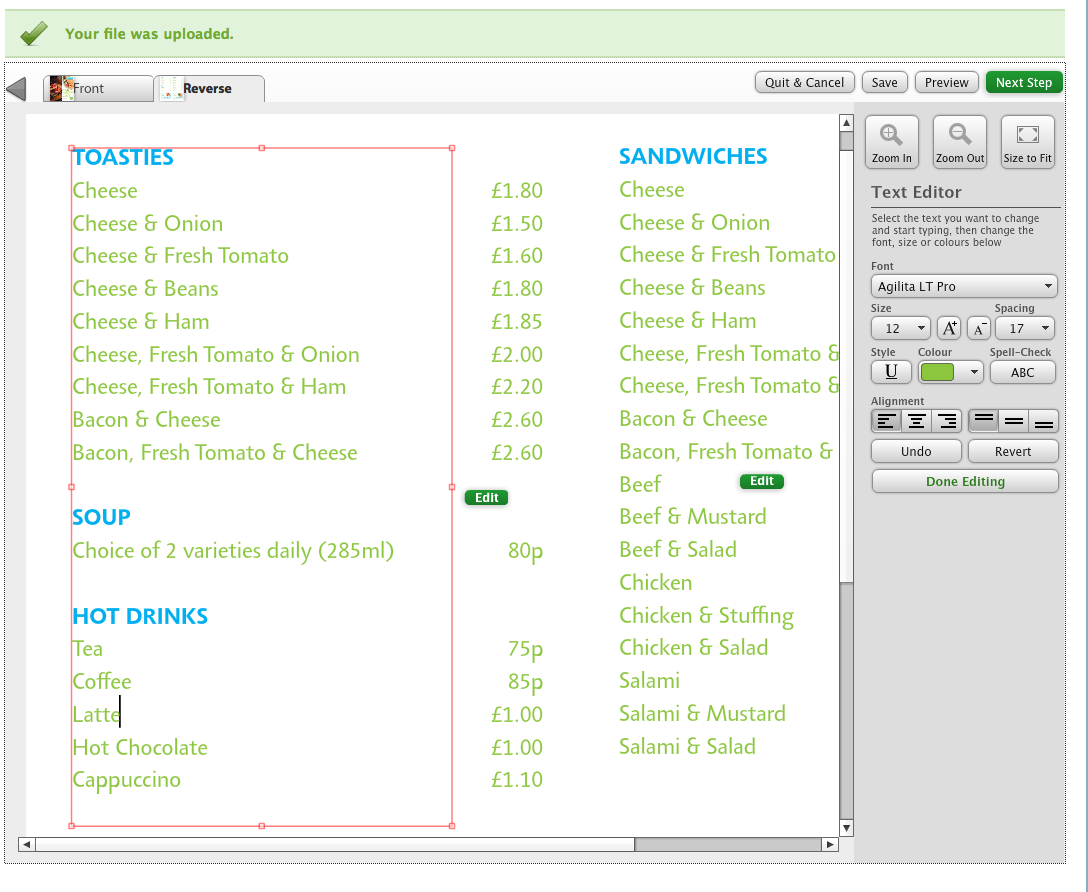
Allow a minimum of 25% of the height of the font at the bottom of the text box . This allows space for ascending and descending characters in the character set to fit in. Failure to leave enough ‘breathing space’ may result in text frame overflow and missing text in the template. This image shows a red text box that has a defined text frame zone and plenty of 'breathing space' to allow for descending characters:
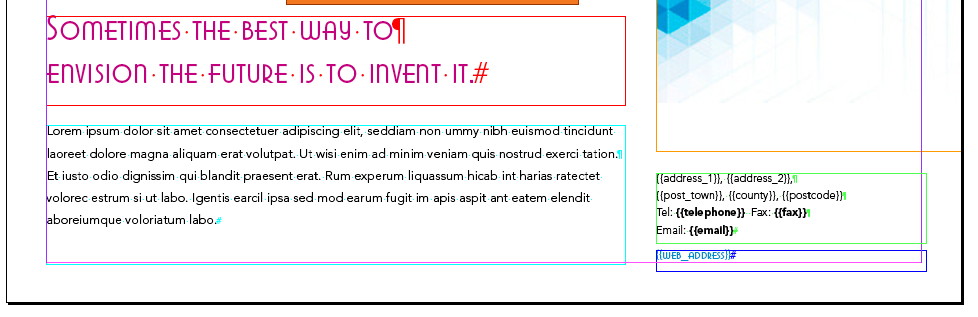
Once you have set your text frames, you need to check that the Hash Tag symbol (#) is visible at the end of the text box and there is no hidden text or returns beyond the text frame, like in this example:
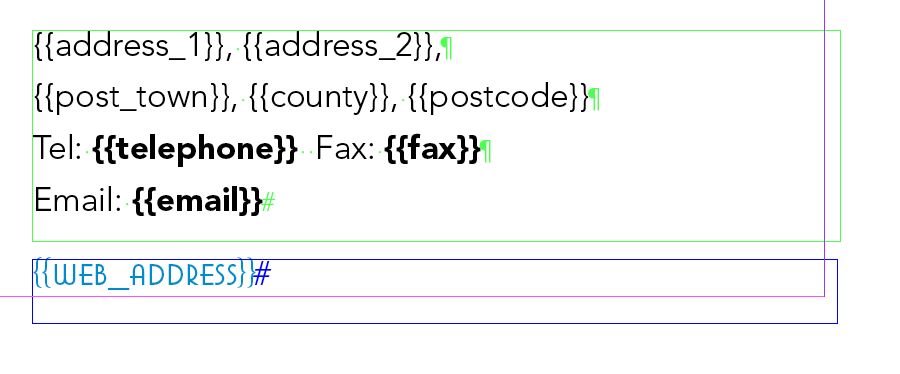
To show the Hidden Characters, will need to be turned on. For templates larger than A3 in size we would recommend a minimum font size of 20pt for Editable Text objects.
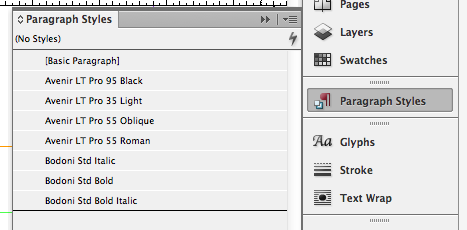
Once you have created a text object, you must make a corresponding Paragraph Style. This will ensure the font is available to use in the editor.
Once you have made all the required Paragraph Styles, go to . If there is a rogue font listed here, locate it in the file and either delete it or convert to outlines. If there is no text present, you may have converted a graphic object into a text object. In this case, select the object and then
DO NOT use any System Fonts anywhere in your template. Not even as a ‘placeholder’ font which you intend to substitute at the build stage. The use of a System Fonts in the template will cause it to fail.
Paragraph styles are not being used in their traditional sense, they are used as a way to 'package' up the fonts you want to make available in the editor.
You only need to create one Paragraph style per font, you don’t need to create a separate one for every variation of size and colour.
Character styles are not supported in online templates. If your document includes any, they will need to be removed prior to uploading to Flyerlink®.
When creating a template, if you do not possess the exact version of the fonts featured in the Template Font List (eg. You may have ‘Diverda Sans Com Regular’ but not ‘Diverda Sans LT Std Regular’) then you can use your existing version, and then swap it at the build stage provided that the version that you own is in .otf (Opentype) or TTF (True Type) format. Alternatively, you could purchase the exact version to help with laying out your Template designs.
The font substitution tool will only work with OpenType (OTF) and True Type (TTF) fonts.
Postscript Type 1 fonts are not suitable for substitution. In addition, do not mix OpenType and True Type fonts of the same family, as this will cause the font substitution to fail.
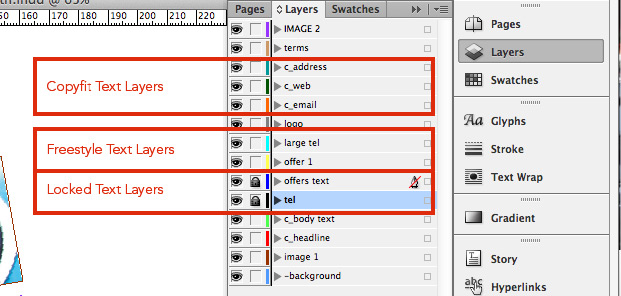
Editable Text objects can be Locked or Freestyle, in both cases the ‘text content’ will be editable in the final template, but the ‘text properties’ e.g. font, colour and font size, can be restricted in accordance with the clients corporate brand guidelines. You must decide which editable text objects will be restricted (Locked) and which will allow more flexibility (Freestyle).
The ‘text content’ of a Locked text object can be edited in the final template, but the ‘text properties’ cannot be changed e.g. font, colour and font size.
To Lock a text object, lock the layer in InDesign®
The content, font, colour and font size of a Freestyle Text object can be edited in the final template. A layer naming convention or prefix is not required on a Freestyle Text layer, just leave it unlocked.
Copyfit automatically resizes text when the user types too much into the text frame. If you want to apply Copyfit to an editable text field, give the layer name a ‘c_’ prefix e.g. c_Now Operating, c_Email.
A text frame that requires Copyfit must only contain one font, font size and font style, if a text frame contains a combination of these then the Copyfit functionality will not work.
 If the feature has not been applied and the user types too much into the text frame, a warning will instruct them to type less.
The Copyfit function can also be added to layers that have Active Update fields on them (Step 4 in this book covers Active Updates).
Here is an example of a document using all 3 types of text settings:
If an editable text element has copyfit applied, but the text box doesn't contain enough breathing space, then the text will automatically shrink to fit the available space when the template is initially built.
If you are unsure of how to check for any of the InDesign® features, please refer to
Active Updates is a feature that will save time for the end user, by automatically filling in certain personal details when the template loads.
The use of Active Updates is optional but we’d recommend you use them in your templates wherever possible, instead of using ‘placeholder’ text like “your name” or “your phone number”.
Simply replace ‘placeholder’ text with special field names from this table:
| Active Update text | Corresponding Flyerlink® Field |
|---|---|
|
{{title}} |
Contact's "Title:" |
|
{{first_name}} |
Contact's "First Name: |
|
{{surname}} |
Contact's "Surname:" |
|
{{name}} |
Contact's "First and Surname” |
|
{{job_title}} |
Contact's "Position:" |
|
{{salutation}} |
Contact's "Salutation:" |
|
{{email}} |
Contact's "Email:" |
|
{{telephone}} |
Contact's "Telephone:" |
|
{{direct_tel}} |
Contact's "Direct Tel:" |
|
{{fax}} |
Contact's "Fax:" |
|
{{mobile}} |
Contact's "Mobile:" |
|
{{web_address}} |
Contact's "Website:" |
|
{{business_name}} |
Contact's address "Business Name:" |
|
{{legal_name}} |
Contact's address "Legal Name:" |
|
{{address_1}} |
Contact's address "Address:" line 1 |
|
{{address_2}} |
Contact's address "Address:" line 2 |
|
{{post_town}} |
Contact's address "Post Town:" |
|
{{county}} |
Contact's address "County:" |
|
{{country}} |
Contact's address "Country:" |
|
{{postcode}} |
Contact's address "Postcode:" |
This is how an InDesign® file may look that is using Active Updates:
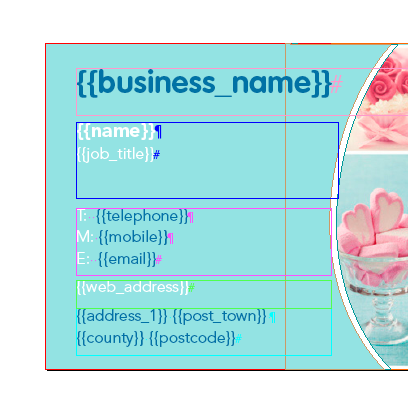
When the template is loaded, the special fields are replaced with the user's details from Flyerlink®, it is therefore important that your customer information present in Flyerlink® is correct.
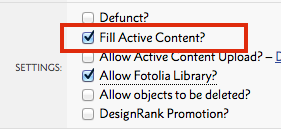
You simply need to tell Flyerlink® to do this by ticking the Fill Active Content? tick box on the Template Summary.
The table above details the field names you use. Each has {{double_curly_brackets}} round it. You must use the text exactly as shown, no caps etc. If you use a field name incorrectly, Flyerlink® won't substitute it. The same will happen if the Flyerlink® field is
blank.
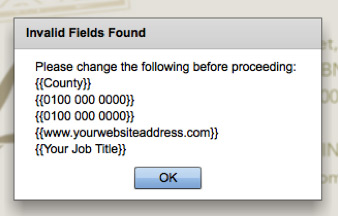
If a user presses Next and there are any {{double curly brackets}} still in the template they will be prompted to edit them with this window.
This means you can also use this feature as a safety net. For example, if there is an editable field that does not relate to an Active Update field (maybe a price that needs to be changed for example), you can add {{double curly brackets}} to the placeholder text to ensure that the client is prompted to fill it in manually before proceeding to print.
If the content is too long for the Text Object, when the fields are filled, the text will truncate or chop the text and produce a warning, informing the user that there is too much text. It is important to allow plenty space for the content, and therefore define the Text Frame sufficiently. Alternately, apply Copyfit to the text box containing the Active Update fields.
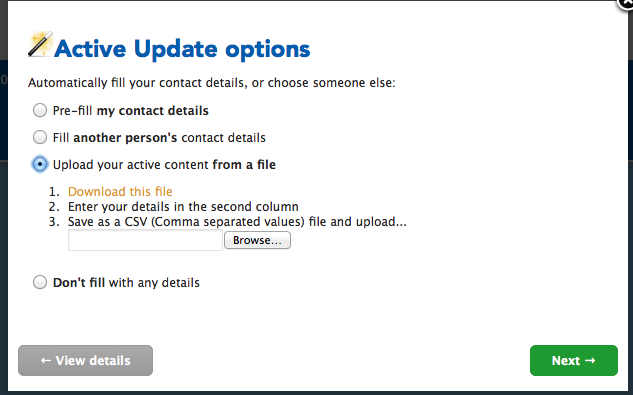
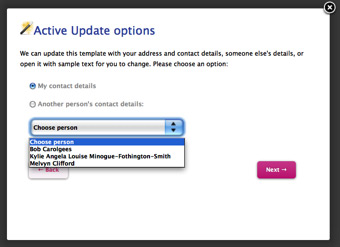 If there's only one contact within a customer, the template will automatically fill any Active Update fields with their details. If there's more than one, the user will be asked whether they want to use their own details or someone else in their team.

For Microsite Administrators, they'll also be able to choose from any Department within their Category, and then any contact within that Department
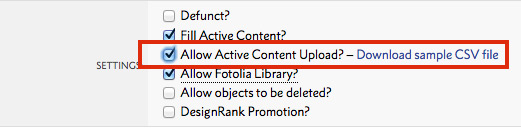
As an extension to the standard Active Update fields, you can also set up custom variable data too. It's simple to set up a template with Active Content upload - just tick a box in Flyerlink Allow Active Content Upload? then download the sample CSV file. When Allow Active Content Upload is ticked, Flyerlink scans the document and makes the list of fields, ready for use.
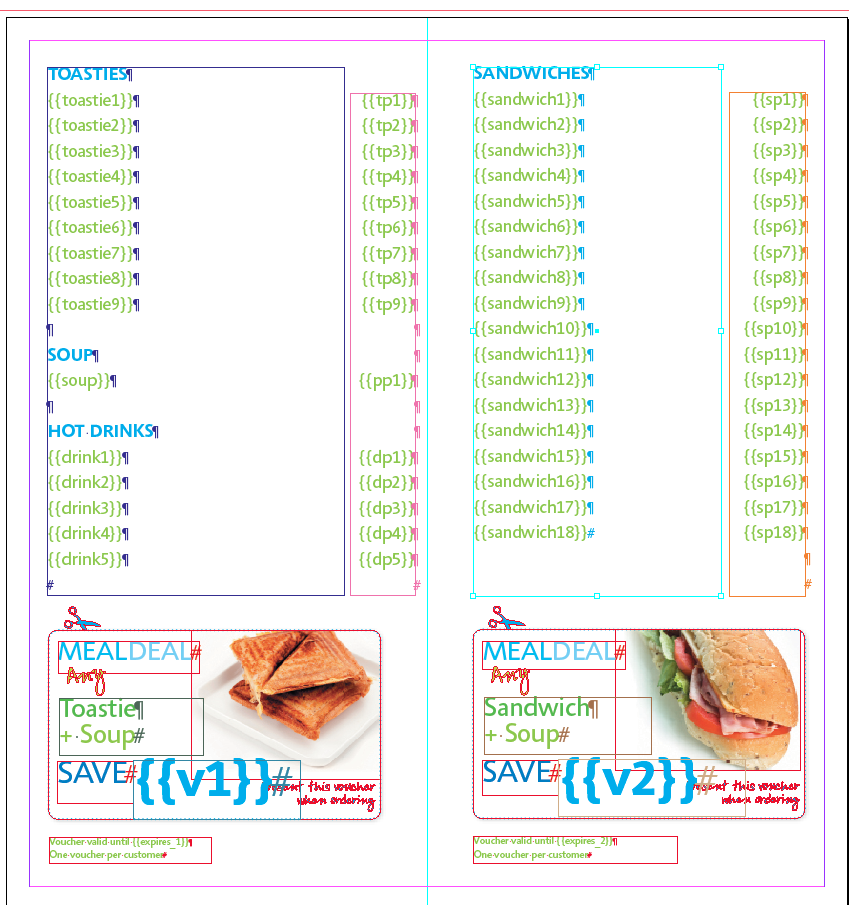
Create your Active Update fields as required in your InDesign® document like this:
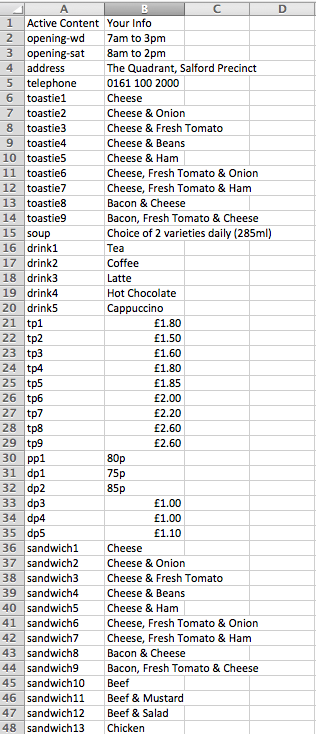
When your client logs into use a template that has the Allow Active Content Upload ticked, they will be asked to upload their spreadsheet and we'll populate the template with their uploaded details for them:
This is now live for printing.com, BrandDemand, Orderlink and w3shop.
All colours used in an Editable Text Layer (including black and white, if used) must be defined within the InDesign® document.
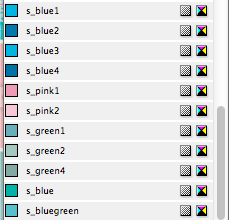
Firstly, create an appropriately named colour (remember the colour names will be visible to the end user) in the Swatch Palette. Colours must be set at 100% tint, if lower tints are required this must be created as its own swatch e.g. 60% cyan should be created as its own swatch containing 60c.
The swatch name must contain an ‘s_’ prefix, e.g.
This is how swatches should look:
Make sure the corresponding text object is using the colour swatch you’ve created.
To make additional colours available in the final template that are not used in the InDesign® document, follow the instructions above.
Any colours not labelled with the ‘s_’ prefix will not be present in the online template, including InDesign®’s default colour swatches e.g. [Registration], [Paper] and [Black]. Do not use these swatches for any editable text objects.
Don't use LAB colours in your InDesign® file, as this will cause the colours to convert incorrectly.
If your template is going to be used for Pantone® Spot Colour printing then you will still need to add the s_ prefix to each colour to be used. Spot colours cannot have their name changed as standard though, so to work around this select the Spot Colour Required then change it in the Swatch options to be Process CMYK. This will then allow you to add the s_ prefix in the Swatch Name (for example, s_ Pantone 172C). Once added, convert the Process CMYK colour back to a Spot Colour. This will maintain the original colour make up but at the same time it will add the additional Spot Colour as an extra separation named with the correct Pantone® name.
Not Supported within swatches on Editable Text Objects
The graphic file complies with the artwork specification, as detailed in the Designing for Production documentation.
Bleed is included within the document page size (Do not use document bleed settings with templates)
Only fonts from the Template Font List in Flyerlink® are used, all others are converted to outlines or are used within a rasterized image. To check which fonts are being used within your document go to. Use the button to identify where unsupported fonts are used within the document.
System fonts are not being used in the file.
Whilst we list 145MB as our maximum file size, there are other elements that can affect the build and load time of a template. There are no absolute limits on size - it's a combination of:
All non-editable objects are on the -Background layer (the lowest stacking layer within the Layer Palette). Layer should not be locked.
All editable objects are on individual layers with a unique name (use InDesign's Layer Visibility Tool (The eye icon) with Select All to locate rogue artwork elements).
All editable objects (Text and Image boxes) have rectangular frames.
Naming conventions and layers are locked where appropriate; e.g. c_ServicesList
Copyfit layers (c_Name) only contain one font, font size or font style, in a single text frame.
The TGI Finishing layer has been added to the -Background layer.
Unnecessary hidden layers are all deleted, including TGI layers.
All fonts required in the final template have a corresponding paragraph style. All unnecessary paragraph styles are deleted.
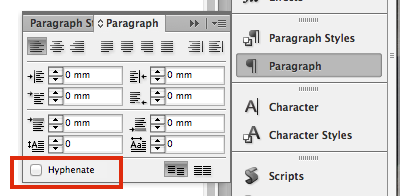
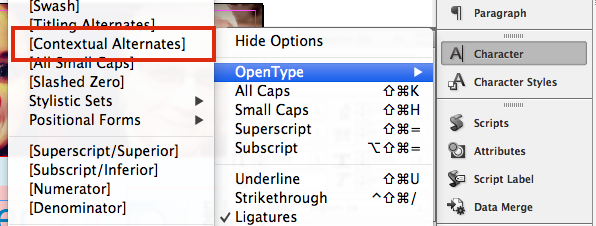
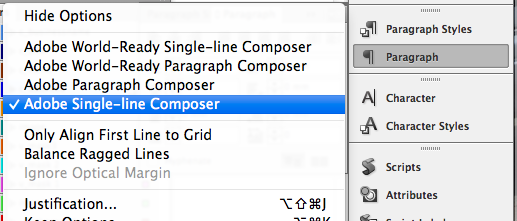
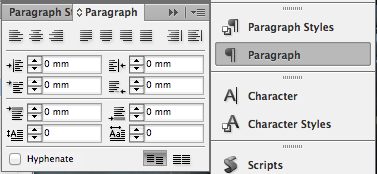
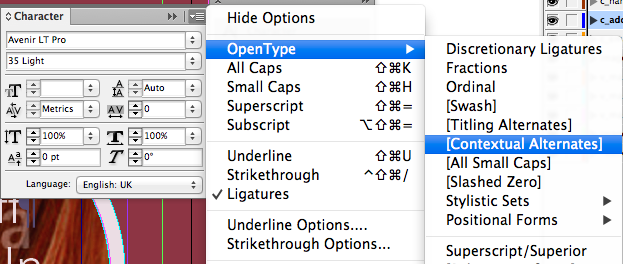
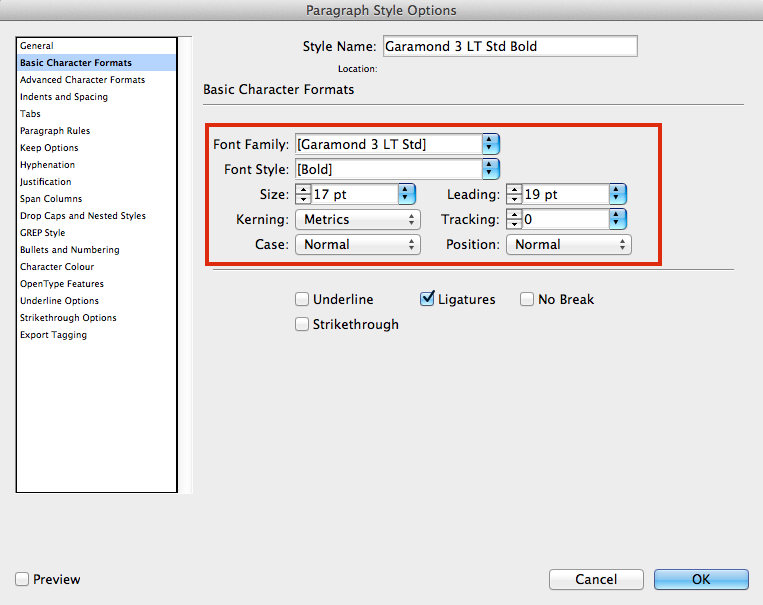
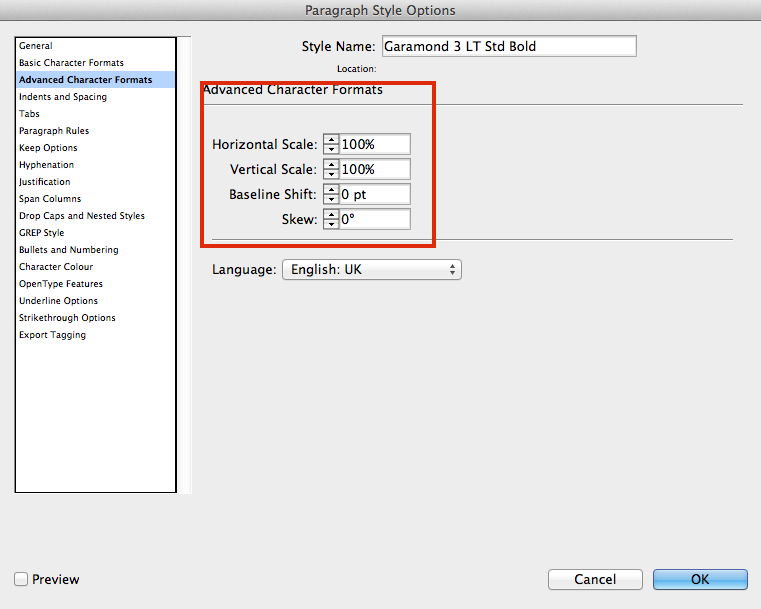
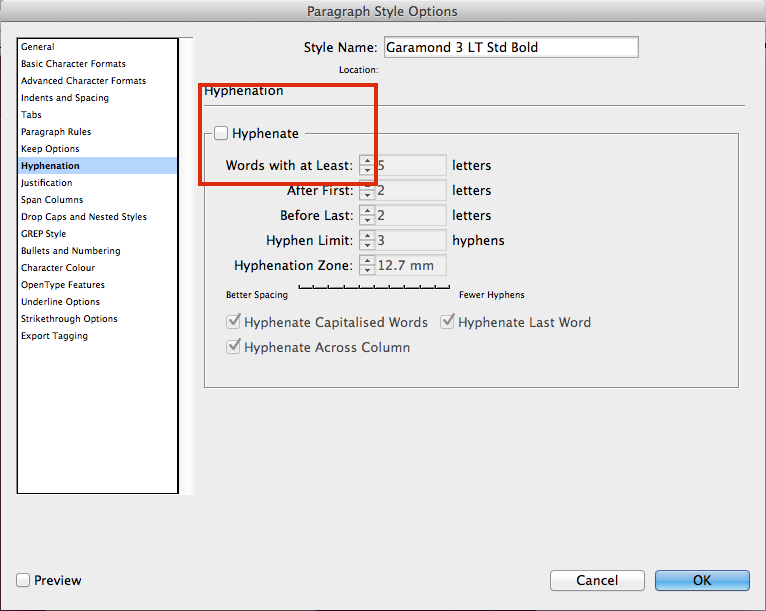
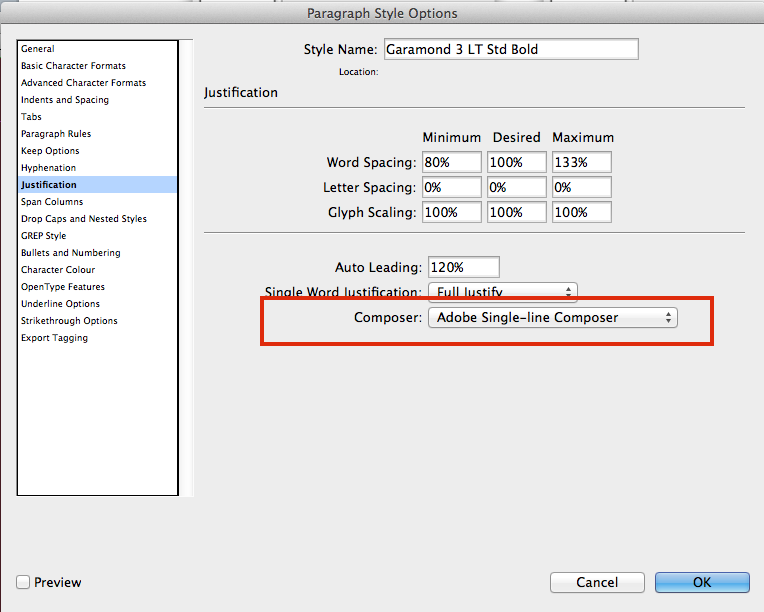
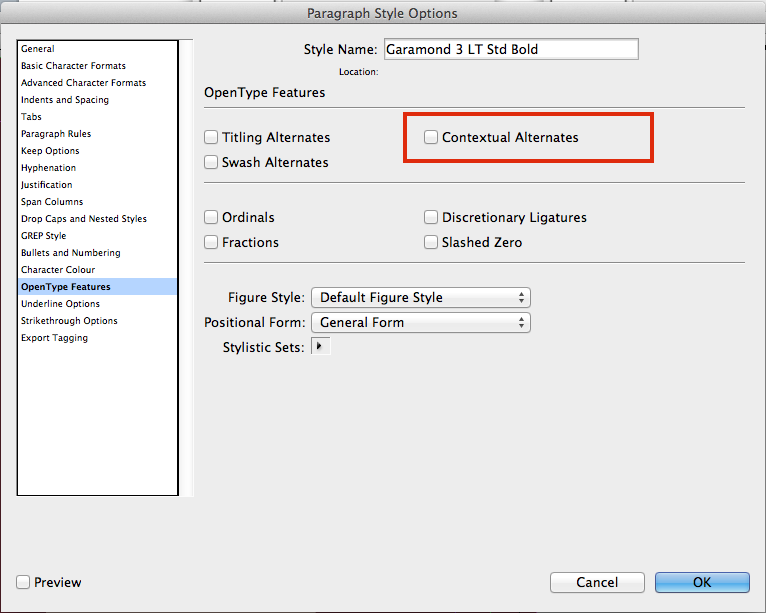
All fonts are set to Adobe Single Line Composer, Hyphenation is not selected and OpenType Contextual Alternatives are switched off (see Things to Avoid for further assistance).
All colours used on Editable Text Objects or any additional colours required as an alternative option, have a named colour in the palette; e.g. s_Black.
The isn't set to Convert All Spot To Process.
All correctly labelled colour swatches are CMYK, and are not tints or gradient swatches.
All images are embedded.
Editable image layers are not locked.
All editable text frame zones are defined appropriately.
All editable text frames include enough 'breathing space' for ascending and descending characters.
The Hash symbol (#) is visible at the end of every editable text frame.
No overlapping editable objects.
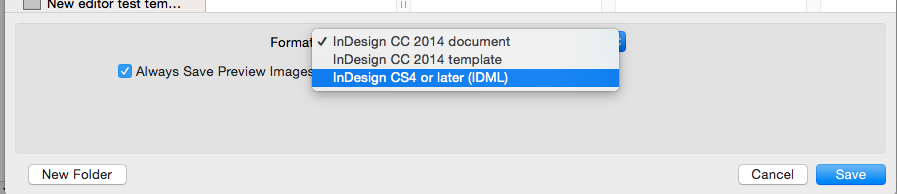
Save file as either an InDesign® Template file, .indt or InDesign® IDML file, .idml
Go to

Make sure none of these settings or features are used within Editable Objects. If you are unsure of how to check for any of the InDesign® features, please refer to
Vector images e.g. shapes, outlined text;
EPS files;
Transparency effects on an object, frame, fill or stroke e.g. opacity, drop shadows, feather, glows, blending modes;
Images should be flipped in Photoshop, re-saved and replaced;
Shaped image frames, all image frames must be rectangular;
Embedded images with non-alphanumeric names.
Outlined text (converted to paths);
Empty text frames;
No special character effects e.g. All Caps, Small Caps, Superscript, Subscript, Underline, Baseline shift, Strike-through;
Character styles;
Forced bold, italic or outlined;
Paragraph hyphenation;
Soft returns (also called Forced Line Breaks);
Text attached to paths;
Multi column text frames;
Linked (threaded) text frames;
Tables;
Tabs;
Nested text styles;
Padding;
Text Wrap (not supported on Background layer);
Rotated text within a text frame (rotated text frames are accepted);
Shaped text frames, all text frames must be rectangular;
Colour tint swatches or gradients swatches.
Go to and ensure that Facing Pages isn't selected.
Your Indesign® file should include the bleed within the page size, rather than use the Bleed and Slug options. When the template is presented to the end user, we exclude the bleed from within the editing window.
If creating templates using Adobe CC you must save your templates as a IDML file. If saving from CS4 to CS6 save as INDT.
Go to and check the following settings. Altering these settings may affect content.
Check all your Paragraph Styles settings don't include any of the unsupported features.
This article explains how to link Products to Templates.
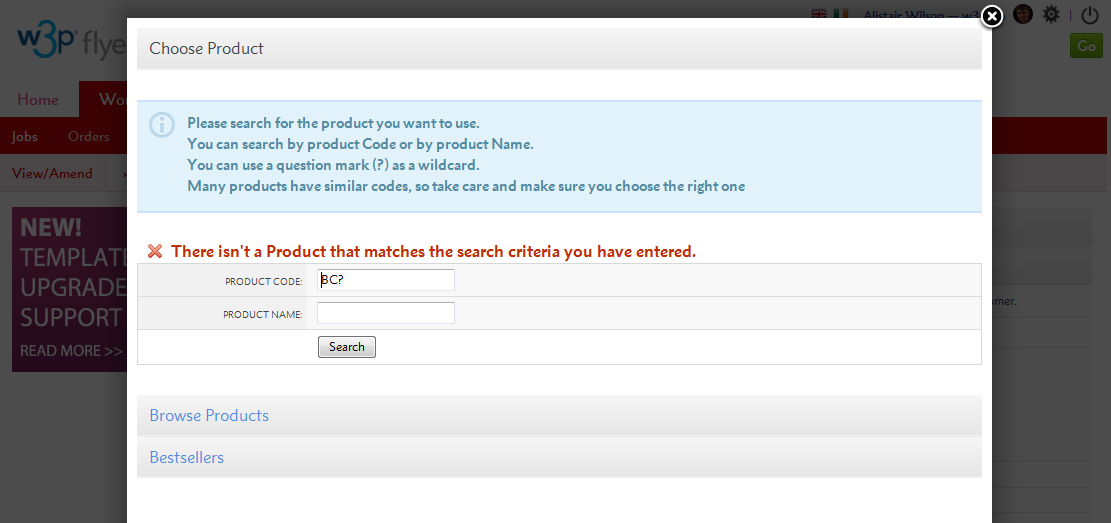
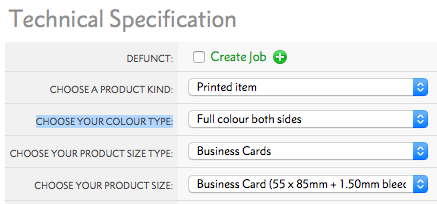
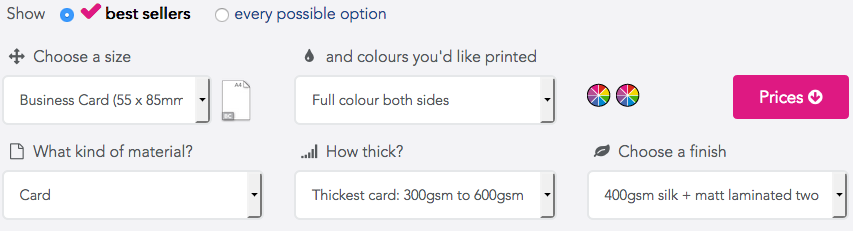
When you build a Template via . You're asked what Product Size & Colour Type you want.
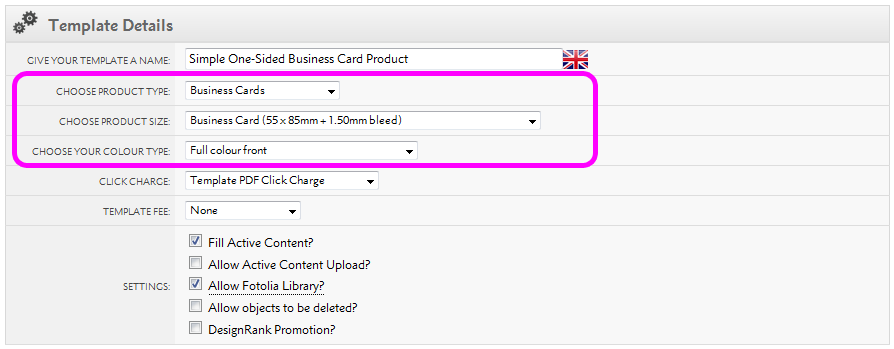
Every Product in Flyerlink also has a Product Size & Colour Type.
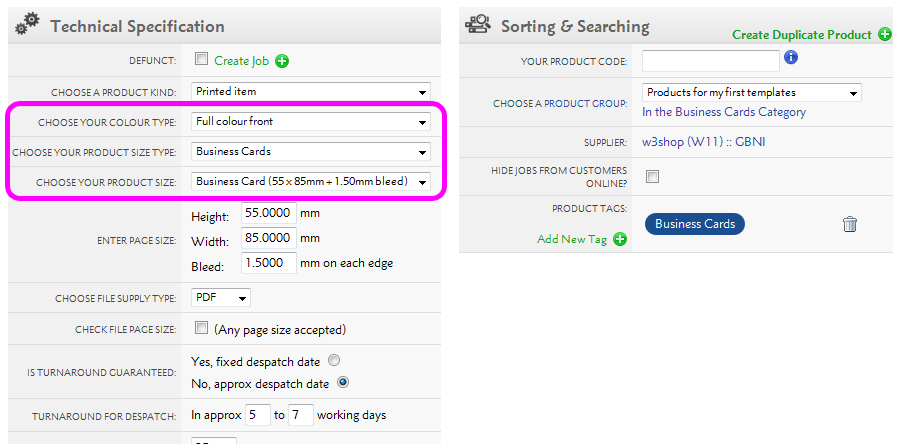
For a Product to be eligible to a Template, the Product Size & Colour Type need to match.
Product Types are groups of Product Sizes to help you find an appropriate size. If you can't find the Product Size you're looking for, you may need to change the Product Type.
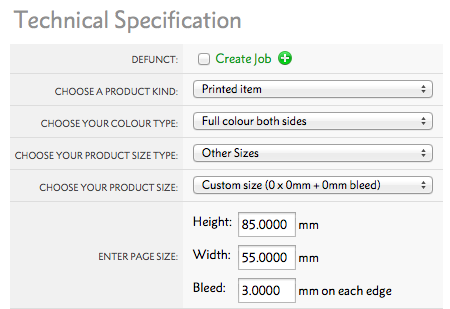
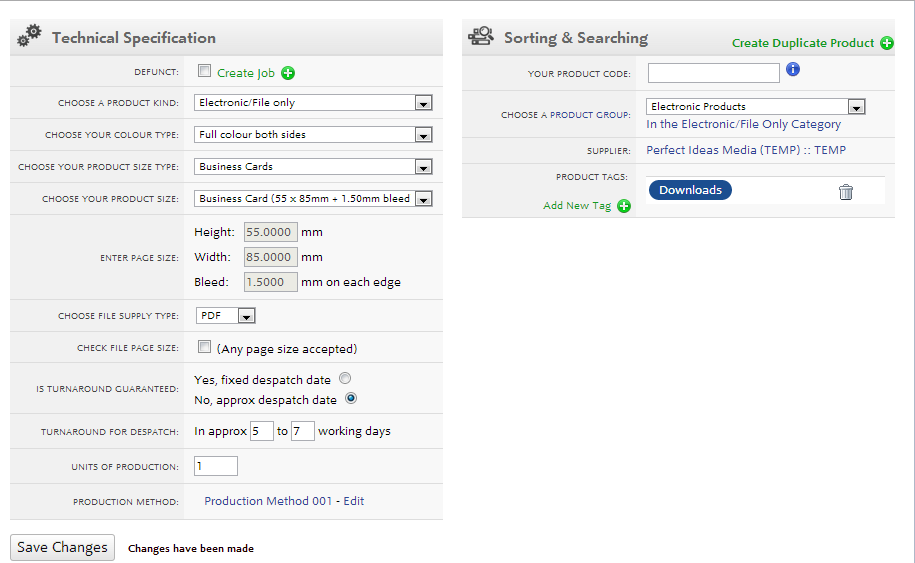
Flyerlink has hundreds of Product Sizes to choose from when you're building your Template. But if your Template and Product are of an irregular size, or you can't find the right Product Size; you can chose a Custom size.
When you build a Product, the Custom size option enables you to add your own height, width and bleed.
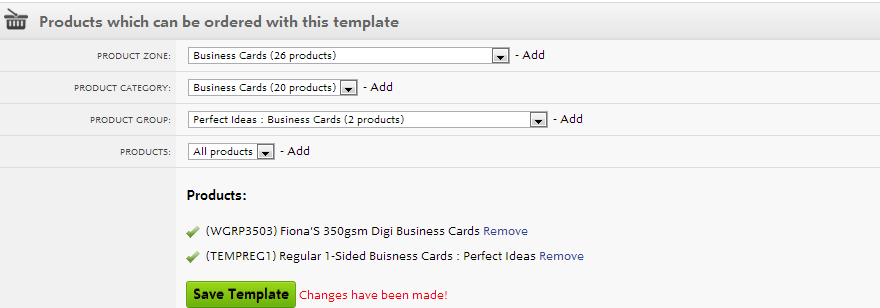
Once you've chosen your Product Size & Colour Type. You need to choose how many Products you want to be available to your Template.
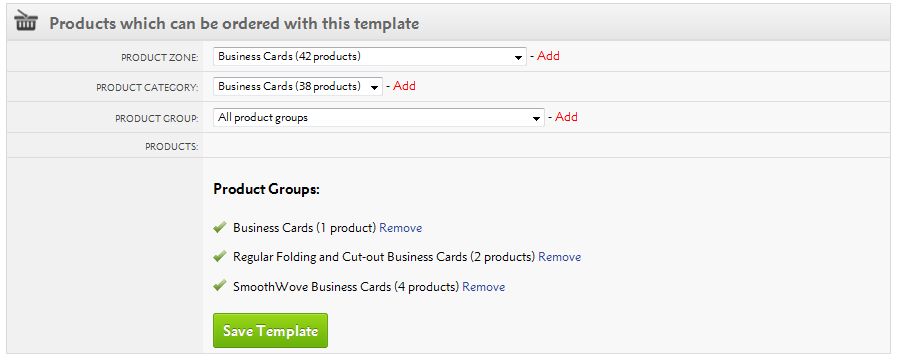
By default, all Matching Products will be mapped to your Template.
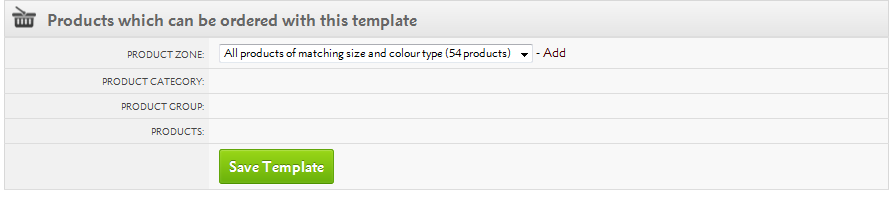
However, you can also restrict to just a few Product Groups, Product Categories or Product Zones.
When you build a Product via , you need to choose Customer Permissions.
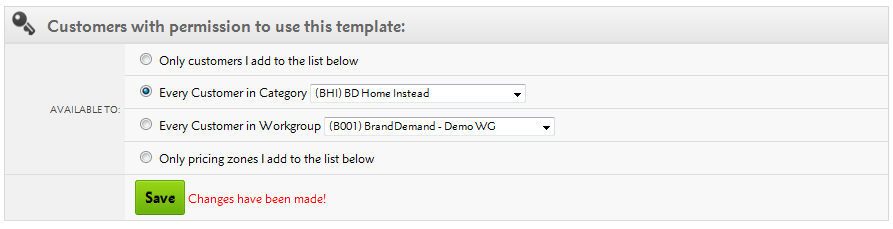
You also need to choose Customer Permissions on your Template via .
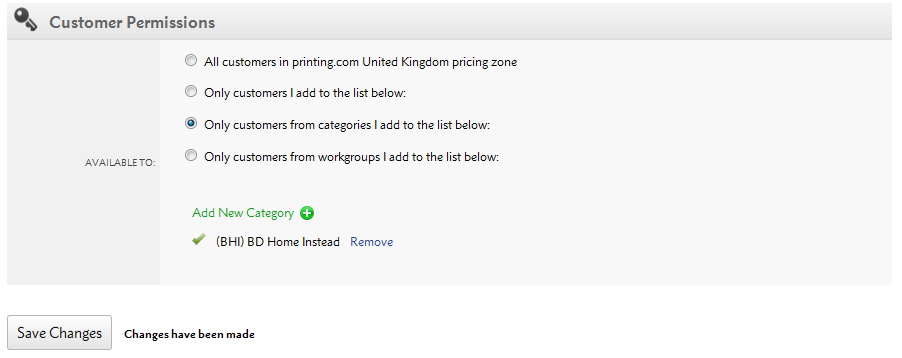
Provided there are matching Customer Permissions, you'll be able to see your Product in the filter for which products are available for your Template.
.png)
Online templates should be built as efficiently as possible, including the upload stage. Follow this advice to ensure that your file can be uploaded quickly.
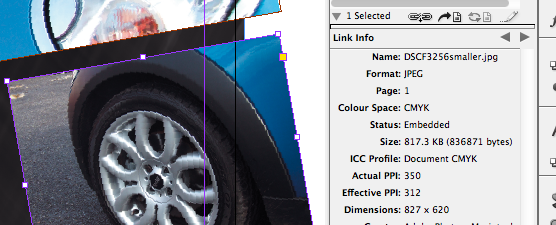
To keep the file size reasonable, ensure that the effective ppi of your images is no more than 350 ppi when importing them into InDesign. Use the window to check:
We support all flattened file types for editable images. We recommend using a JPEG set at maximum quality, as these will print perfectly while maintaining a small file size.
In your InDesign template file, only embed images that are used in the actual file. Delete anything from your pasteboard, both vector and bitmap elements.
For client templates, you should only need to include Paragraph Styles for the fonts and weights that are actually used in the design. Extra unused Paragraph Styles increase the size of the file that you will upload.
You can import and embed PDF files onto the -background layer of your file. Ensure that:
We'd recommmend that you use composite vector graphics in InDesign. Vector elements copied and pasted from other vector applications may cause a build fail if they aren't correctly formatted.
While templates are normally designed to be editable by clients using INDT or IDML files, you may not want any of the template to be editable.
You can set up a template to be an Uneditable PDF template, instead of the default INDT option.
This is useful for clients who re-order the same PDF often, but don't want to have to look through their previous orders to re-order. You may also want to use this if you've built a design that hasn't been ordered yet and to show the PDF in your client's template area.
Head to
Choose the Uneditable PDF option
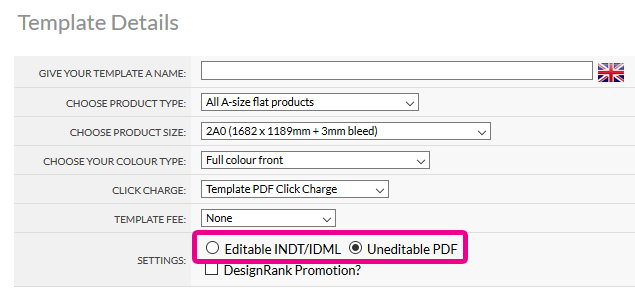
You'll see slimmed down options for Uneditable PDFs, since all you'll need to do is upload files, add tags, choose your product and customer permissions, then publish.
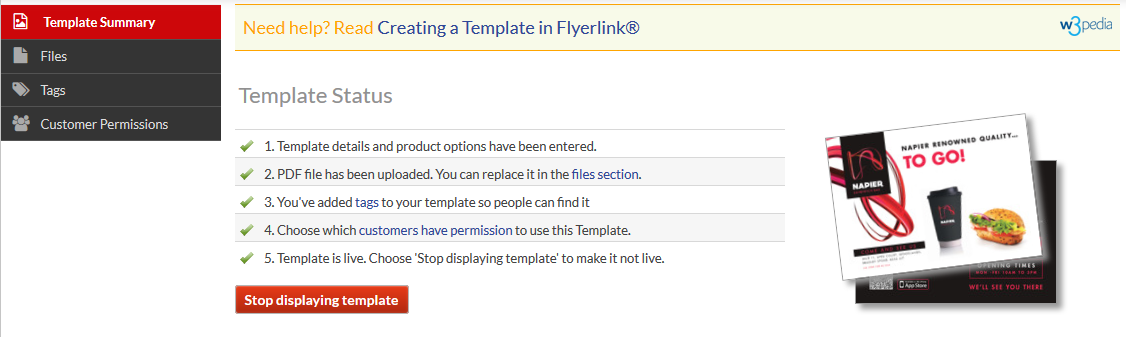
You can change a template from Editable INDT/IDML to an Uneditable PDF until files are uploaded. You can only upload PDFs that match your template size and colour type.
Your uneditable PDFs will show in the template folder alongside other indesign templates.
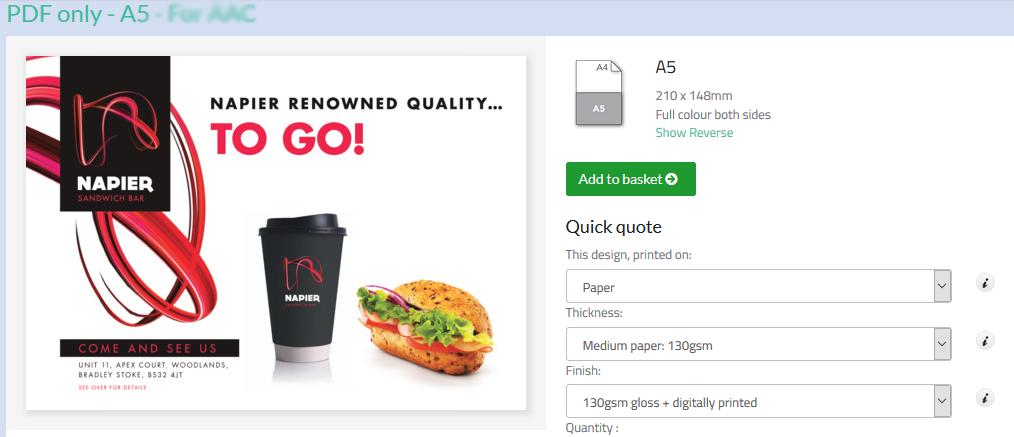
However when someone orders the template, they won't edit it, instead it will go straight into their basket with the PDF uploaded. The PDF will then show in your and folder. If you have auto021 enabled, the file will automatically go through filecheck after it's ordered.
The Categories & Microsites Menu Tab in Flyerlink is the Control Panel for printing.com, nettl, BrandDemand, w3client and w3shop Microsites.
Menu Location:
Customer Account consists of a Main Account Contact and several Additional Contacts who work for the same business.
Each Customer Account is assigned a unique Customer Account Code to differeantiate them from other customers.
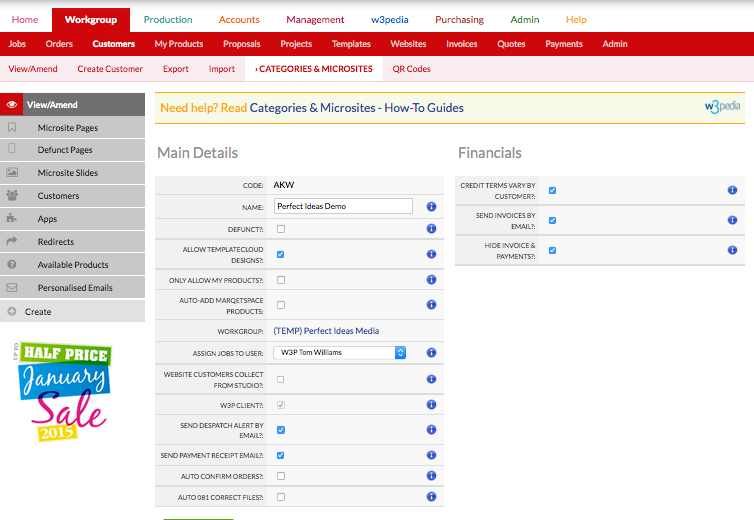
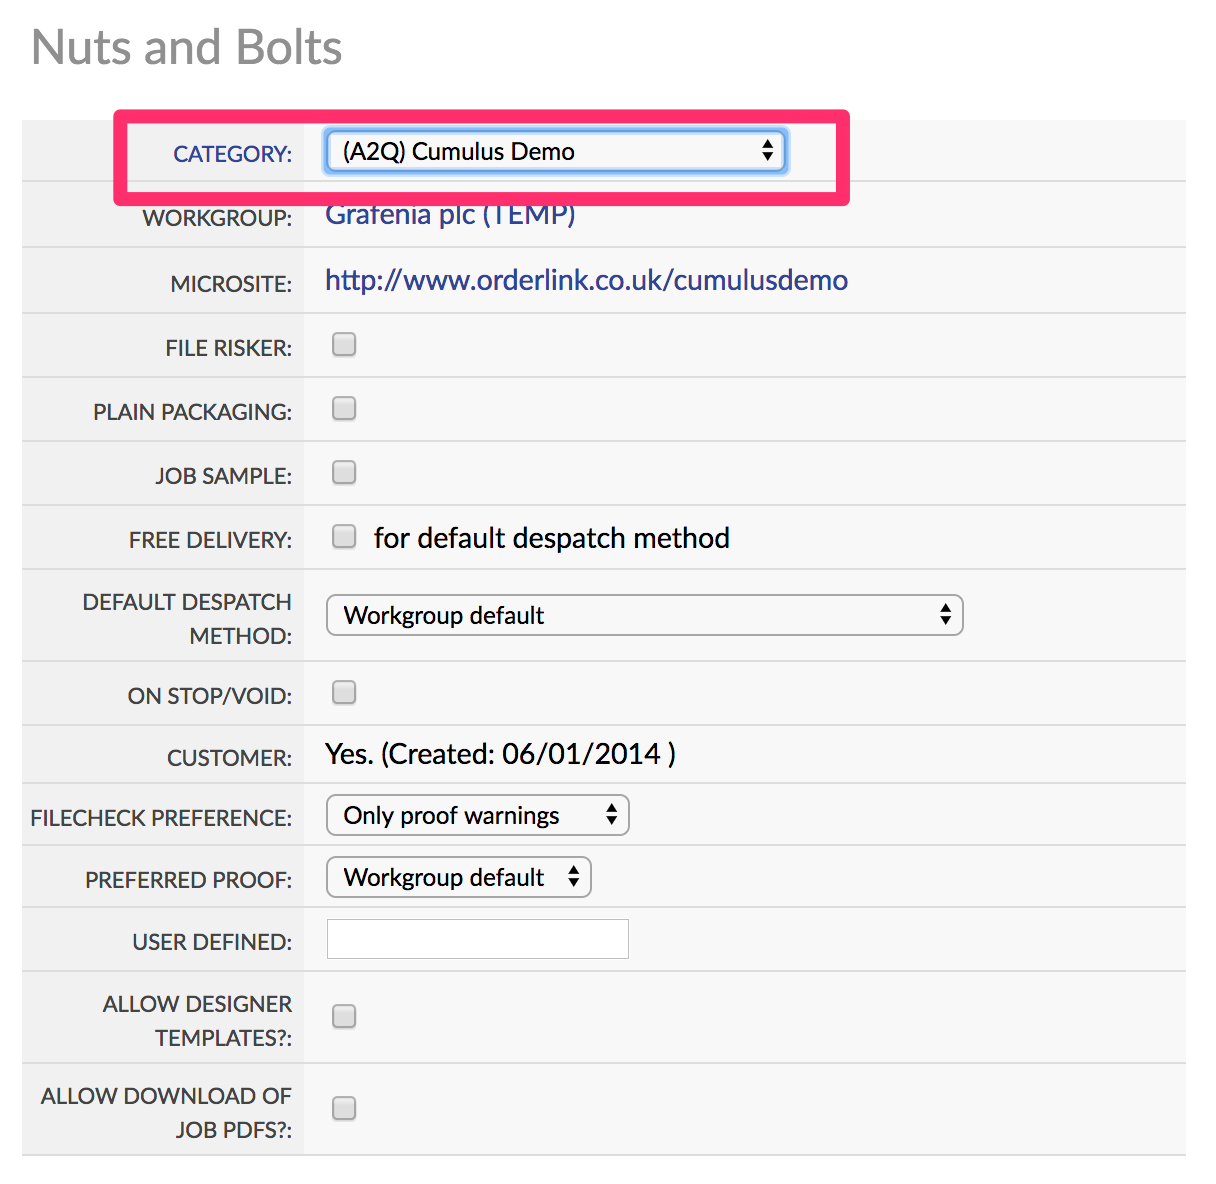
All Flyerlink Workgroups are set up with a Default Microsite that all customers are assigned to when first created found under
You can move customers to different Categories/Microsites using the dropdown menu under Nuts & Bolts.
1. Select your w3shop Category
2. Under Microsite Style, edit your Theme, Fonts, Colours and upload a personalised website header image.
3. Add common web pages to your w3shop website.
4. Add Google Analytics, Meta Data and Descriptions to each page to help Google to find you.
5. Build your own products to sell online.
6. Cherry pick products you wish to sell from the Marqetspace product range.
7. Add a Payment Gateway to accept online payments.
8. Link your Domain Name to your w3shop website.
This articles explains how you can quickly remove templates or products from your w3shop/microsite.
On your microsite, you can use the Available Products filter to choose exactly what products you want to show. But there's another way you can restrict the TemplateCloud Designs or Products on sale for your w3shop.
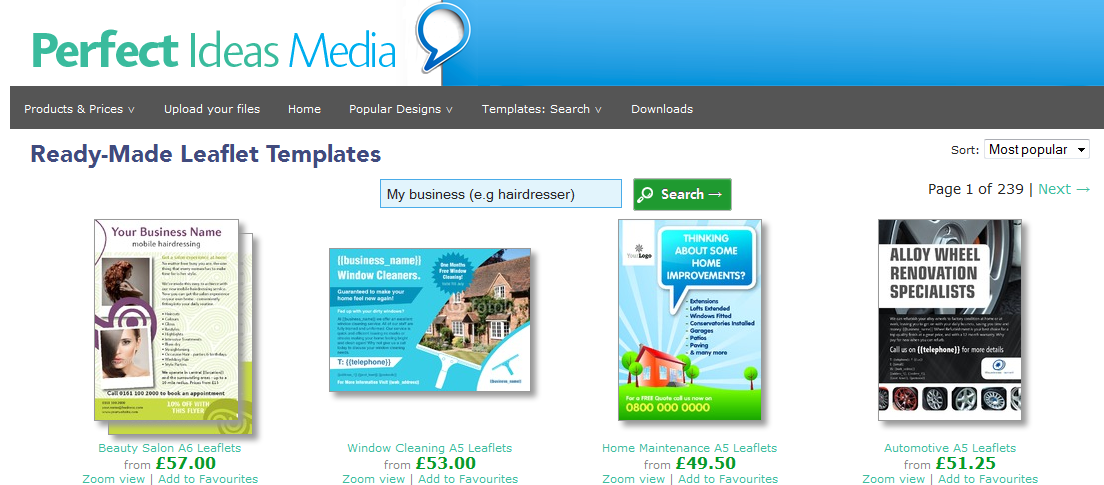
All w3shops can list the TemplateCloud Design library, they just need to have "Allow TemplateCloud Designs?:" ticked on .

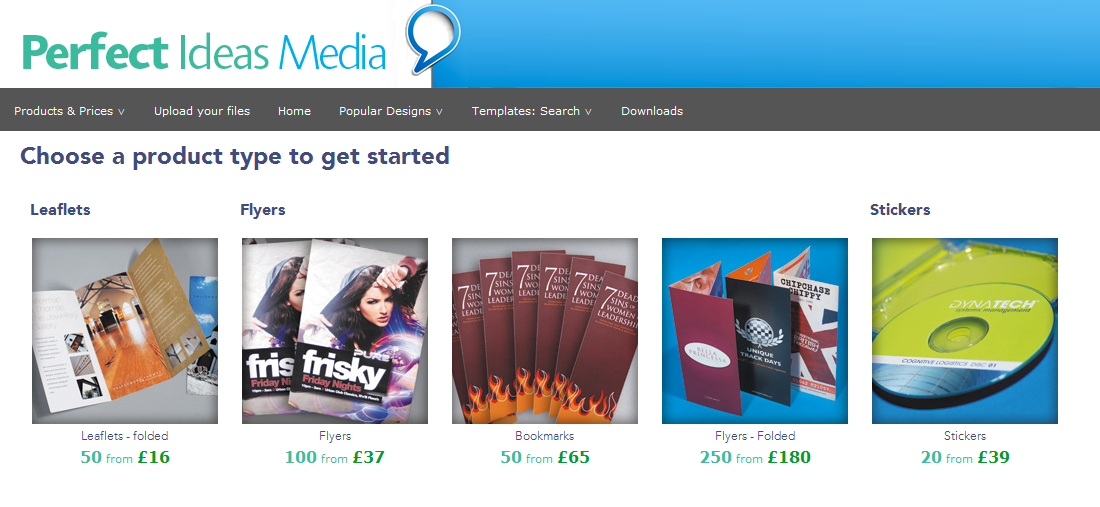
Then your Template Search page type will list all TemplateCloud Designs with a Matching Product.

If you only see a limited selection of TemplateCloud Designs, it's likely the Templates are the only ones that match products available in your Product Search page.


If you untick "Allow TemplateCloud Designs?:", the only templates you'll find are those set up for TemplateCloud Match.
If you want to completely remove all products made from the Production Hub, Network Partners or Marqetspace Sellers, simply tick "Only allow my templates and my products?" on .

Your Available Products filter will then only list the products you've created on .

And your w3shop or microsite will only list the products you've created as well.

Flyerlink comes inbuilt with credit controls you can set against customers or microsites.
If you want to set up a credit limit for your customer
Head to
In the Financials section, change the payment terms from CASH to another option.
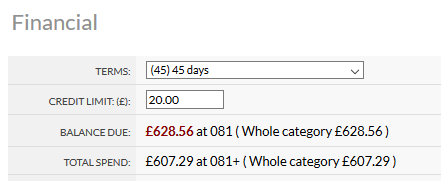
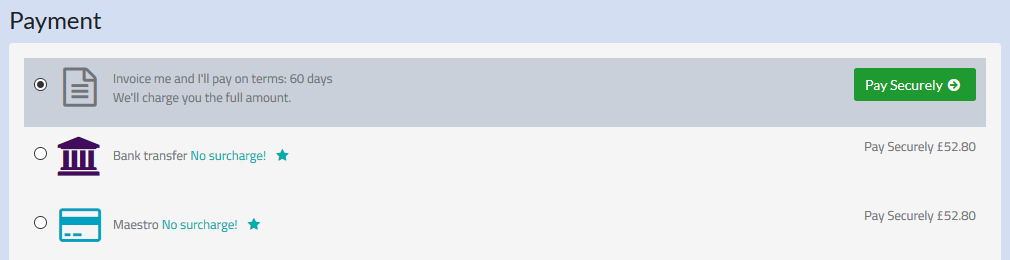
This payment term will be applied to all customer invoices, and will also show an offline payment option on the checkout payment page when they order online.
Once you choose a non-cash payment term, you are able to enter a credit limit.
When that credit limit is exceeded, we apply a job control to all jobs created in Flyerlink or ordered online that exceed the credit limit you've set.
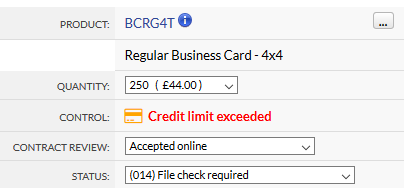
We also email your client explaining the credit limit has been exceeded and payment will be required to progress the job.
We also email the client and apply the credit limit exceeded job control if they exceed credit terms (by ordering with overdue invoices that require payment). As soon as the overdue invoices are paid online, we release the jobs they've just ordered allowing them into production.
You can see if the customer has outstanding invoices requiring payment by going to
You can also add credit limits to your microsites
Choosing the payment terms here will apply to your invoices, but you can set a limit you expect to be spent per customer or category.
If you can't set a limit on an individual customer, you'll need to tick "Credit limits vary by franchisee/licensee/department" on

The automated applying of job controls doesn't happen if your controling credit by microsite.
Offering credit to customers is a risk, as you can incur costs for the order and fail to recoup payment. It is also useful for winning large contracts.
Check out our advice on the Payment Directive to see if you should offer credit to your clients.
There are two payment controls you can add to your jobs via
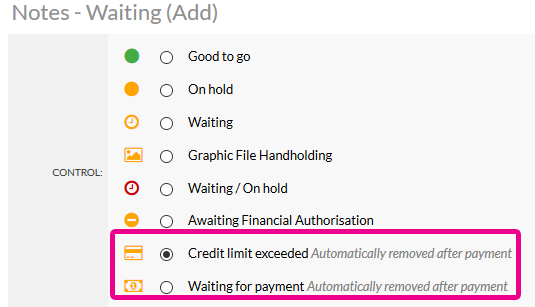
Choosing these opens up an email template to your customer, that you can edit.
After these controls are applied, if your customer pays for the job we will automatically remove the control and send an email to you saying the control has been removed and the job can be progressed.
With the V3 responsive version of w3client microsites and w3shop categories, you don't have to use all the apps or menus.

You can choose which apps are available to all customers for your microsite or w3shop, and even vary the apps for individual customers.
To change apps for all your customers head to
.
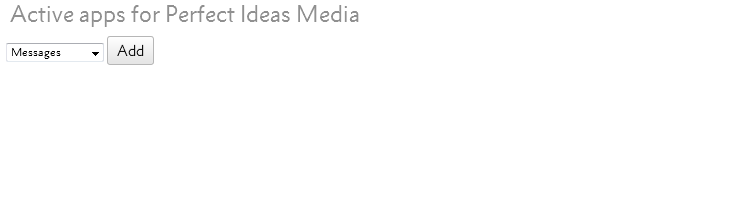
By default you'll see no apps, this just means you want all of them to show.
If you want all apps apart from the Files & Images app, simply add the ones you want and don't add the Files & Images app.
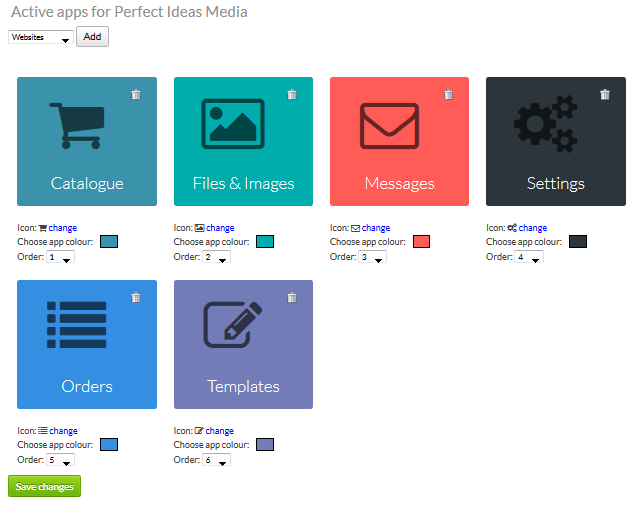
Then when your customers log into their microsite, they'll only see the apps you've chosen.
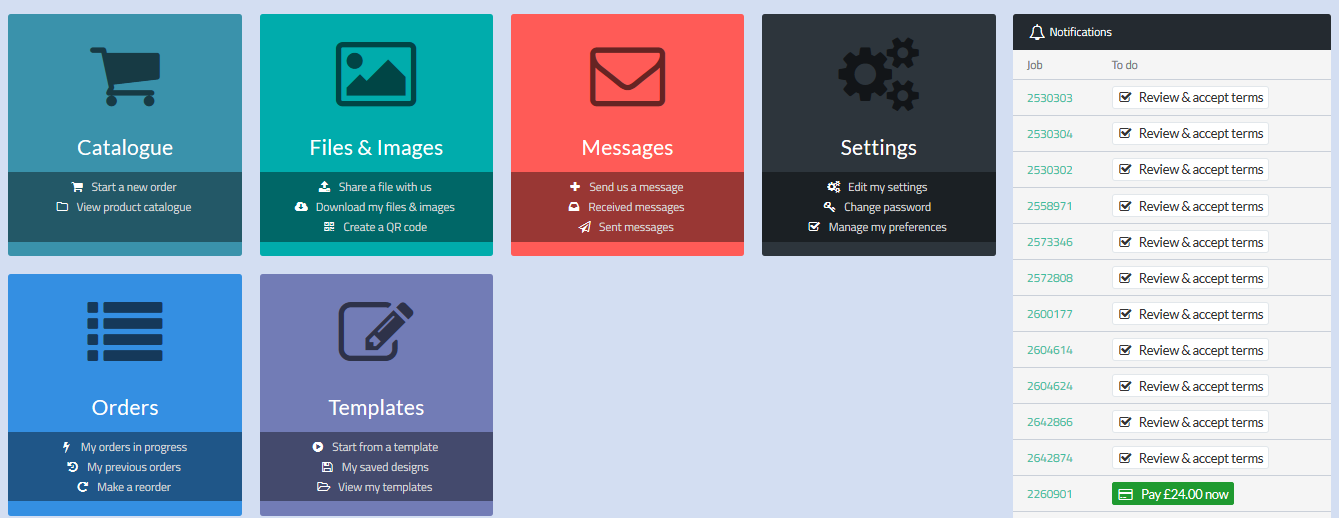
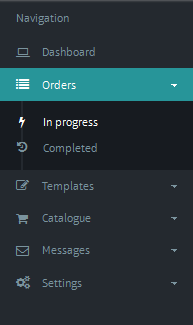
They also won't see any menu links to their missing apps
You can also choose different apps for individual customers from
.
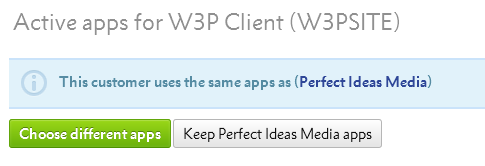
To start off with all your customers will have the same apps as your category. If you want different apps, press Choose different apps.
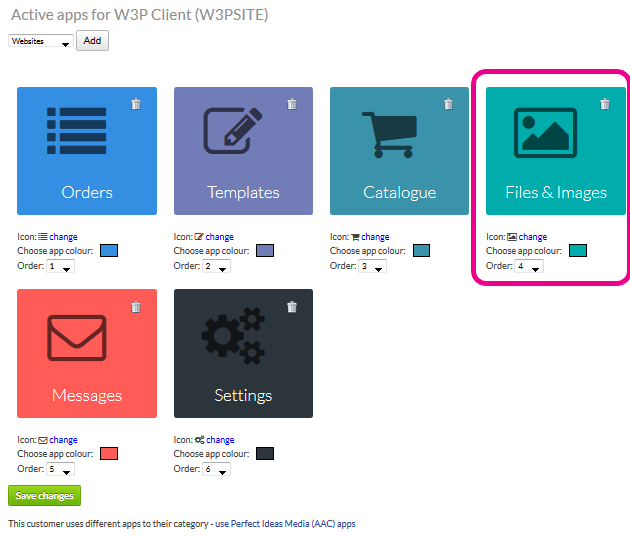
Then you can adjust the apps and add or remove some for just this customer. In this example, 1 customer can have access to the Files & Images app, while all others in the category don't.
If you need that customer to go back to the categories app, you can change them back anytime.
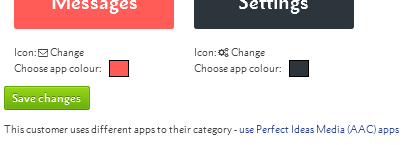
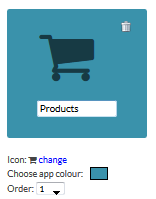
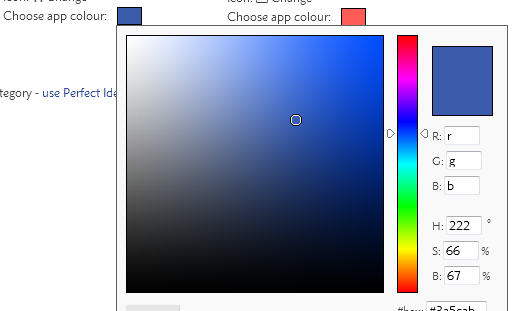
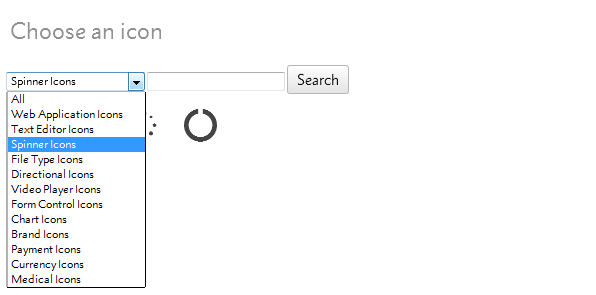
For each app you can change the:
With custom apps you are able to add links to any web page you want. For example, your client may want the microsite to link to some training resources or how-to videos.
The app can link to either an external web page, like a clients own intranet system, or you can use an iframe to show the content within your microsite area.
To add a custom app, choose the Custom App option via or
You'll see new options to add a url, choose the url behaviour or show in an iframe.
.png)
Change the colour and icon, and enter the url of the web page you want to show.
Your new app will then show in your dashboard, and as a menu option.
.png)
If you choose to show the webpage in an iframe, we will load the website within your microsite.
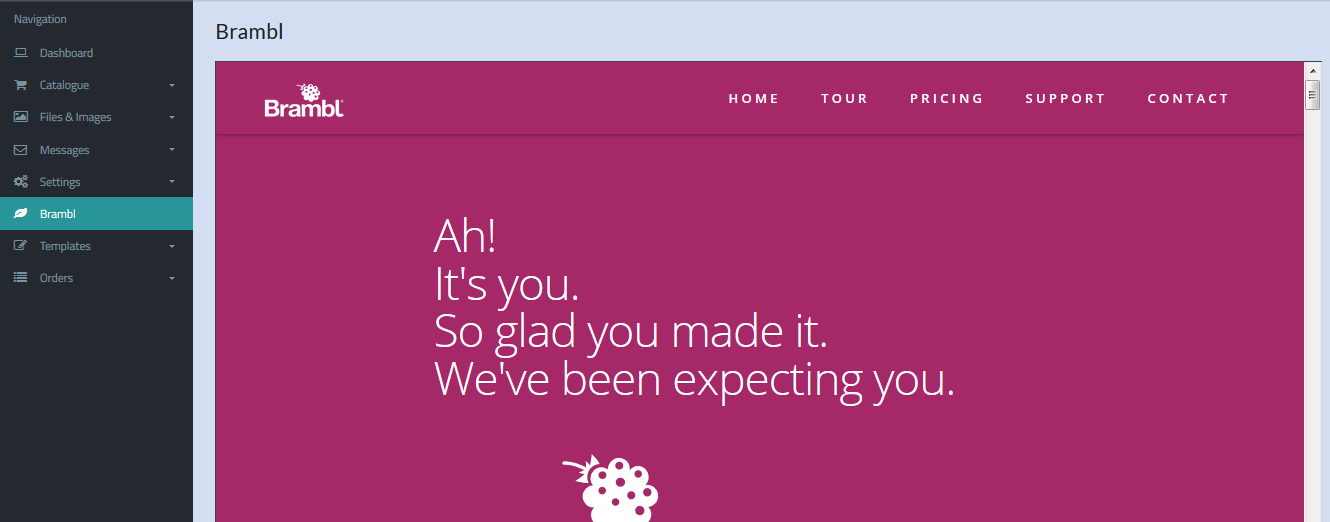
If you'd like to build a web pages quickly and easily to work with your custom apps, ask your support team about upgrading to build websites and webpages with Brambl.
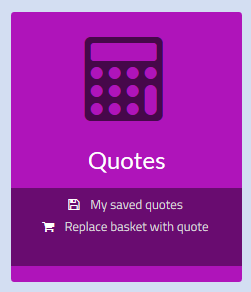
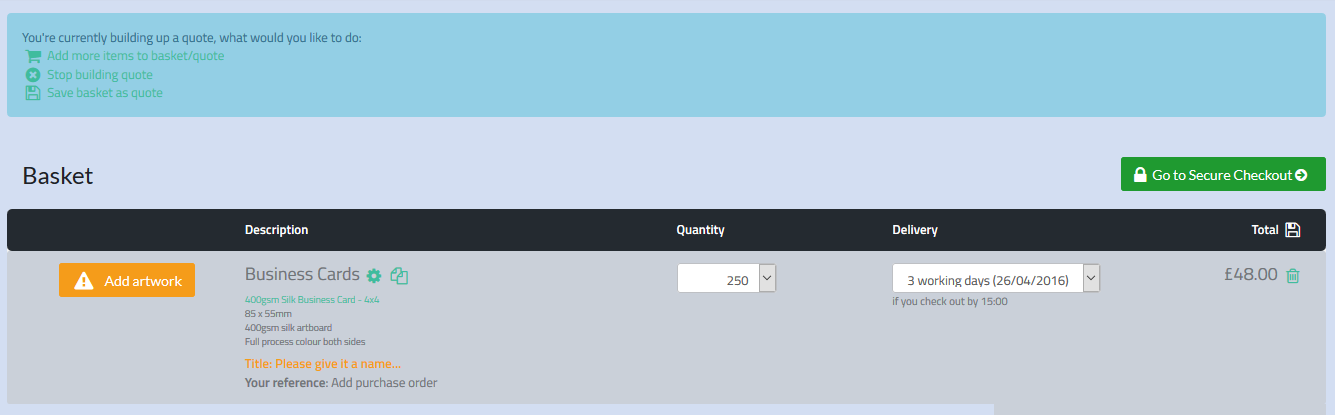
The quotes app allows customer to save multiple different baskets and to swap their basket with an older quote.
It can be used by customers to build up different orders, and leave a quote saved for later if a more immediate requirement for print comes up.
The quotes app appears by default on V3 responsive microsites, and can be removed by choosing other explicit apps - see Microsite Apps - Choosing your menus for more info. If you turn off the quotes app for a customer or category, you won't see a save icon in the basket.
Please note: Basket quotes are not related to the quotes menu in Flyerlink.
The quotes menu in Flyerlink lets Flyerlink users build a quote to check prices and send out a PDF to the client.
Basket quotes allows your customer to save baskets as quotes for later use.
Customers can see a link to all their quotes once they log in and go to their dashboard
The page will show a list of all baskets they've saved
To save a quote, simply head to the basket and press a new save icon.

You will then be redirected back to the quote page where you can see an overview of your quotes
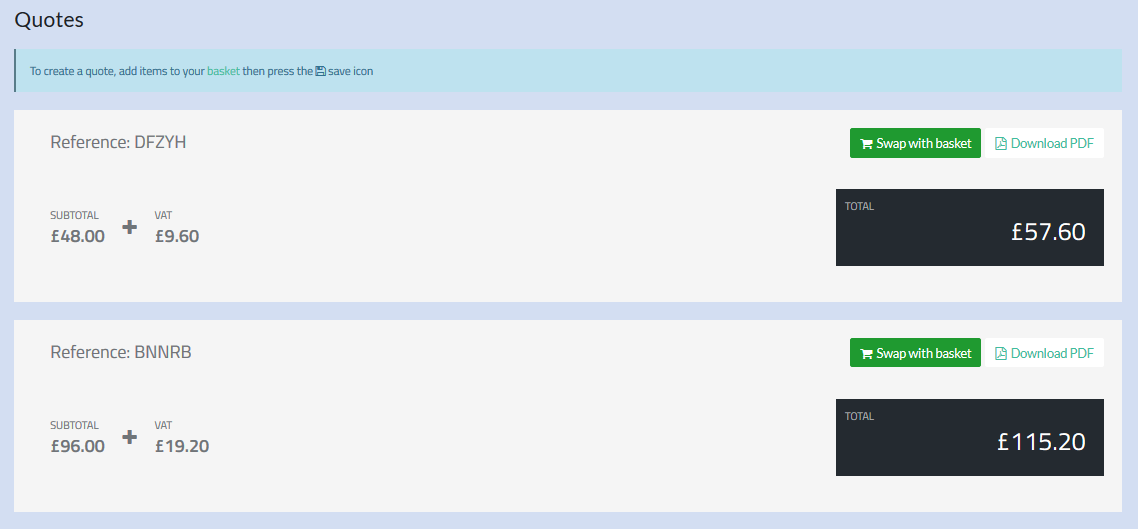
Expand an item to see more details

The quote is active and can be added to within Flyerlink.
Press swap with basket to exchange the existing basket with this quote.
If a client knows they want to build a quote and get prices without having to upload artwork immediately, you can direct them to their quote app.

Here they'll see a note that has a helpful "Start now" link.
When that is pressed, instead of redirecting clients to the artwork options when they add an item to their basket, we will instead direct them straight to the basket.
On the basket we highlight the next steps someone can take. Whether they should keep adding items to their basket, stop quoting or save the quote.
This article explains how to adjust products and prices within your w3shop or private client microsites.
For each Category with an associated microsite, you'll see a menu option . This option will not appear for printing.com studios.
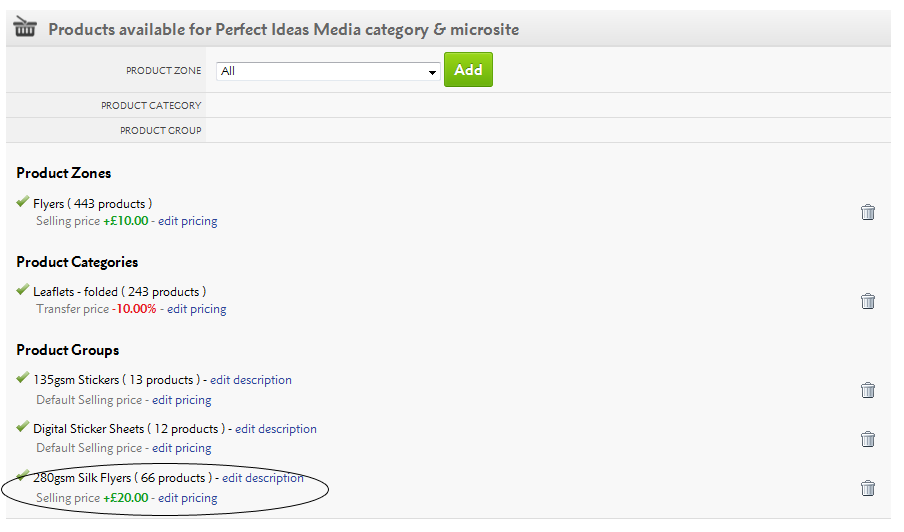
By default all products are available.
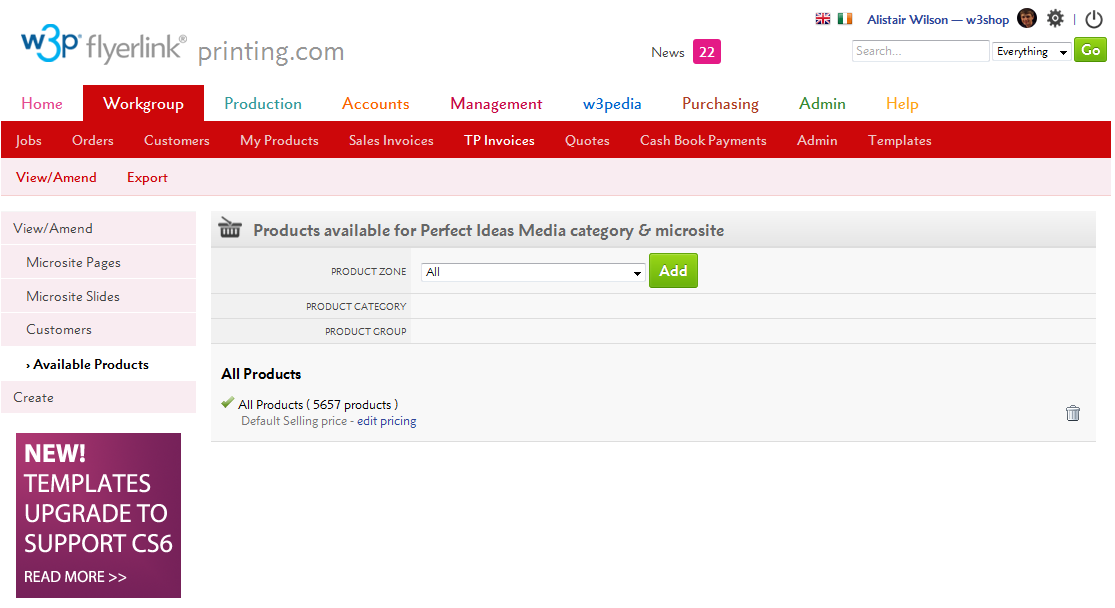
To restrict the product selection:
If you choose a Product Zone, you will list ALL products within that zone. If you restrict the product selection, you'll also need to re-add all the Opensource Products you've set up.
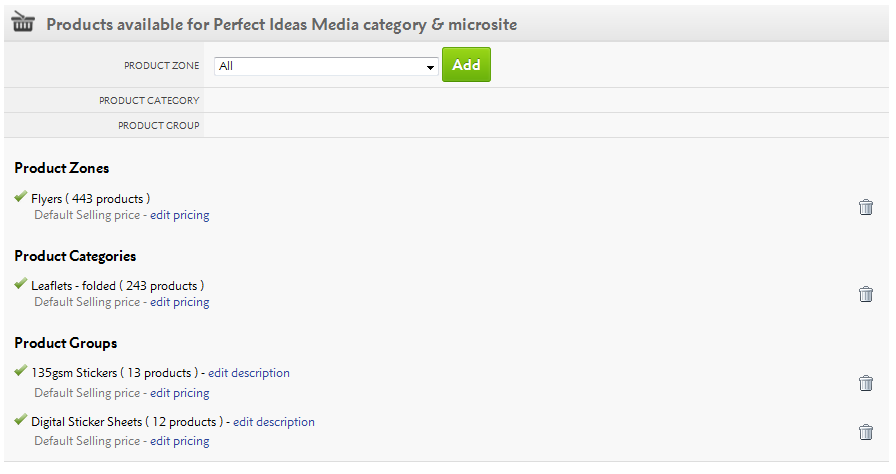
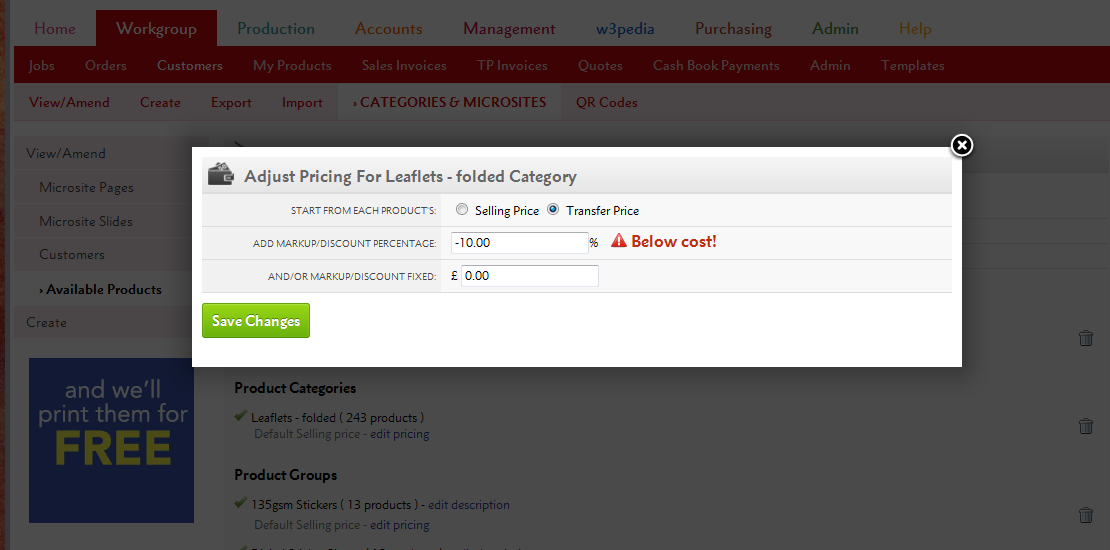
By clicking the "edit pricing" link, a pop-up will appear and you'll be able to adjust the prices for that Product Zone, Product Category or Product Group.
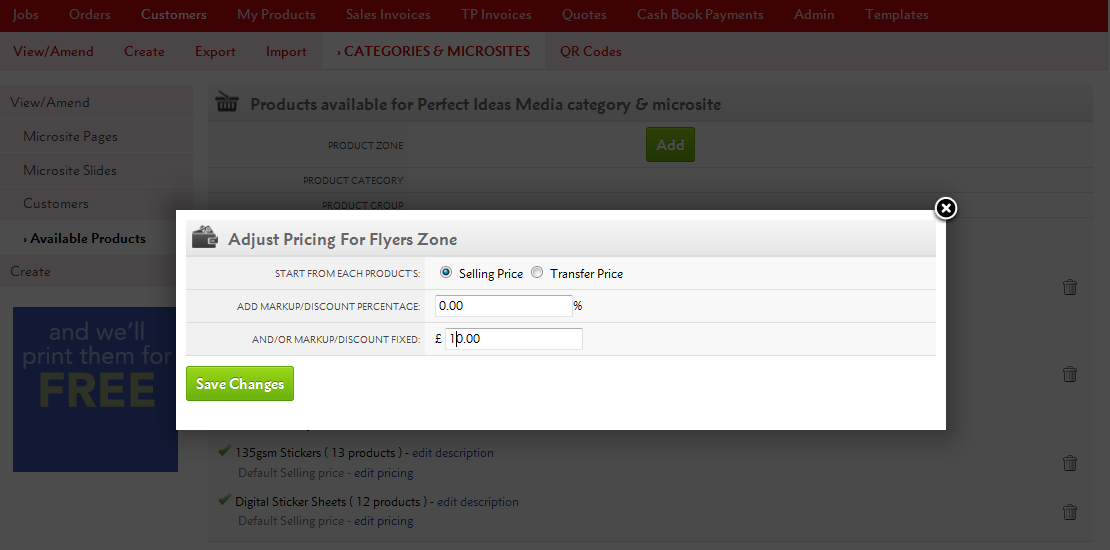
From here, you can either:
a) Make changes to the fixed price or a percentage of the total product Selling Price (RRP), or
b) You can do the same based on the Transfer Price, which is how much you will be charged for the product.
Remember, any negative discounts (based on Transfer Price) mean that you'll be selling products for less than your cost price.
Price changes for Product Groups or Product Categories override those within the Product Zone. So you can increase all Flyers by, say £10, then choose one Product Group to increase by £20.
Add 100% Markup => 50% Gross Profit Margin
Add 66.66% Markup => 40% Gross Profit Margin
Add 42.86% Markup => 30% Gross Profit Margin
Add 25% Markup => 20% Gross Profit Margin
Add 11.11% Markup => 10% Gross Profit Margin
For Product Groups only, you can also change the descriptions your customers see.
Simply click the "edit description" link.
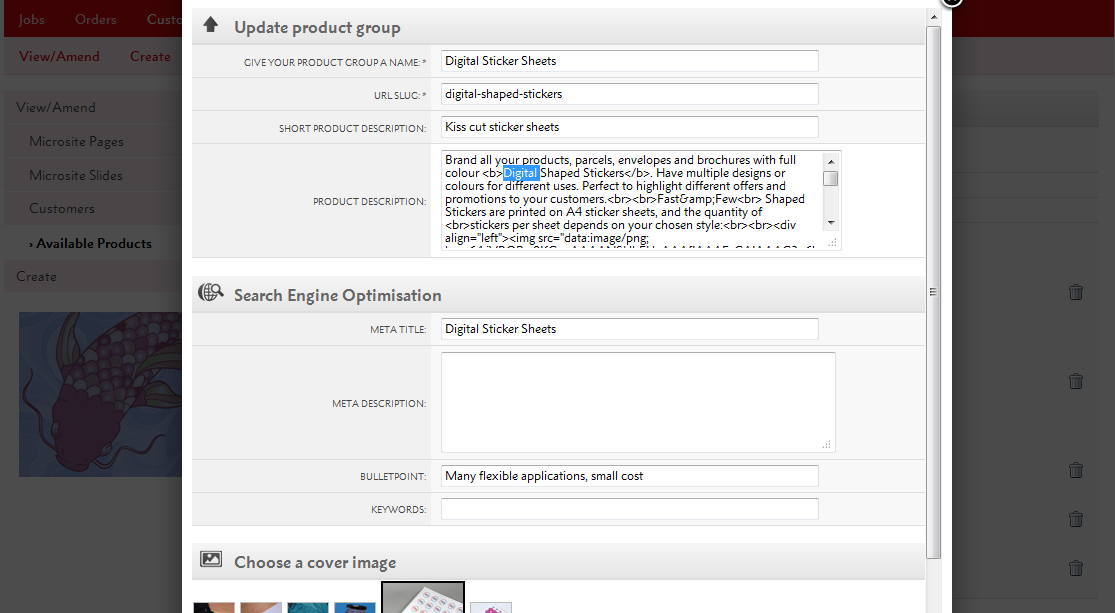
Starting from your supplier's marketing, you'll be able to adjust the Product Group name, url-slug, description and Search Engine Optimisation settings to fit your branding.
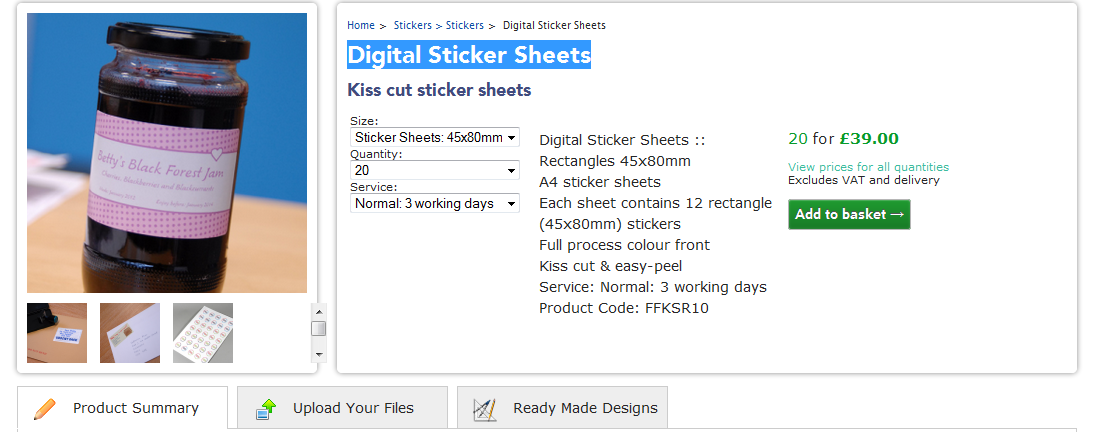
Any changes to the text will appear on your microsite.
Your price changes and product restrictions apply across Flyerlink and your microsite.
In Flyerlink, any customers belonging to the microsite will only be able to create jobs for products available to them e.g if you've removed Business Cards, your client won't be able to order them.
On your microsite, only the Product Groups you've selected will show online and any price changes will appear across the entire site.
You will also only see online Templates compatible with the product range(s) you've made available.
Price & description changes can take an hour before they are fully updated on your site.
Templates will update every day but you may have to wait for all the incompatible templates to disappear.
Please refer to Resource Article 4982 for any questions on update speed.
Redirections are URLs that link to another webpage. They are commonly used to help users find webpages, or to replace pages that are now redundant.
You can set up redirections through Flyerlink, using a Short url.
This guide explains how to set up redirections for your w3shop
There are two ways of adding Redirections for your w3shop:
Use permanent redirects to replace now discontinued pages with a more relavent page.
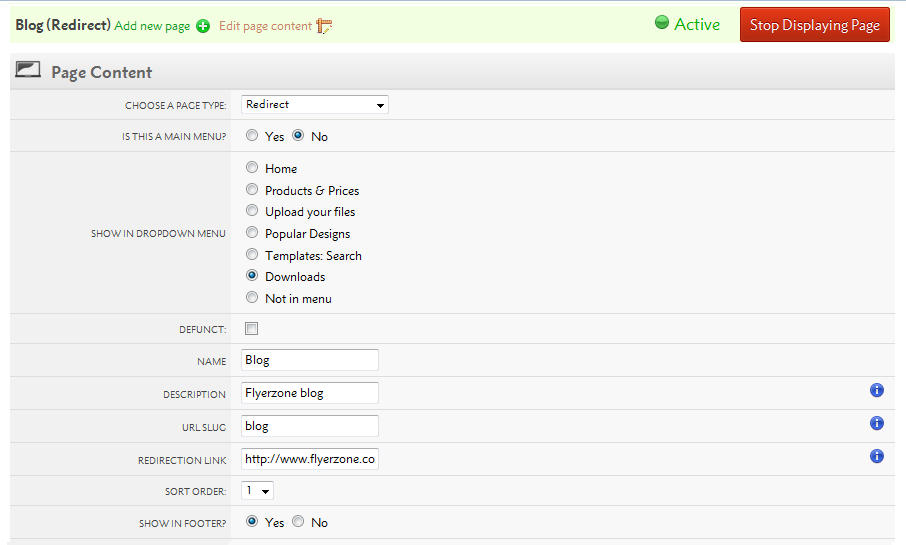
Use the redirection page type to add menus links to Internal pagesor External websites.
You can now view existing and add new permanent redirections for your whole microsite via .
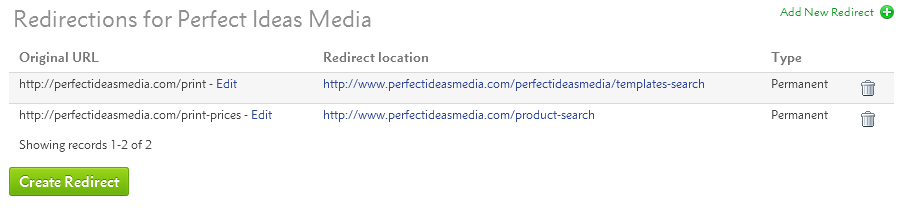
To create a new one, simply press Create Redirect

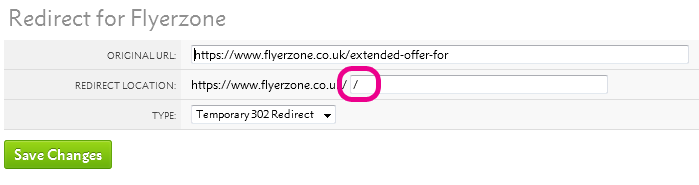
Add your old redundant url page in the Original URL, then enter the page you'd like it to redirect to in the Redirect Location.
You'll be able to add any link into the Original URL that includes your w3shop main domain or aliased domains.
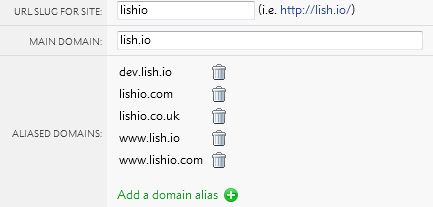
To try out the redirect, enter the old url to your browser and check it goes where you want.
To prevent permanent redirect loops on your homepage, a url slug is required for your redirection location.
If your homepage has no url-slug, you can simply add "/"
Some w3shop pages like Product Group pages are automatically generated, and you don't need to make a new page type for each one.
However, if you'd like to make a header or footer link you can do so using the Redirection page type.

If there is a website you really like, or if part of your w3shop is hosted by another web provider. You can use redirection links to external sites.
The set up is the same, but your URL should be an external webpage.
Search engines prefer 301 redirections to 302 redirections, however we default to 302 redirections.
The difference is that 302 redirections are easier to change.
301 redirections are cached in a browser memory, if you need to change one of these redirections you will need to refresh the browser cache of everyone who's used the link.
While this is good when you know a page will never change, you may want to use 302 while testing to ensure they are correct before making it harder to undo a mistake.
One of the advantages of w3shops is that they come pre-built with TemplateCloud and products from Grafenia's production HubM. The Grafenia product range already have hundreds of product images to advertise the print range.
It is possible to change the Granfenia product RRP for your shop using the available products filter. And it is also possible to change the Grafenia product images using the Product Images tool.
Use the Product Images tool to change Grafenia product images.
Head to
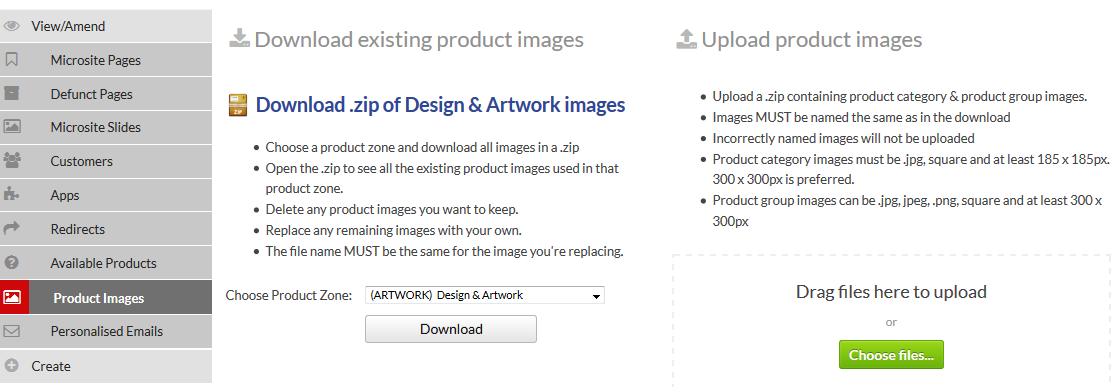
Here you can download the existing product images you have on your site. Choose the product zone you want to download images for.
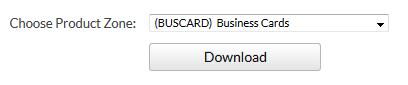
You'll be given a .zip of the product category images, which appear in the upload your files page type.

And the .zip will also contain all product group images you see on the product search pages.
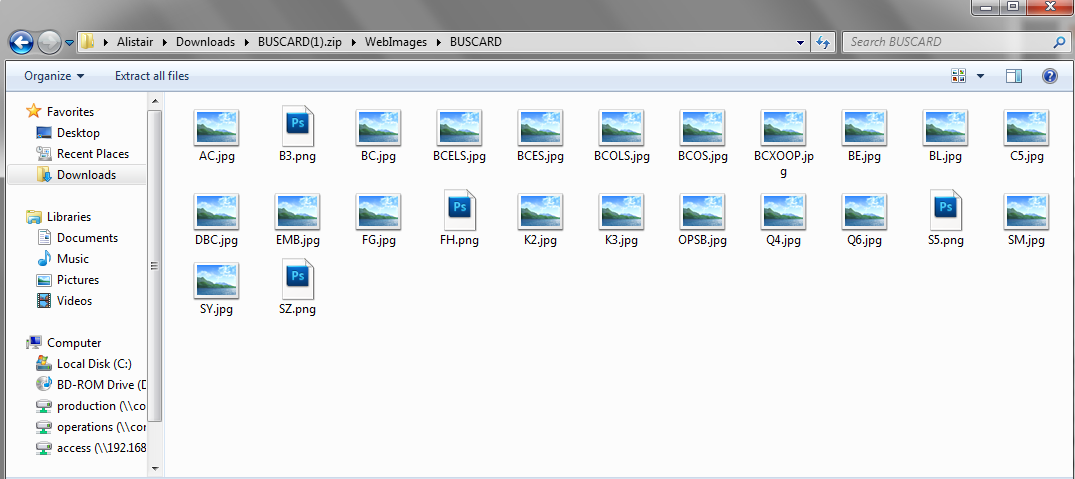
Delete any images you don't need to update.
Then replace the images with your new ones.
You'll need to keep the file name the same, the file name has a special code that helps us know which image is being replaced. For example you'll need a BUSCARD.png or BUSCARD.jpg file to replace the business card product category image.
If you upload a file that hasn't got one of our special file names, we'll reject it as we don't know which image it's designed to replace.
Once you've adjusted the files, you can .zip up the file again and upload it.
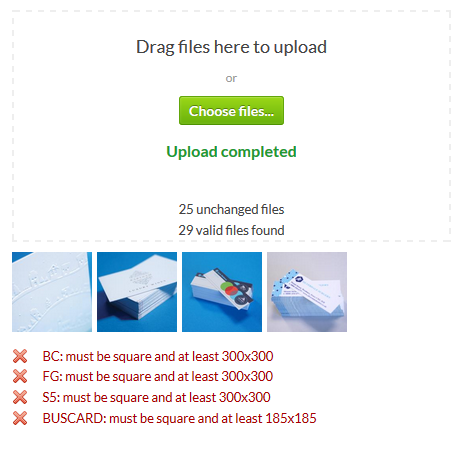
We'll show you if there are any issues we have uploading the files, alongside an image of any files we actually replace.
Product category images show on the upload your files page, which have an hour long cache to improve the page load time.
As a result of this cache, any product category images could take upto an hour before they take affect.
For opensource products, you don't need to use the Product Images tool to replace your product group image.
Simply upload an image for the product you create on
If you've more than 1 product image for a product group, you can choose the cover photo for your product group on
This article explains how to personalise emails sent to your customers and studios from w3p sites.
w3shops and w3client microsites send a number of emails to customers and your sales team when orders are placed, passwords are changed or important activities are undertaken.
You are able to personalise these emails and adjust the text to suit your brand.
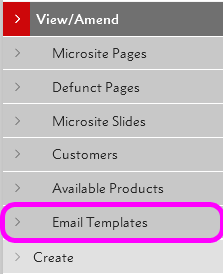
Go to .
Either search for an email template you've already personalised, or Add a new one:

Once you've chosen an email to edit, you'll be given a default email.
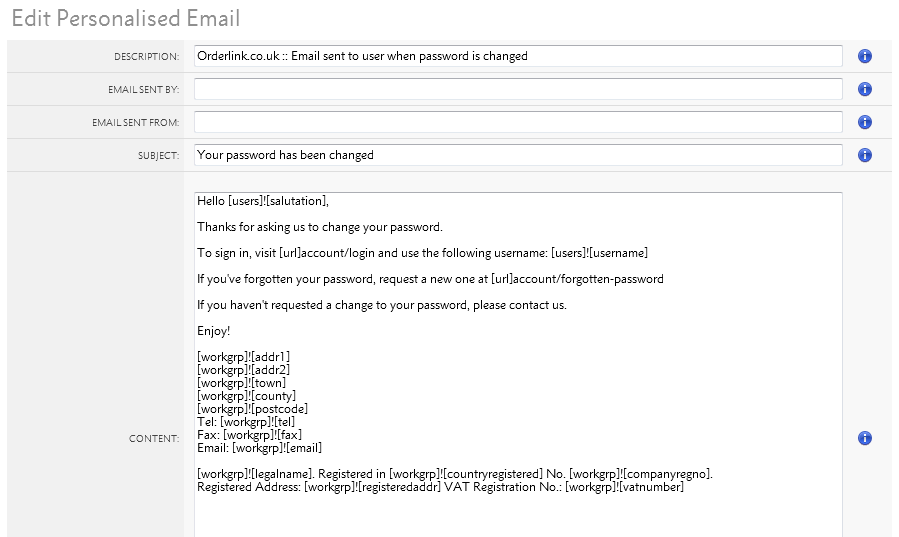
You'll be able to change the description for internal reference of what the email does.
You'll also be able to choose who the email is sent by and which email address it is sent from. If this is blank, a sensible email from your workgroup is chosen.
Then you can change the email's subject line, which is visible to customers, and the email content.
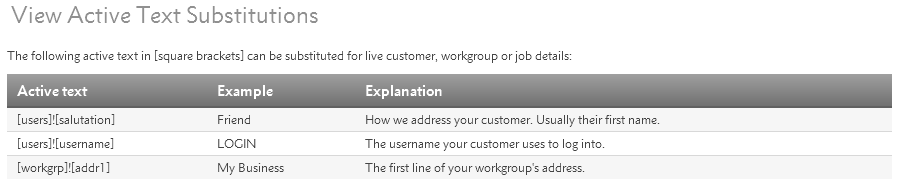
The default emails make extensive use of Active Text Substitutions. These are [square]![brackets] that retrieve information about your customer, their order or your workgroup.
We recommend you continue to use Active Text Substitutions.
Below your email, there'll be an explanation of what information the Text Substitutions retrieve is given.
You'll be able to use these Active Text Substitutions anywhere in your email, or you can replace the workgroup information with your own signiture.
Once you've finished personalising your emails, you can send a sample to yourself.
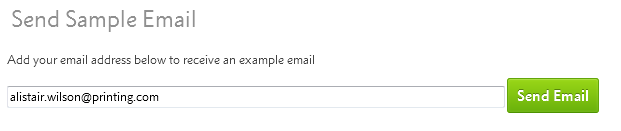
The Sample Email will retrieve your Active Text Substution's example, not a live order. It will make more sense to your customers than to yourself.
When you've finished editing, simply save your changes.
You can also revert to the default email template if you've made a mistake, or you can delete the personalised email and stick to the one created on your behalf.

There are some other emails sent out by flyerlink, mostly workgroup notifications, that cannot be personalised. However, you will be able to personalise all the main emails sent out under your branding.
You will be able to personalise the following types of emails:
All the emails available for personalisation can be found via .
A quick guide to creating Products and Product Groups.
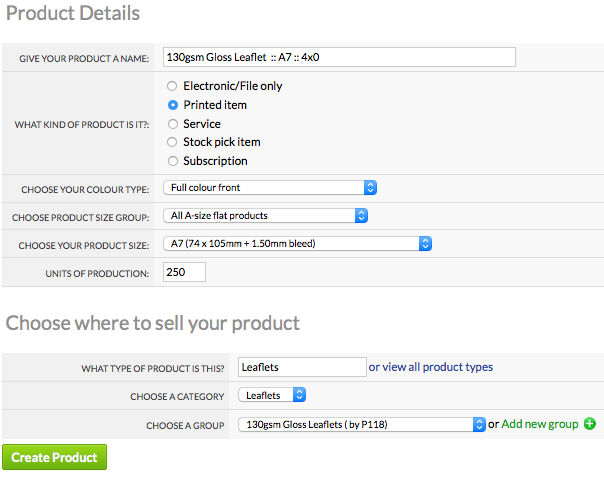
To create a New Product go to . Then enter your Product Details.
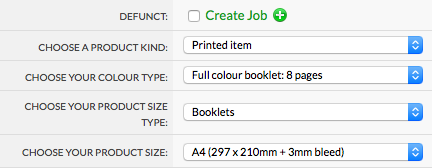
You'll need to give it a name, choose your product kind (see below), size and colour type.
Sizes are broken down into groups, with all A sizes like A4 and A5 in a group of all A-size flat products. If you can't find the right size for you, choose other sizes then custom size to enter your own size. You can also allow customers to choose their own size using an any size product.
The colour choice decides how many pages are available for the file and what colours should be expected, more details on colours can be found here.
Product Groups group together similar products, such as A4, A5 and A6 130gsm Gloss Leaflets.
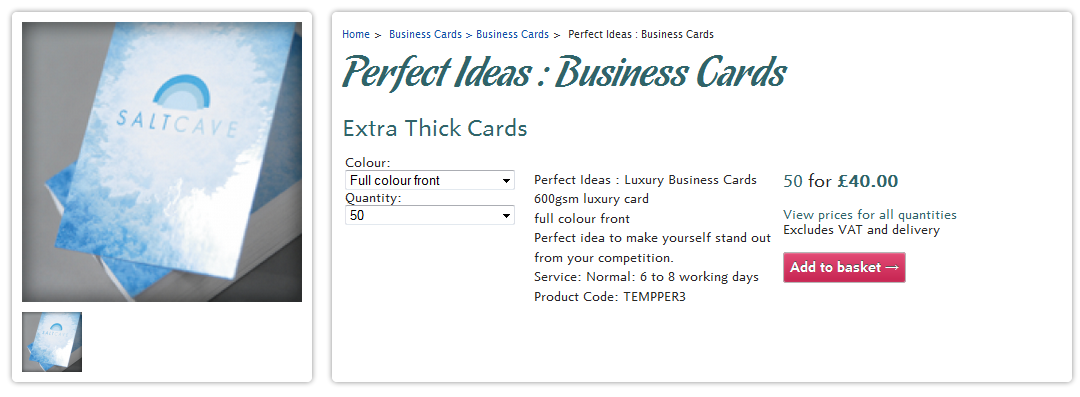
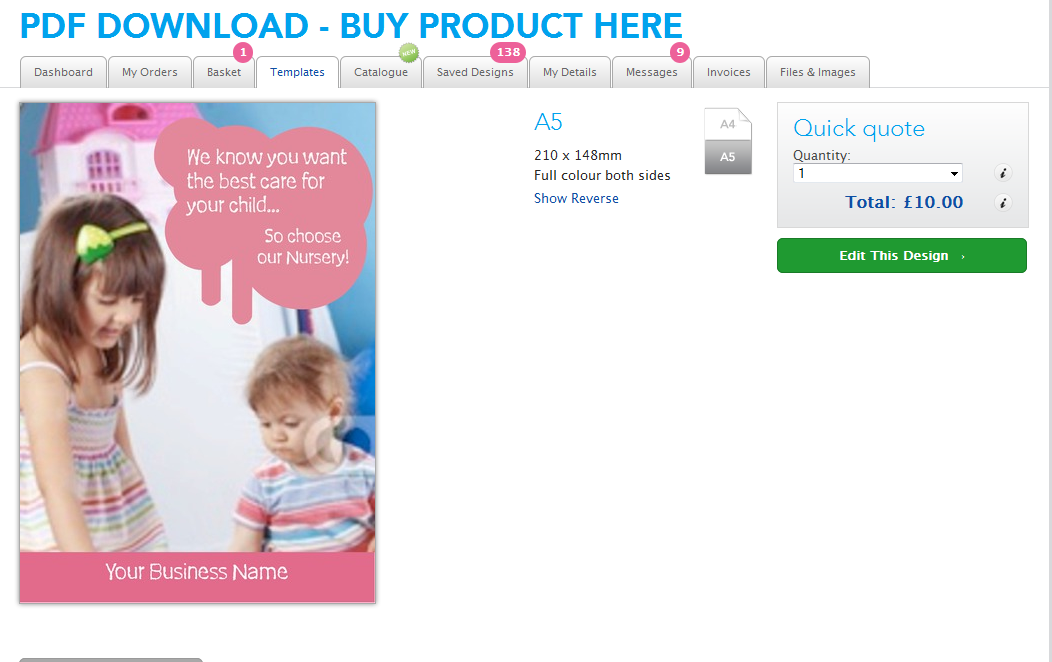
This is an example of a Business card Product Group:
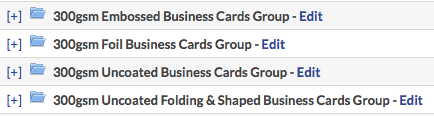
We recommend naming the products within a group consistently to help both you and your customers.
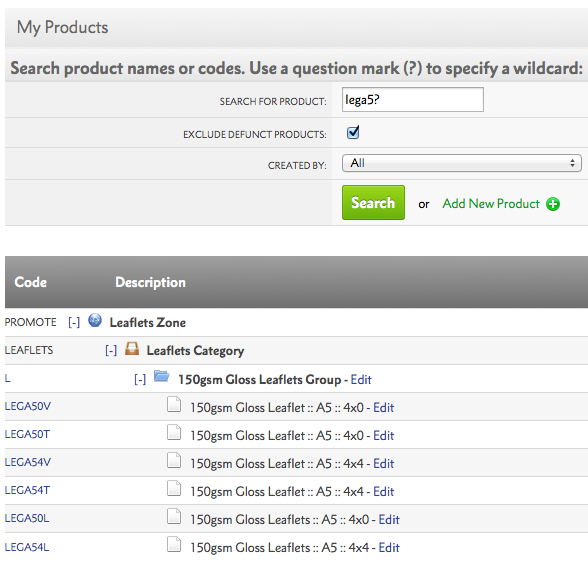
This example is of a list of Products contained within a Leaflet Product Group (Notice Products are listed by Size and Colour Type):
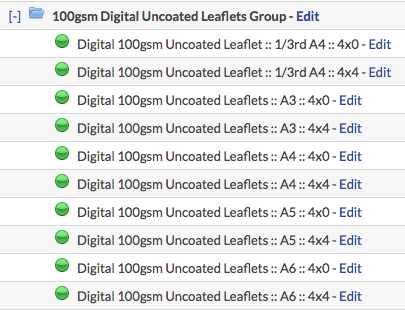
The quickest way to create your products is to create a single sided product first using the Full Colour Front Colour Type, then select Duplicate Product under Sorting & searching to create a double sided version (Identified by 4x4 in the above example).
Use Duplicate for all additional sizes and adjust your prices accordingly.
Remember to also change the Product Name, Colour Type and Product Size (under Technical Specification) for each new product you create/duplicate.
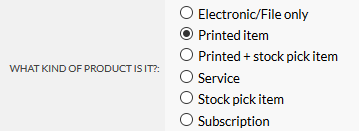
Each product you create has a product kind.
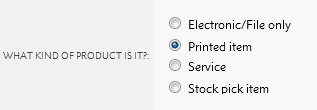
You have 5 types to choose from each with different features.
| Product Kind | Explanation |
| Printed item |
The product makes a physical printed good. |
| Electronic file | The product makes an electronic item, like a press advert or graphic design. Doesn't make a physical item, but requires a graphic file. |
| Stock pick item | The product has been pre-produced, for you to pick and pack to your customers. Physical item that doesn't need a graphic file. Uses the Stock Manager to control stock levels. |
| Service | The product is a service, like consultancy or training. It's not a physical item and doesn't require a graphic file. Can be used for Flyerlink's invoicing and TimeTracking features. |
Product Group pages display products by Size and Colour Type.
If two Products share the same Size and Colour Type, Leaflets and Flyers for example. Product tags must be used to display them correctly online.
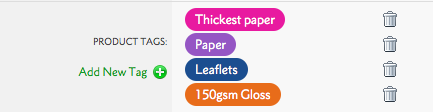
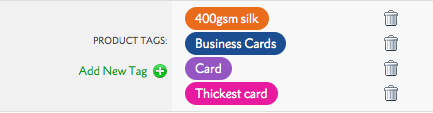
You can view your Products Tags here:
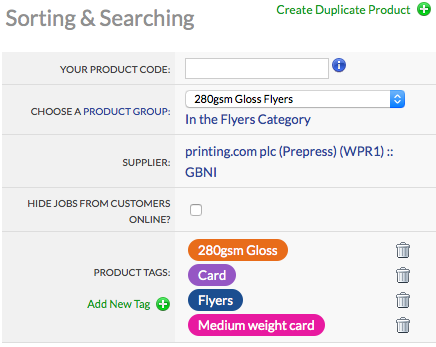
Product Tag Order:
Your product will not show online if the purple Substrate Tag is missing.
Each tag takes the customer down a different route to find the product they are after and should be unique.
Click here to view this page live.
A5 Leaflet Products Tags
Substrate > Substrate Weight > Product Style
Paper > Thickest Paper > 150gsm Gloss
Paper > Thickest Paper > 170gsm Silk
A5 Flyer Products Tags
Substrate > Substrate Weight > Product Style
Card > Medium Weight Card > 280gsm Gloss
Card > Medium Weight Card > 280gsm Silk
When creating a Product you are asked to set customer permissions to ensure the correct people can see your product.
3 options are provided:

Only the Customer Account Codes you add to the list can see this Product.
Set your Customer permissions to Workgroup and use the Availbale Products Filter under Categories & Microsites to make specific products available to all customers in your selected category.
This option makes your products available to every Customer, Category & Microsite in your Workgroup.
Use the Available Products Filter on the Category & Microsite page to make specific products available to customer in this your Category/Microsite.
Once completed ensure you select the green ‘Make Product Active’ button, products that say ‘building' next to the product name and product code are not active.
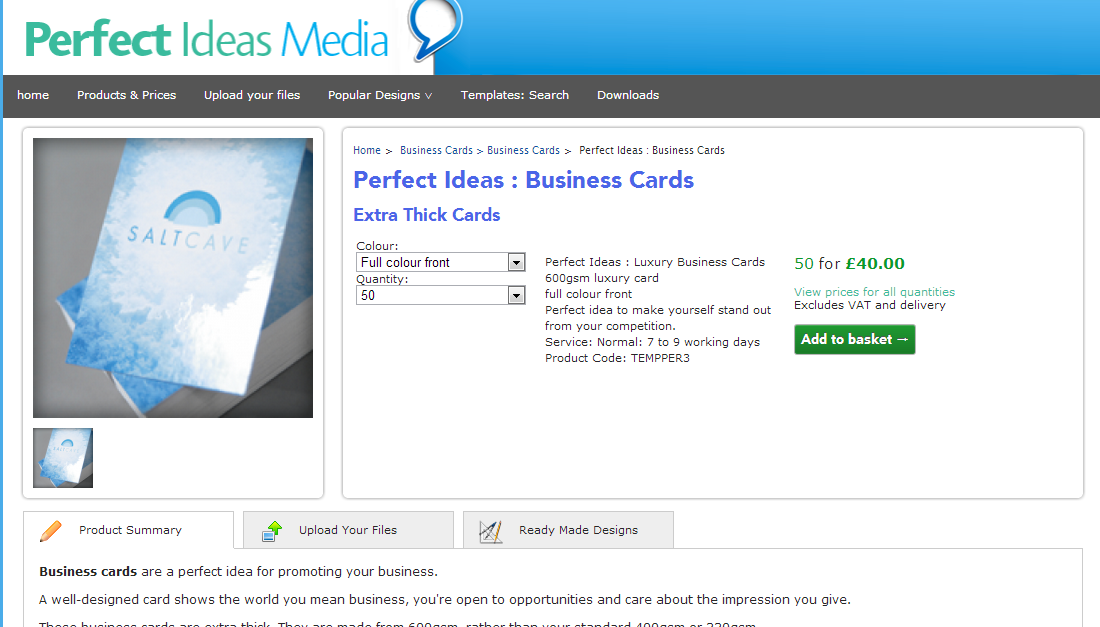
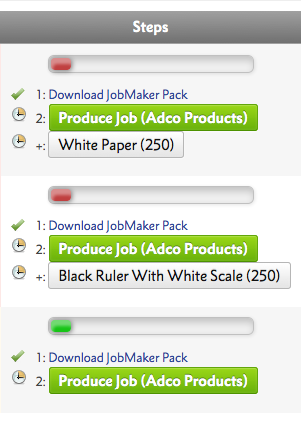
This screenshot gives you a sense of how these products appear under once completed.
There's an online tutorial video under Online Training > Production here, which gives you an overview of this process.
Below is a training video cover creating products InHouse using w3p.
Use this guide in conjunction with the Flyerlink User Guide on w3pedia - Creating Products, page 87.
Follow this guide to ensure your products are set up correctly:
Choose the correct Product Size for your product and pay careful attention to the bleed required.
Use the correct Colour Type for your Product
Don't forget to add Product Tags so that your product shows in the correct places online (Quick Quote/Template Details Page)
Use the correct Customer Permissions for w3shop, w3client and BrandDemand.
Make your products available online using the Available Products filter under .
This article gives advice for making the most of Product Groups.
Each product you create will belong to a Product Group.
Flyerlink will help you select a Product Group, by only showing existing groups for the type of product you select.
If you choose "Mini Brochure" you'll only see Folded Leaflet Product Groups.

Product Groups are used to group together similar types of products.
We recommend naming Product Groups after the Substrate Weight (130gsm), Paper Stock (Gloss) and Product Type (Leaflets).
You can then name products within a group consistently to help both you and your customers
For example:
| 130gsm Gloss Leaflet :: A5 :: 4x0 |
| 130gsm Gloss Leaflet :: A5 :: 4x4 |
On you have various options for how you describe your product groups.
You can choose a product group url-slugs, add a description and provide some google-friendly meta titles and meta descriptions.
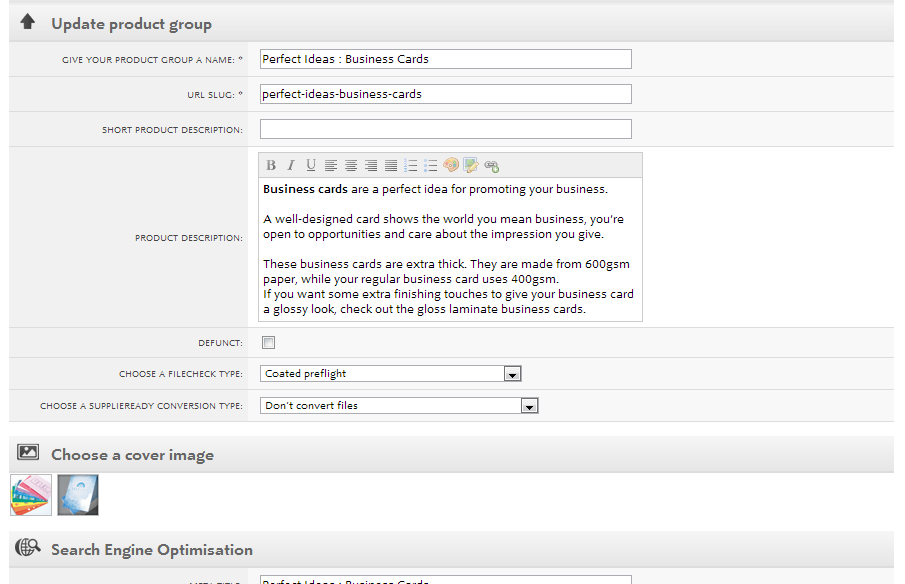
The url-slug generates a new product group page for your products.
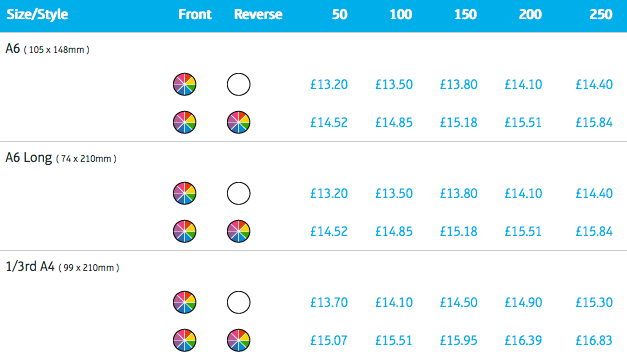
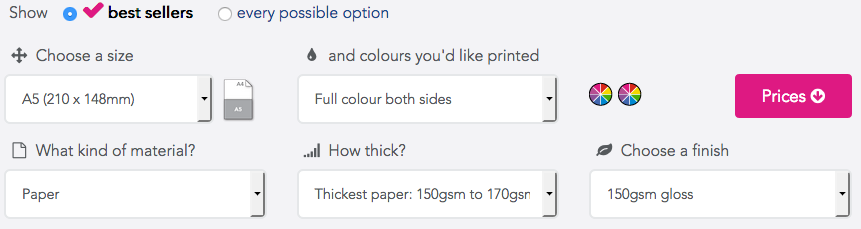
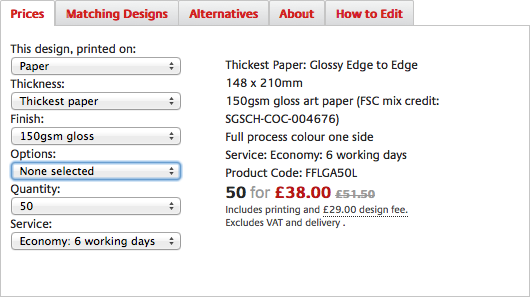
The price grid is automatically constructed using the product prices.
Each row shows the product size and colour type.
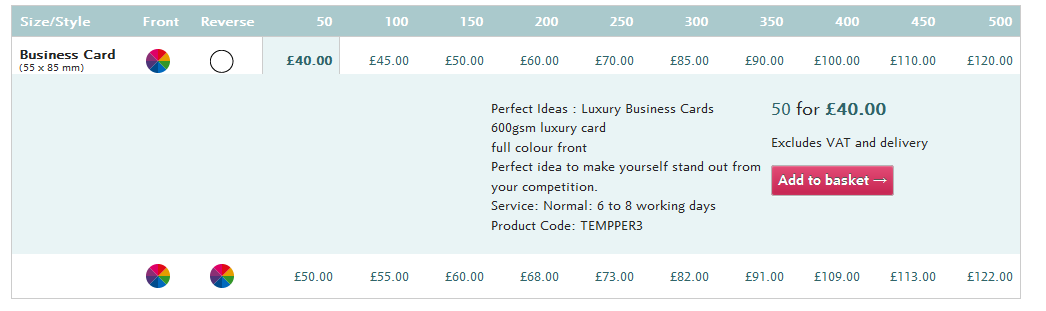
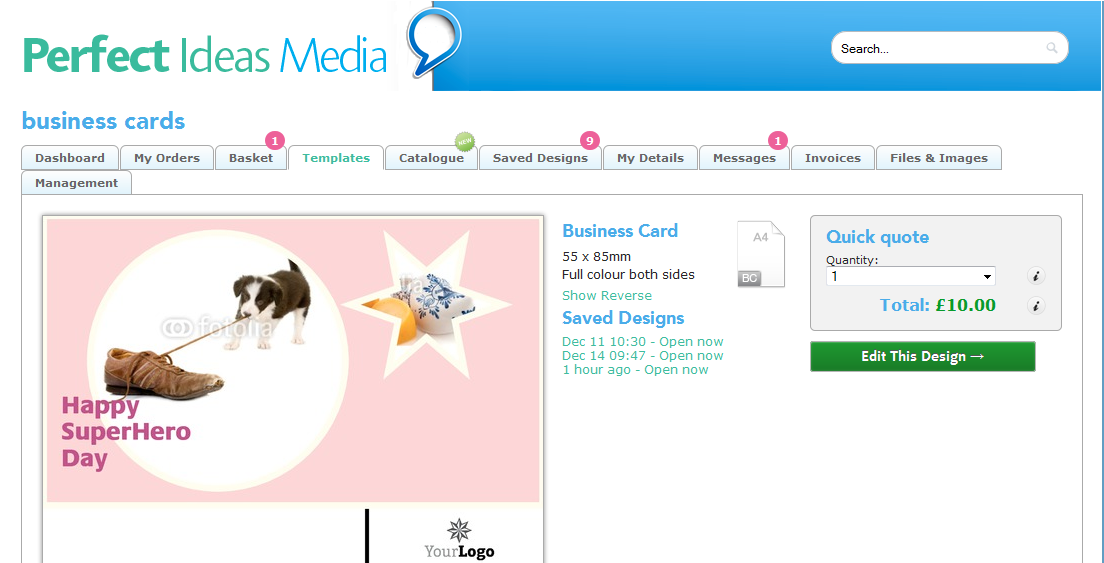
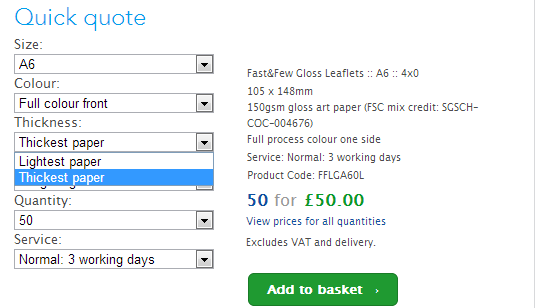
The Quick Quote uses tags (see Resource Article 4977) to help users find what they're looking for.
The images also come from those you upload to your products.
Finally, the Product Description comes from your product group description.

This link takes you straight through to how to where you can start building your products within Flyerlink!
Printed + stock pick items and stock pick items product kinds allow you to manage stock levels and prevent people being able to order products that are not in stock.
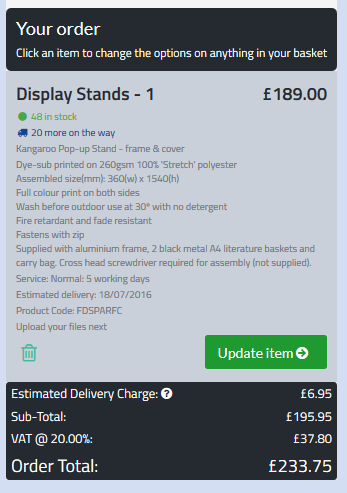
The stock availability of the product will show when you create a job or order in Flyerlink.
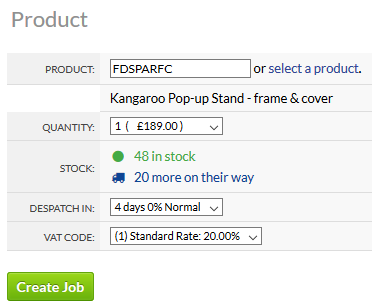
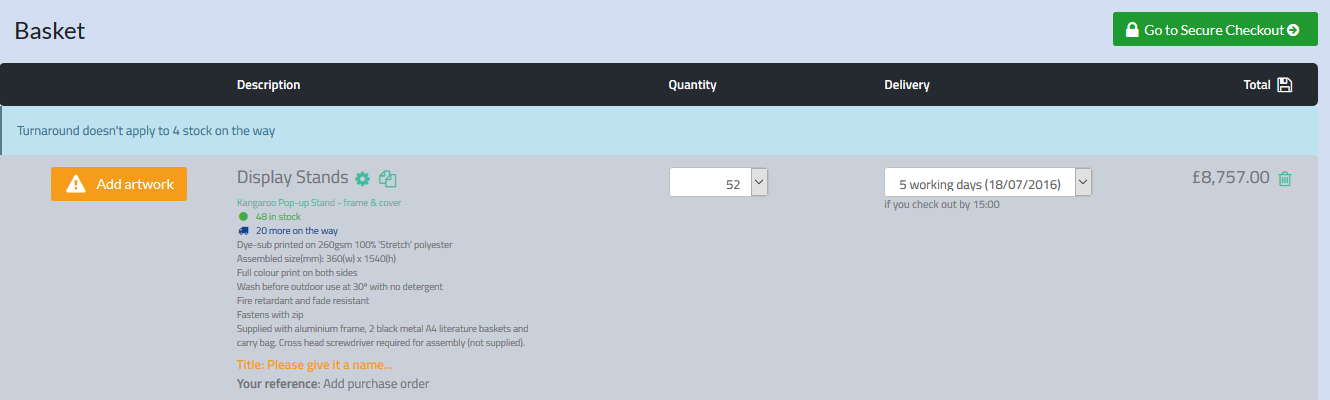
It also shows online to customers when they order.
The stock is only reserved when a job goes to status 081 and not when you create a job. If stock levels change before that and back ordering isn't allowed, you'll only be able to order stock that's available.
Stock that's on order can be claimed by 081ing a job with stock that's available including what's on order, but only what's in stock will have our normal turnaround applied.
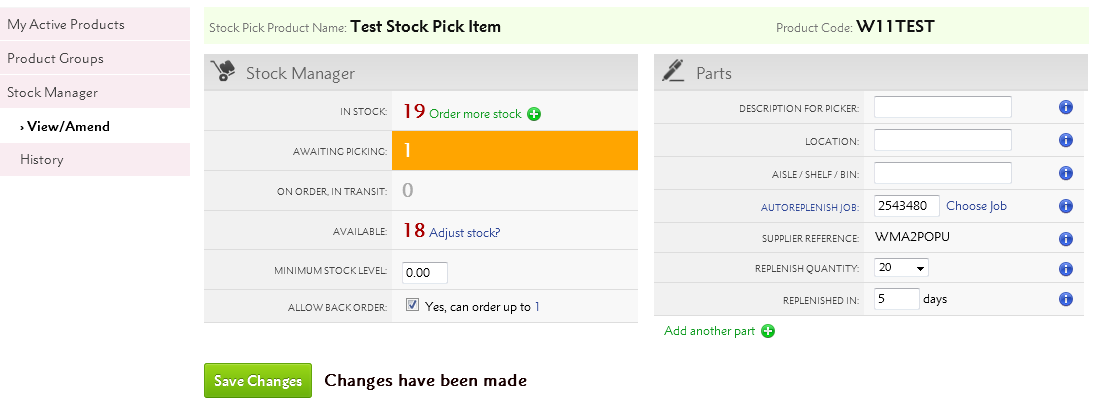
The stock is managed via the stock manager via . The main purpose of the stock manager is to help you adjust stock levels. Stock levels can be shared between multiple products.
Awaiting picking shows how much of the product has been ordered and is ready to Pick"n"Pack.
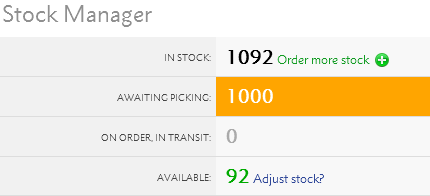
You can reduce this by despatching jobs that are awaiting picking.
The available column shows how many products you have in-stock minus the amount awaiting picking.
The available stock amount
You can adjust stock levels in 2 ways:
When you chose the Order more stock (+) option, a pop-up window emerges asking for your re-order quantity.
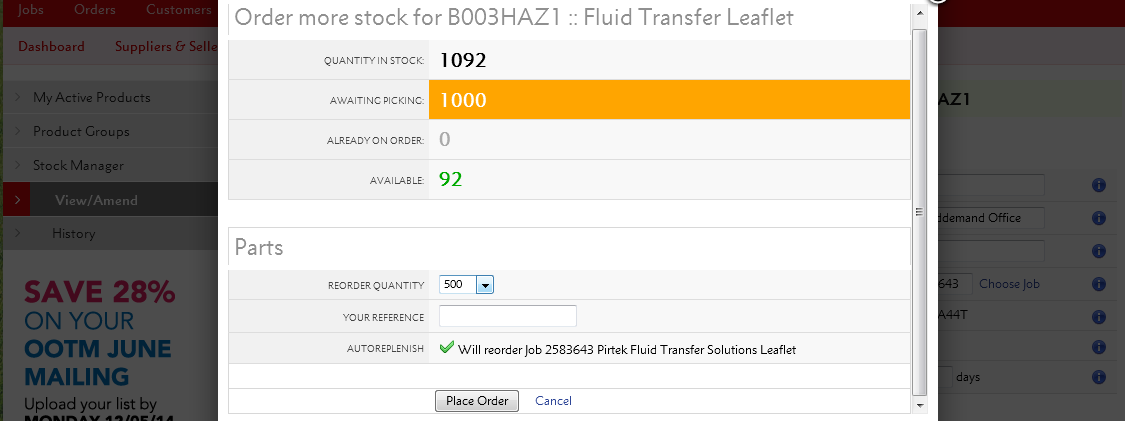
You then place an order, and will be given a pre-filled email template you can send to your supplier.
If you've set up an auto-replish job, the order more stock option will create a new job for you instead of giving you a pre-filled email template.
You can also change the stock levels by Manually adjusting stock using the Adjust stock? link.
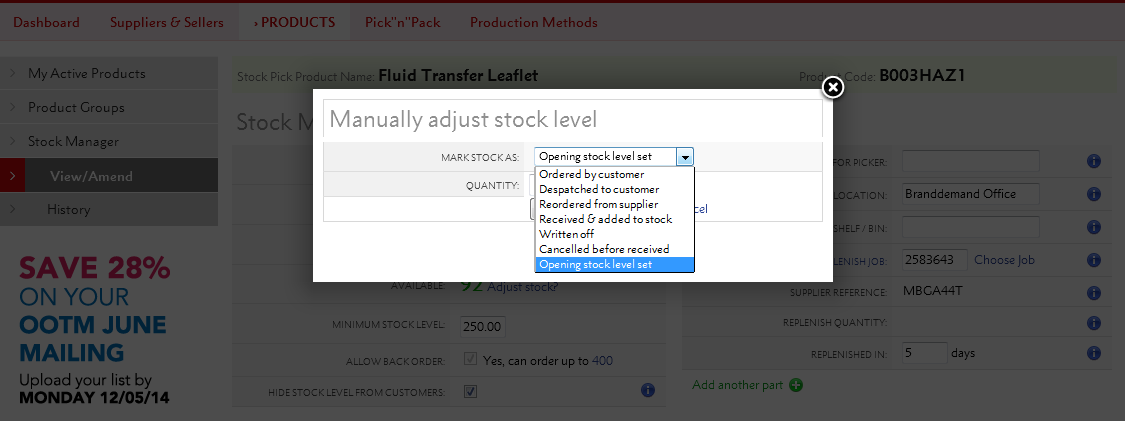
There are 7 options to choose from, which allow you to either increase or decrease your stock level.
Some options also allow you to show Stock in transit, that you've ordered but haven't arrived yet.
If the stock is In Transit, you'll need to book it in once it arrives.
| Option | Adjustment | In Transit? |
|---|---|---|
| Ordered by customer |
Neutral |
Decreases stock when Despatched to customer. |
| Despatched to customer | - Decrease | No |
| Reordered from supplier | + Increase | Yes |
| Received & added to stock | + Increase | Moves order from In Transit to In Stock |
| Written off (-) | - Decrease | No |
| Cancelled before received | - Decrease | Decreases order In Transit |
| Increase stock level (+) | + Increase | No |
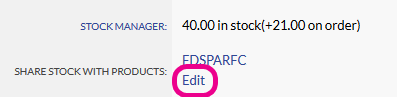
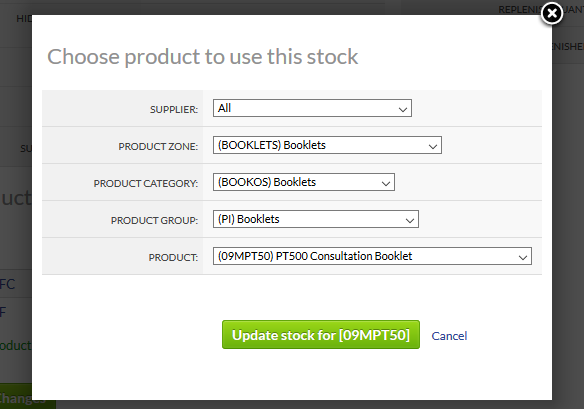
You can share stock between two products in two places
1) On
Under the stock manger
Choose share stock and you can choose another stock pick product to share your stock with
2) On
In the bottom section add another product to share this stock with
In the Parts section, you can add details to help you locate your stock when orders are ready for despatch.
Simply provide useful details about what the stock looks like or what shelf it's on
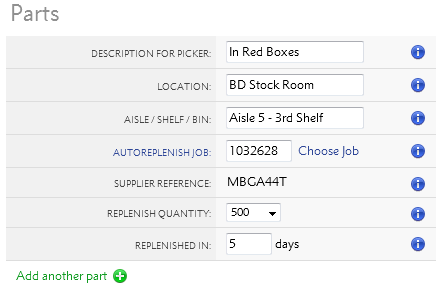
Then when you despatch the order via or , you'll see the part location.
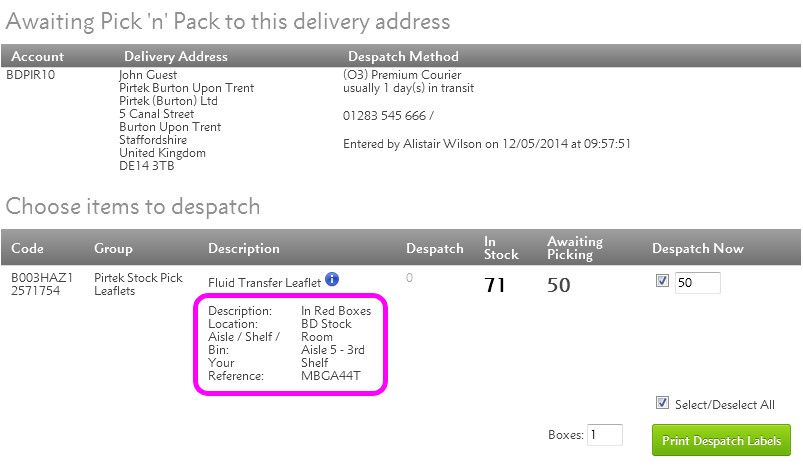
You can also add more parts for complex orders.
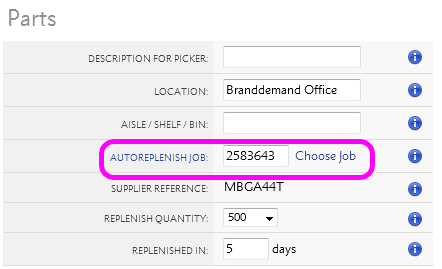
Flyerlink can automatically create new jobs when you order more stock.
Simply add a previous order for the stock you want.
.png)
Then a new repeat job will be created when you order more stock from the supplier.
.png)
You can set a minimum stock level against you stock and set up an email address to receive a low stock warning
Once the available stock is less than the minimum stock level (available stock includes whats in order and physically present).
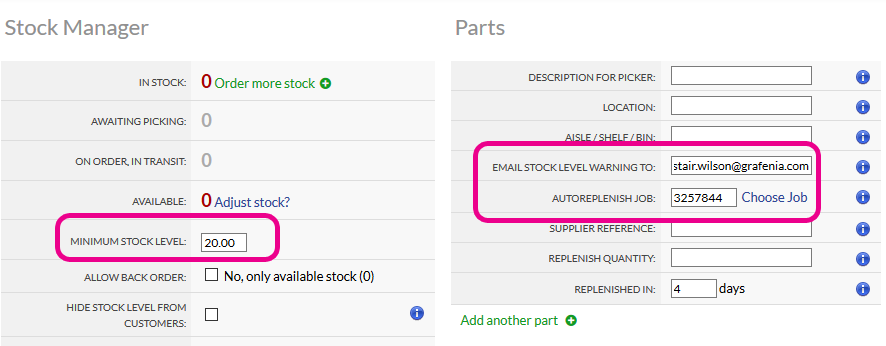
You can also use this to auto-replenish your stock as it creates a reorder of any auto-replenish jobs set up and auto081s this (provided correct files were uploaded to the original job)
A reference of the automated reorder job is stored in your stock history.
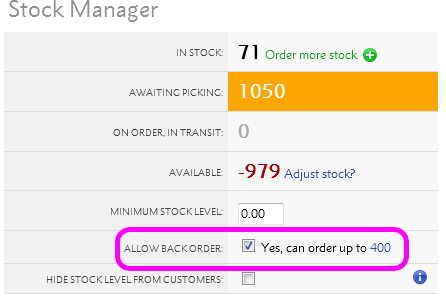
The allow back order option allows you to choose whether customers can order you stock while you're stock levels are less than 0 or not.
If allow back order is ticked, customers can order the stock whatever your stock levels.
If allow back order isn't ticked, they can only order when you have a positive amount of stock available.
If you don't want to use the Stock Manager to actively maintain your stock levels, you can simply hide the stock levels from your customers.
.png)
If you tick "Hide Stock Level From Customers"...
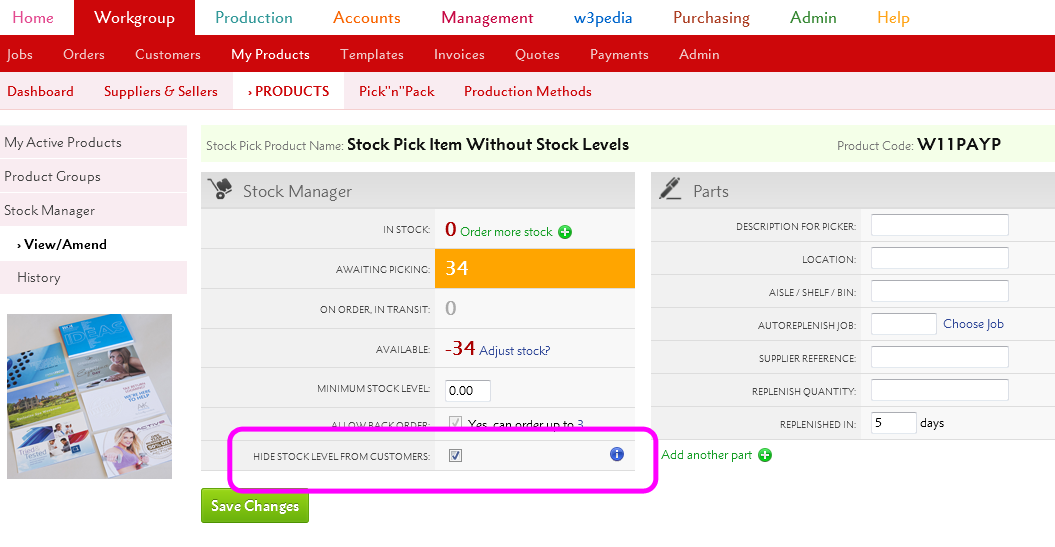
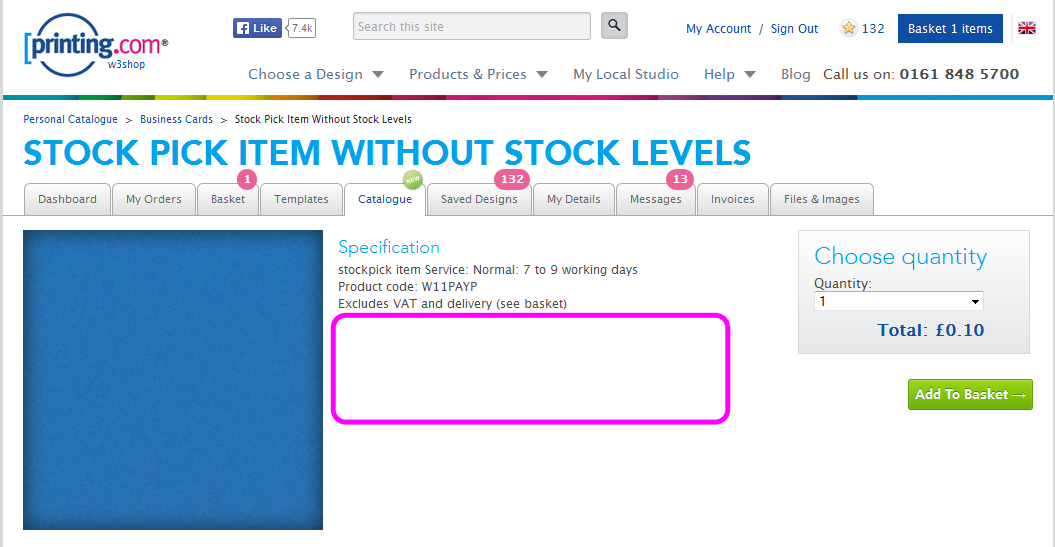
Then the stock level will be hidden from your clients.
Each product you create via has a product kind.
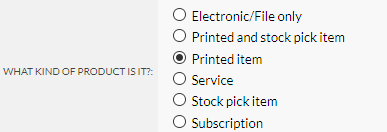
You have 5 types to choose from each with different features.
| Product Kind | Explanation |
|---|---|
| Printed item |
The product makes a physical printed good. |
| Electronic file | The product makes an electronic item, like a press advert or graphic design. Doesn't make a physical item, but requires a graphic file. |
| Stock pick item | The product has been pre-produced, for you to pick and pack to your customers. Physical item that doesn't need a graphic file. Uses the Stock Manager to control stock levels. |
| Service | The product is a service, like consultancy or training. It's not a physical item and doesn't require a graphic file. Can be used for Flyerlink's invoicing and TimeTracking features. |
| Printed & stock pick item | The product makes a physical printed good. It requires a graphic file to be produced. It also uses the Stock Manager to control stock levels. Main use case is a printed item which has a frame or stock element to it, eg fabric with a frame. |
| Subscription | The product is the same as a service, like consultancy or training. It's not a physical item and doesn't require a graphic file. It can be used for recurring Subscriptions |
For Printed items and Electronic files, a job can only be changed to Status 081 when a Graphic File has been uploaded. If there's no graphic file, the Status 081 doesn't appear.
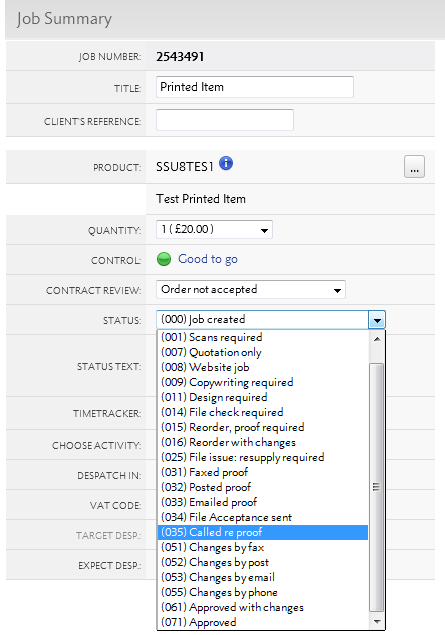
You'll either need to upload a file name matching the name and product size in your via the FTP.
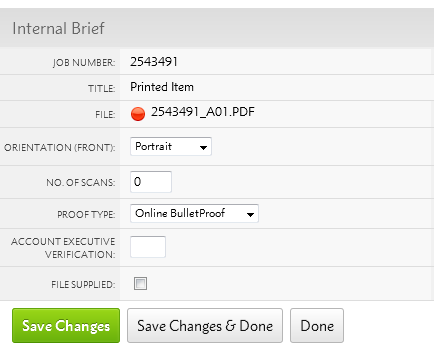
Or add your file by going to . Add a file and choose the FileCheck All button to check the PDF and upload your files to your job.
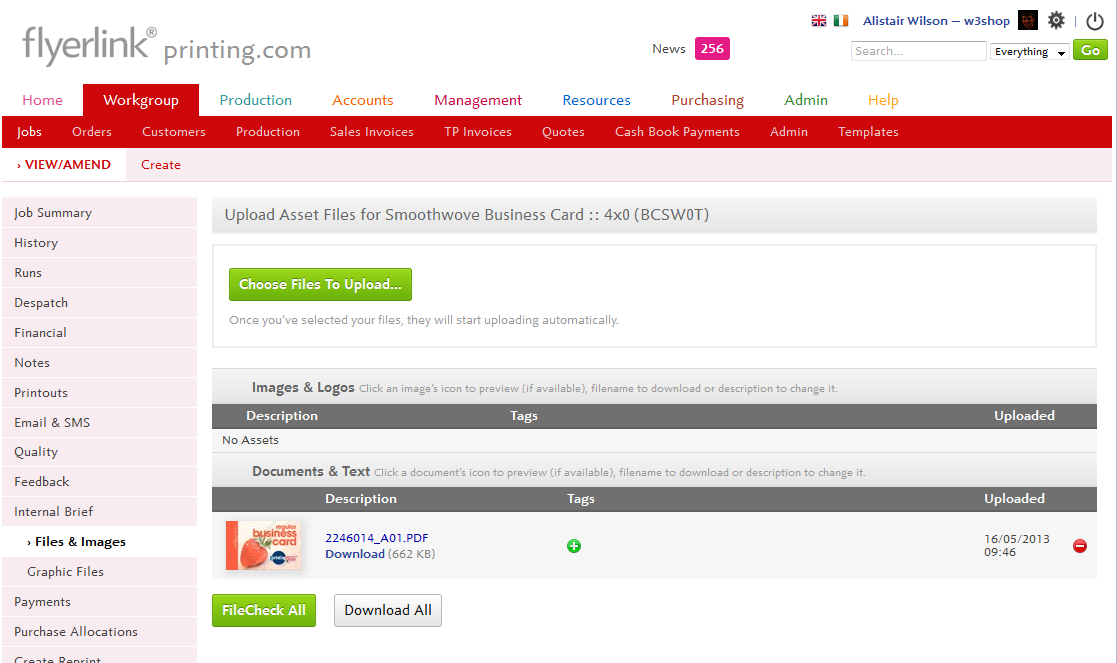
Once that's done, you'll be able to change your Job Status to 081 and send the file to production.
Services & Stock pick items do not need a graphic file and can go straight to Status 081.
For Stock pick items you are able to manage your stock levels via .
The Stock Manager allows you to adjust the stock levels to match the number of products you have in stock.
You can use the Order more stock link to email suppliers and request more of the product.
You can also auto replenish orders when your Stock Levels fall below a certain level. This will create a new job of an original order.
Finally you can add details about the location your stock is kept at, which appears when they despatch the job via or .
Since Services & Stock pick items do not require artwork, when a customer orders one of these product types they will not see the Artwork Options page on your microsite.
However, Printed items and Electronic files need a graphic file. So the Artwork Options page provides customers a choice of uploading their own artwork, or choosing a matching template.
Colour Types are used to create Single Sided and Double Sided products. They also determine the number of pages to be supplied.
Popular Colour Types are listed below:
Business Cards:
Leaflets:
Folded Leaflets:
Booklets:
Banners:
Clothing:
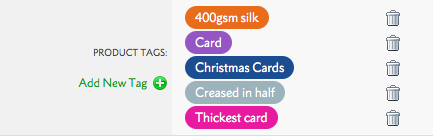
Greeting Cards:
This options is required if using TemplateCloud Christmas Card designs.
NCR Pads:
This article explains how Product Tags work on your products, and why they're useful.
When you make products via , you may have noticed a Sorting & Searching Section.
The highlight of this section is the ability to add Product Tags.
These help users distinguish between your different product options.
Please note: While on templates and the personal catalogue you can get away with just having 1 blue product tag. You need to add Substrate, Substrate Weight and Product Style to show on product group pages and your configure your printing page.
Suppose you set up a Template for a customer, and it has two different products associated to it.
How do you tell the two apart?
Without any Product Tags it is impossible. They'd need to have different sizes or colour types, but then they wouldn't work with the same template!
Here's how it currently looks:
If you add a different Product Tag to each one...
Users can distinguish between the two products:
This tagging system is how all products are distinguished.
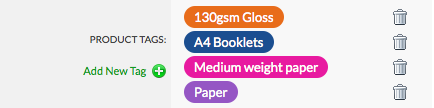
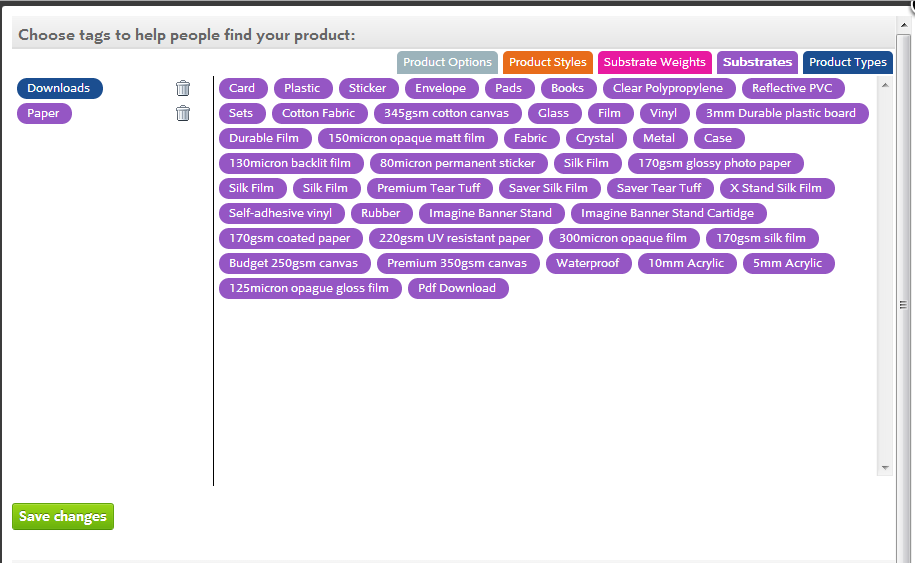
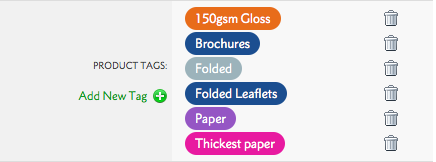
Best practice is to add 1:
(Blue) Product Tag,
(Purple) Substrate Tag,
(Pink) Substrate Weight Tag, and
(Orange) Product Style Tag.
These provide different choices for users on the Quick Quote.
You can add as many Product Type Tags and Product Options Tags as you want. But only 1 of each of the other types.
Provided there is at least one difference in the tags, the Quick Quote will be able to tell the two products apart.
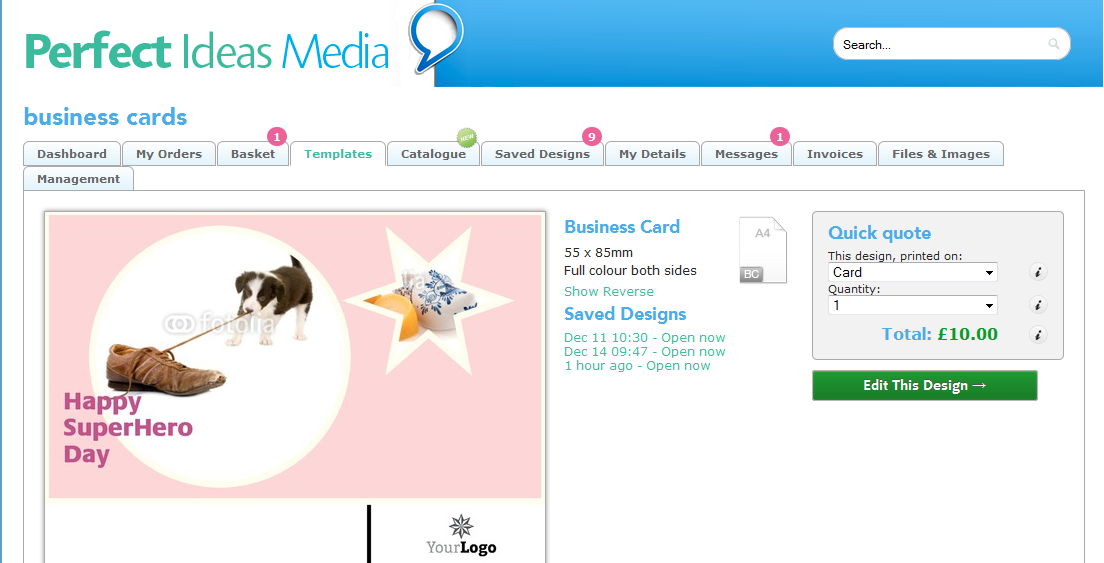
There is a hierarchy to tags.
The Quick Quote looks up Substrate tags first for the Printed on dropown menu. The Thickness dropdown uses Substrate Weight tags and the Finish uses Product Style tags.
You cannot skip tags.
Adding a Product Style tag without a Substrate tag will confuse the quick quote.
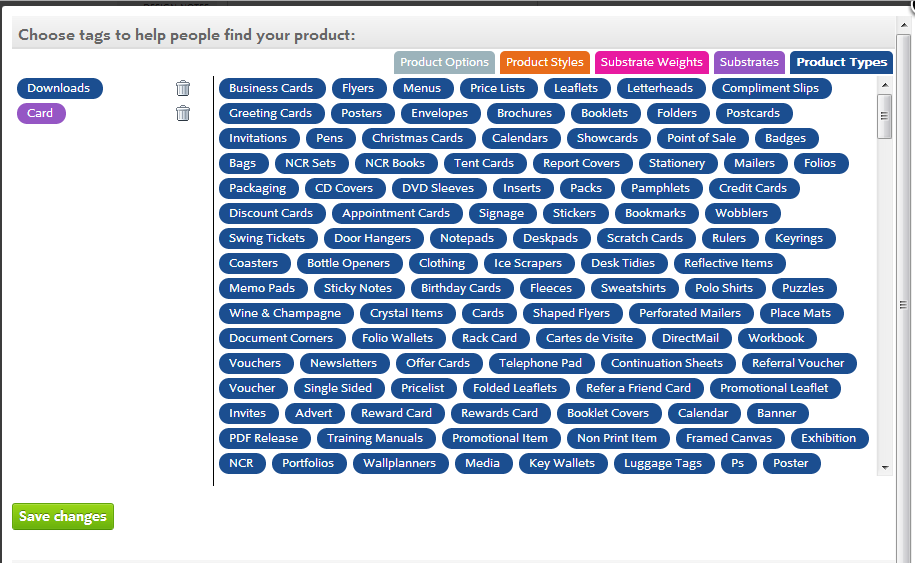
(Blue) Product Tags
Each Product Type Tag you add will list your product in another folder option on the Catalogue page.
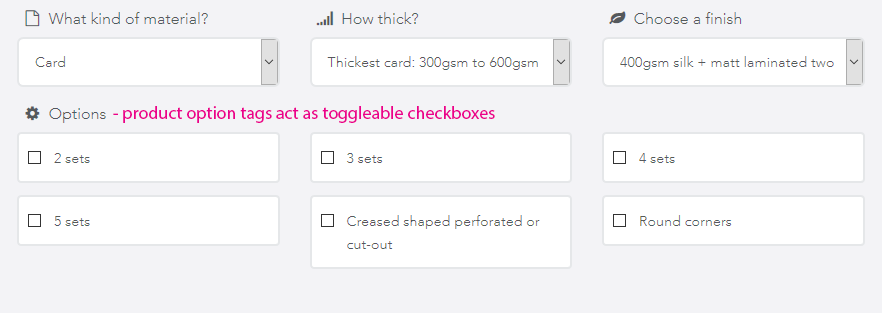
Each Product Options Tag is visible as a tickbox on the Configure your printing page.
The idea is that Product Options can be toggled on and off
For this to work you will need
1 product with a Substrate, Substrate Weight, Product Style AND Product Option tag
And another product with the same details, the same Substrate, Substrate Weight, Product Style tags BUT NO Product Option tag.
 Try to avoid Product Option tags, as they can be difficult to remove for users.
You can use Product Style instead with as much information in to distinguish between products as possible.
Use the product stock as a way to distinguish products using the Product Style Tag. Maybe come up with your own system of what a "Thick Card" or a "Thin Card" is, or use the Product Style Tag as your own brand name for the product.
For more great tagging examples check out w3pedia article 5500.
Product Group pages display products by Size and Colour Type.
If two Products share the same Size and Colour Type, Leaflets and Flyers for example. Product tags must be used to display them correctly online.
You can view your Products Tags here:
Product Tag Order:
Your product will not show online if the Substrate Tag is missing.
Each tag takes the customer down a different route to find the product they are after and should be unique.
Click here to view this page live.
A5 Leaflet Products Tags
Substrate > Substrate Weight > Product Style
Paper > Thickest Paper > 150gsm Gloss
Paper > Thickest Paper > 170gsm Silk
A5 Flyer Products Tags
Substrate > Substrate Weight > Product Style
Card > Medium Weight Card > 280gsm Gloss
Card > Medium Weight Card > 280gsm Silk
Click here to view this page live.
1. 400gsm Silk Business Card
Colour Type: Full Colour Both Sides
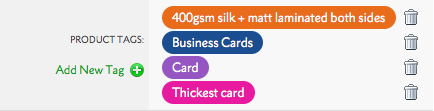
2. 400gsm Silk Business Card + Matt Lamination
Colour Type: Full Colour Both Sides
3. 400gsm Silk Business Card + Matt Lamination + Spot UV
Colour Type: Full Colour Both Sides + Spot UV Front
Both Business Card products use the same Product Tags, the Colour Type (under Technical Specification) is used to differentiate between the two products in the Configure Your printing menu.
150gsm Gloss Folded Leaflet
400gsm Silk Greeting Card
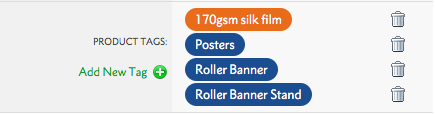
Roller banner Stand with 170gsm Silk Film Poster
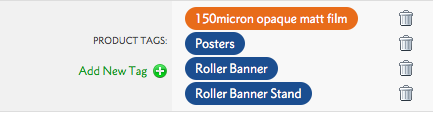
Roller banner Stand with 150 Micron Matt Film Poster
This article explains:
When you complete a job in Flyerlink, your customer can see the old design and reorder it.
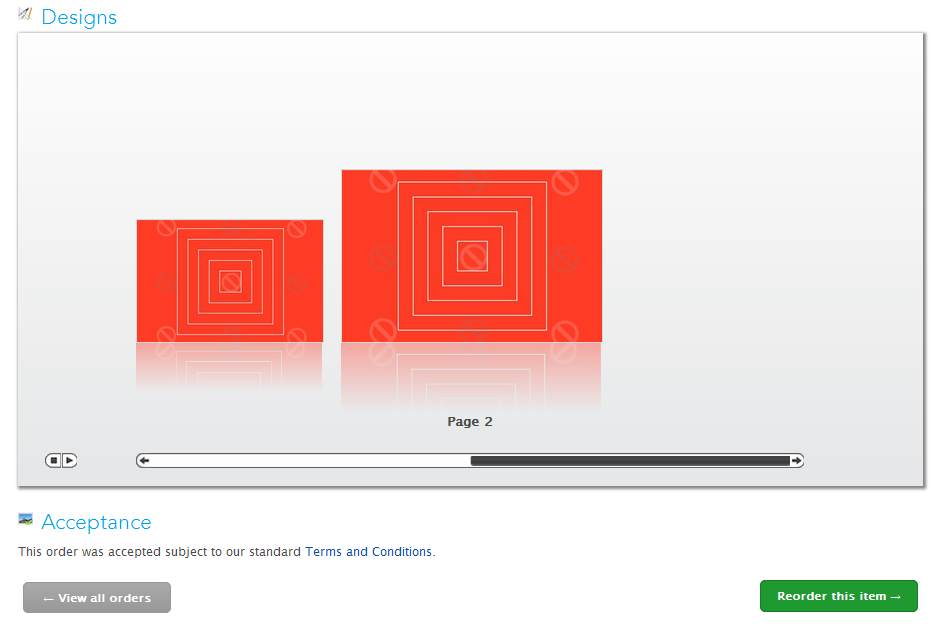
For Electronic Files, customers can also Download the PDF
But suppose you don't want to show your customers the PDF they've made as a reorder? You can hide these files in Flyerlink.
Just go to Workgroup > Customers > View/Amend > Files & Images > Previous Designs
You'll see a list of that client's Previous Designs
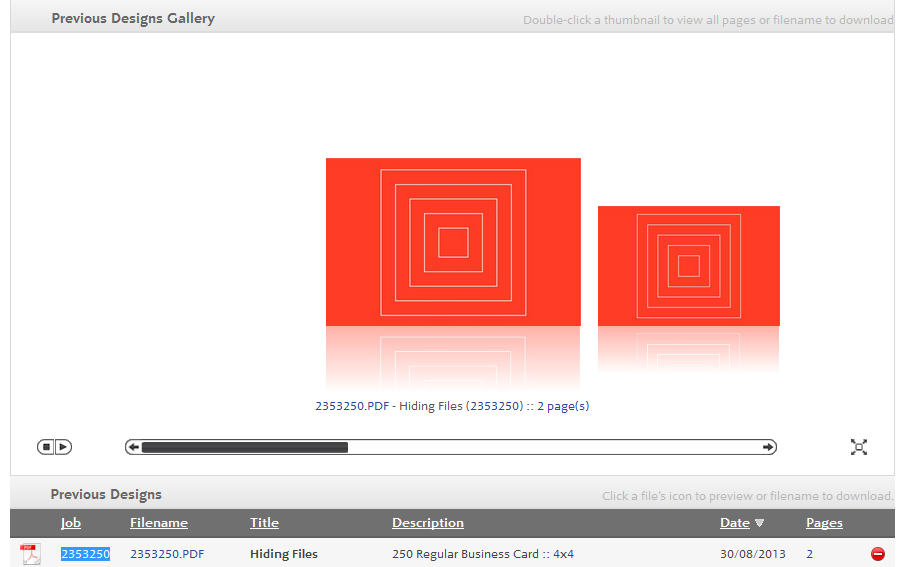
If you delete one of the designs
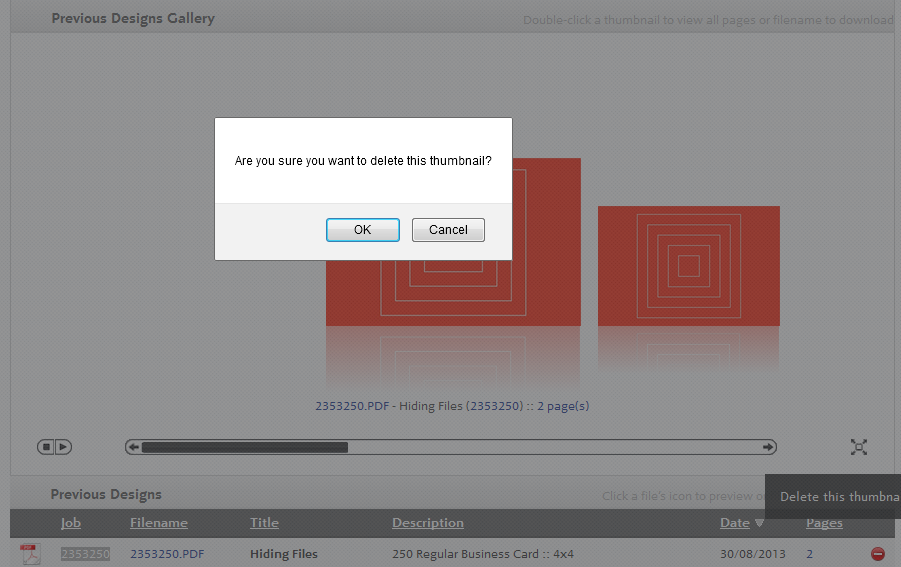
It'll no longer appear in your client's My Orders page to be reordered.

You may want to hide all the jobs created by one product. Like a design job or a service you invoice regularly. You may just want to reduce clutter from your client's My Orders page.
Hiding all jobs from 1 product is simple.
Go to for your chosen product.
In the Sorting & Searching section, tick "Hide jobs from customers online?"

Then it'll no longer appear online.
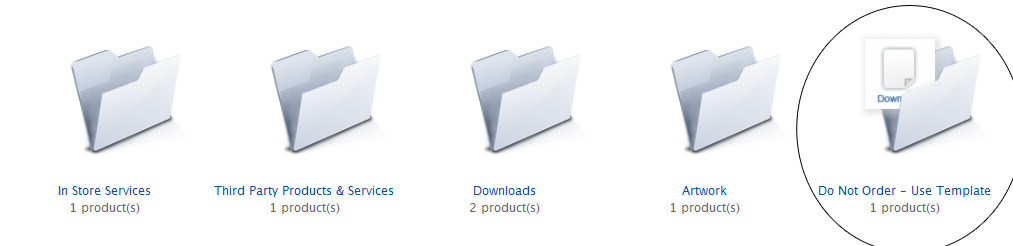
Suppose you want to sell a template to your customers, so you make a new Opensource product for that very purpose.
You could give it a product tag of Do Not Order - Use Template.
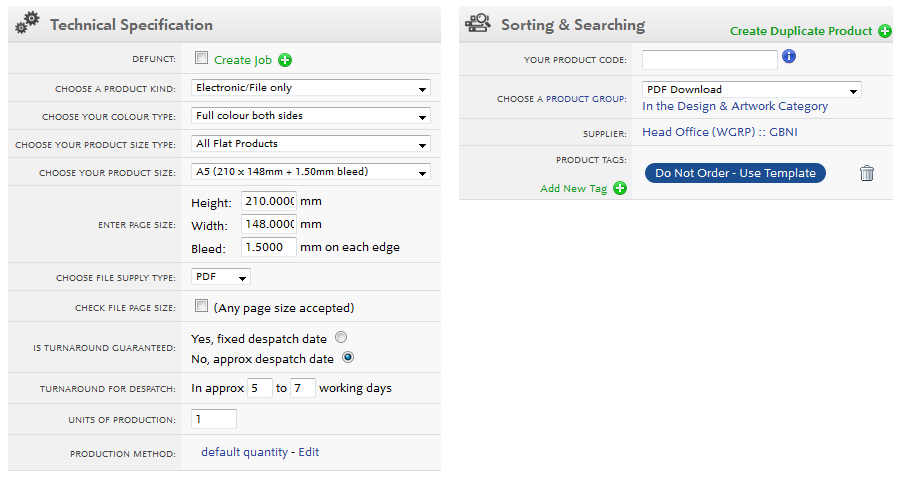
And associate a template to just that product.
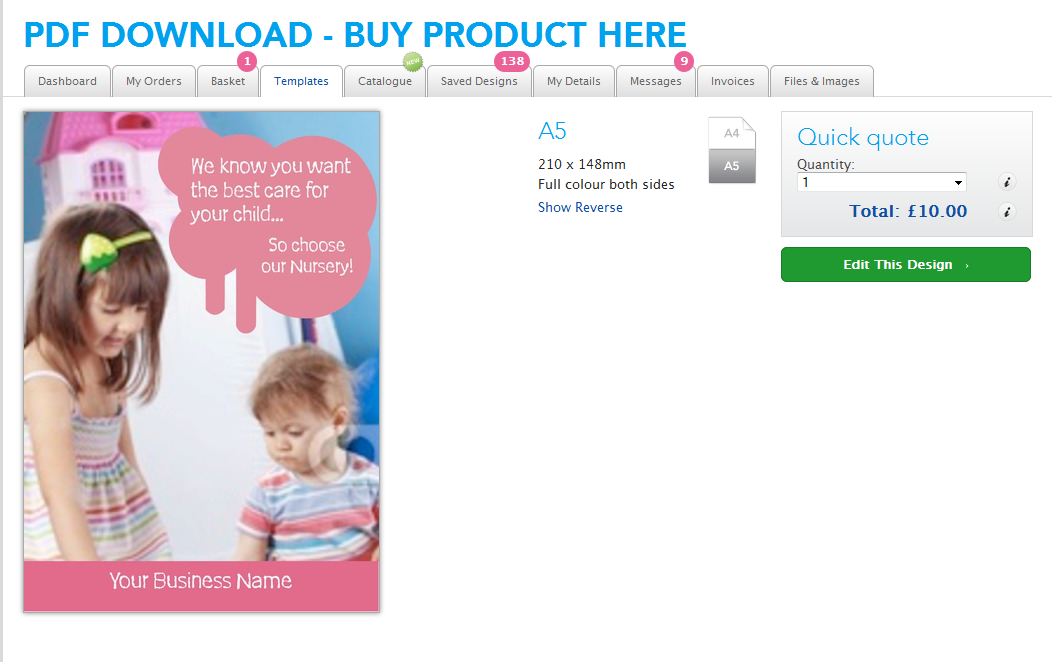
Then when a client logs in and goes to their catalogue, they see the PDF with a reminder to order from the template.
Then they go to the template.
But...wouldn't it be better if the Product was just hidden from the catalogue altogether?
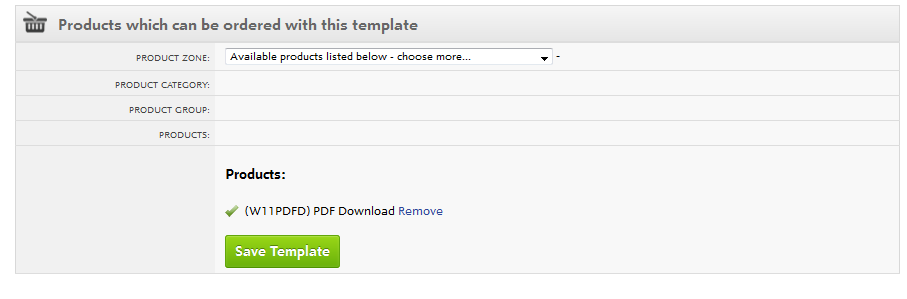
Well now you can do that.
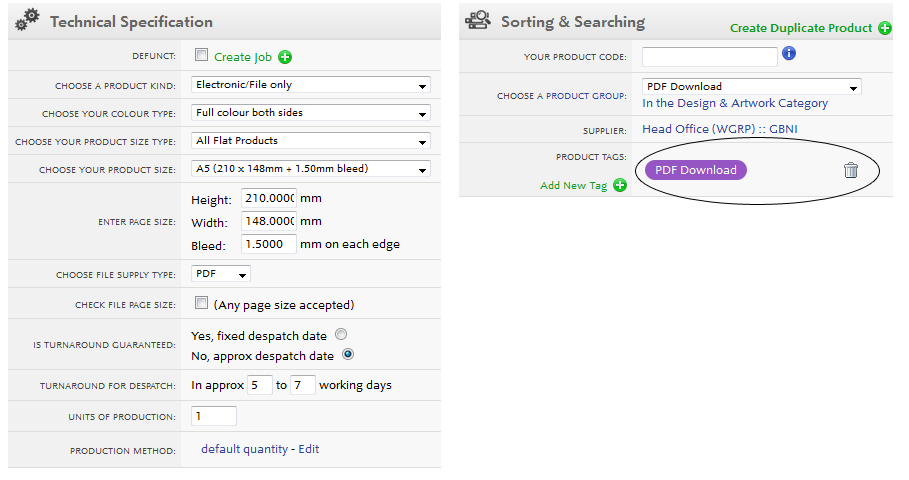
Simply go back to your product, and Remove the Product Tag.
Then Add a Substrate Tag so the Template Quick Quote knows there's a product it can show a customer.
What you'll find is the product is missing from the Personal Catalogue.
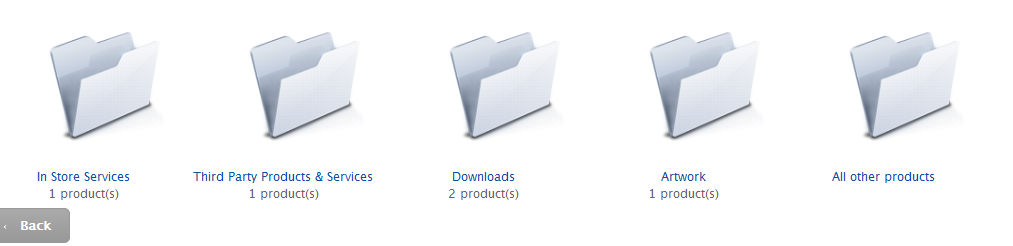
But you can still order it from a Template.
When creating a Product or Template you are asked to set customer permissions to ensure the correct people can see your product or template.
3 options are provided:
For Templates. Only the Customer Account Codes you add to the list can see this Template.
For Products. Only the Customer Account Codes you add to the list can see this Product.
For Templates. Only the Customers associated with this Category/Microsite Code can see this template (used for w3client and w3shop).
For Products. Set your Customer permissions to Workgroup and use the Availbale Products Filter under Categories & Microsites to make speicifc products available to all customers in your selected category.
For Templates. Do not use this option for templates.
For Products. This option makes your products available to every Customer, Category & Microsite in your Workgroup.
Use the Available Products Filter on the Category & Microsite page to make specific products availbale to customer in this your Category/Microsite.
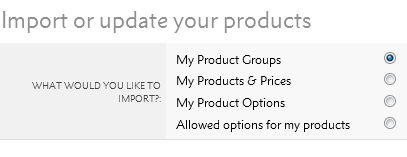
The Product Importer lets you:
You can use the Product Importer to adjust your product groups, Products, and product options.
To start using the Product Importer, go to .
The first step to importing a new product range is adding a new product group.
Product groups are used to batch similar types of Products together, such as those using the same stock type but different sizes. See w3pedia article 4979 for more info.
All products must belong to a product group, so add a new product group first before your next group of products & prices.
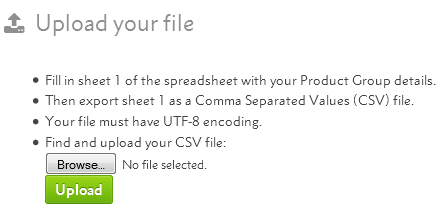
For all Product Importer types you can either:
To start from scratch download a blank example Excel file, or click the download advice link.
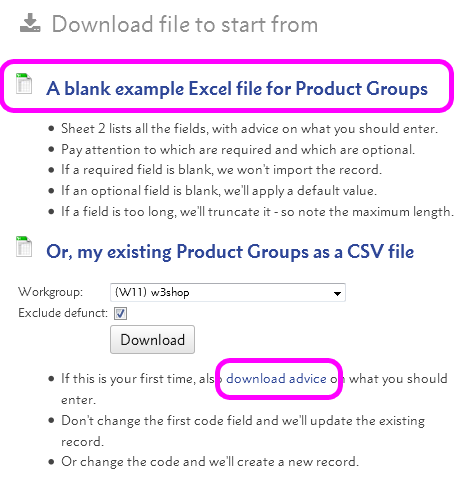
The download template explains what each column does.
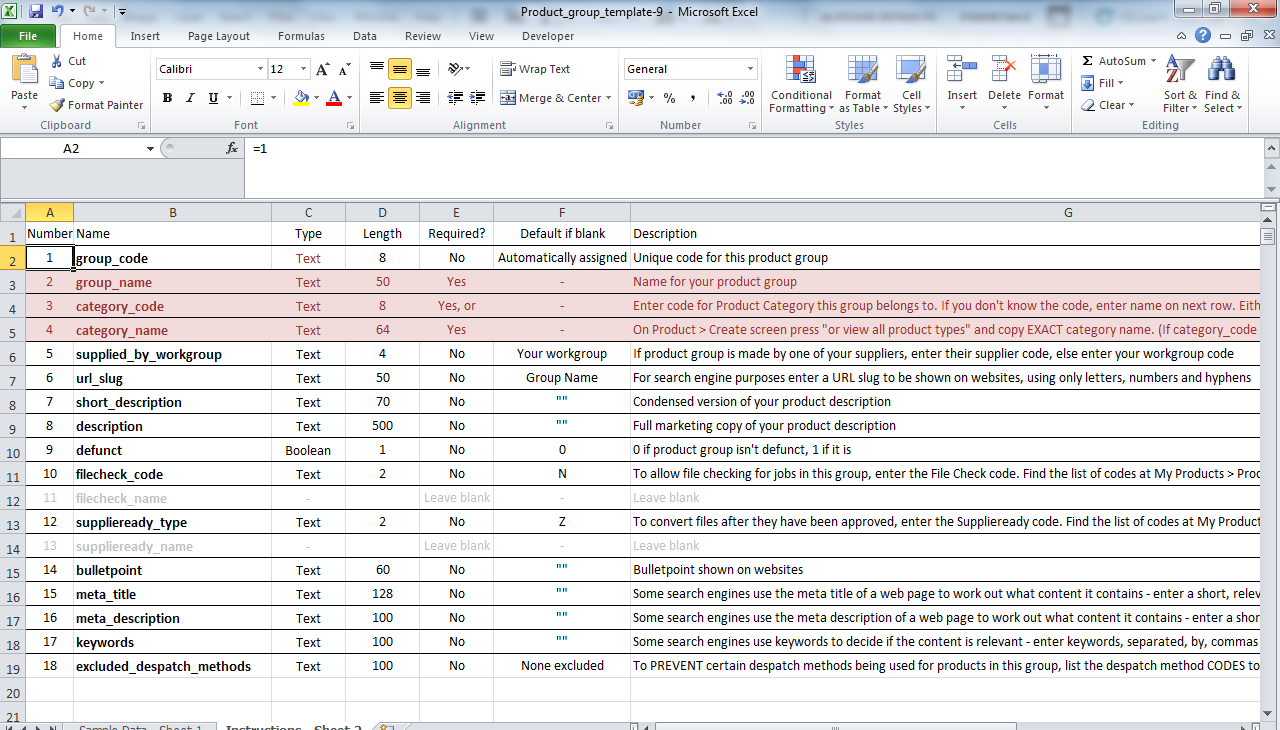
It lets you know which fields are required, and what defaults will be given if you leave it blank.
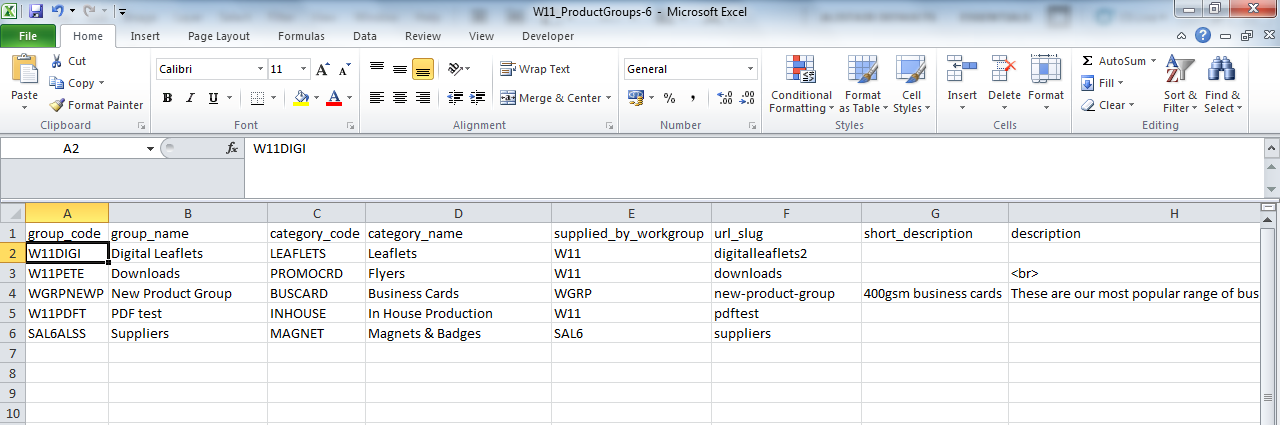
Next change to Sheet-1, add your new product group details and...
... remember to save excel template as a CSV.
When you're finished, simply Upload your file.
If you're adjusting an existing product group, or making another group similar to an existing group, you can download your product range.
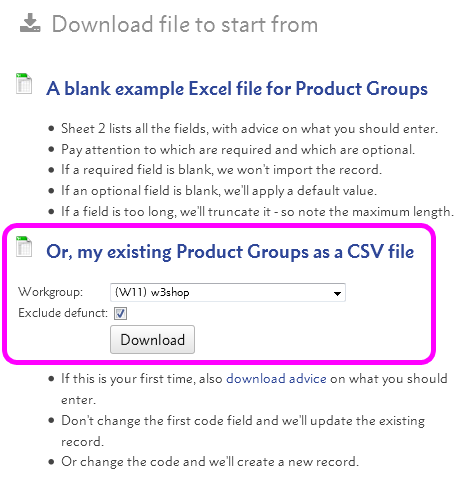
This will download all your existing product groups, but because it's a CSV file, you won't get any advice.
Delete any rows which you don't need to change - only leave new rows and product groups you want to update.
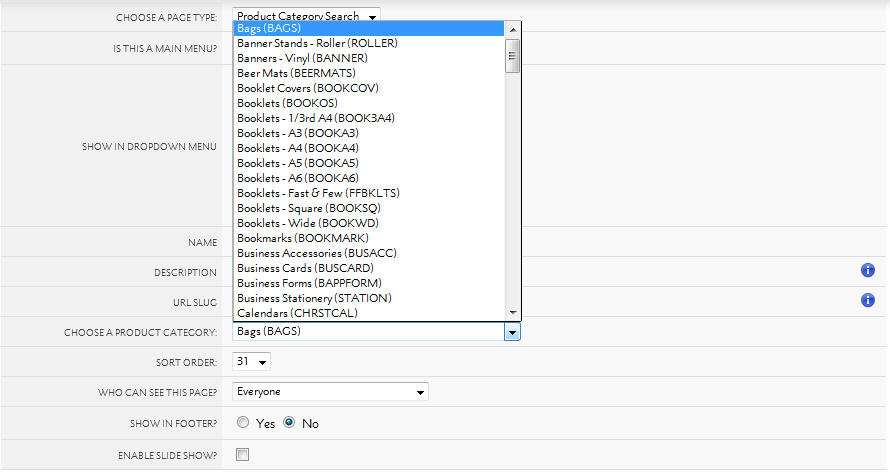
For the Product Group import, you'll need to add a product category code.
You can find a list of these in Flyerlink when you build a Landing Page or Product Category Search page for w3shops
Once you've added product groups, it's time to upload your Products.
You can start from scratch, or from your existing product range again. When you import, only include rows you want to change or add - if you import the whole sheet, it'll take you longer.
With your products & prices, you're able to specify your:
If an image is already hosted online, add a url to the image.
Flyerlink will download the image and use it for your Product.
No upload is required.
Your Product's production method must belong to the same workgroup as it's product group.
Provide your Product's height/width/bleed and a matching size will be selected for you.
Add the name of the product tags you want to add, and they'll be added for you. Check out w3pedia article 4977 for more guidance on tags.
To add extra services, add a new blank line with just:
Your Product code and your prices for the new service level.
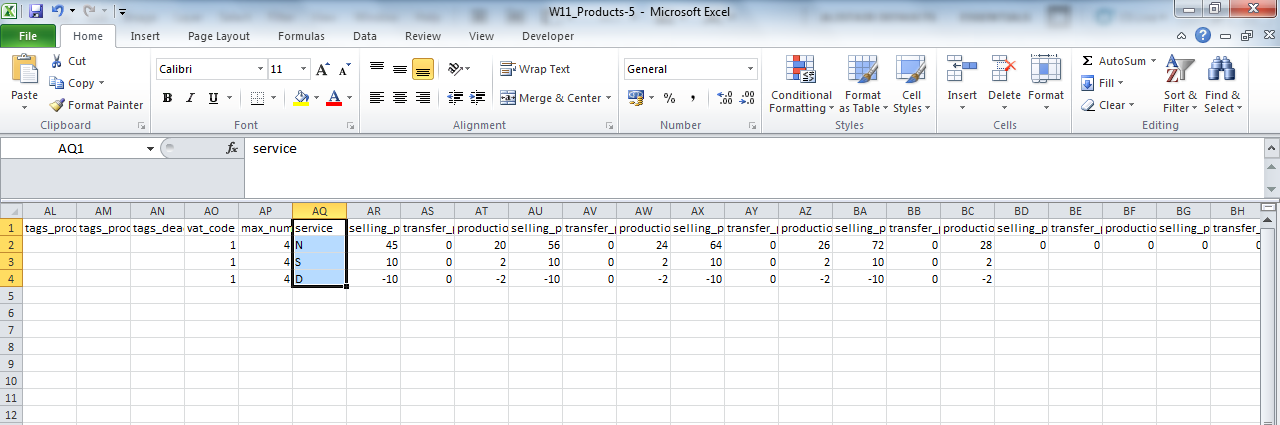
You don't need to duplicate every detail, just the product code and financial details.
You can add permissions to either workgroups, categories or customers.
However you cannot mix-and-match your permissions between columns (for example to make it available to a Category as well as two different customers.)
You can use the importer to make new product options, and then to add them to your existing Products.
You can start from scratch, or download your existing product options.
The import choices available for Product Options are identical to what you'll find on .
Read w3pedia article 5375 for more tips on how to use Product Options.
To add product options to your products, simply download your template or existing product options and add a new line for every option you want to add.
The option_group you choose will decide whether your product option is:
To make your Product Option part of a choice group, add an option_group to more than 1 product option.
All product options in the same option_group will be visible as a choice to customers and/or your sales team.
To automatically add a Product Option while making it removable to your sales team, leave the option_group blank.
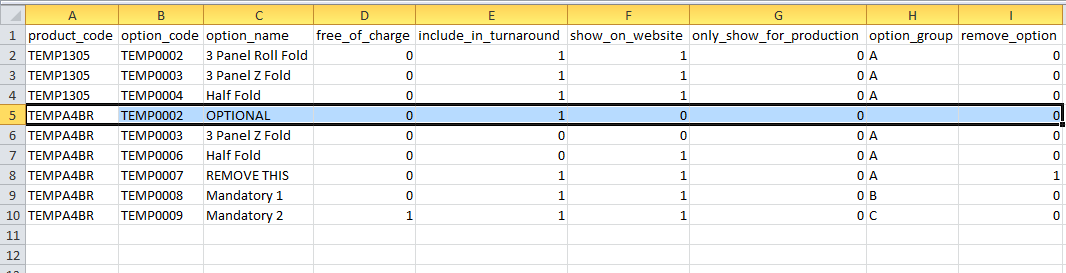
To make a Product Option mandatory, add it as a solo product option in a option_group. If there's only one product option in an option_group, neither your sales team nor your production team will be able to remove the product option.
It is advisable to start your mandatory product options using an option_group letters from the end of the alphabet, eg Z,Y,X.
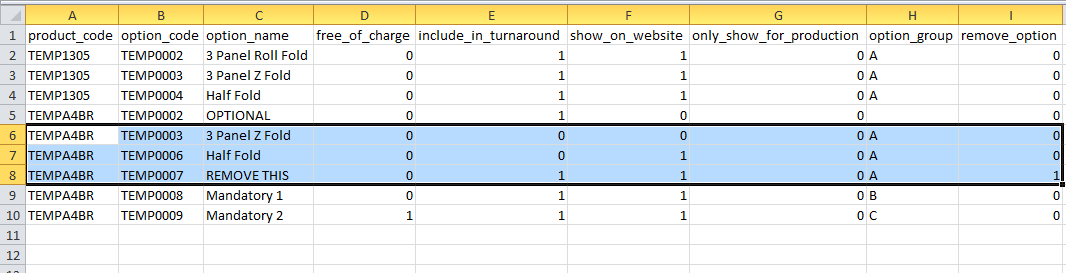
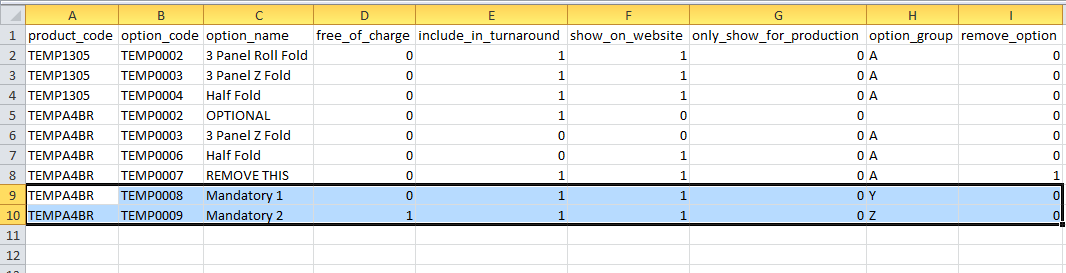
To remove a product option, change remove_option from 0 to 1 on an existing product option.
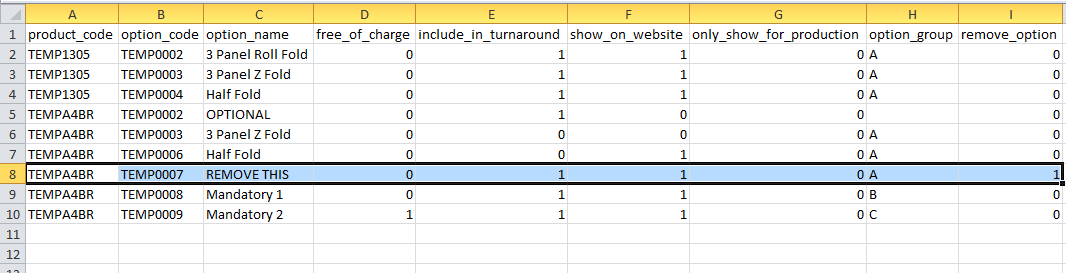
For more on adding product options to your products, see w3pedia article 5382.
The product importer is designed to work with Comma Seperated Values using the Unicode (UTF-8) character set.
If you're products will make extensive use of accents and special characters, we recommend opening your file in OpenOffice or Google Docs.
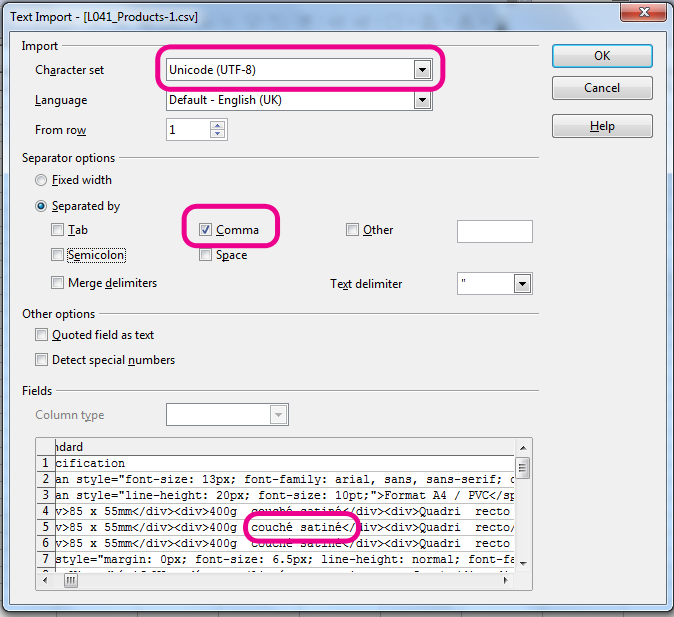
This will ensure your characters are preserved during the download and upload of your products.
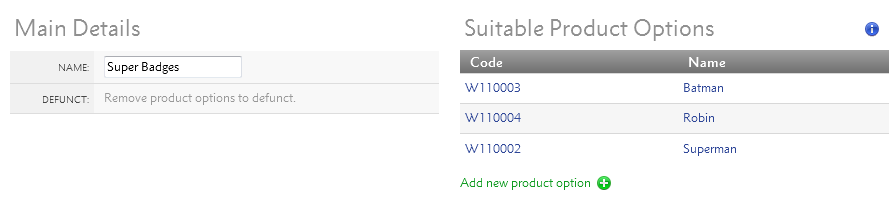
This guide explains how to add Product Options to your Products.
Product Options can be used to provide a choice of finishing or styles.
For example you can use Product Options to add a choice of background colours...

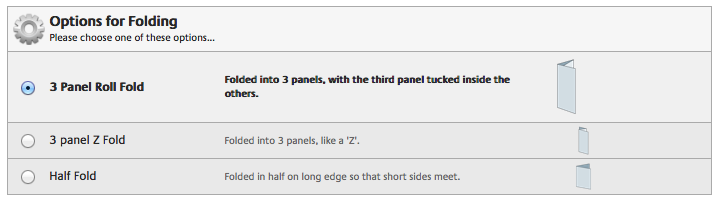
Or a choice of how Products are folded.
They can also be used as an additional Production Step.
Product Options show in the Configure your printing menu, when you add your product to the basket.
Go to .
Give your Product Option a name and choose it's Product Option Category as a way to group similar Options together.
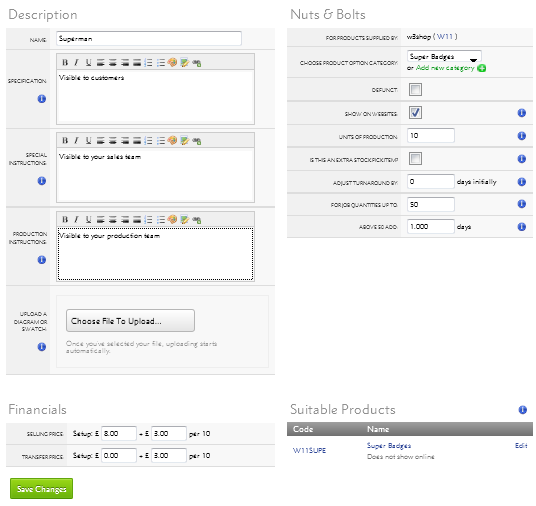
Then on you can customise the Product Option to your heart's content.
In the Description Section you can add notes and images about the Product Option.

The Specification is visible to your Customers;
The Special Instructions appear to your Sales Team in a ; and
The Production Instructions appear to your Production Team in.
You can also upload an image of your Product Option, that appears to your Customers, Sales Team and Production Team.
In this section you can change the Product Option Category, and choose how much of the Product Option is needed before additional costs or transfer days are required.
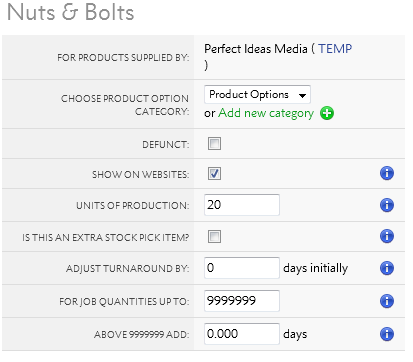
The Units of Production can be increased to change how much each Product Option costs when large amounts of associated Products are ordered.
The Adjust Turnaround options allow you to add additional turnaround times to your product. You can use Adjust Turnaround By to set additional turnaround times for all jobs using the Product Option, or you can add additional turnaround days when large job quantities are ordered using the For job quantities upto choice.
In the Financial section, you can add how much it costs to produce and how much you charge your customers.
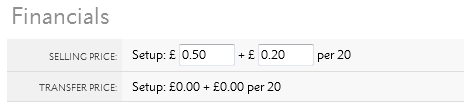
The Selling Price is how much it costs your customers, and Transfer Price is how much you pay Grafenia for the Product Option.
Transfer Prices are only used for products supplied by HubM. You can ignore them.
This section shows you which products this Product Option is used on.
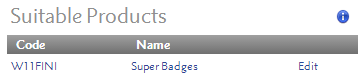
You can add more Product Options to Products via .
Go to to edit your Product Option Categories.
Product Option Categories are used to group together similar Product Options. If you have a choice set of Product Options that will apply to multiple Products, you can add them to the same Product Option Categories to help you remember them all when you add to Products.
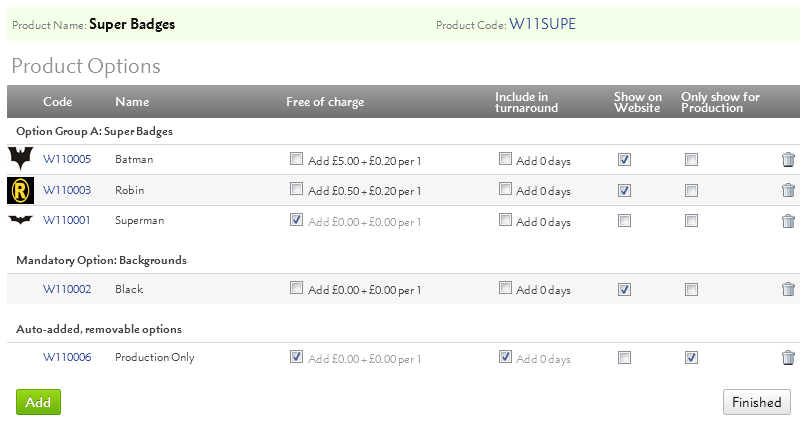
View the Product Options associated to a Product on

Then add more on .
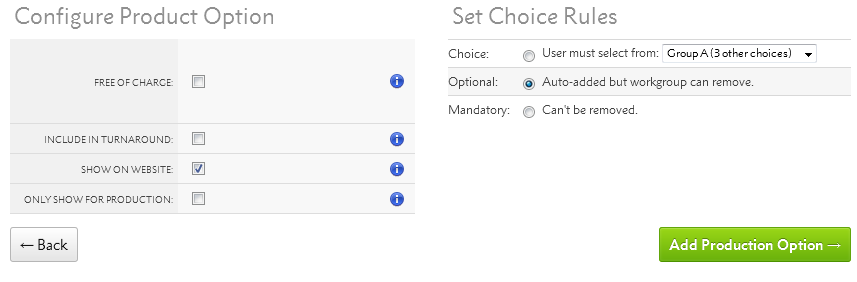
Every Product Option you add comes with a Choice Rule. The Option can be:
A Product Option will be mandatory if there is no alternative in their Option Group.
Once you've chosen your Choice Rule, there are other settings you can add to your Choice Rule:
If Free of charge is ticked, the Product Option financial details will be ignored. Otherwise each job will have a revenue line for the Product Option.
If Include in turnaround is ticked, the Product Option turnaround details will be added to the product, making the turnaround time longer.
If Show on Website? is ticked, customers will see the Product Option. This is advisable when there is a Choice of options, but not for Mandatory options.
If Only show for Production is ticked, the Sales team will not be able to adjust the option via .
Products in Flyerlink can allow customers to choose any size. Any size is especially useful for large format ranges of banners or the fabric display produced by Grafenia.
To create a product with any size head to
Choose the "Other sizes" group and then "Choose your size"
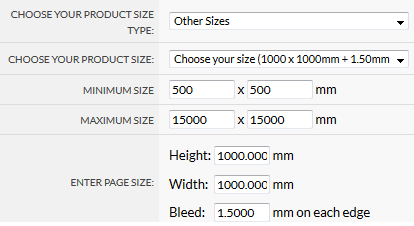
When you make a product with this size, you'll see new options for a minimum size, maximum size and default page size.
Your minimum size is the smallest possible size you can make with this product code.
The default size is the size a client sees by default. We recommend using 1000 x 1000mm ( 1 m² ). The default size is also used as the lowest possible price point, so you can include a size that covers all your set up costs for the default size.
The maximum size is the largest possible size a client can order.
For any sized products, pricing for any-sized products is based on per m².
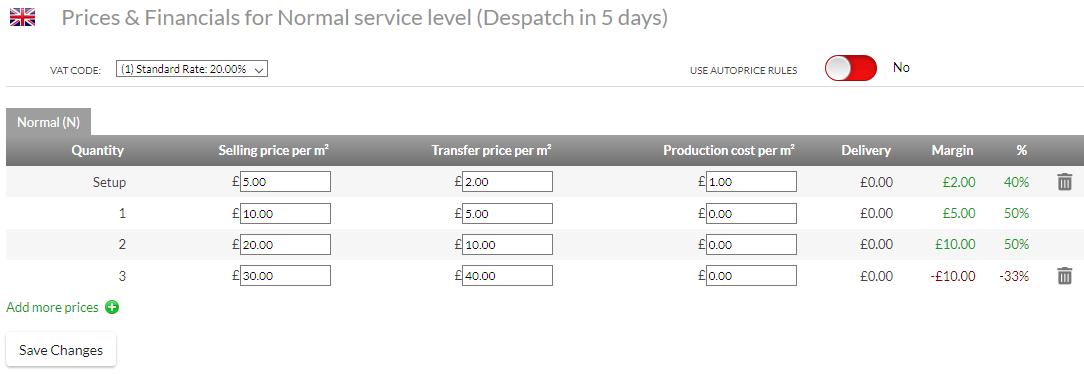
If you add a set up cost, we always add the set up cost to any size the customer chooses
Then we multiple the other costs by the size choosen
For example a job of 2000 x 2000 mm will make 4m².
If the set up = £5
Size = 4m²
Selling price per m² = £10
The cost will be £5 + (4 * £10) = £45
If you don't set a set up cost, the default product size you do will become the minimum amount charged to a customer
If set up = £0
Size = 0.2m²
Selling price per m² = £10
And default product size is 1m²
Then the cost will be £10
If you do add a set up cost, the set up cost becomes the minimum charged
If set up = £2
Size = 0.2m²
Selling price per m² = £10
And default product size is 1m²
Then the cost will be £2 + ( 0.2 * £10) = £4
Once you've created a product that allows any size, you can create a job with that product code.
When you do you'll see an any size option that lets you choose between the minimum size, default size, maximum size and custom size.
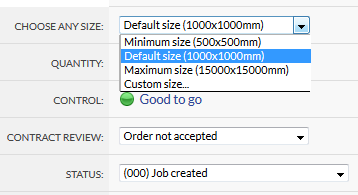
If you choose a custom size, you'll be able to enter your own size.
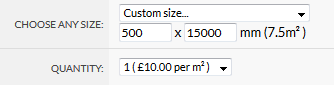
You'll see what the size you've chosen works out in m².
When you save, we will then recalculate the prices for the job.
Remember to save a job to see the new price.
It's also possible to order any size products online.
When someone views an any size product, they'll see a popup that asks what size they would like to choose within your minimum and maximum range.
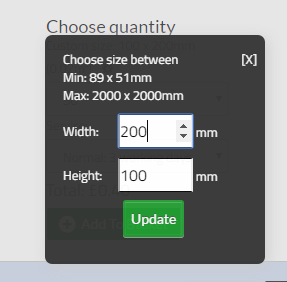
They can adjust the size within the configure your printing page, product group page, and personal catalogue.
Any size products are not available for use on templates.
For batch litho print, it's more efficient to let customers order products in batch amounts that can be ganged together and produced with similar jobs in a single run.
However, for other forms of printing, such as digital, you may want to allow customers the ability to order jobs in any quantity. This approach is possible through Flyerlink.
To set your product to allow any quantity ordering, head to
In the Technical Specification section, tick "Allow any quantity:"
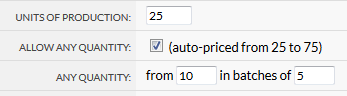
Then choose the unit you want to start from, and the batch quantity.
This can be from 1 to 1 if you want any quantity to be available, or you can use batches of 5, 25, 50, 100, 500.
The note after your tick box will explain what quantities will then be available.
The any quantity batch you use must be divisible by your units of production, and it's the units of production that you use to enter your prices.

Anything ordered upto the first Units of production will still cost the same as the first batch. This is because often the set up costs for a job are the same regardless of what quantity is ordered. Any quantity ordered above the first batch will then show the in-between price.
Using the example above of a product costing £30 for 10 units and £50 for 20 units, we can work out how much the inbetween prices are:
Price difference: £50 - £30 = £20
Quantity difference: 20 - 10 = 10
Price difference/Quantity difference: £20/10 = £2
Then add the closest batch + the in-between price of the two batches.
If 16 was ordered, it would cost: £30 + (6 * £2) = £42.
When you create or modify a job in Flyerlink that has any quantity activated, you'll see the first 100 inbetween in the quantity dropdown menu.
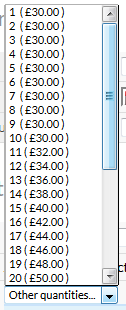
If you need to order any more, you can choose "Other quantities" and choose your amount.
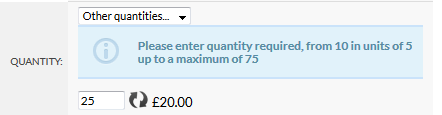
This "Other quantities..." option also shows whenever a customer has the option to choose this product online.

For the product group page, we merge together multiple products. It's possible to show upto 2 clauses to the customer, such as "Enter quantity from 10 to 75 (in units of 5) or from 75 to 750 (in units of 25)"
However we only show a maximum of two to avoid confusion for the customer. If you're having a product that gets merged with lots of quantity breaks, try to make things as simple as possible by keeping the batches as similar as possibe.
This article explains what Service Levels are and how to add them to your products.
Due to sustained price rises within all our supply chains, Service Level costs will increase from this date.
Click here to read our w3pin post for more information.
Service levels are designed to give your customers flexibility in the timeframe their job will be produced.
If you or your customer need a product immediately, you can use the SOS or Xpress service. If you can wait and want to reduce the normal printing cost, you can choose the Stand-by service.

The Service Level affects both the Sales price and the Transfer price of a job. To produce a job faster, it will cost slightly more. To produce a job slower, it will cost less.
This 3 working day product would be despatched from the Production Hub on the 2nd working day (03/10/14) to be delivered on the 3rd working day (04/10/14).
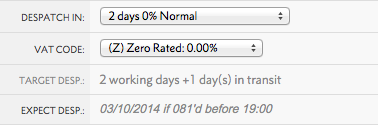
If Customer Collection is required, the job will be made available to collect on the 3rd working day (the same day we would expect to deliver it).
We cannot guarantee that Jobs will be available to collect on the "Expected Despatch" date (i.e. the day before it is expected to be with the customer).
Please note that you can only change the Service Level/Turnaround before setting your job to status 081.
After this time, your job is allocated to a print run alongside jobs with similar turnaround times.
If your job has not yet been allocated to a print run (where the Progress bar is still grey), you can manually set the job status to 071 > change your Turnaround time > set the job status back to 081.
It is important to remember that pulling your job(s) back from status 081 will reset the turnaround time.
This means the new turnaround will start from the day that you make those changes, not the original date that you set the job to 081.
We've recently introduced an in-flight upgrade service to give you extra flexibility if your deadlines change.
You can email support@worksmcr.com to request an upgrade and we'll do our best to accommodate you.
Has your order gone to print with the wrong artwork? Or does an order already in production need to be sped up?
If we're able to deallocate the artwork, you'll pay a service fee plus any material costs incurred.
If we’re able to speed up the turnaround, you'll pay a service fee plus the service level premium for the earlier despatch date.
Successful requests will be raised as charges against your Trading Account and appear on your Transfer Price invoices so we'd recommend passing those charges onto clients for the service.
Service levels used by Grafenia all follow consistent behaviours, see the example below for a product that has a Normal turnaround of 10 working days:
|
Service Level |
Turnaround |
Sales Price |
Transfer Price |
|---|---|---|---|
|
(S) Stand-by Zero |
At least doubles the 'standard' turnaround time |
0% |
-5% |
|
(S) Stand-by |
Doubles the 'standard' turnaround time |
-5% |
-5% |
|
(N) Normal |
'Standard' turnaround time |
0% |
0% |
|
(R) Pretty Quick |
10 working days becomes 9 |
10% |
10% |
|
(Q) Pretty Quick |
10 working days becomes 8 |
14% |
14% |
|
(P) Pretty Quick |
10 working days becomes 7 |
18% |
18% |
|
(X) Xpress |
Halves the 'standard' turnaround time |
25% |
25% |
|
(D) SOS |
Print will be available the next day, if sent to print before 12pm (midday) |
100% |
100% |
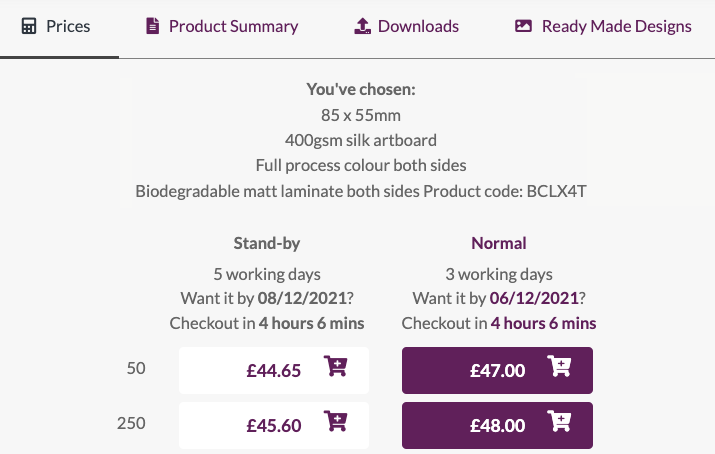
You can add Service Levels to products you create yourself.
Head to .
In the Technical Settings:

Once this is done, you'll have the option to add extra Service Levels in your Pricing section. You can choose how much markup or markdown from the Normal service you want for each level.
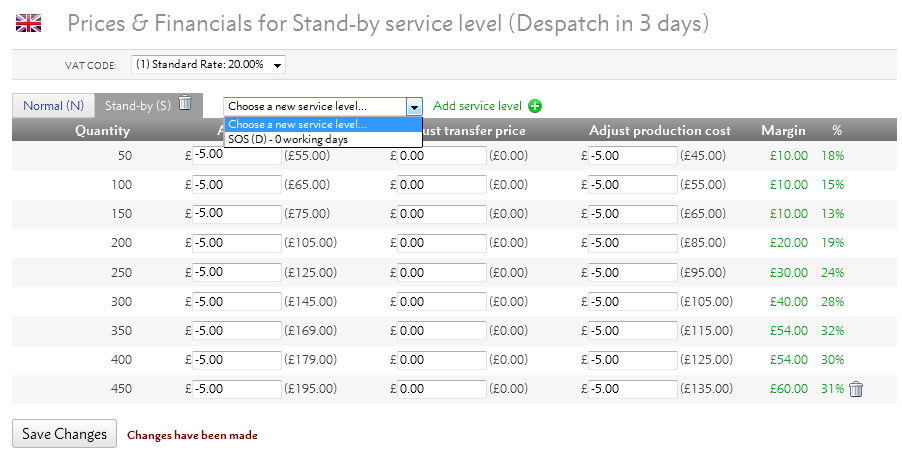
These can vary for every price break or you can set a fixed increase or decrease of £5 or £10.
The available Service Levels will depend on your normal turnaround time. If a product normally takes a long time to produce, you can add layers of Service Levels to speed up the process.
The following table shows which Service Levels you can add depending on your Normal turnaround for despatch.
| (N) Normal | (S) Stand-by | (R) Pretty Quick | (Q) Pretty Quick | (P) Pretty Quick | (Y) Xpress | (X) Xpress | (D) SOS |
|---|---|---|---|---|---|---|---|
| 1 day | 3 | - | - | - | - | - | 0 |
| 2 days | 5 | - | - | - | 1 | - | 0 |
| 3 days | 7 | - | 2 | - | 1 | - | - |
| 4 days | 9 | - | 3 | - | 2 | - | - |
| 5 days | 11 | - | 4 | 3 | 2 | - | - |
| 6 days | 13 | - | 5 | 4 | 3 | - | - |
| 7 days | 15 | - | 6 | 5 | 4 | 3 | - |
| 8 days | 17 | - | 7 | 6 | 5 | 4 | - |
| 9 days | 19 | 8 | 7 | 6 | 5 | 4 | - |
| 10 days | 21 | 9 | 8 | 6 | 5 | 4 | - |
| 11 days | 22 | 10 | 9 | 8 | 7 | 5 | - |
| 12 days | 24 | 11 | 10 | 9 | 7 | 6 | - |
| 13 days | 26 | 12 | 11 | 9 | 8 | 6 | - |
| 14 days | 28 | 13 | 11 | 10 | 8 | 7 | - |
| 15 days | 30 | 14 | 12 | 11 | 9 | 7 | - |
Flyerlink® Supplieready is a tool that enables a PDF file to be manipulated to meet a production specification that is different to our standard w3p hub printed formats. Supplieready is free to use, and is available on Open Source and In-House Product Groups.
A recorded training webinar detailing how to use OpenSource when adding your own products to Flyerlink! and w3shop.
A recorded training webinar detailing how to use InHouse when adding items you produce InHouse to Flyerlink! and w3shop.
A recorded training webinar detailing how to use the Pick n Pack stock management tool for your own products on Flyerlink! and w3shop.
See also
|
|||||
Jump to contents page of
|
|||||