Support for

This book contains articles about how to use the Supplier Portal or Production Dashboard.
Getting Started
|
|||||||||||
Production Methods
|
|||||||||||
Supplieready
|
|||||||||||
This book contains articles about how to use the Supplier Portal or Production Dashboard.
Your opensource products can belong to either your workgroup, or a supplier you set up.
Suppliers can be made in three places:
1) You can create a supplier before making any products or product groups
via
2) When you create a new product group
via
3) When you create a new product, and in so doing create a new product group
via
When you make a product, you're asked what product group to assign it to and each product group is allocated to a supplier.
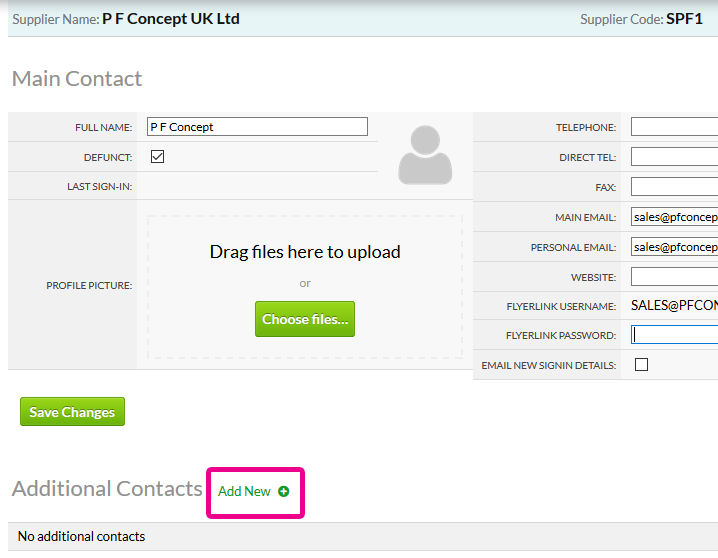
Your supplier has information about the person you are sourcing the product from. You can edit your supplier's contact details on
You can also use your suppliers to send self-bill production invoices
And ask them to log into the Production Dashboard to process orders once they've gone to status 081
For a supplier to be able to log into the production dashboard, you'll need to make a flyerlink user for your supplier. This can be done on
Your supplier is an S level flyerlink user, meaning they only have access to the production dashboard.
This article explains:
Both you and your suppliers have access to the menu in Flyerlink.
Through this menu, you can access all jobs using products belonging to your workgroup or your suppliers.
Go to and you'll see an overview of the jobs that are in production:
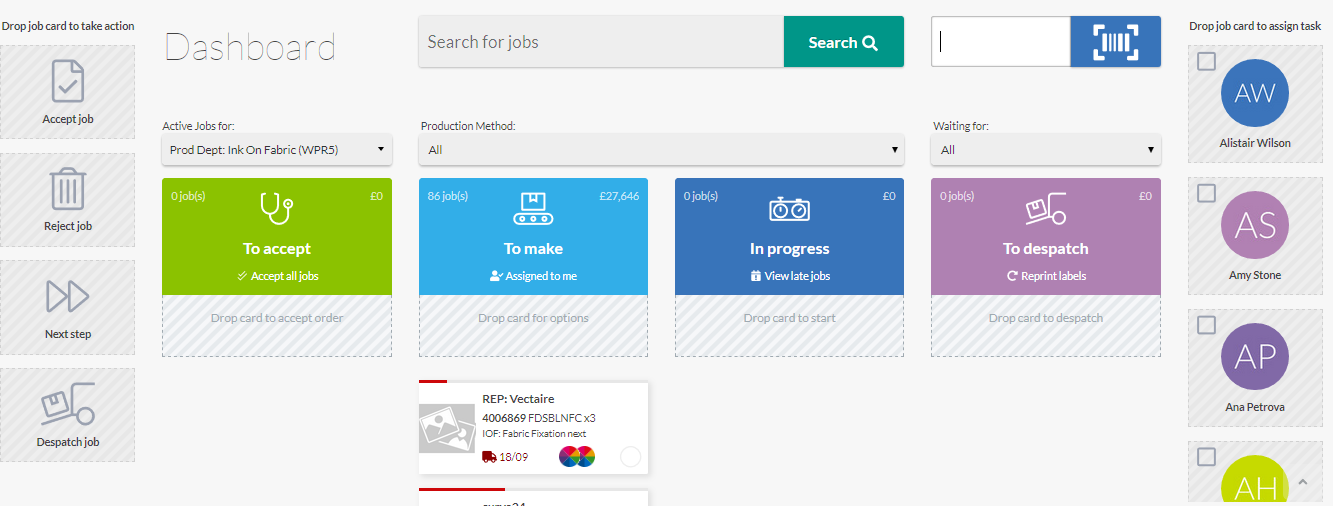
The page is responsive but designed to work on desktop or landscape iPad, not mobile or portrait iPad.
The screen is split into 4 sections:
You will see a job card for each job in each section
Click a card to see more details about the job, and use the tabs to find out more or act upon a production step
The Jobs to accept columns shows all jobs which are at Status 081 and haven't yet been accepted or had a production step started.
You can filter by production step or production method to only accept specific jobs.

To accept 1 job, drag one card into the accept tile
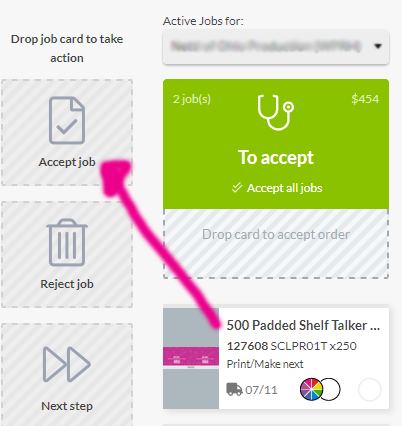
It will then move into the Jobs to make section.
You can click the accept all jobs to move them all over - or just start acting on the production steps by clicking a card, going to the steps tab and confirming a production step has started or is in progress.
If you want to reject a job, because it doesn't conform to your requirements, drag the card instead into the Reject job tile.
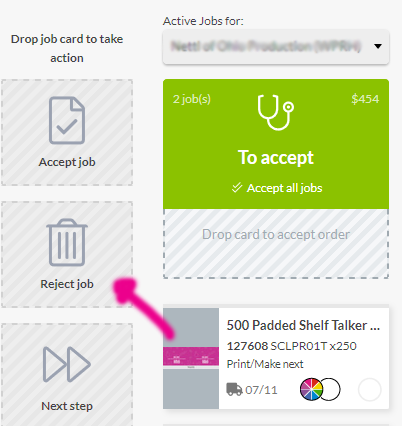
That'll put the job to status 091 and notify the workgroup that placed the order.
Status 091
If you reject a job or change the status to 091, it will be sent back to the Sales Team and you cannot produce it.
Status 094
If there are file conformance issues but you are still willing to produce the job, choose status 094.
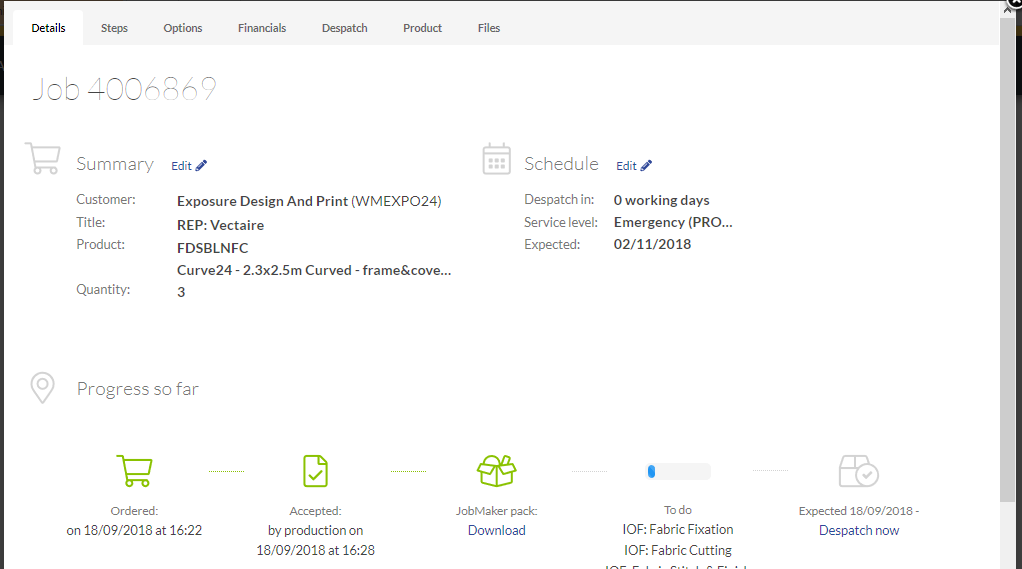
To produce a job you will need the job files
You can get these by clicking a job, choosing Files tab
You'll see a list
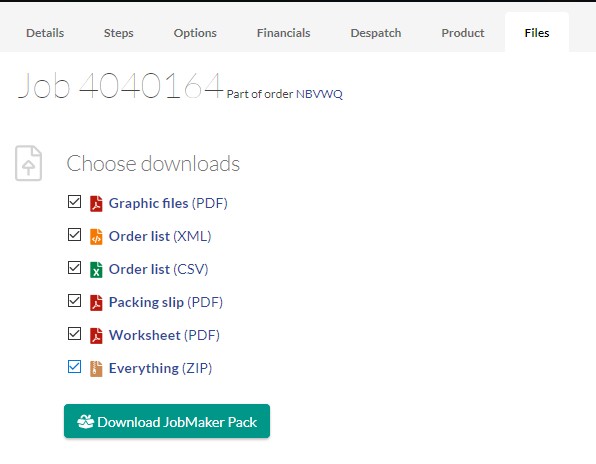
Hit Download JobMaker Pack to get a ZIP containing:
When you download a JobMaker pack we move that job from To Accept to To Make
You can still reject the job afterwards if needed
Along the right side you'll see a list of users in the production workgroup
Drag a card to a production user to assign it to that person
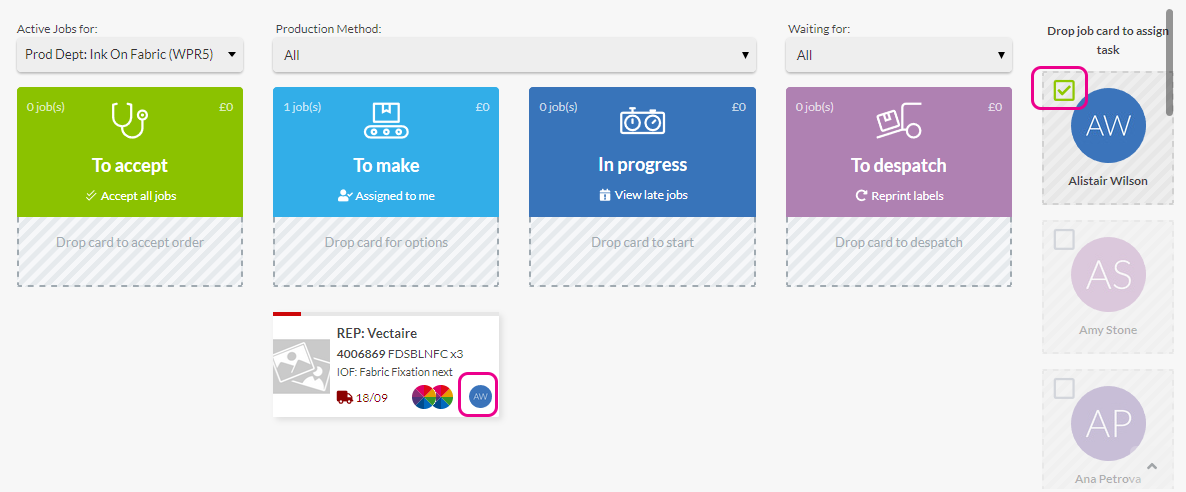
You can then tick the staff member on the side to filter only out and only show their work in progress
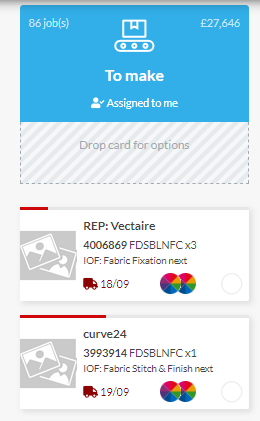
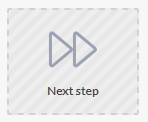
Once you've accepted jobs, they move to Jobs to make:
Drag a card onto Next step tile to see the next step
Or click a job and choose the Steps tab
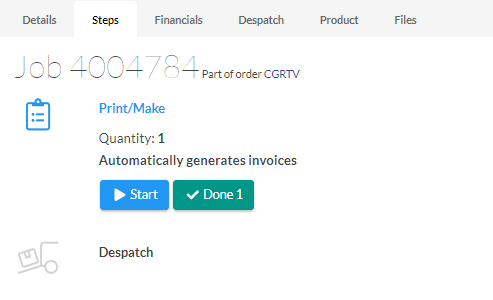
Here you'll see a list of each of the Production Steps you've added on displayed as a start or done button.
As a minimum you will have print & despatch but can add more.
The next step to do is highlighted as a green button, others need to be clicked to expand and start.
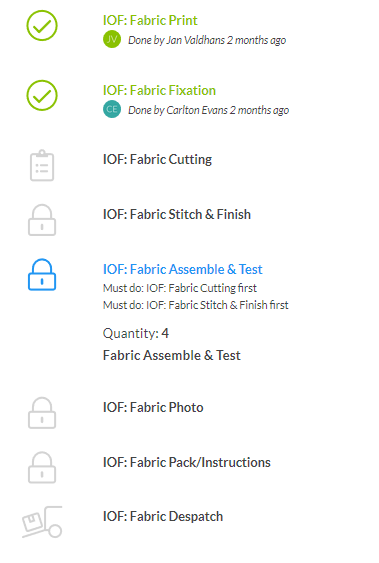 If you've set any Must do steps, that step is locked until the previous step is completed.
Once the step is completed, simply press done step. Flyerlink will record who progressed the step and when, incase there are any issues with the production.
Choose Start to record time taken between start & finish.
Once you've made your jobs, you need to despatch them. The ones with just a despatch left will show in the "To despatch" column
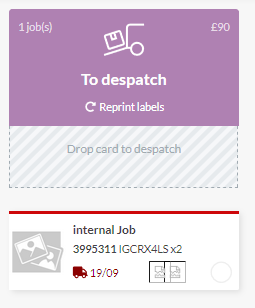
To do this click the despatch step
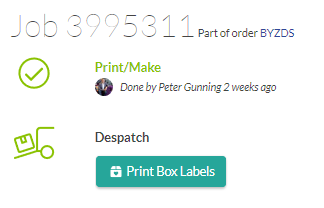
Click the Print box labels to start the despatch process. Flyerlink will show you all jobs going to the same address, by the same despatch method, in case you want to put more than one job in the same box. Just tick the jobs you're despatching and choose the quantity & number of boxes required:
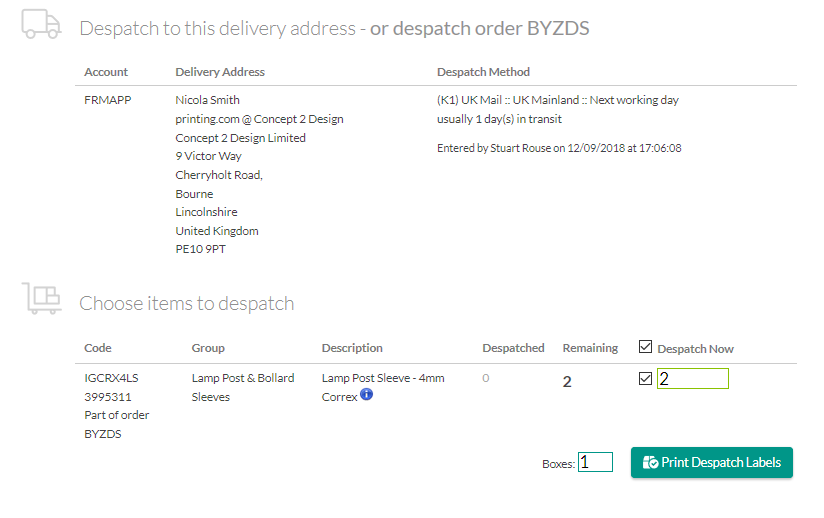
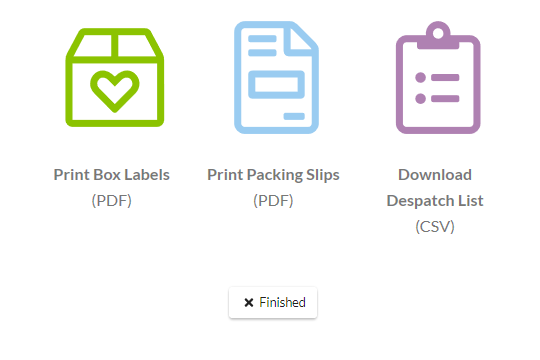
On the next screen, print the despatch labels, actual packing slips and get the despatch details as a CSV file if you want to import them somewhere else:
If you would like to change the despatch method before despatching
Click a job and choose the Despatch tab
Click the Change Despatch option
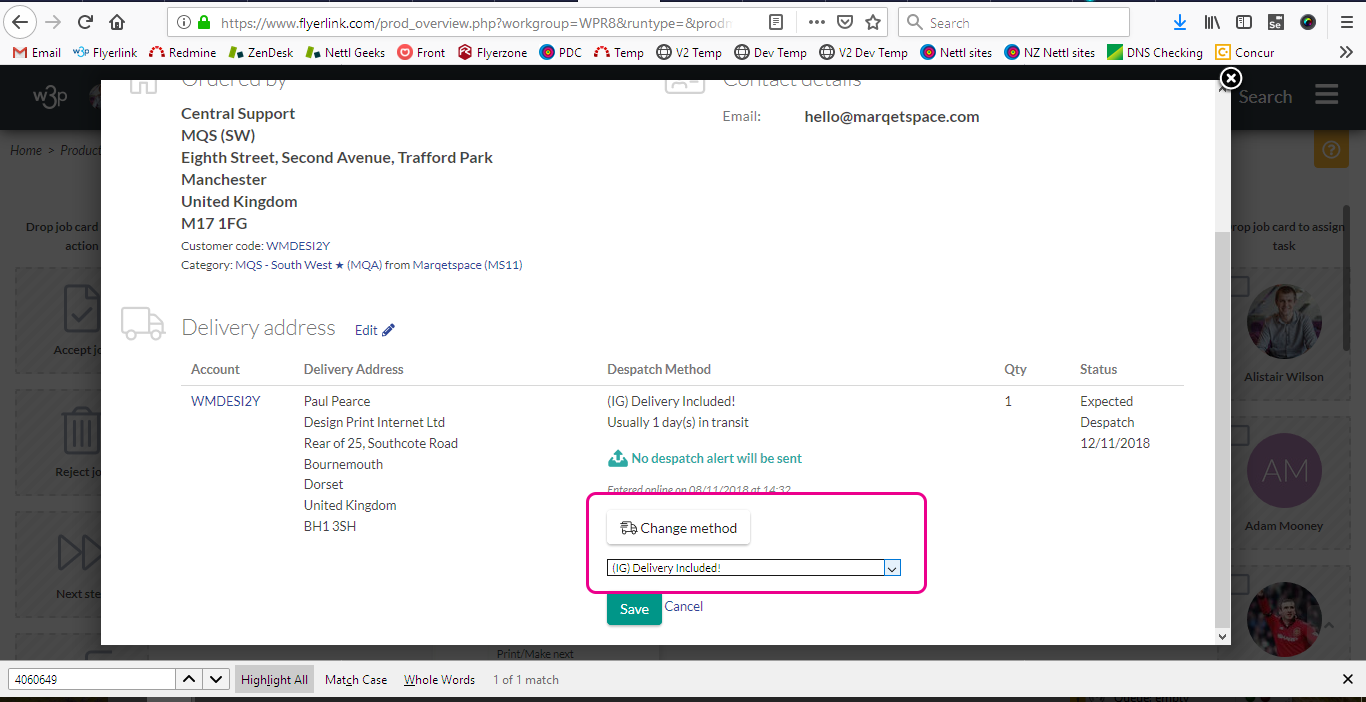
Choose the option and save then you can despatch
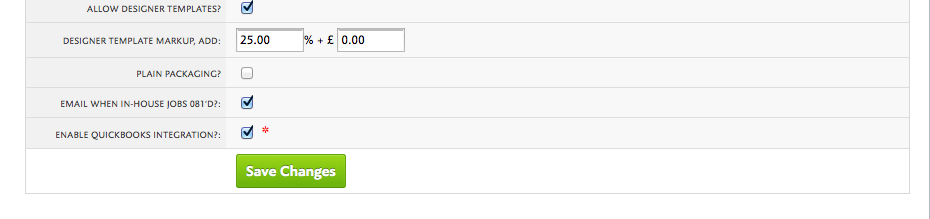
If you'd like to get an email when any InHouse production jobs go to 081, go to and tick the Email when In-house jobs 081'd?: option:
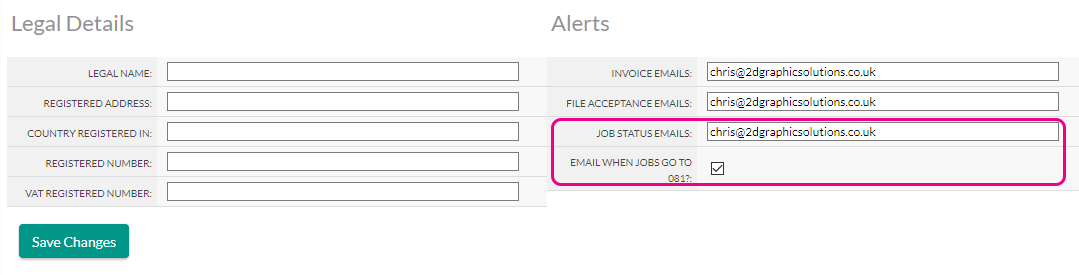
There's a similar setting for each of your Opensource Suppliers. Go to , scroll to the Alerts section and stick a big fat tick in the Email When 081?: box:
This gets sent to the Job Status Email of the product's supplier
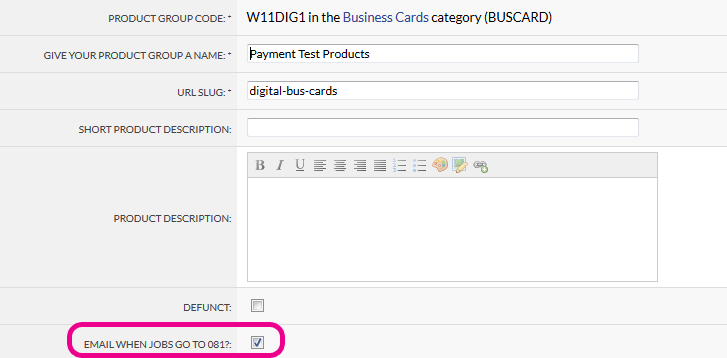
You can turn on the notification per product group via by ticking Email when jobs go to 081?:
This article explains what the JobMaker Pack is and how to use it.
Once you've accepted Jobs for Production via , you're asked to download the JobMaker Pack.
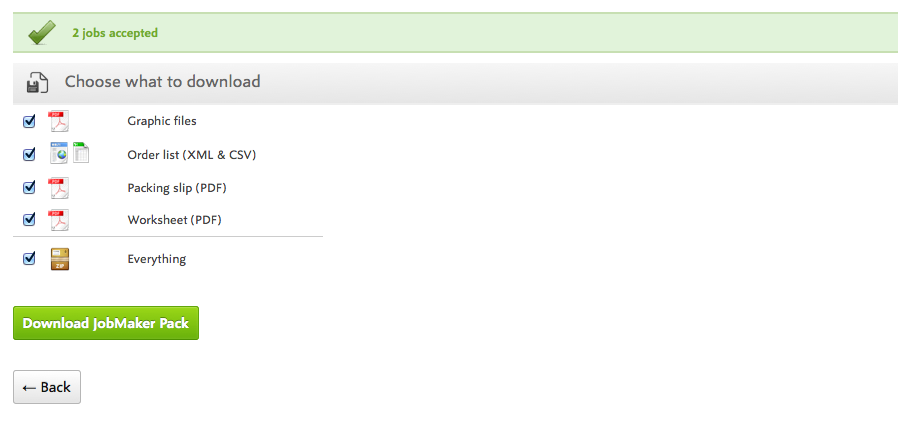
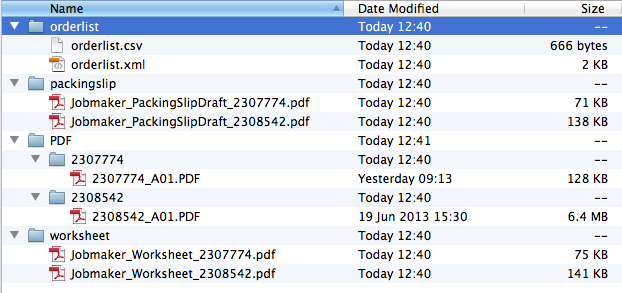
The JobMaker Pack provides a zip containing 4 items:
The Graphic File, Orderlist, Packing slip and Worksheet.
The Graphic File provides the product's Artwork, usually in a PDF format.
You can download this file and upload it to your Pre-Press to ensure the customer receives the right design for their print.
If you need to download the graphic file again, you can retrieve it from in the Graphic Files for Production section.

Throughout production, you'll see a thumbnail of the graphic file to help you see what you're working towards.
The Orderlist comes in two formats; CSV & XML.
The Orderlist gives an overview of all the important technical aspects of the job, such as the product, it's height, width and bleed, the job reference and the Production Method you're using.

You can use the CSV or XML to add the Orderlist into a different MIS system or application if you're tracking job details outside of Flyerlink.
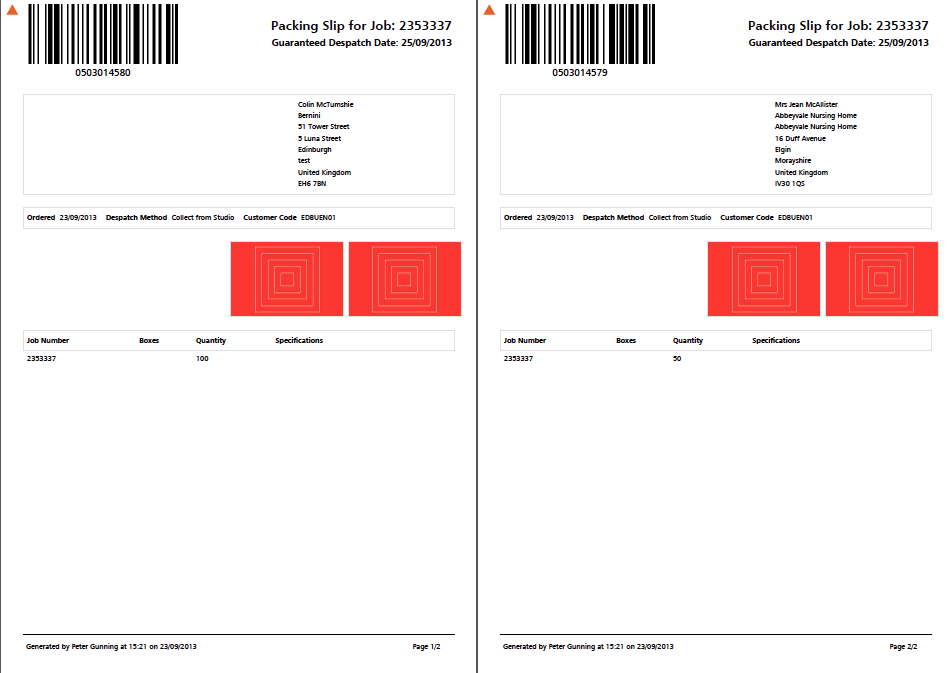
The Packing Slip you are provided with is a draft format, that shows the job details, the design thumbnail and the customer's address you're despatching too.
It also provides any product specifications added to to help your production team.
You can use this packing slip to follow the job through production.

The colour in the top left gives you an indication of the day it should be despatched on:
| Day | Icon | |
|---|---|---|
| Monday | Red Square | |
| Tuesday | Green Circle | |
| Wednesday | Orange Triangle | |
| Thursday | Blue Rectangle | |
| Friday | Purple Octagon | |
| Saturday | Gold Star | |
| Sunday | Magenta Oval |
Read Resource Article 5119 to understand how to use the barcodes as part of your production.
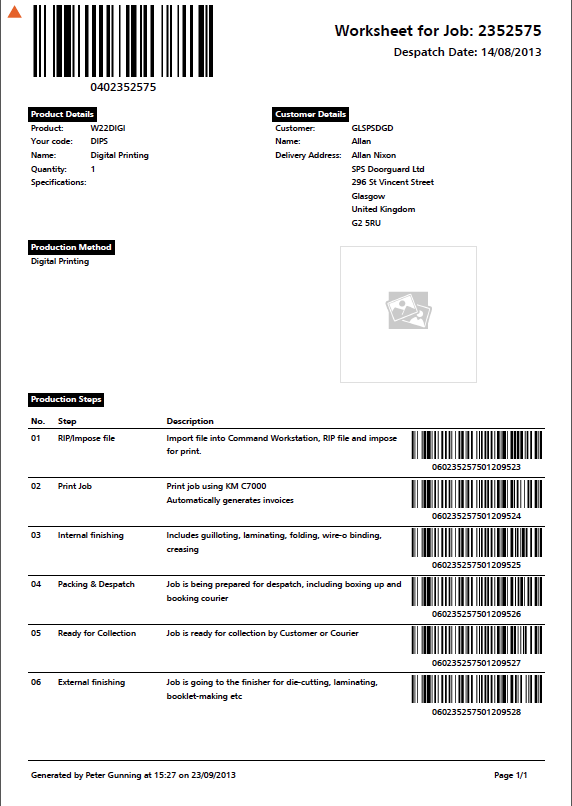
The Worksheet also follows you around the production.
The Worksheet shows you all the production steps that need completing before the Job can be despatched.
It also uses coloured shapes to indicate what day a Job should be despatched by.

Any production details or production notes you add on or will show on the Worksheet.
You can also use the Barcodes in your production.
This article explains how to use Barcodes in the Production Dashboard.
Barcode scanning provides a nifty short-cut during your Production. It saves keystrokes, speeds up the process and eliminates typing errors. To use barcodes, we've taken the core quality processes our production hubs use and simplified it.
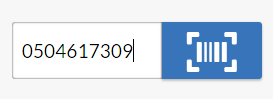
Simply plugin a barcode scanner to your Mac or PC (usually into the USB port) to play. When you or your supplier signs into Flyerlink and visits the , you'll see a Scan a Barcode section:
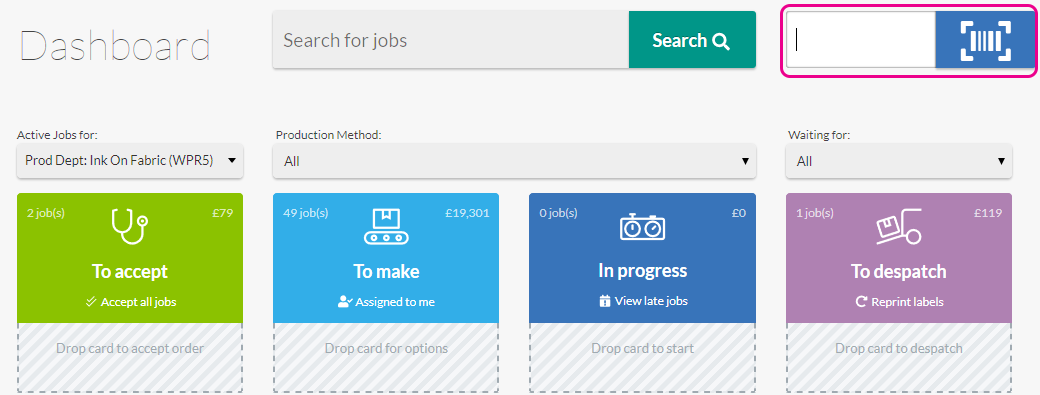
The field is active and ready to accept a barcode.
Each of the JobMaker Pack printouts have different barcodes on them.
If you've set up Production Steps for any of your Production Methods you'll see a unique barcode for each step on the Worksheet:
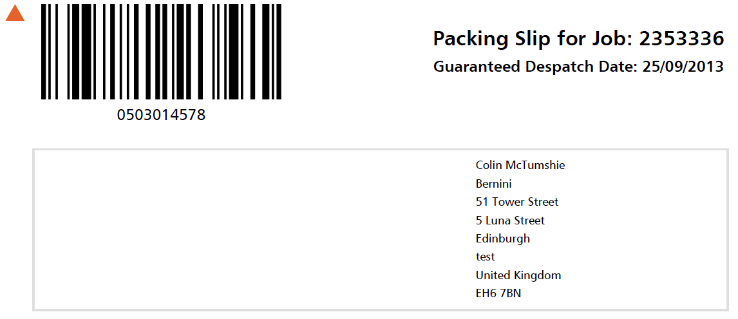
Likewise, you'll get a unique barcode for each delivery address your job is being shipped to in your Packing Slip:
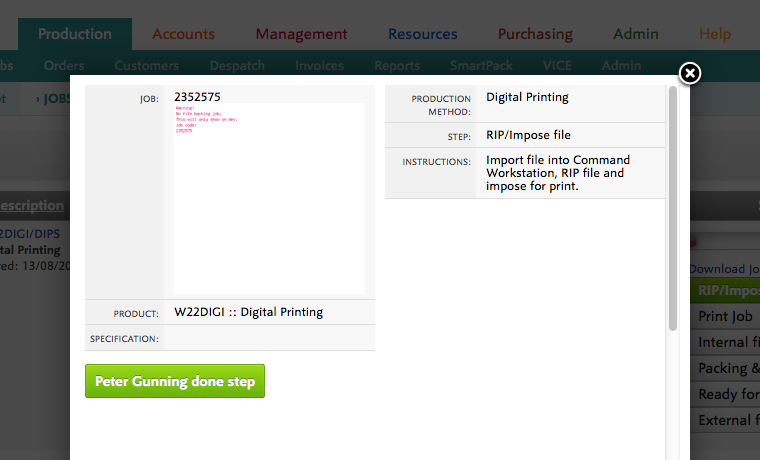
When you scan a production step barcode, starting with 060, on the Worksheet:
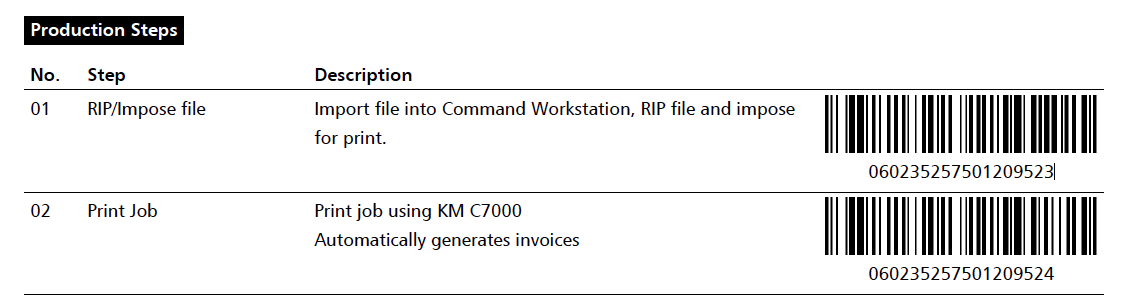
Flyerlink will open a pop-up and take you to the appropriate step to complete:
Scan the large barcode, starting with 040, on your Worksheet:

Flyerlink will link you to that Job's page.

Scan the large barcode, starting with 050, on your Packing Slip:
and you'll be taken to a despatch job screen:

with this screen you can Despatch multiple jobs at once.
Simply scan the delivery barcode on your Packing Slip the number of times you want a despatch label.
Scan twice to get two Despatch Labels. Alternatively, you can scan two or three different jobs at any given time, to despatch in full several jobs at once.
Stock Pick items are ones you may want to despatch all at once.
Flyerlink provides a Picking List in and in .

The Packing Slip will show you a list of all the Stock Pick items currently awaiting picking, along with their barcodes.
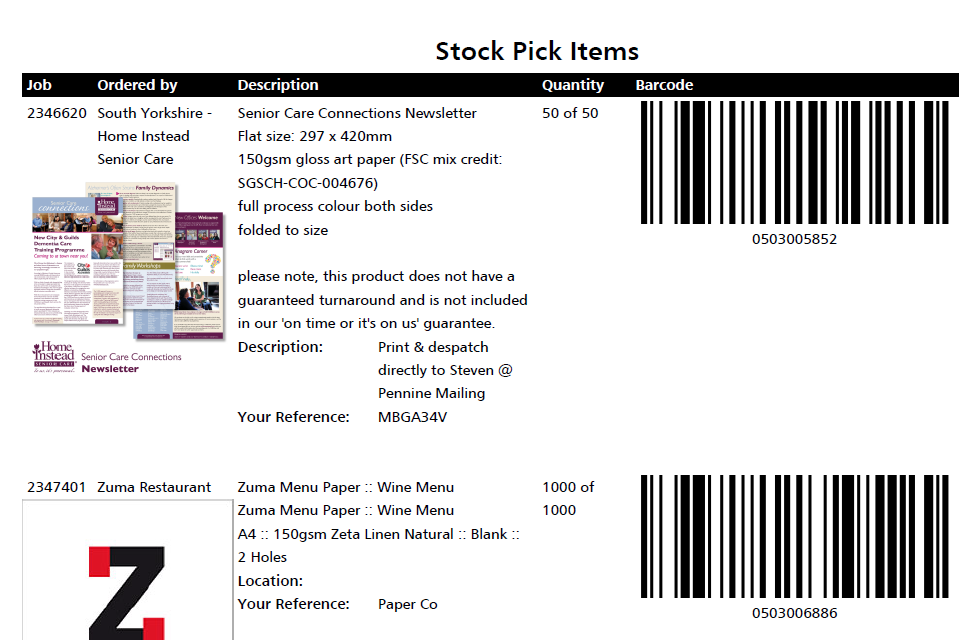
Simply scan the barcodes you want to despatch and you'll be given a list of all the despatch labels you need to complete a batch despatch.

This article explains how to generate production invoices to bill yourself for orders from your suppliers.
With the tab, you can create suppliers and their products to sell to your customers.
You can also use Flyerlink to create production invoices from the supplier to yourself.
This will automatically create a bill for yourself once a product from your supplier has been printed and despatched.
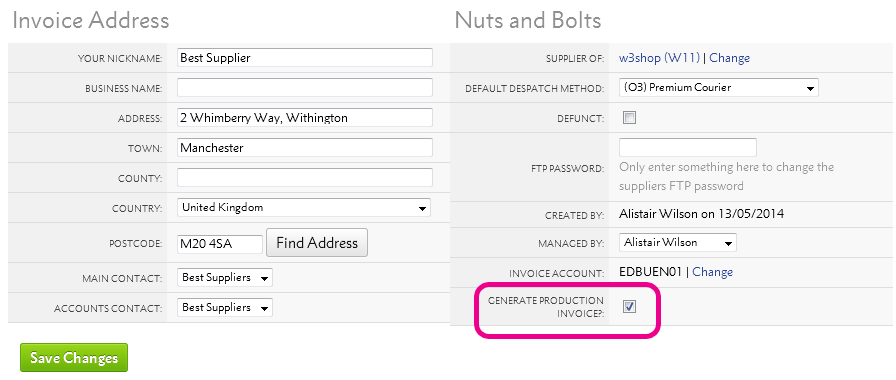
By default, your suppliers do not generate production invoices. However, if you want to active self-billing for any or all of your suppliers
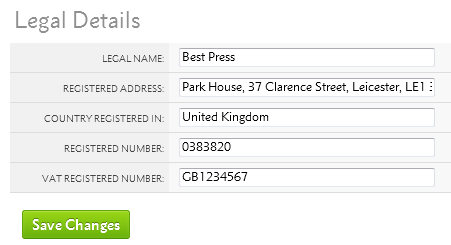
For your invoice to be legally valid, you will need to add your supplier's legal details including their VAT registration number.
The price taken for your production invoices come from the Production cost you set on your products via .
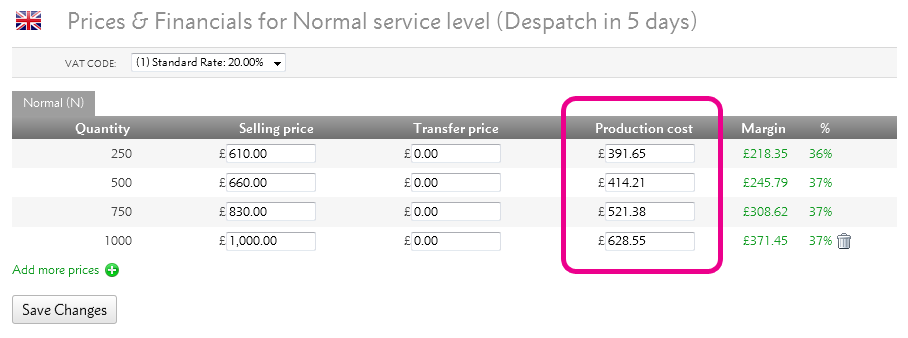
An example production invoice for that product can be seen below:
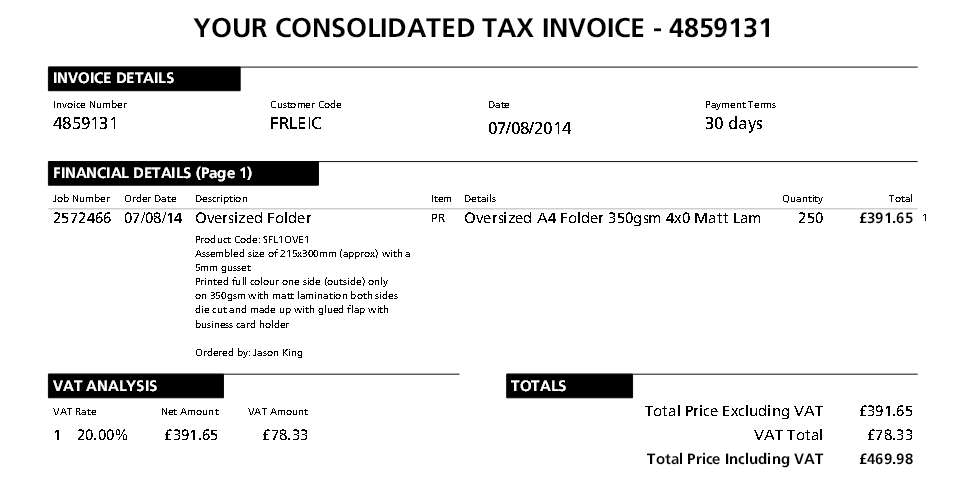
All production invoices are created once your supplier has printed and despatched the job to your customer.
You can find the invoice against the supplier's Invoice Account via .
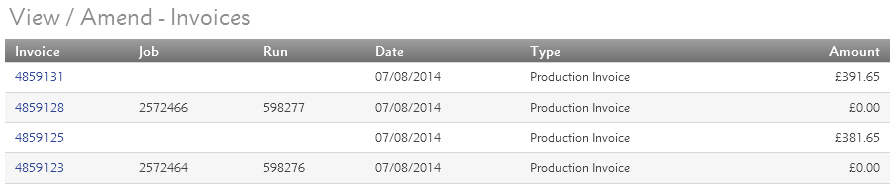
You can also find the invoices when searching for sales invoices on .
This guide explains how to set up Production Methods to improve the workflow of your production if you're using w3p to manage it.
Production Methods are the way to manage how your products or your suppliers' products are produced. Each method is made up of a set of Production Steps.
Production Steps are the series of steps involved in producing a product. For example, you may choose a Step to "Upload files into the printer" or "Check ink levels".
By default, all products created via are made with a simple Production Method that just uses a "Print/Make" Production Step.
The Production Steps you add are visible when a product has been ordered in the pages.

The Production Dashboard can also filter by Production Method, to help you gang or group similar jobs together.

To create a new Production Method, go to .

Add some basic details, like your Production Method's name and any extra notes you need to distinguish between this and other Production Methods, then choose Create Production Method.
Once you've created a production method, you can edit it via .
To add a new production step, choose the Add new step (+) link.

You can then choose to add an existing Production Step you've already created for other Production Methods:

Or you can create a new Production Step.

You can adjust the order your production steps need to be applied, using the Green and Blue arrows.
And you can add Must-do rules, ensuring another task can only happen in production when a previous task has taken place.

You can either change the production method on in the Technical Specifications section.

Or you can add a product via in the Suitable Products section.

You can connect your production method to a production machine in your factory by adding FTP details.
Simply head to
Add your FTP host, username, password and the file location to the folder you want files uploaded to.
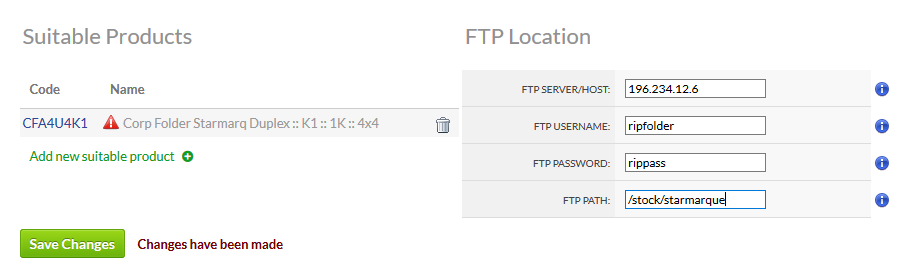
We'll then send job files to your production machine when a job is sent to status 081.
Flyerlink® Supplieready is a tool that enables a PDF file to be manipulated to meet a production specification that is different to our standard w3p hub printed formats. Supplieready is free to use, and is available on Open Source and In-House Product Groups.
Flyerlink® Supplieready is quick and simple and to set up. We have set a range of Supplieready types that you can use. Once you have created your Product Group you can select a Supplieready Conversion Type in the Update Product section ().
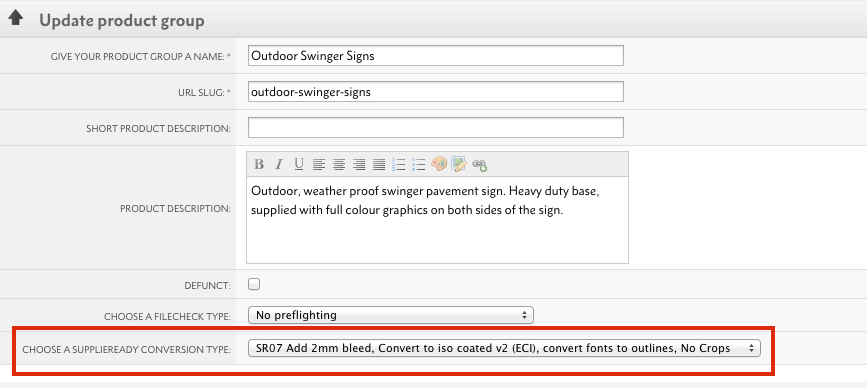
Once you have chosen your Supplieready Conversion Type, click on Save Changes. Our default range of Supplieready types cover most scenarios of file supply for different types of production environment, the different types are detailed in w3pedia article 5097.
If none of our standard Supplieready types are suitable for your production method, then we can develop custom types for you to use. Prices range from £250 to £2,000 depending on the complexity of what you need Supplieready to do, to get a quote on a custom Supplieready type please email us on supplieready@w3p.com
Preflight code : B0
The Supplier Ready flow reduces the ink levels of the pdf to be less than 225% and resizes it to be the page size in flyerlink, if the file has crop marks they are removed
Preflight code : B5
The Supplier Ready flow reduces the ink levels of the pdf to be less than 225% and resizes it to be the page size in flyerlink, if the file has crop marks they are removed
Adds trim marks
Preflight code : B
The Supplier Ready flow reduces the ink levels of the pdf to be less than 300% and resizes it to be the page size in flyerlink, if the file has crop marks they are removed
Adds trim marks
Preflight code : B3
The Supplier Ready flow reduces the ink levels of the pdf to be less than 300% and resizes it to be the page size in flyerlink, if the file has crop marks they are removed
The SR 03: Add Single Sided Overlay Supplieready conversion makes the following changes to a PDF when a job is set to 081:


The SR 04: Add Mutli Page Overlay Supplieready conversion makes the following changes to a PDF when a job is set to 081:


Preflight code : MB
Adds 6mm to file size and adds crop marks
Preflight code: EX
Redistills using exaprint profile
Adds 2mm bleed
Converts fonts to outlines
Converts colour to ISO Coated V2 (ECI)
Preflight code: EX
Redistills using exaprint profile
Adds 2mm bleed
Converts fonts to outlines
Converts colour to ISO Coated V2 (ECI)
Adds Crop marks
The SR 08: Convert RGB to CMYK, Reduce Ink & Add Trim Marks Supplieready conversion makes the following changes to a PDF when a job is set to 081:
Preflight code: HT
Converts RGB to CMYK
Reduces ink to less than 240%
Adds crop marks