Support for

Viewing, checking and editing client supplied PDFs.
Viewing, checking and editing client supplied PDFs.
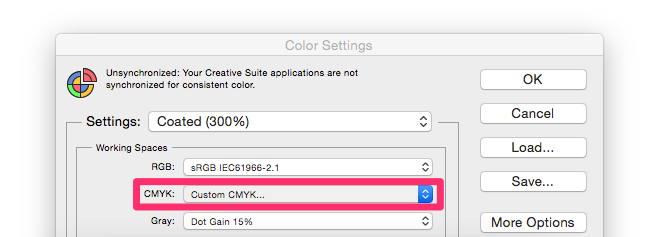
When you convert RGB images to CMYK in Adobe Photoshop maximum Ink Levels are set. We recommend setting up Colour presets to ensure your images are converted using the correct ink levels for Coated (300%) and UnCoated (225%) Paper Stocks.
To edit your colour settings in Adobe Photoshop select then underselect
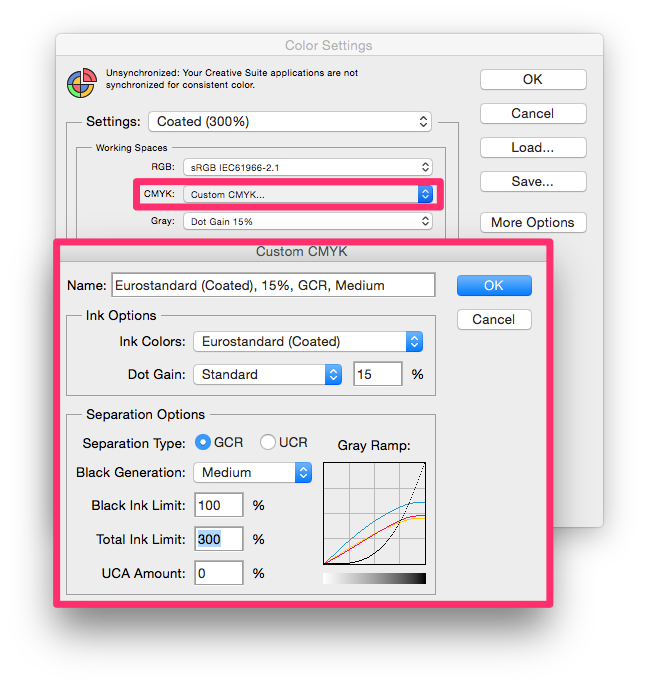
Copy the screenshot below for Coated Paper Stocks.
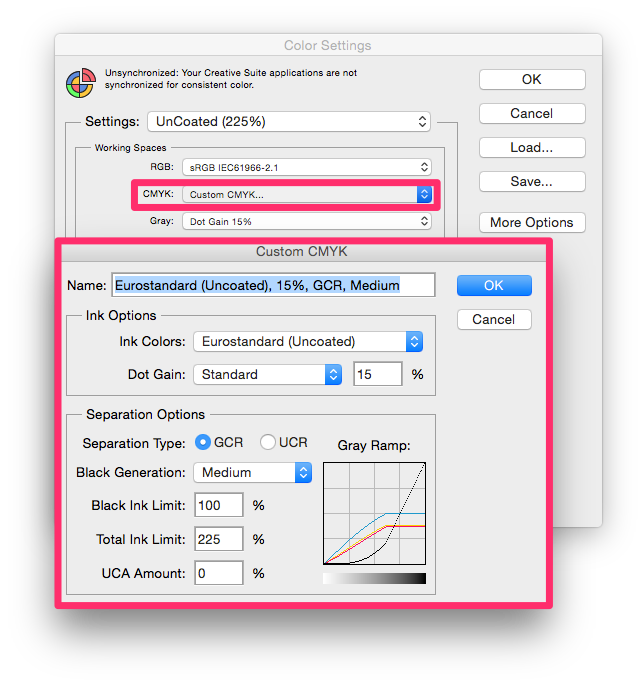
Copy the screenshot below for UnCoated Paper Stocks.
Select your Coated (300%) or Uncoated (225%) Colour Settings from above, then;
To convert RGB Images...
In Photoshop select:
To convert CMYK Images...
In Photoshop select:
We always go to LAB when an image is already CMYK, as LAB is Photoshops widest colour range.
Using the wrong Colour Profile, for example SWOP Coated, could result in your image printing with more magenta.
Using the wrong Dot Gain setting, for example 20%, could result in your image printing lighter than expected.
Using the wrong Ink Limit could result in set-off where areas of image exceed the recommended ink limit for a particular paper stock.
| Profile | Ink Limit | |
|---|---|---|
| Coated | 300% | Silk and Gloss stocks |
|
Uncoated Digital Printing Large Format Printing |
225% 275% 225% |
Recycled stocks and Letterheads Digital Leaflets & Booklets Banners and Large Format Posters |
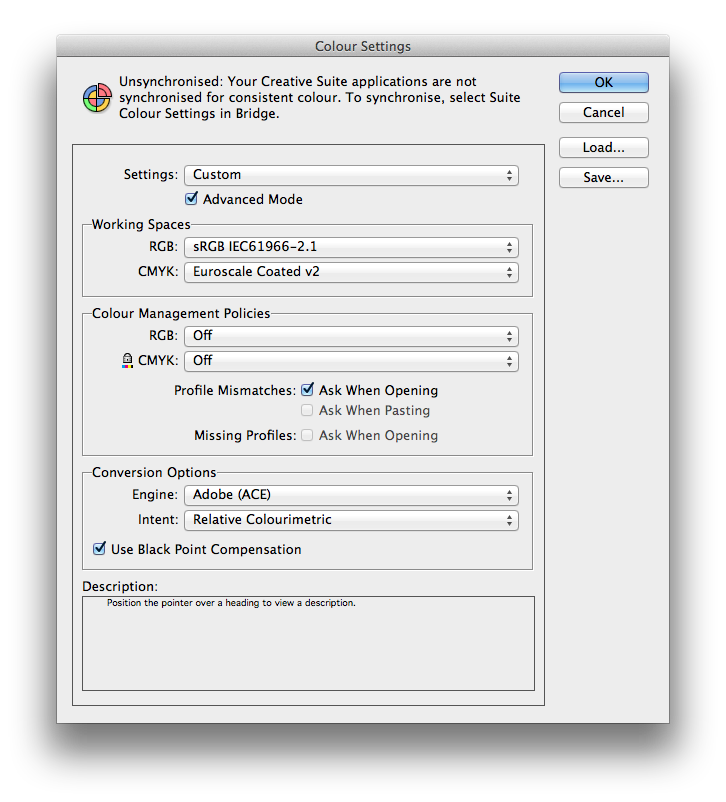
We take the raw CMYK values within your artwork and do not need InDesign to colour manage your documents.
Go to
Set your Working Space for CMYK to Euroscale Coated v2 for Coated products and Euroscale Uncoated v2 for Uncoated products.
Set your Colour Management Policies to 'Off'.
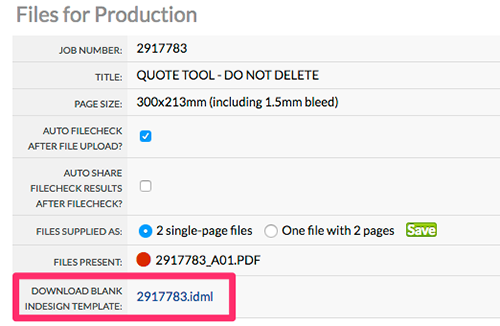
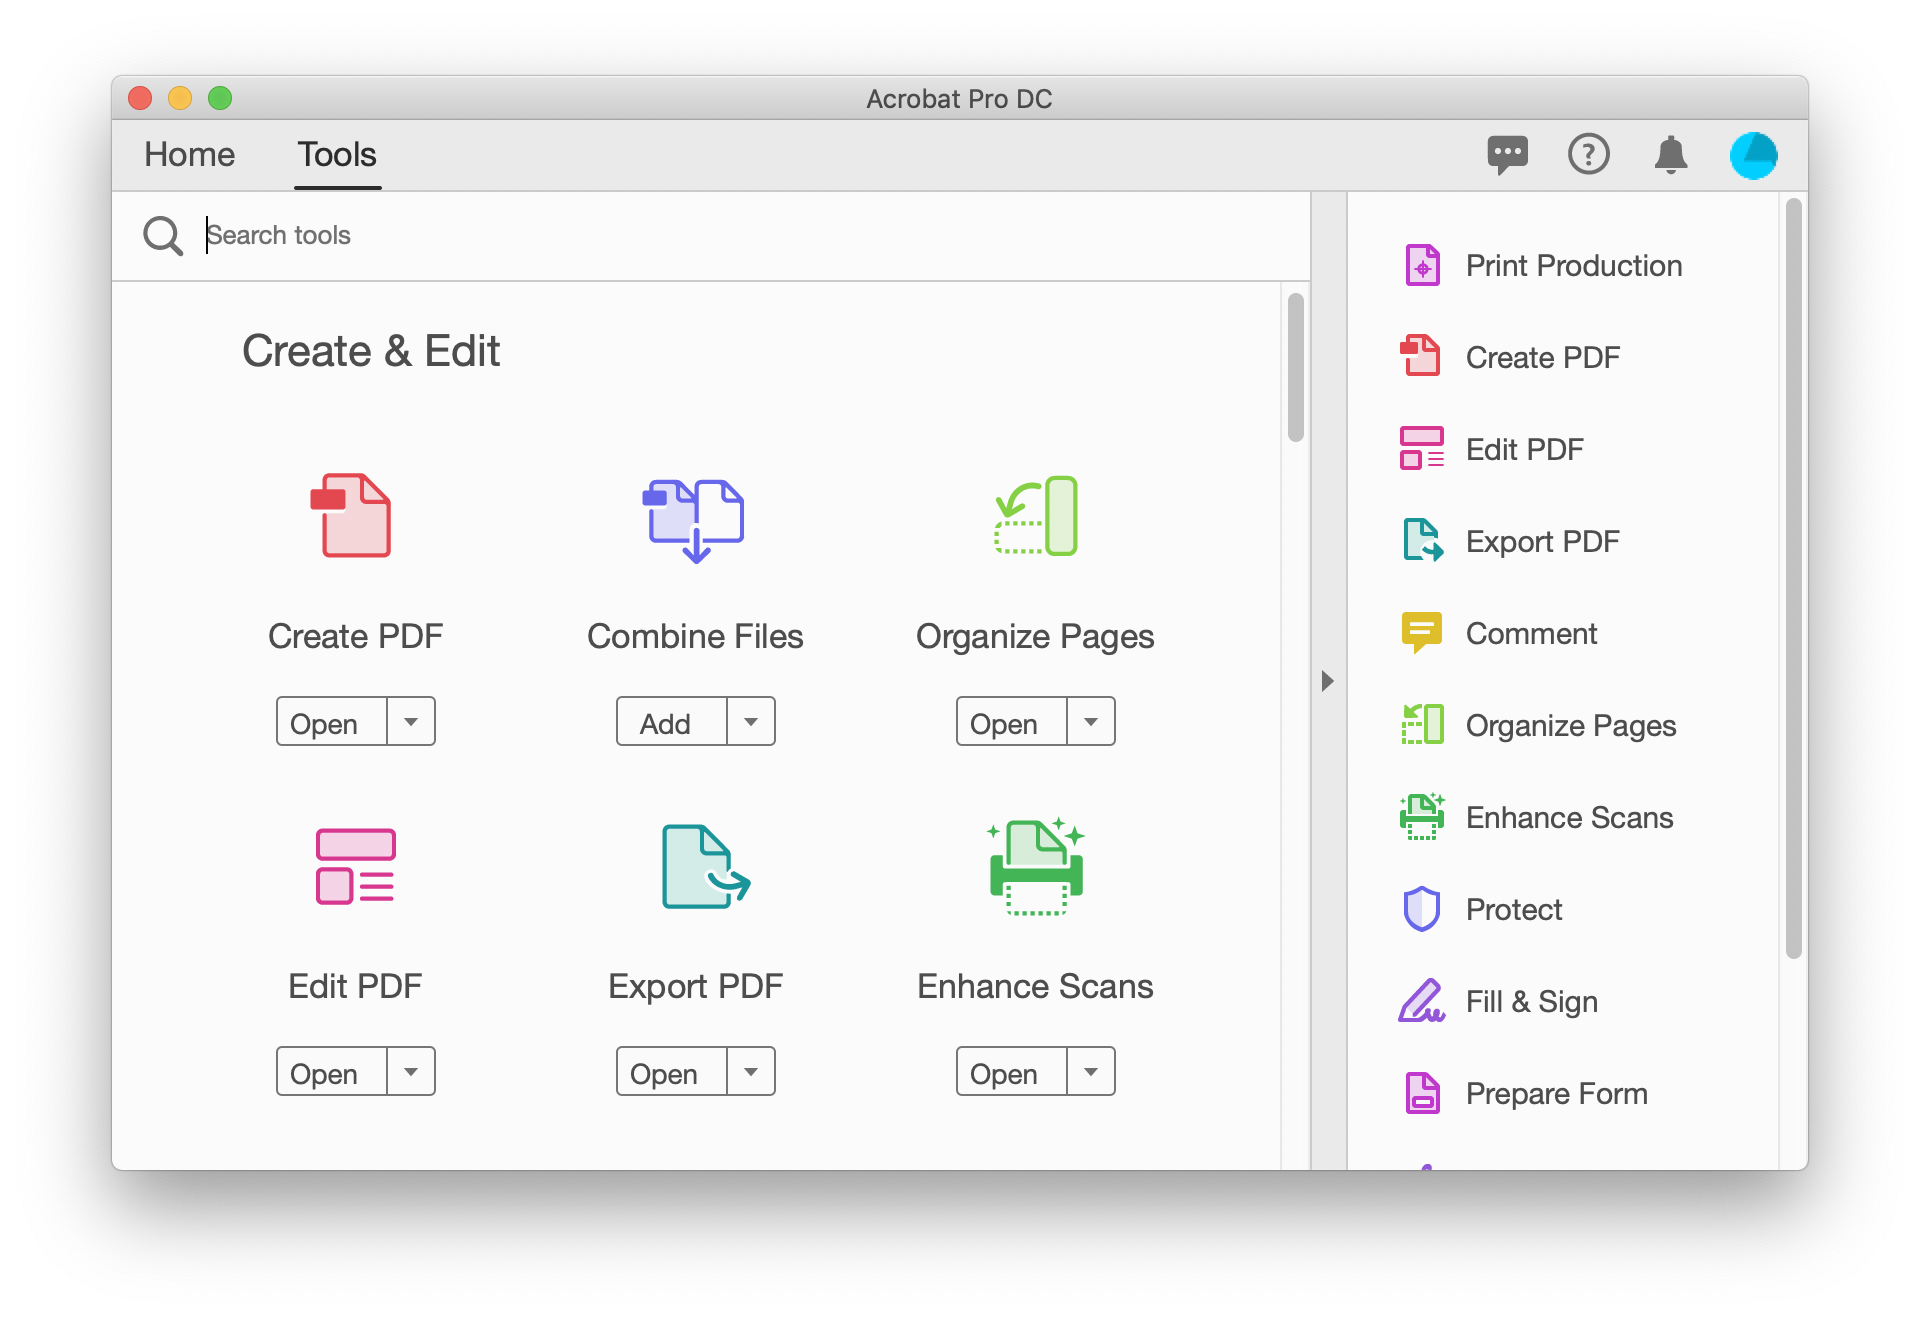
Download a blank InDesign template from .
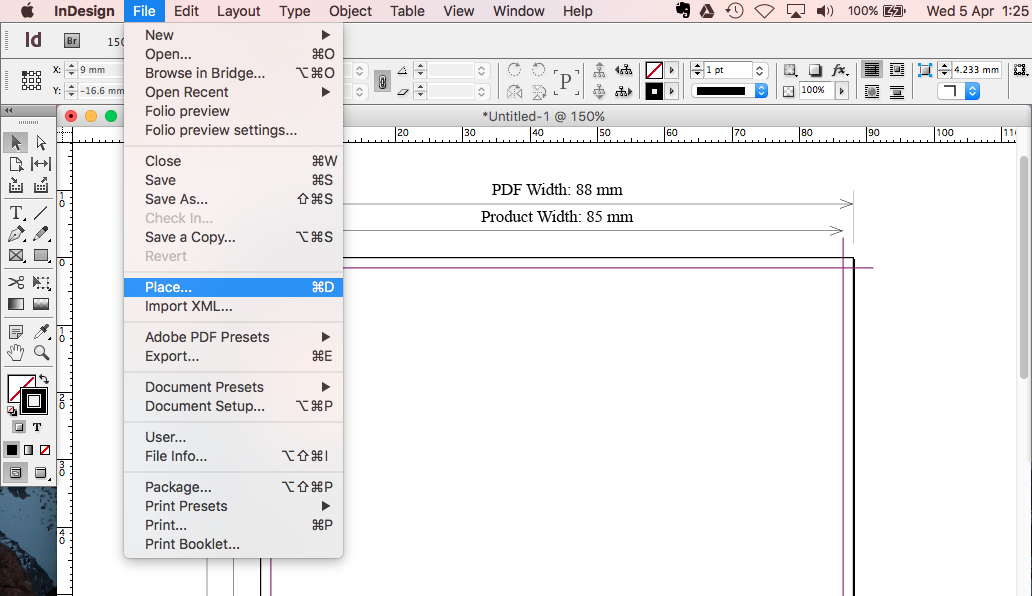
Select , to place the PDF into InDesign.
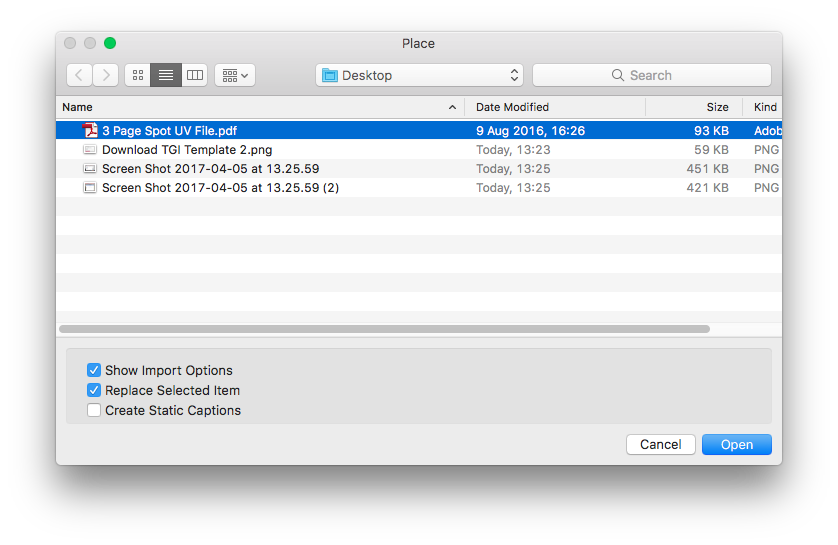
Select your PDF file, ensure "Show import options" is selected.
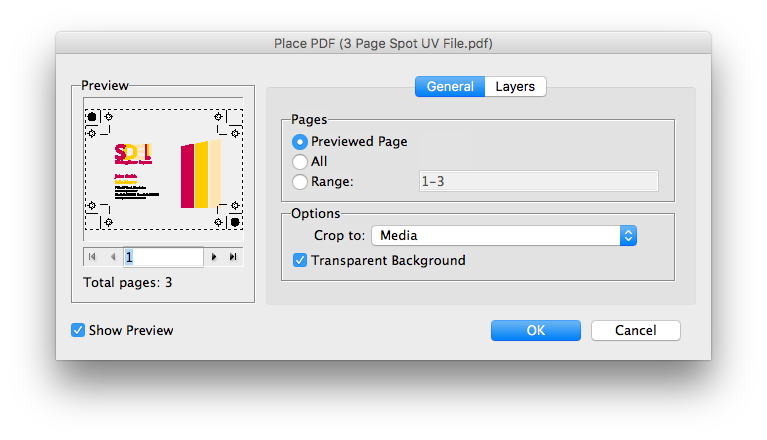
 Select your page number to place in, ensure "Crop to Media" is selected.
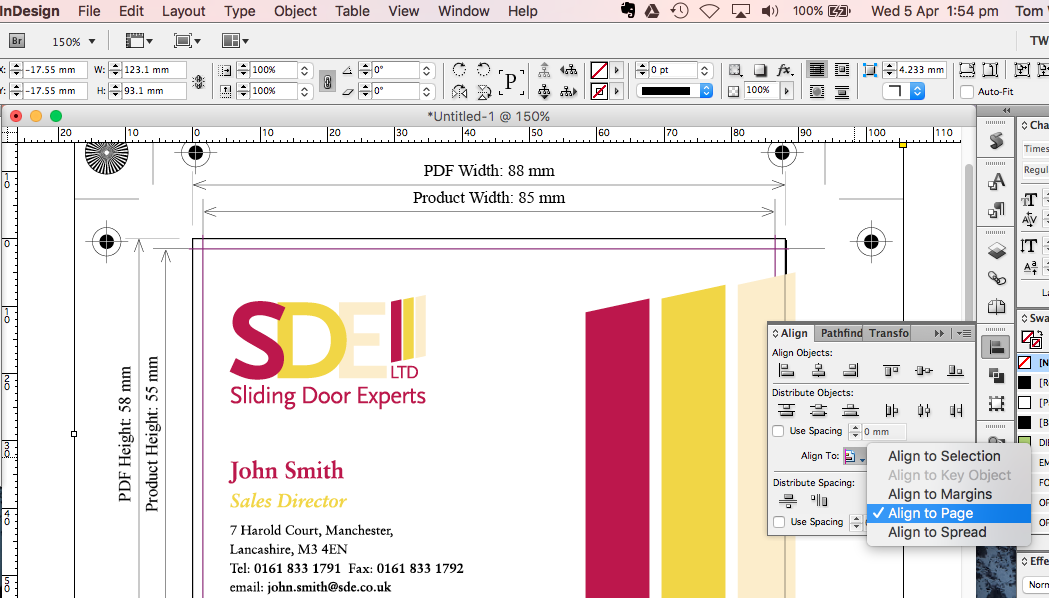
 Use the Pathfinder tool to align the PDF to the centre of your page.
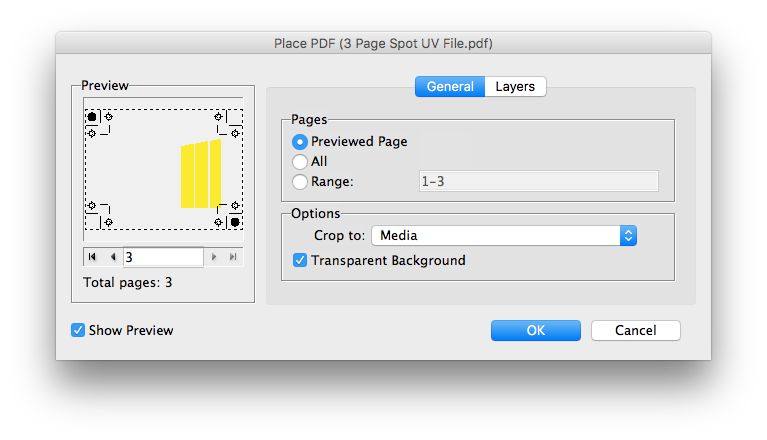
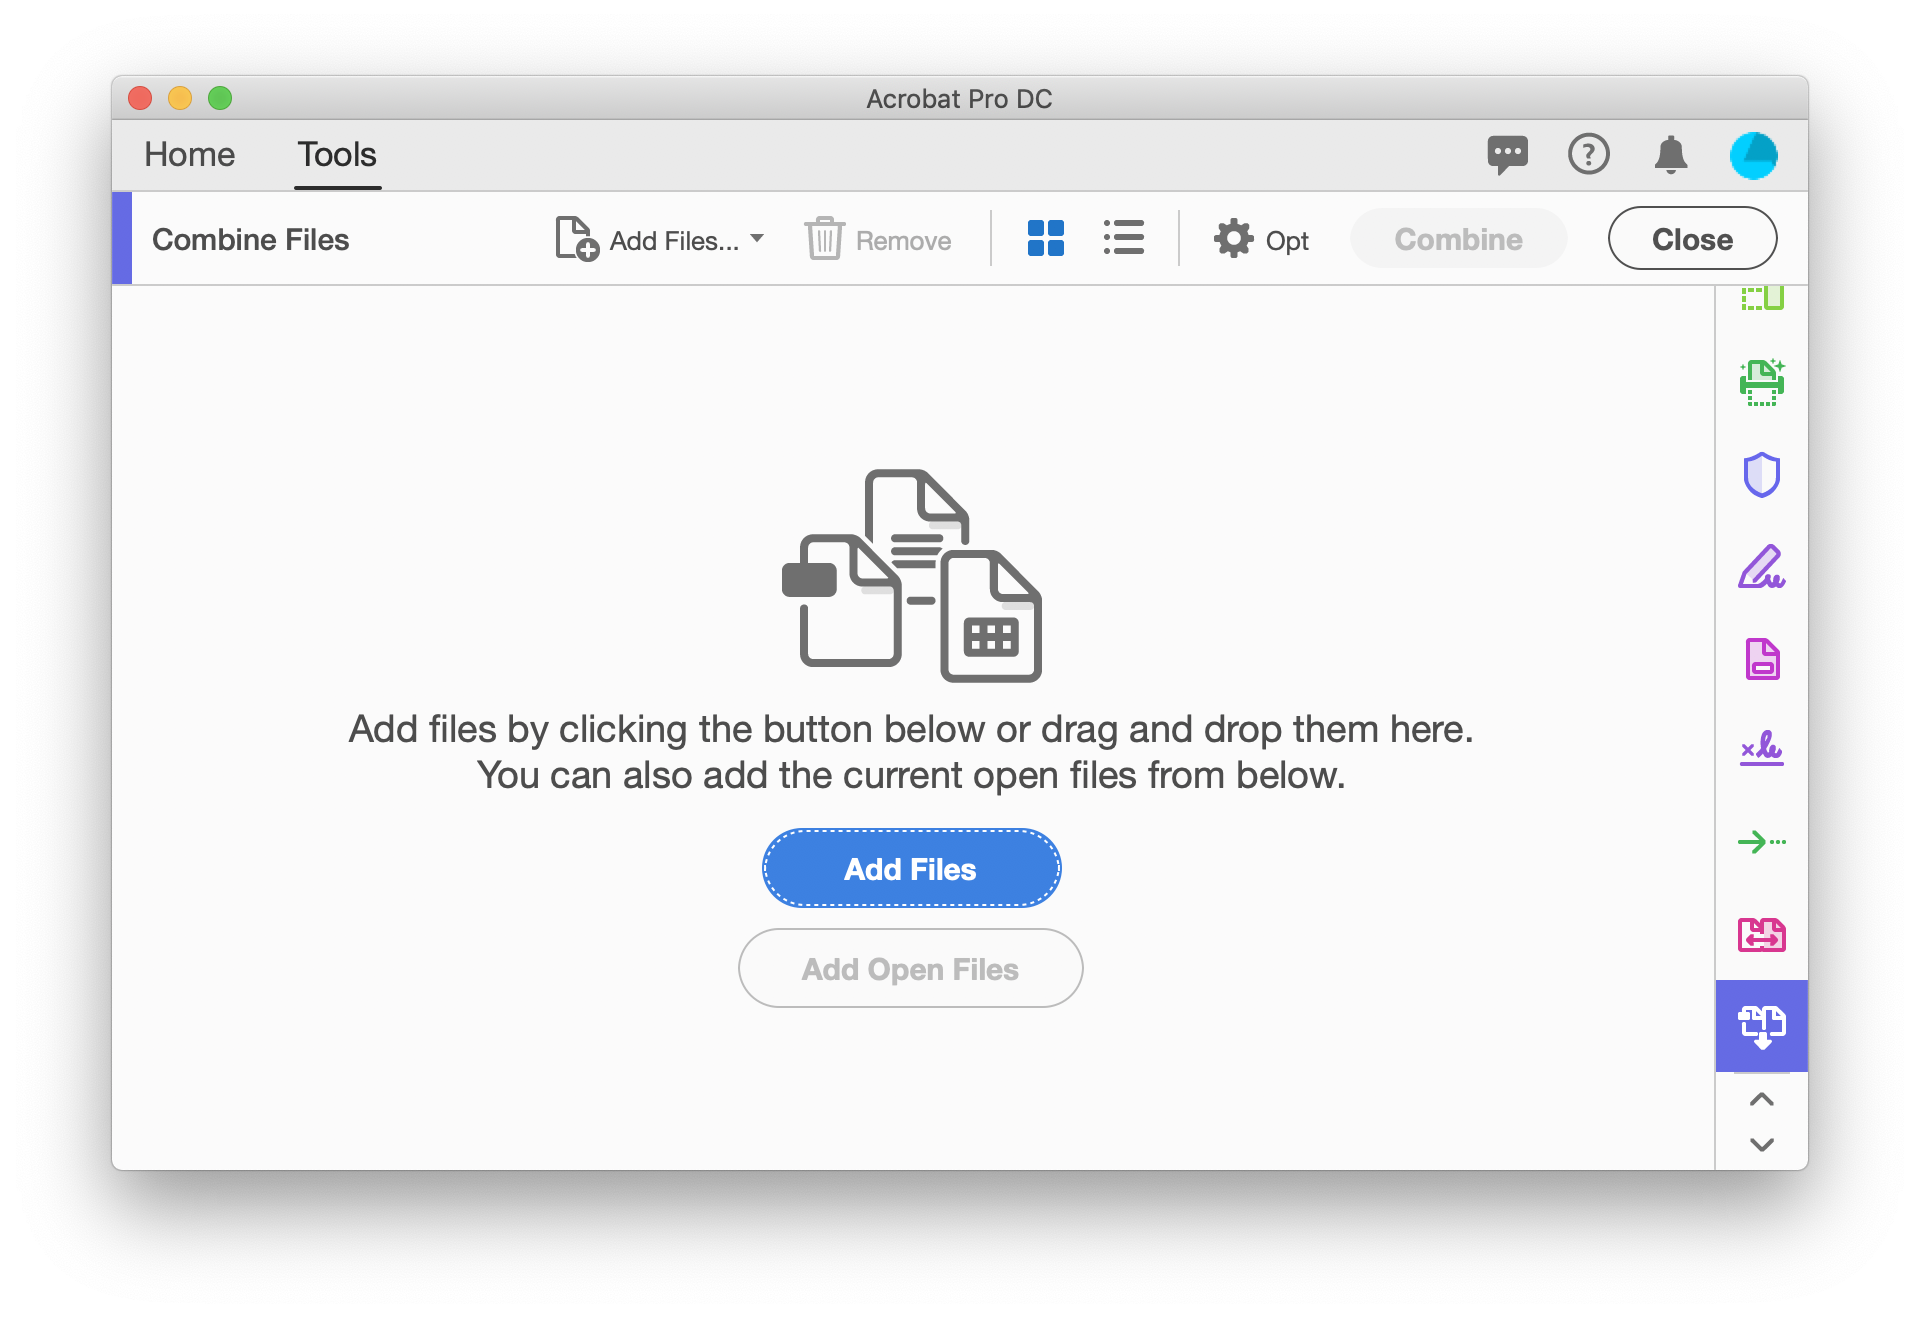
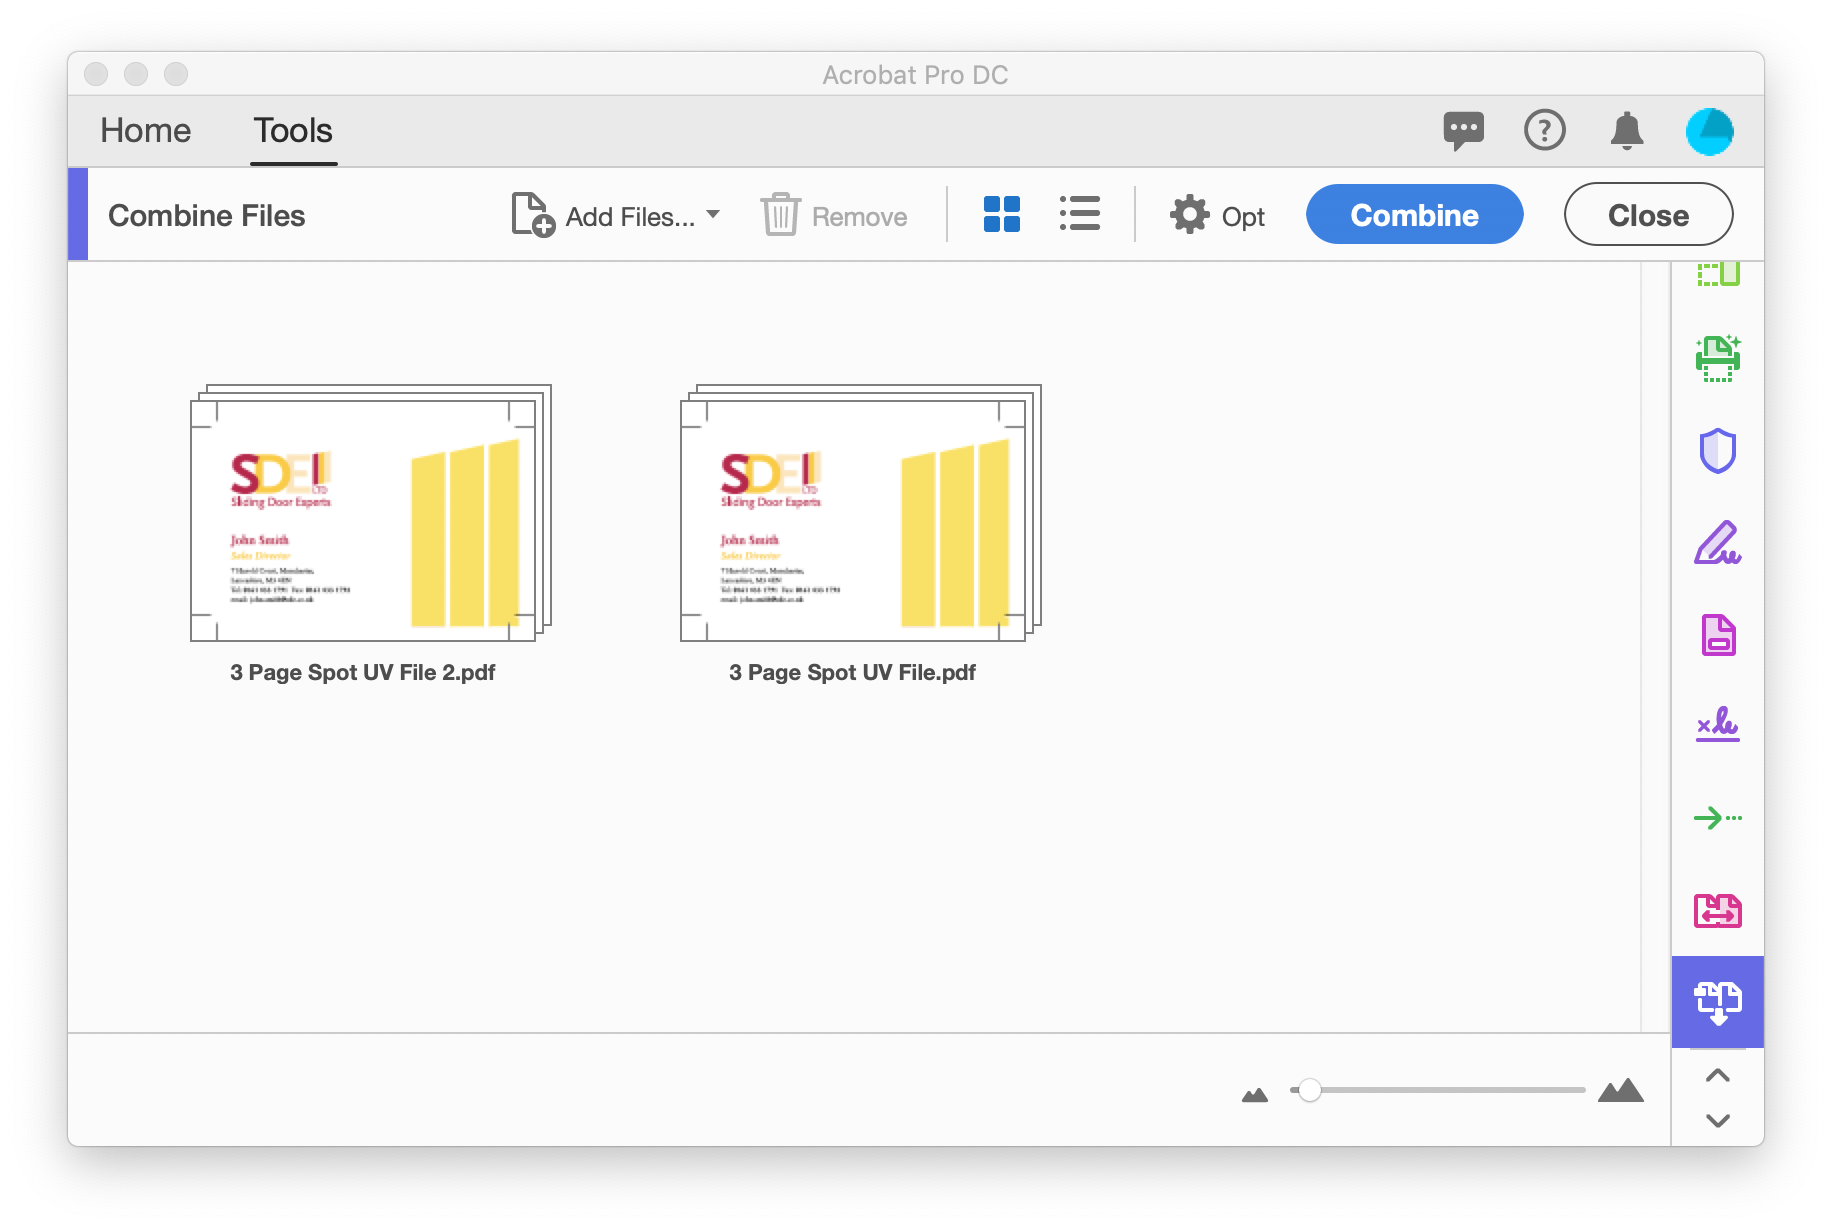
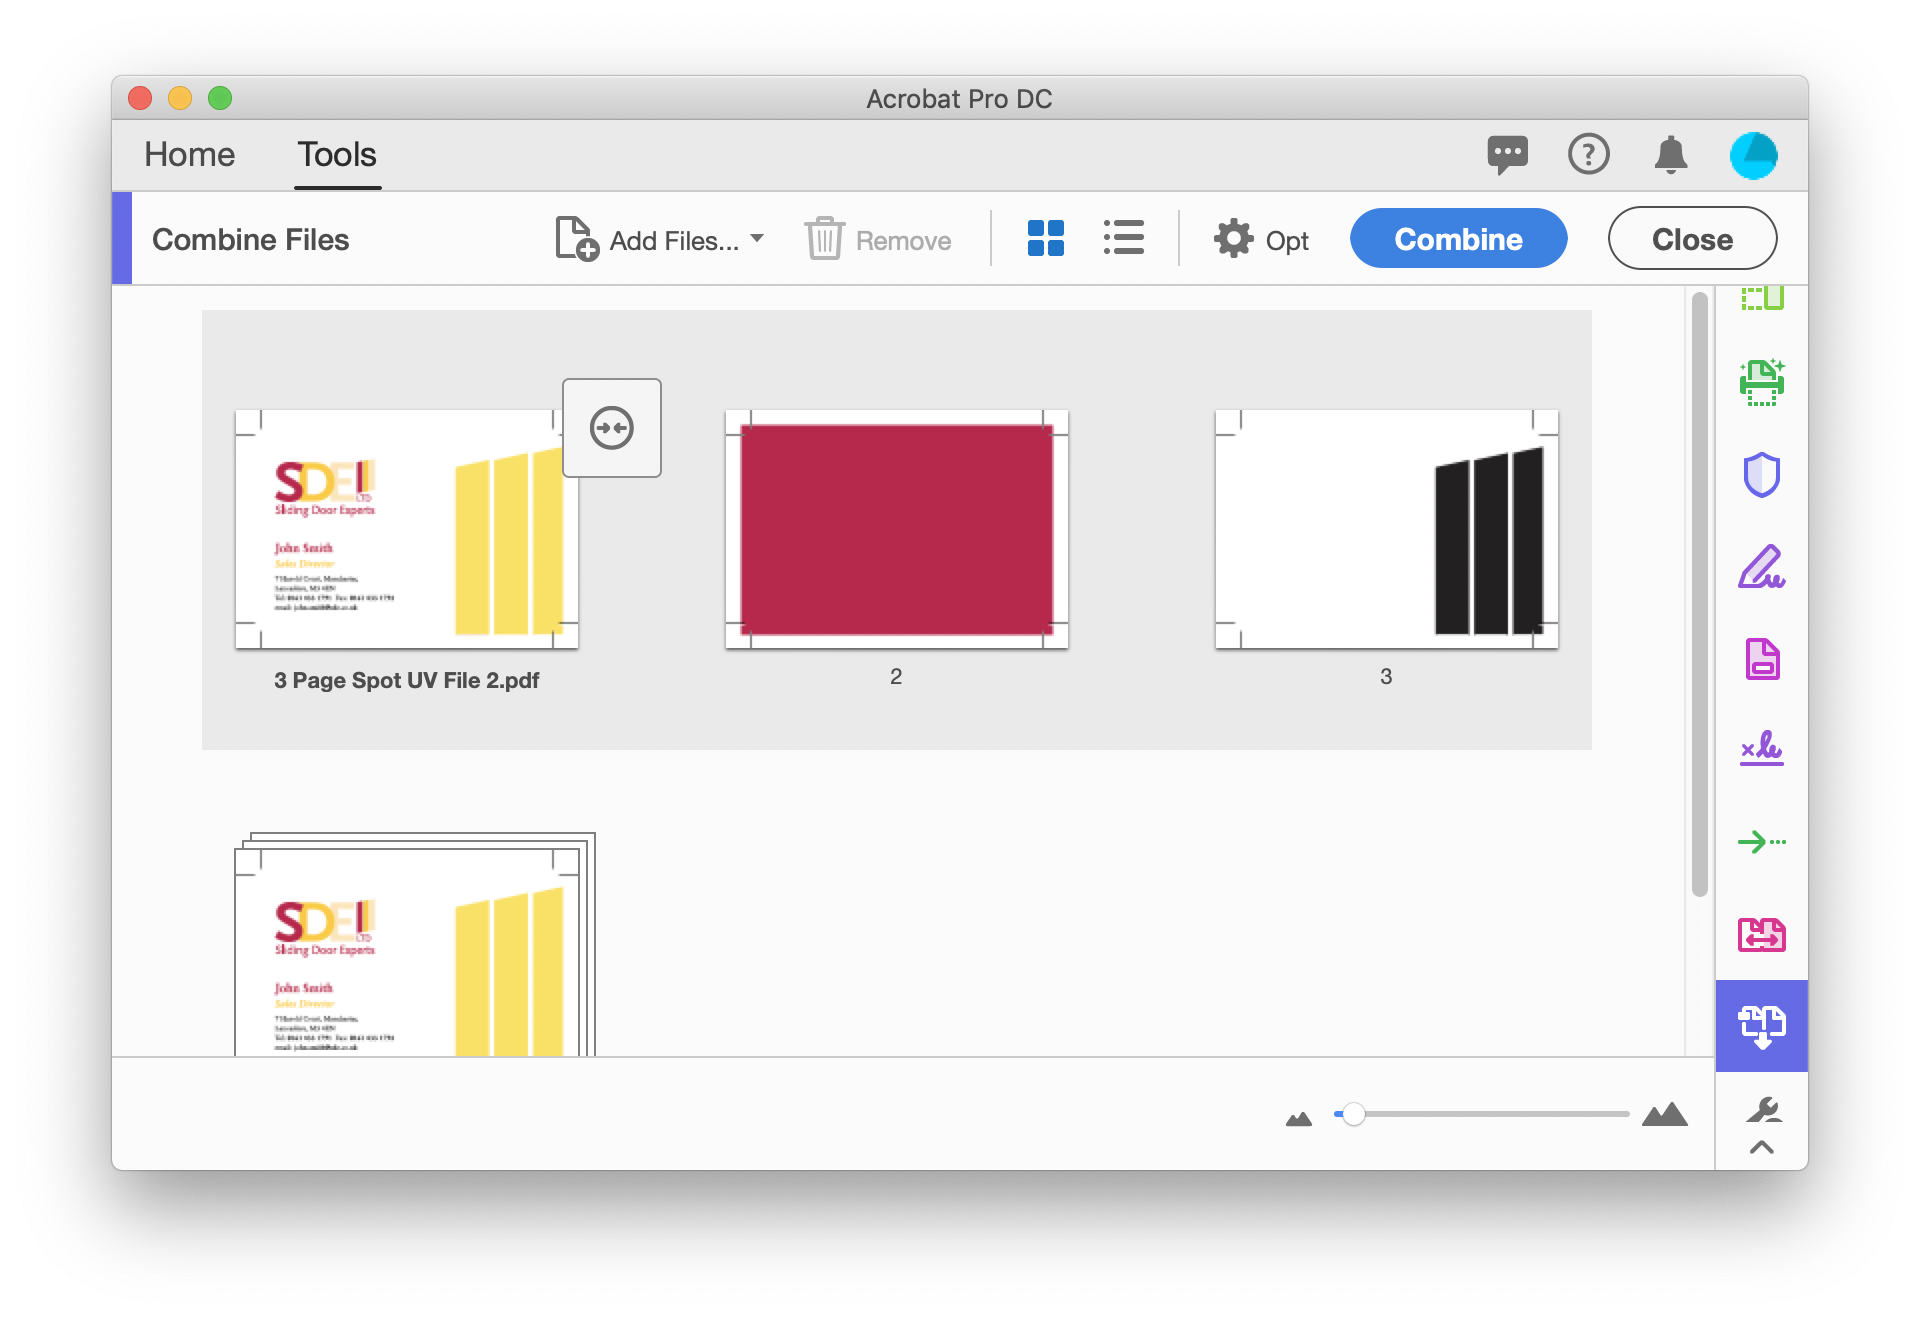
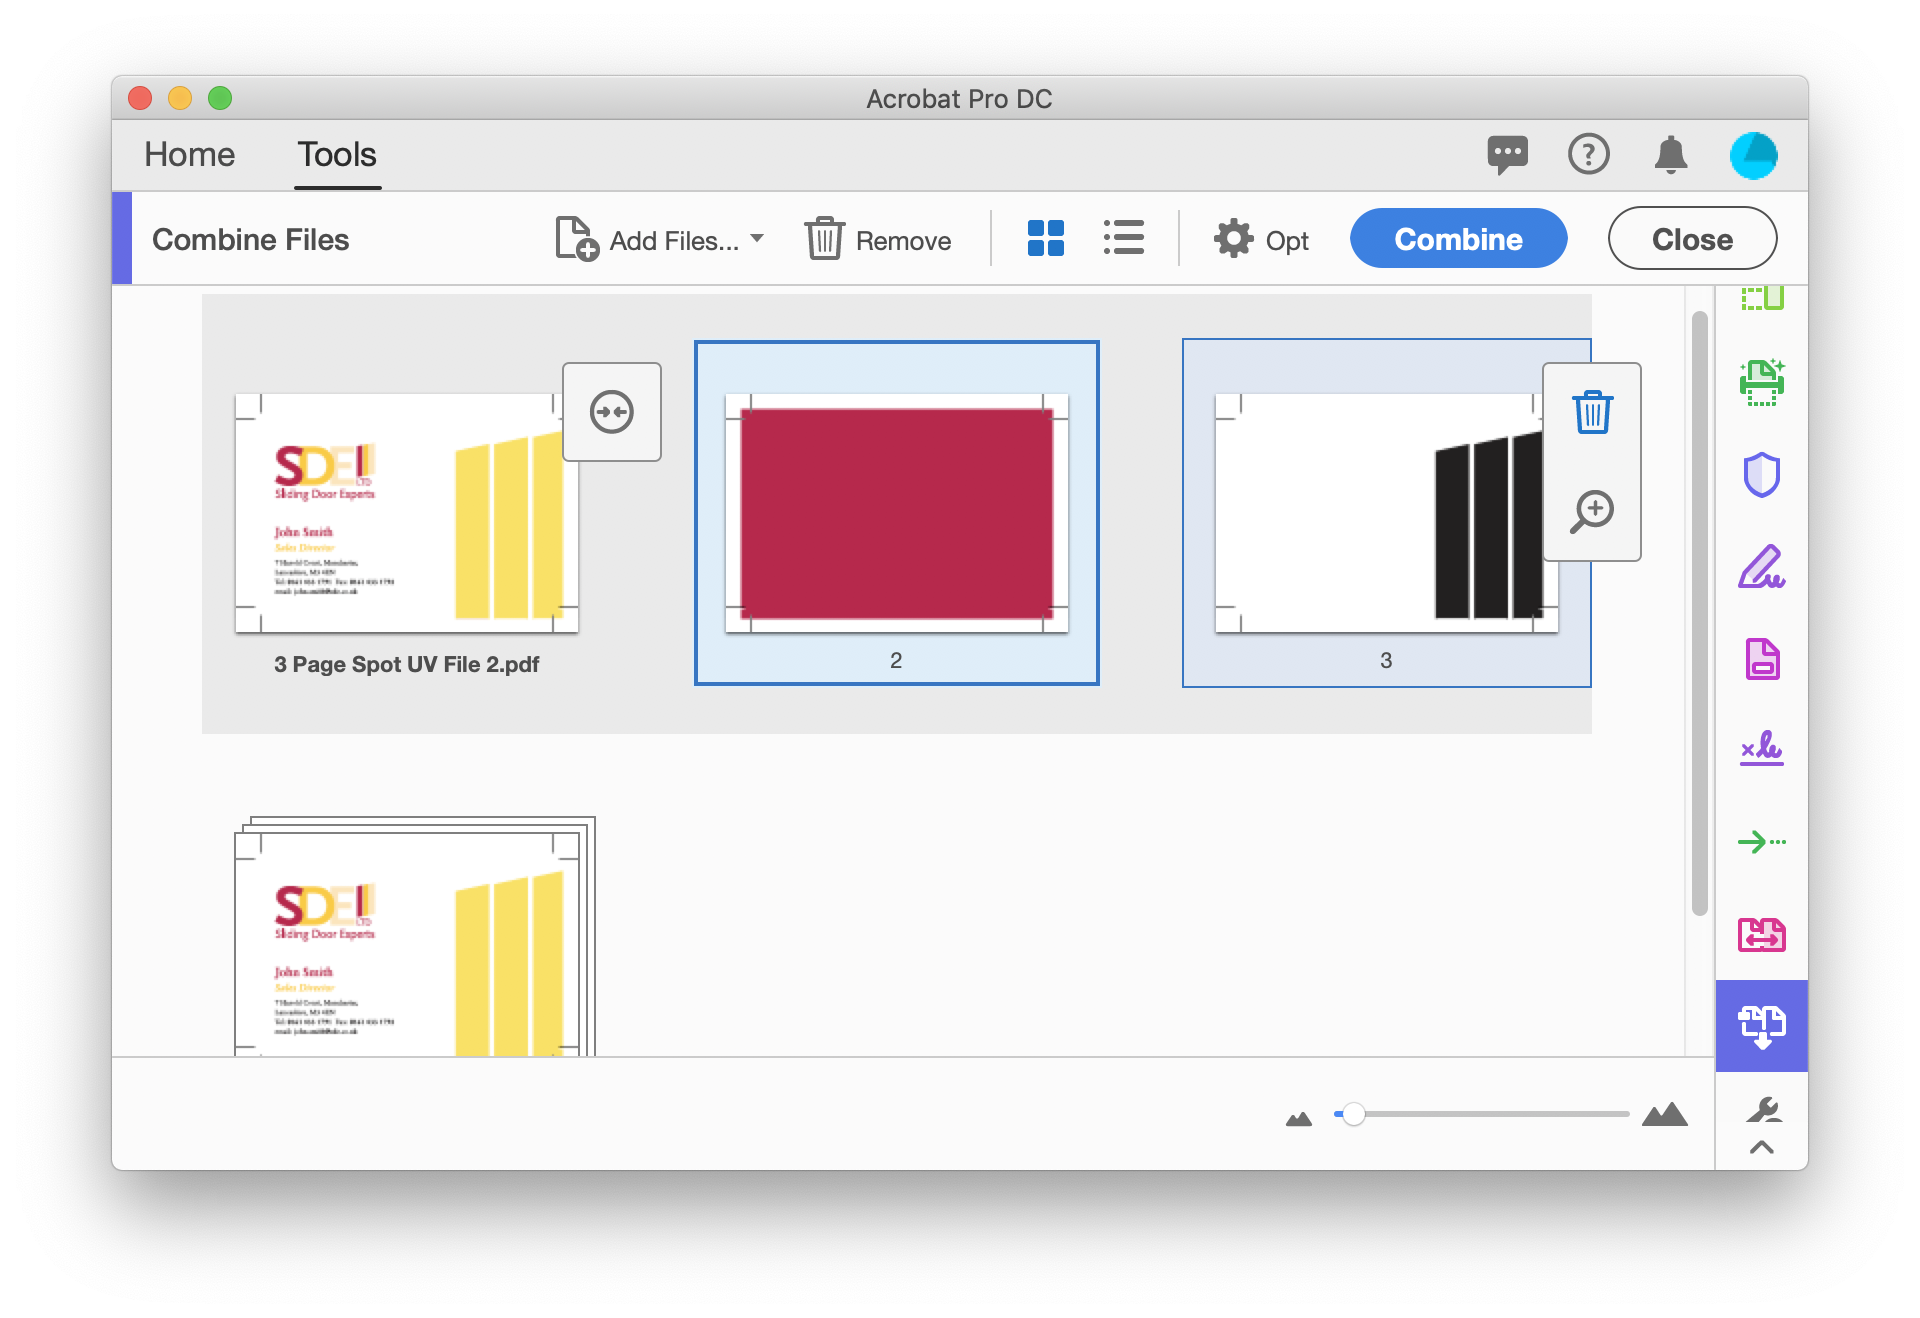
If the Customer has supplied 3 pages to make a 2 page product (such as a 3rd page for Spot UV) you can Place a new PDF page directly above one that you've imported previously.
Select , to place the PDF into InDesign.

Select your PDF file, ensure "Show import options" is selected.
Select your page number to place in, ensure "Crop to Media" is selected.
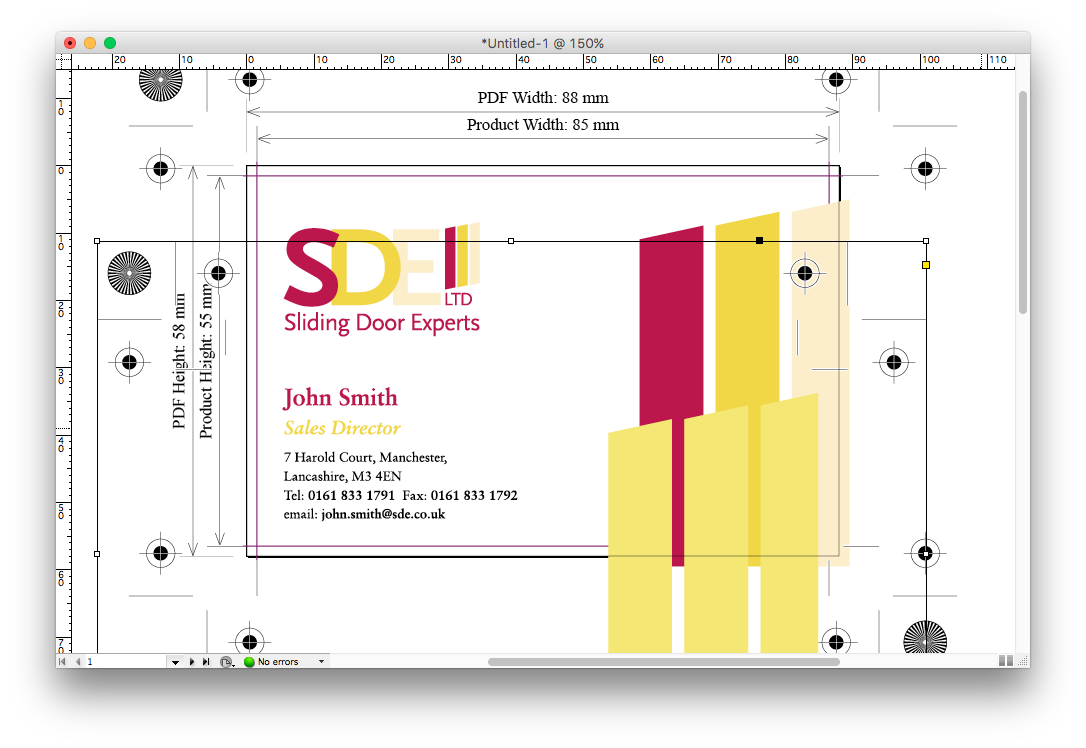
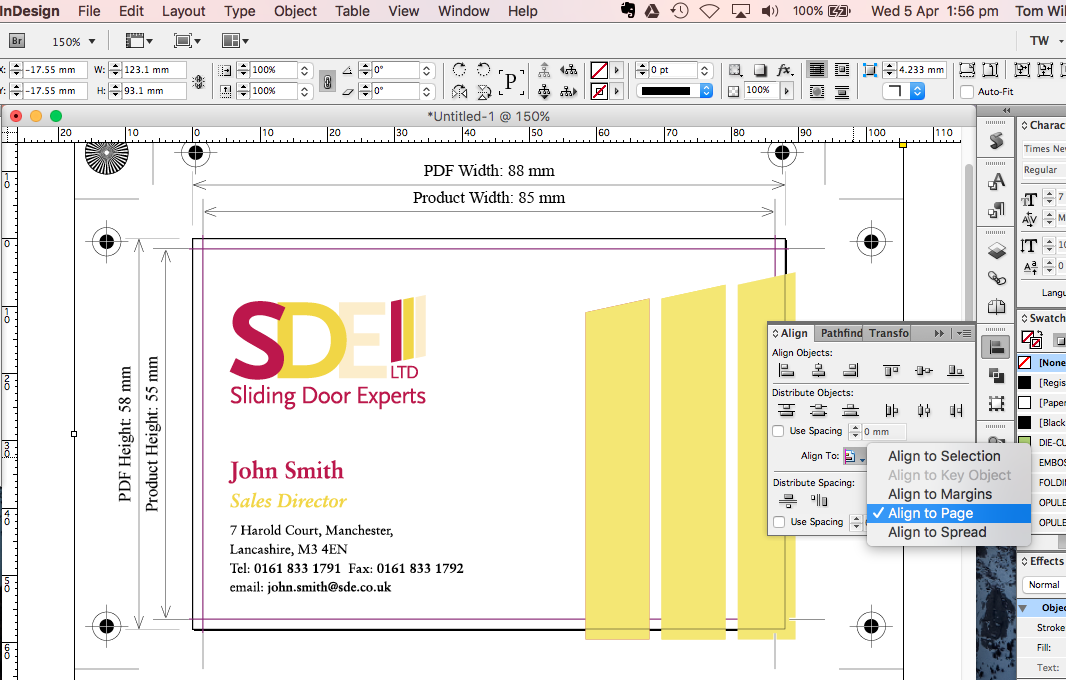
 Use the Pathfinder tool to align the PDF to the centre of your page.
The final step is to as an Adobe PDF (Print), using Press Quality (Compatability: PDF version 1.4).

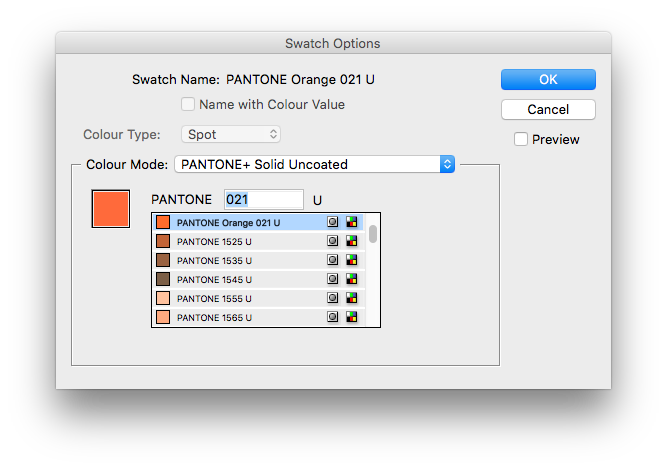
Double click your Pantone/Spot Colour Swatch to open the Swatch Options dialogue box:
Change the Colour Mode to CMYK:

Change your Colour Type to Process:
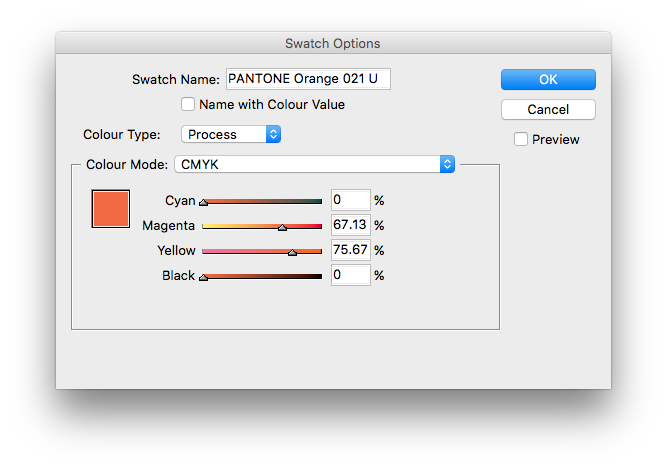
Select Name with Colour Value (Just for your reference):

Open your PDF in Acrobat. Then go to
In the dialogue box below (under Total Area Coverage) enter the recommended Maximum Ink Limit for the paper stock you reqire (225% for Uncoated stocks such as Letterheads and 300% for Coated stocks such as Gloss Leaflets).
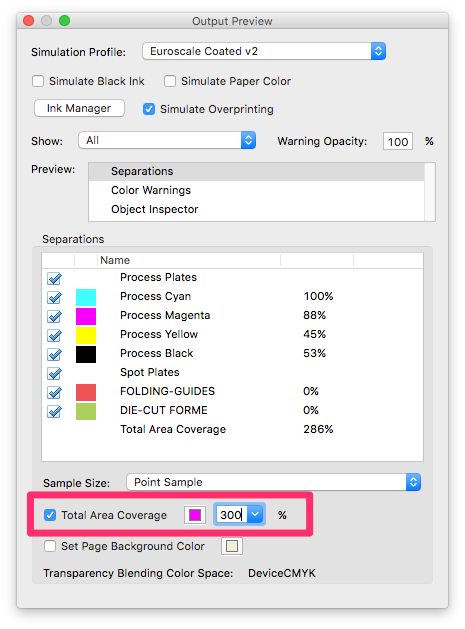
This tool will then highlight the areas within the document that exceed this limit (100C, 100M, 100Y, 100K = 400%).
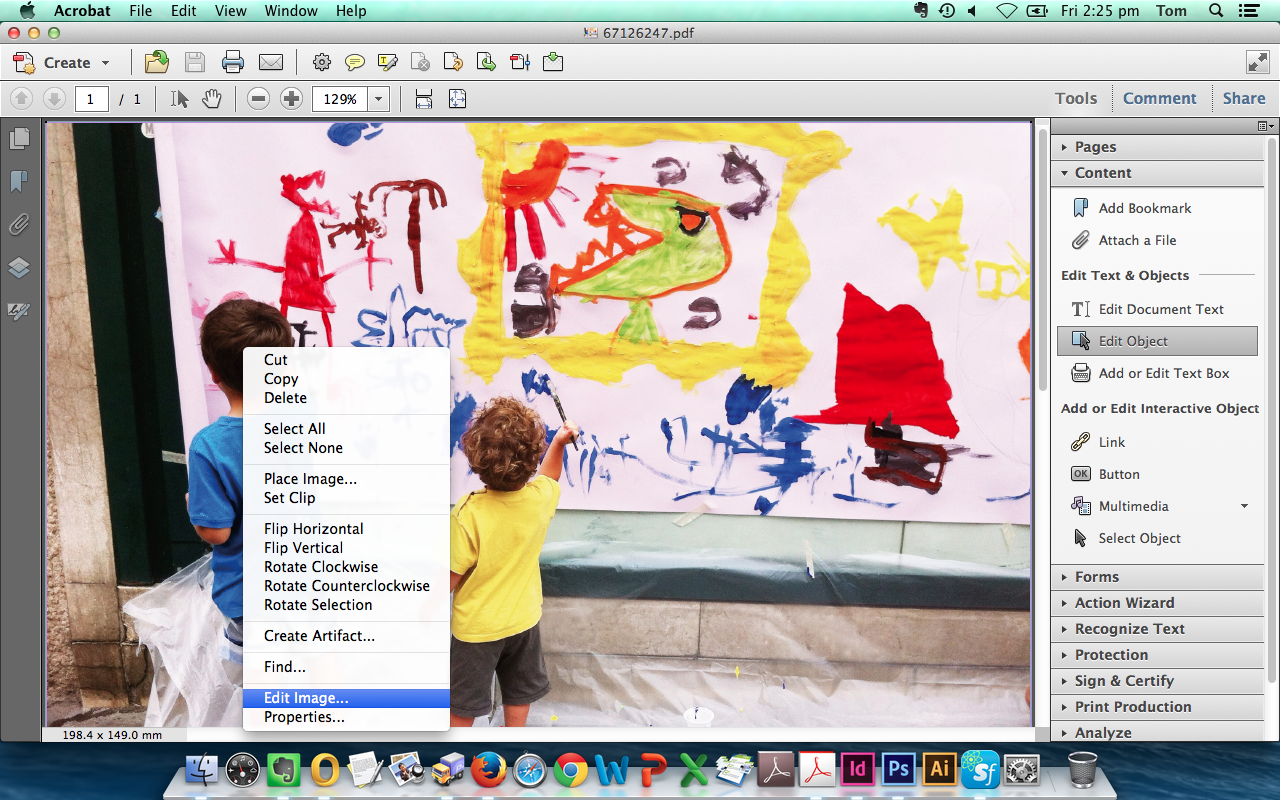
To edit an image, select Edit Object (under ) then the image to select Edit Image... (see below). This opens the image in Photoshop.
Once the image is opened in Adobe Photoshop select then underselect
Copy the screenshot below for Coated Paper Stocks.
UnCoated & Large Format (225%)Copy the screenshot below for UnCoated Paper Stocks.
Select your Coated (300%) or Uncoated (225%) Colour Settings from above, then;
To convert RGB Images...
In Photoshop select:
To convert CMYK Images...
In Photoshop select:
The ink conversion is applied directly to the image which is then saved back into the PDF when you close the image.
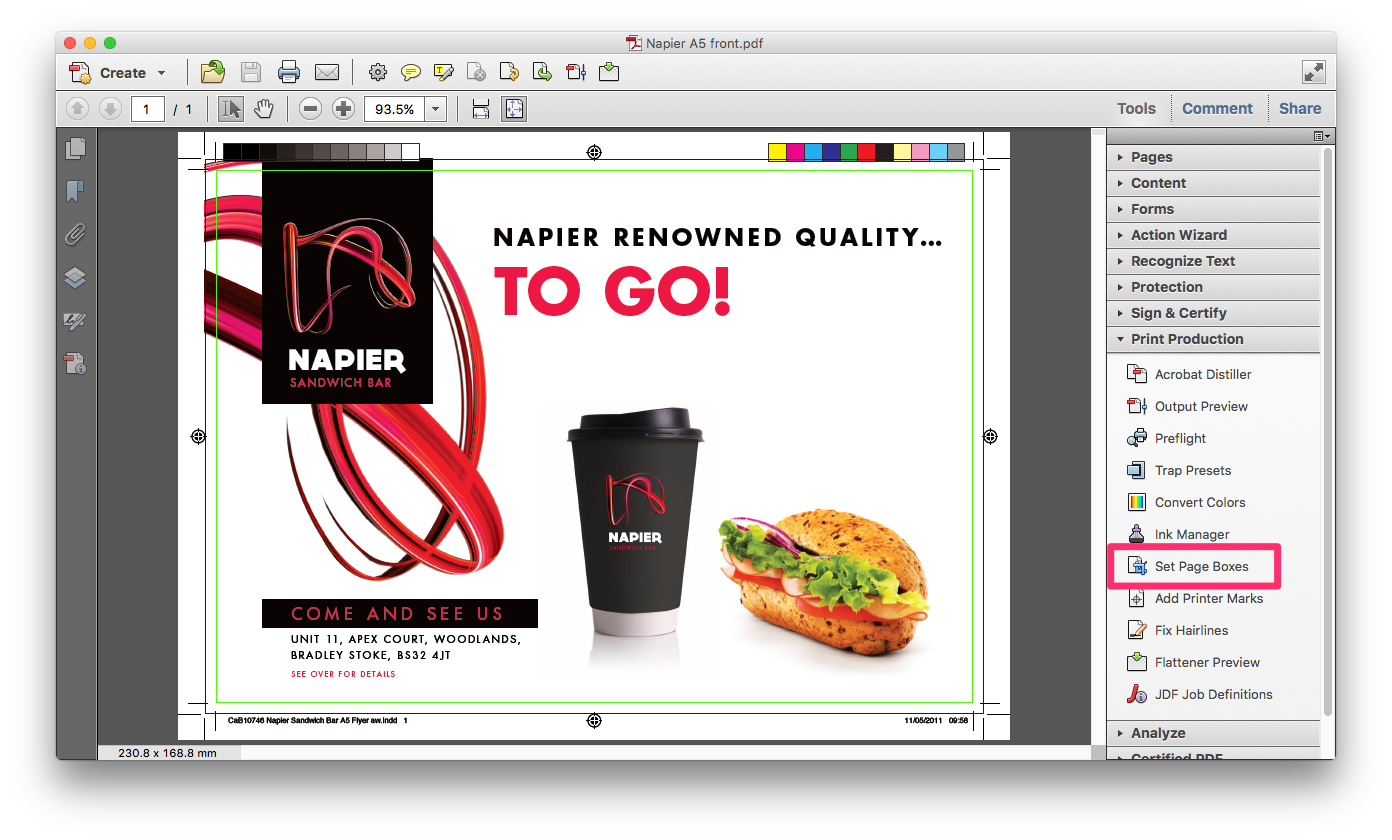
Your PDF contains a number of Internal Measurements used to set the page size.
To show these internal measurements go to Show art, trim and bleed boxes.
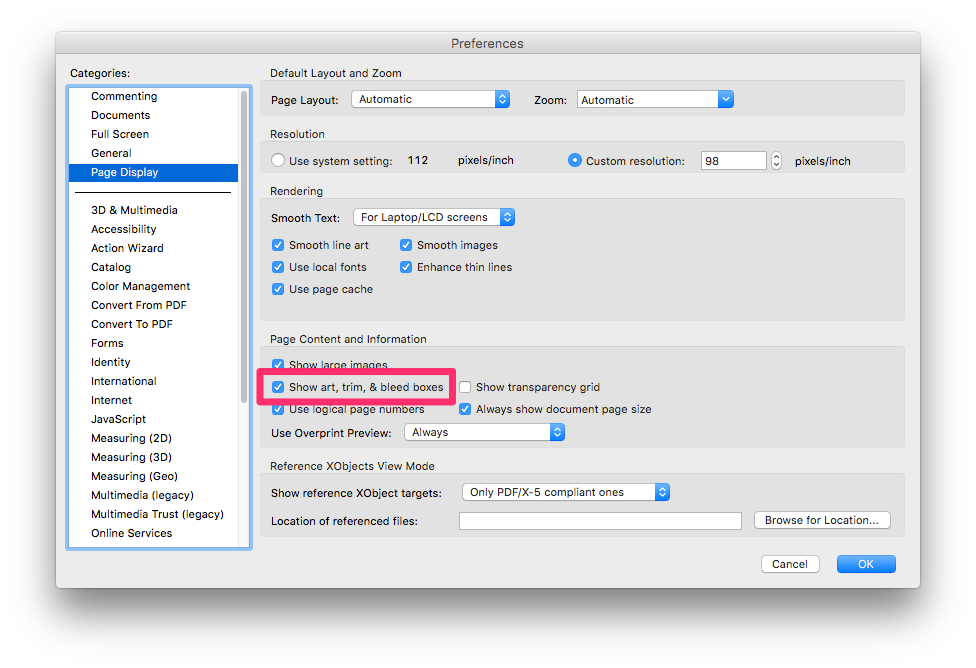
Then select Set Page Boxes.
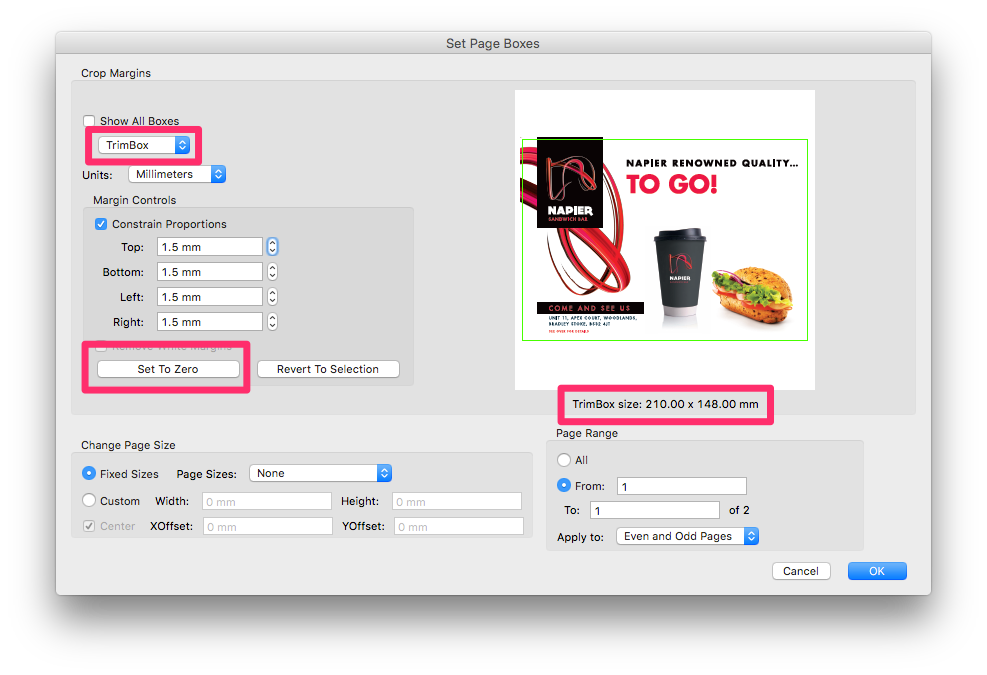
The TrimBox is the mesurement we use to impose your PDF. For a business card the demensions of this Page Box should be 88 x 58mm (on a client supplied PDF they may relate to the finished size 85 x 55mm - This is corrected during FileCheck).

The BleedBox is the area that sits outside of the Trim Box, it includes our 1.5mm bleed. For a business card the demensions of this Page Box would be 88 x 58mm (Matching the TrimBox) (on a client supplied PDF they may relate to a 3mm bleed so the measurement would be 91 x 61mm).
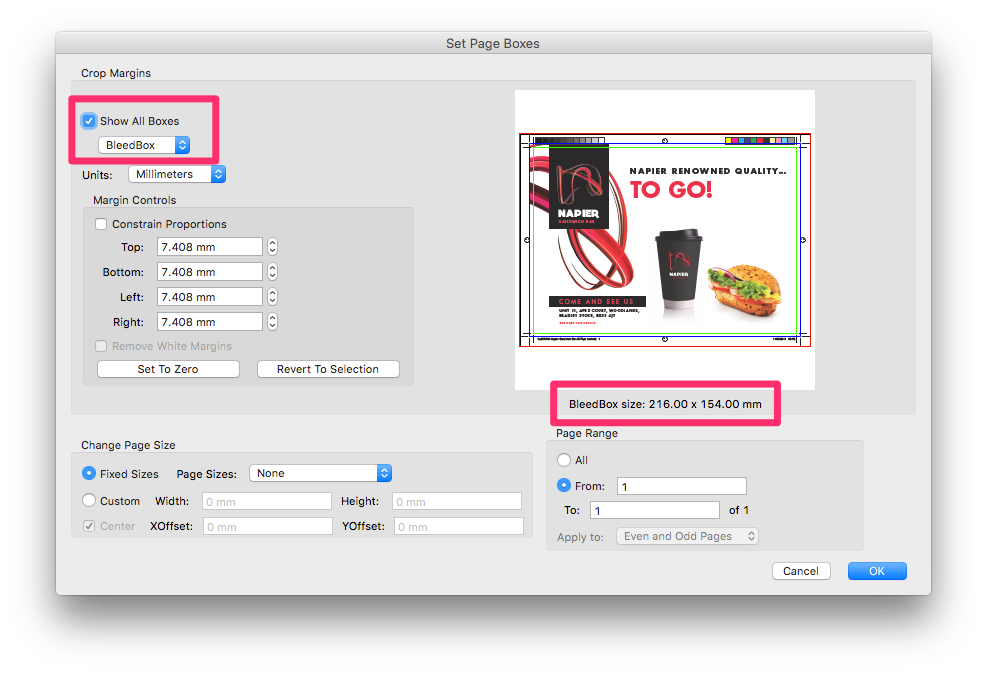
The CropBox is the area that sits outside of the Bleed Box, it includes any Crop Marks which are present on your PDF.
You can set and fix your Page Boxes using Margin Controls.
If your PDF includes a 1.5mm bleed which is set by the document page size (rather than using InDesign's Document Bleed Settings) but shows your TrimBox as the Finished Size you can set the TrimBox to Zero to reset the page size (Finished Size + Bleed). You do this when you get the error message, 'Incorrect page size' during FileCheck.
If a PDF appears to be the correct page size but is scaled up during FileCheck this is usually because the PDFs' Bleed or Trim Box appears smaller than the expected page size (Finished Size + Bleed) visible on .
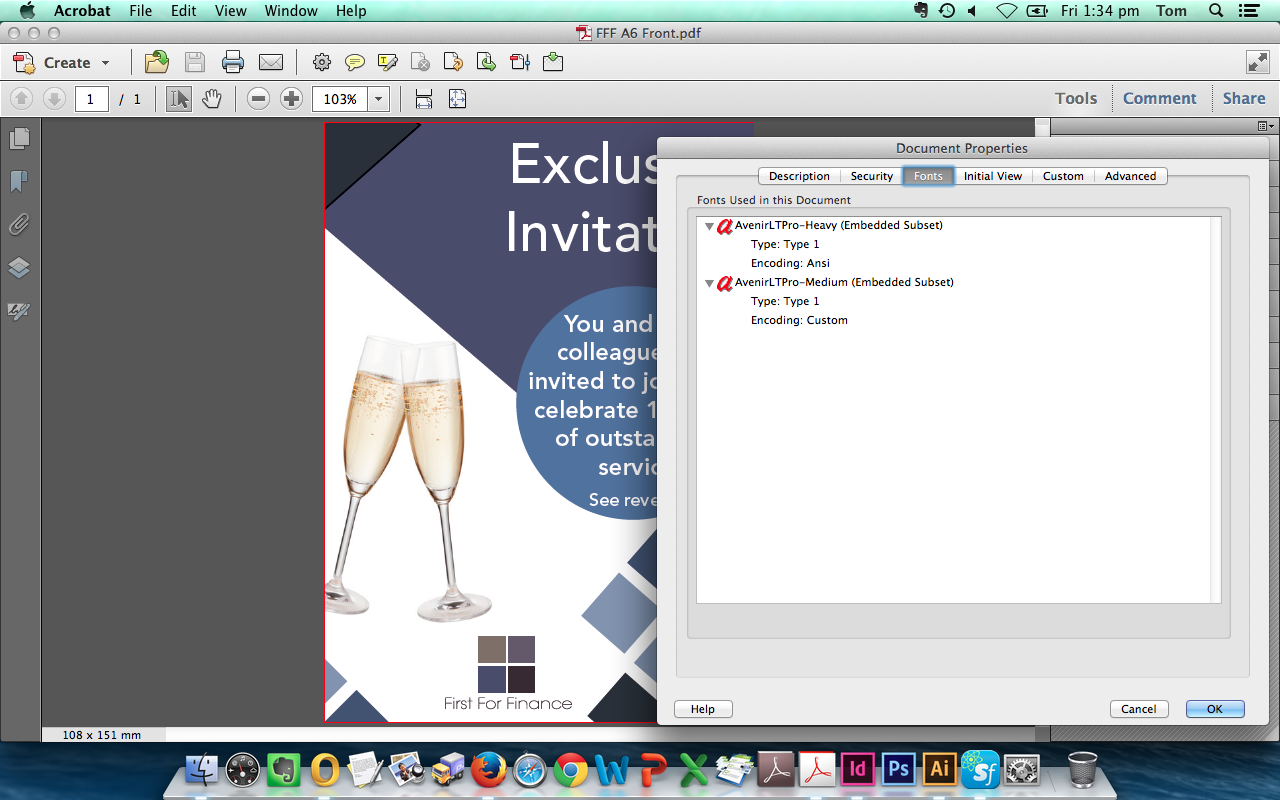
Open your PDF in Adobe Acrobat Pro.
Check for all fonts present by selecting
To convert fonts to outlines use the following steps:
Select Add Watermark...
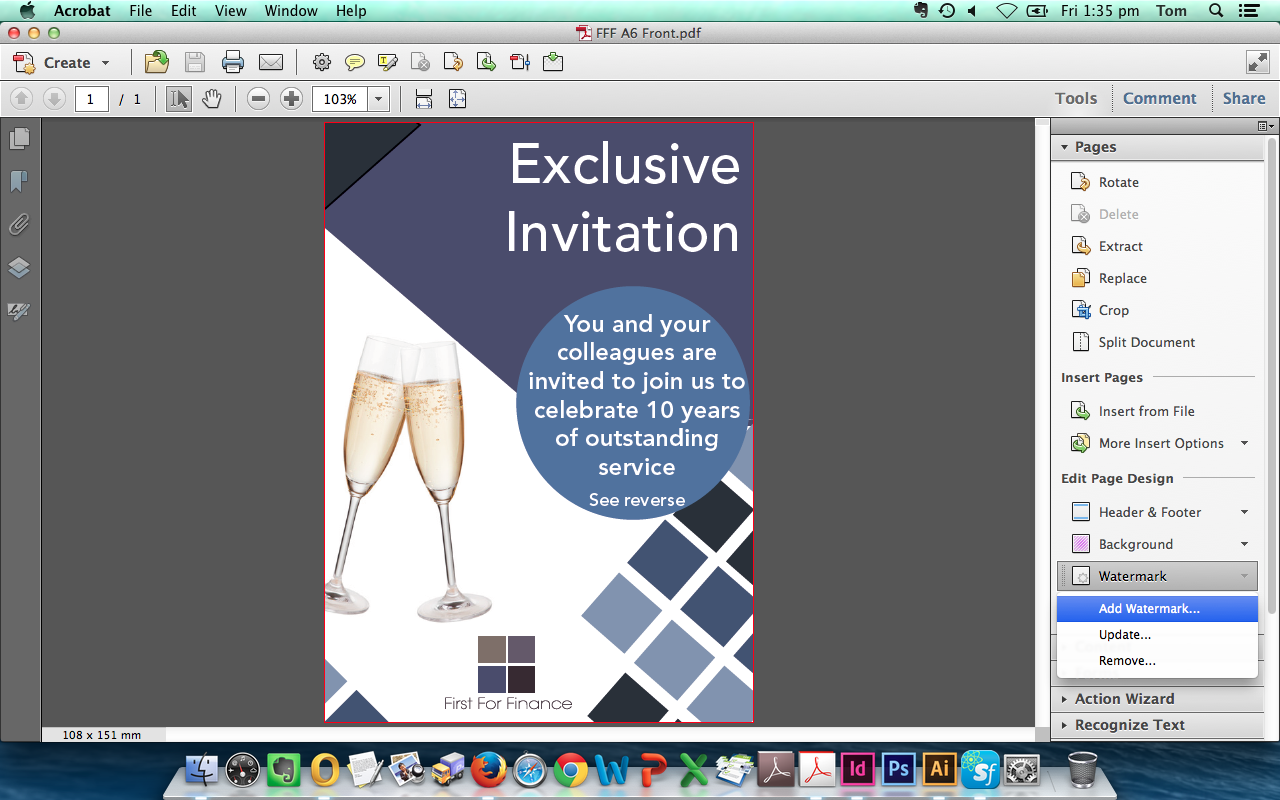
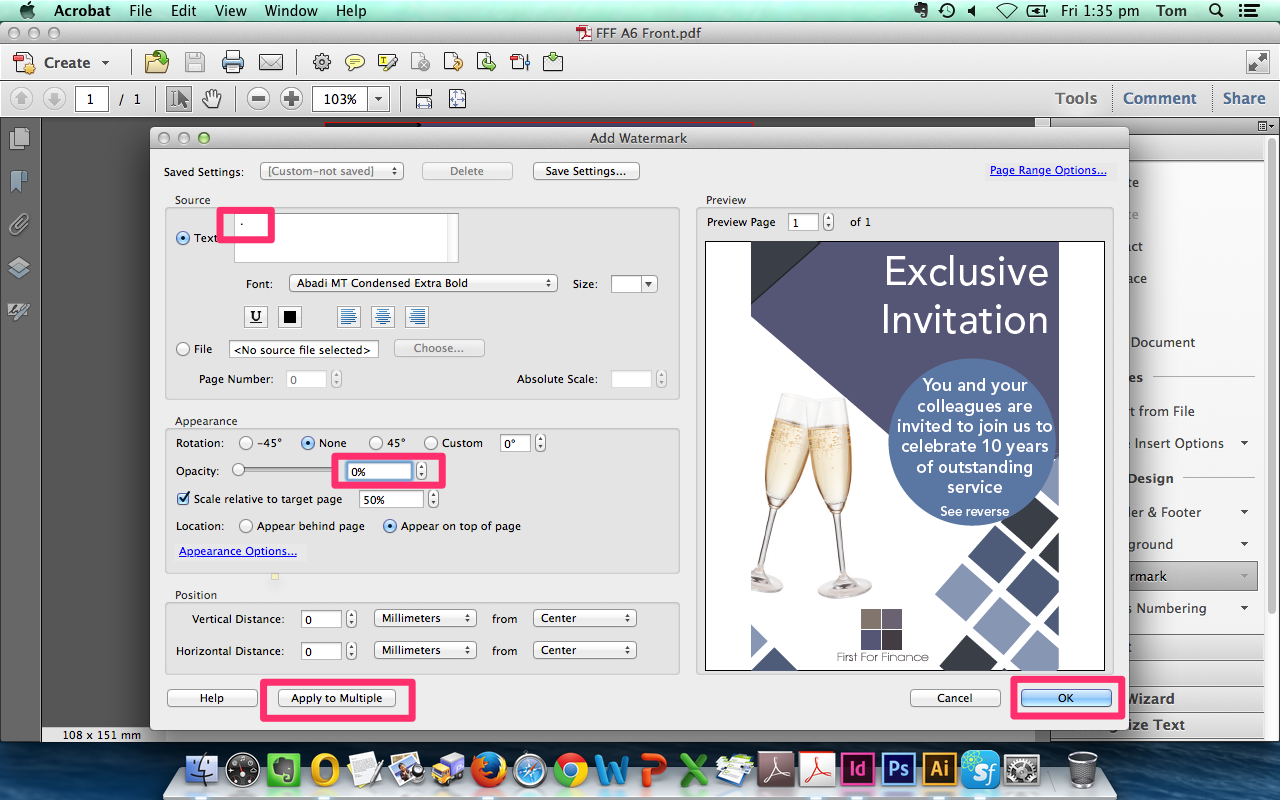
Now select Flattener Preview
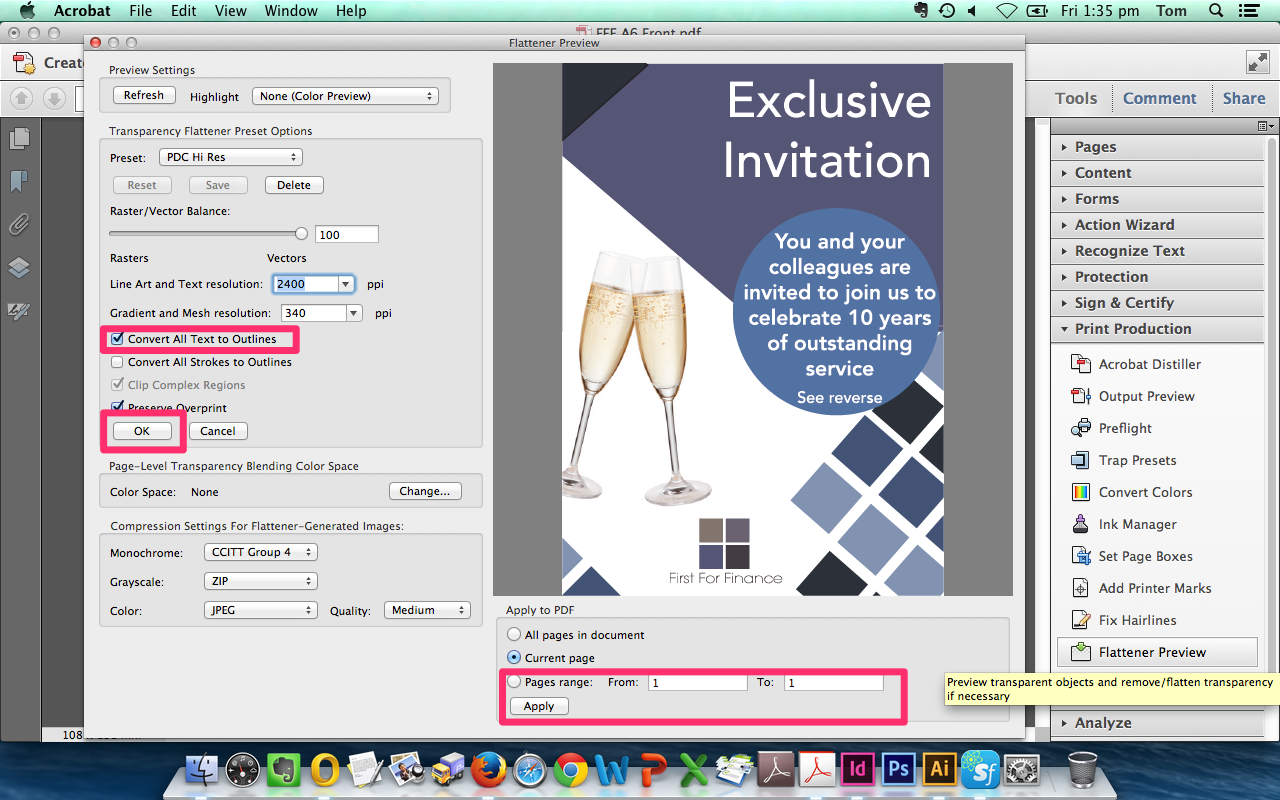
Fonts should now be converted to paths.

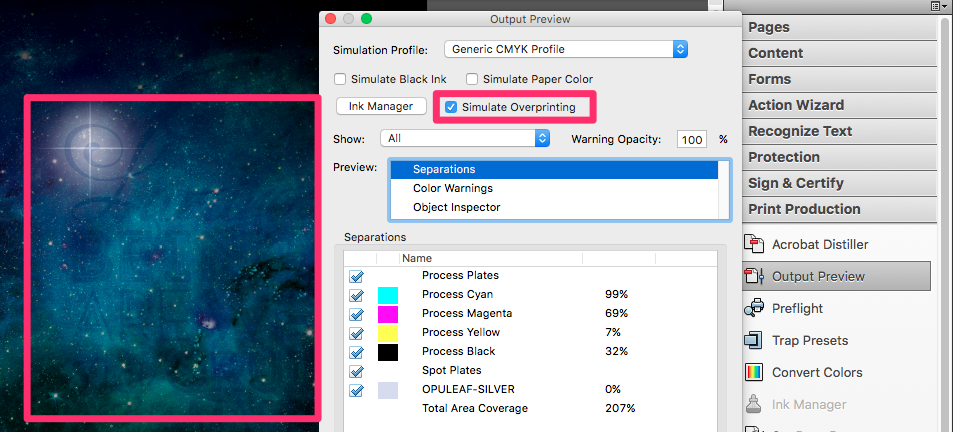
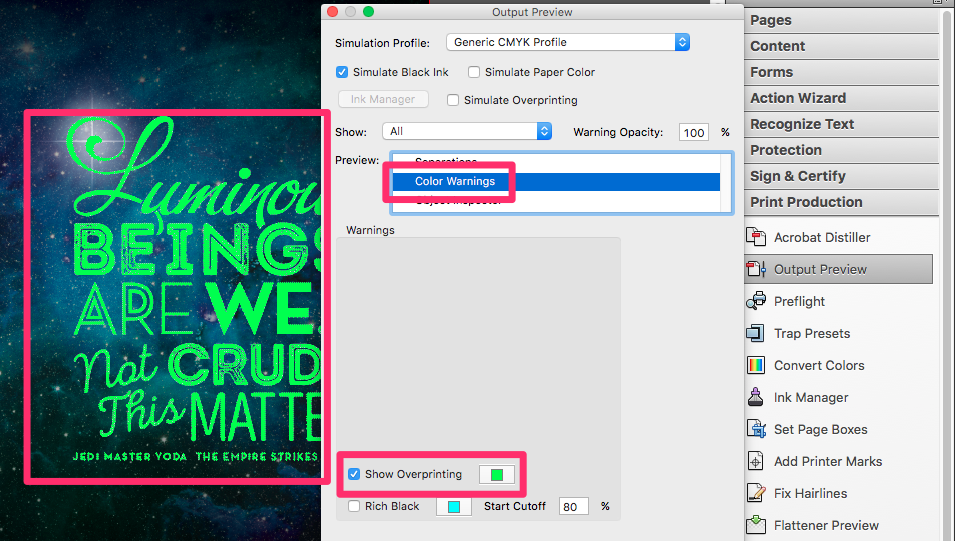
Using Adobe Acrobat's Output Preview Tool you can:
Before you supply your final PDFs to us for printing, we recommend that you check your separations to ensure that there are no extra unrequired spot colours present and that any extra finishing colours such as Spot UV have been left unchanged.
Separations are best checked in Adobe Acrobat®. To do this, open your PDF and go to
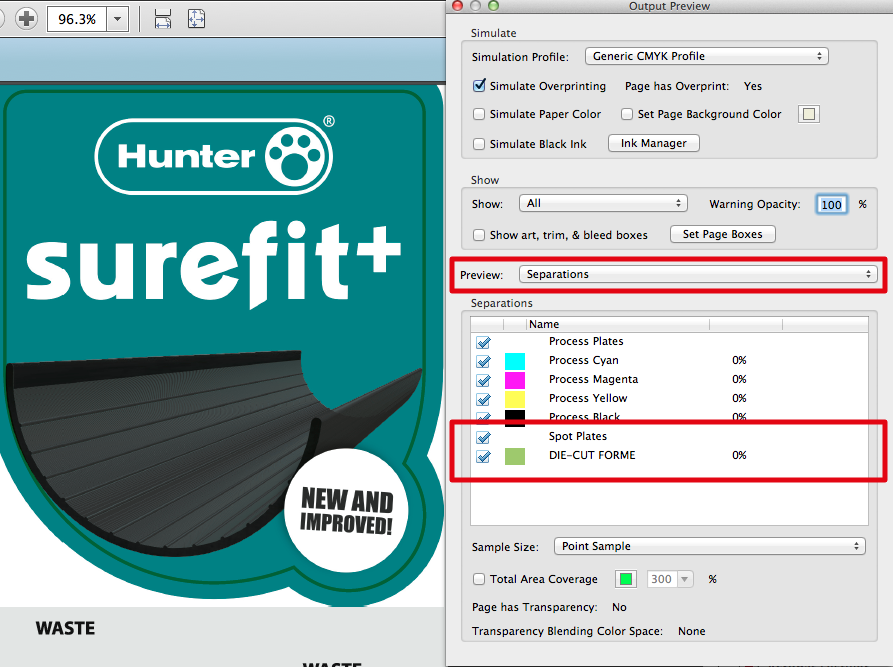
The example above shows a CMYK file that includes a DIE-CUT FORME for a cutter guide. Note that there are no Pantone® or other spot colours present.
If this is ticked, any elements set to Overprint will become transparent and thus show the items behind. If the Simulate Overprinting is ticked and there is no change visually, then no Overprint is present. (Our Special Finishing Colours such as OPULEAF-SILVER must be set to Overprint).

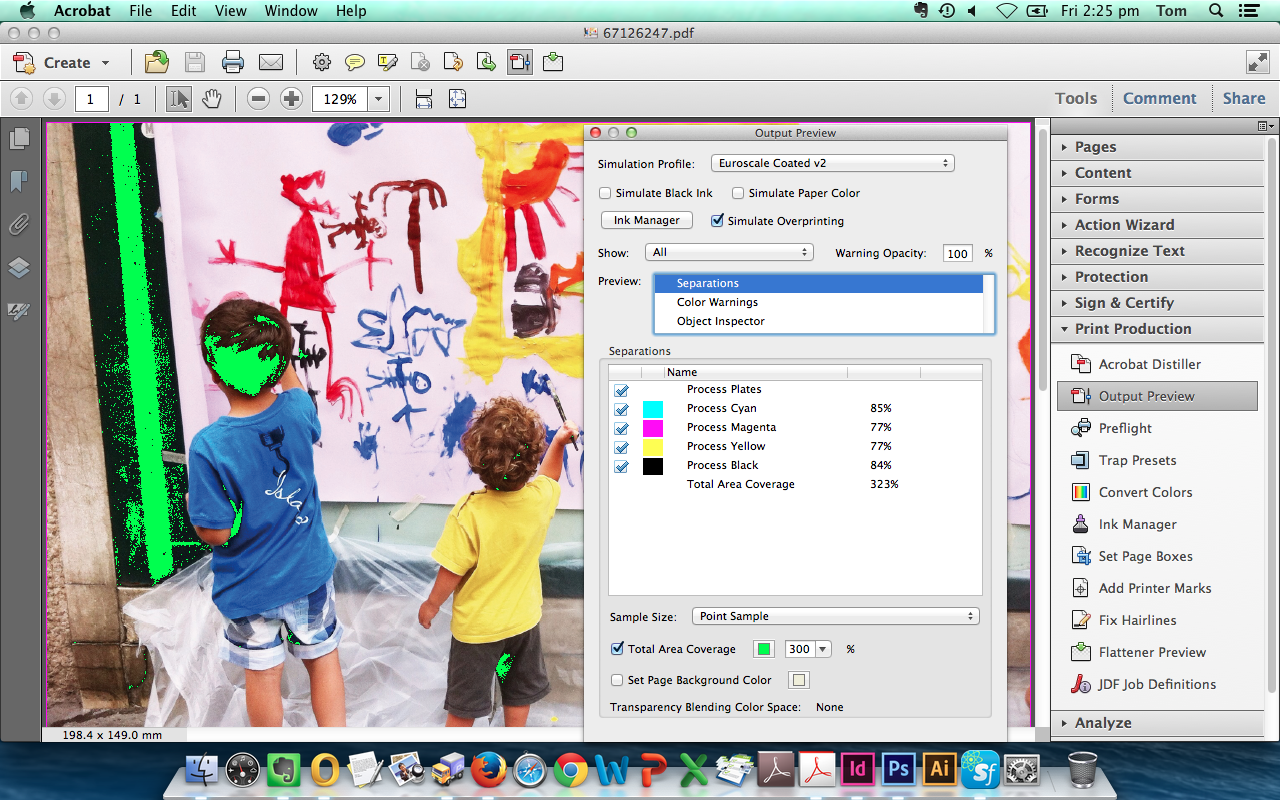
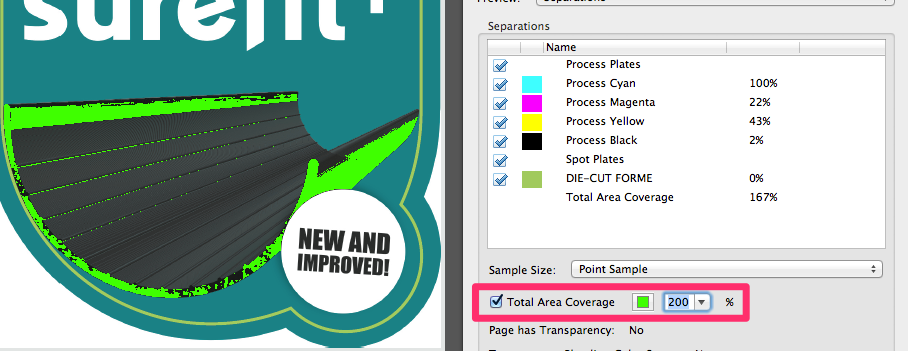
If this is ticked, any element above the predefined percentage will be displayed in a contrasting colour (300% for Coated Stocks and 225% for Uncoated Stocks such as Letterheads). This is useful for checking total ink levels quickly. The example below is highlighting all ink above 200%.
In Output Preview, change the Preview from Separations to Colour Warnings then select the tick box to Show Overprinting, when this is ticked it will display all Overprinted items in a contrasting colour. In this example below the OPULEAF-SILVER element, which is set to Overprint has changed colour. This is useful for quickly checking Overprint on Die Cut, Spot UV, Embossed and Foiled designs.
To locate RGB elements within your artwork select Show: RGB.
You can also use this section to show Images, Text, Line Art (Vectors), CMYK or Spot Colours on their own.

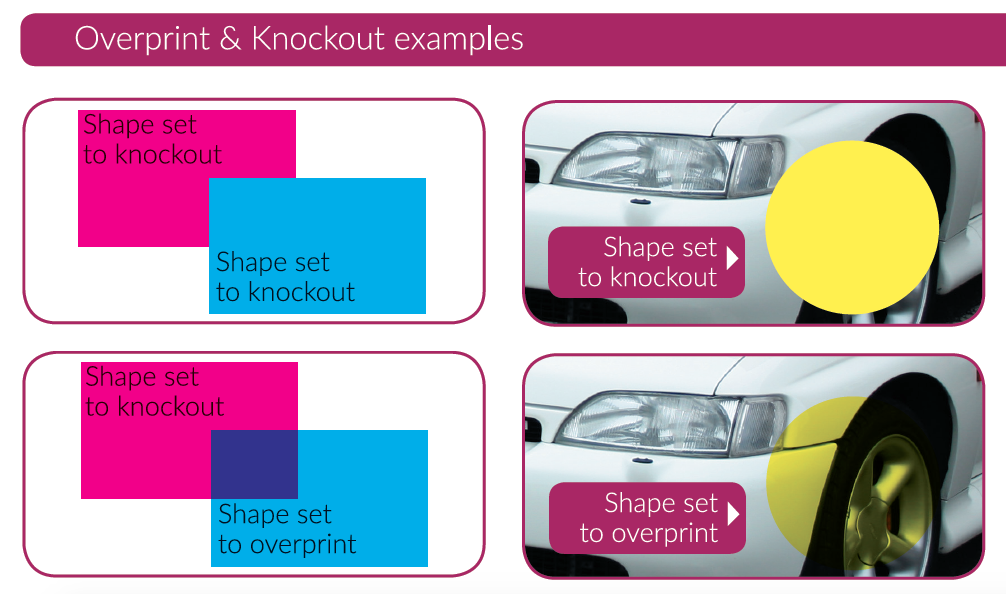
Overprinting is the process of printing one colour on top of another. When a vector object is not set to Overprint it is set to Knockout.
Only use ‘overprint’ in the following circumstances:
Do not alter the default overprint settings unless a desired effect is required. For example, overprinted yellow text on a red background will make the yellow text seem to disappear.
Black text is generally set to overprint by default. This is correct.
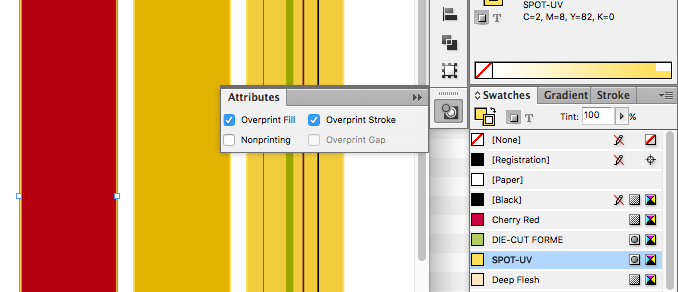
Overpint Fill / Stroke
Objects not set to Overprint are set to knockout as standard, this allows us to print yellow text over a blue background without the final colour appearing green (the yellow text punches out a white shape beneath it).
The OPULEAF-SILVER spot colour is set to overprint in the example above because we want the special finishing colour to appear on the Print Ready PDF without knocking out a white area beneath it.
You can view elements which are set to overprint using Adobe Acrobat's Output Preview Tool. The elements which are set to overprint are highlighted using the colour chosen.
It is likely that novelty uses for overprint might be overridden by our preflight profiles, which cater for typical uses for overprint.
This old version of Quark XPress does not handle overprint as you would expect; patterned lines are only partially overprinted, no matter what settings are specified for colours, printing, or objects. Our solution is for you to enable the Overprint DIE CUT FORME Action in your preflight. This ensures that all DIE CUT FORME objects are set to overprint, no matter what is specified in the design. Note that the DIE CUT FORME colour must be correctly specified for this Action to work.
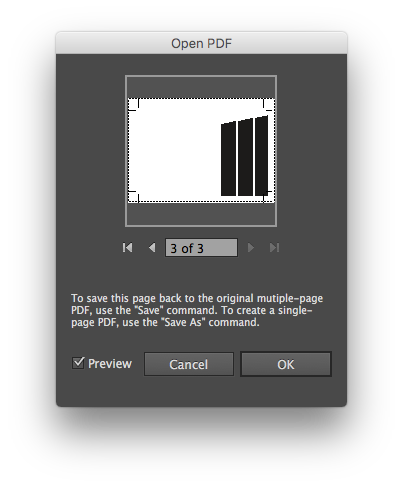
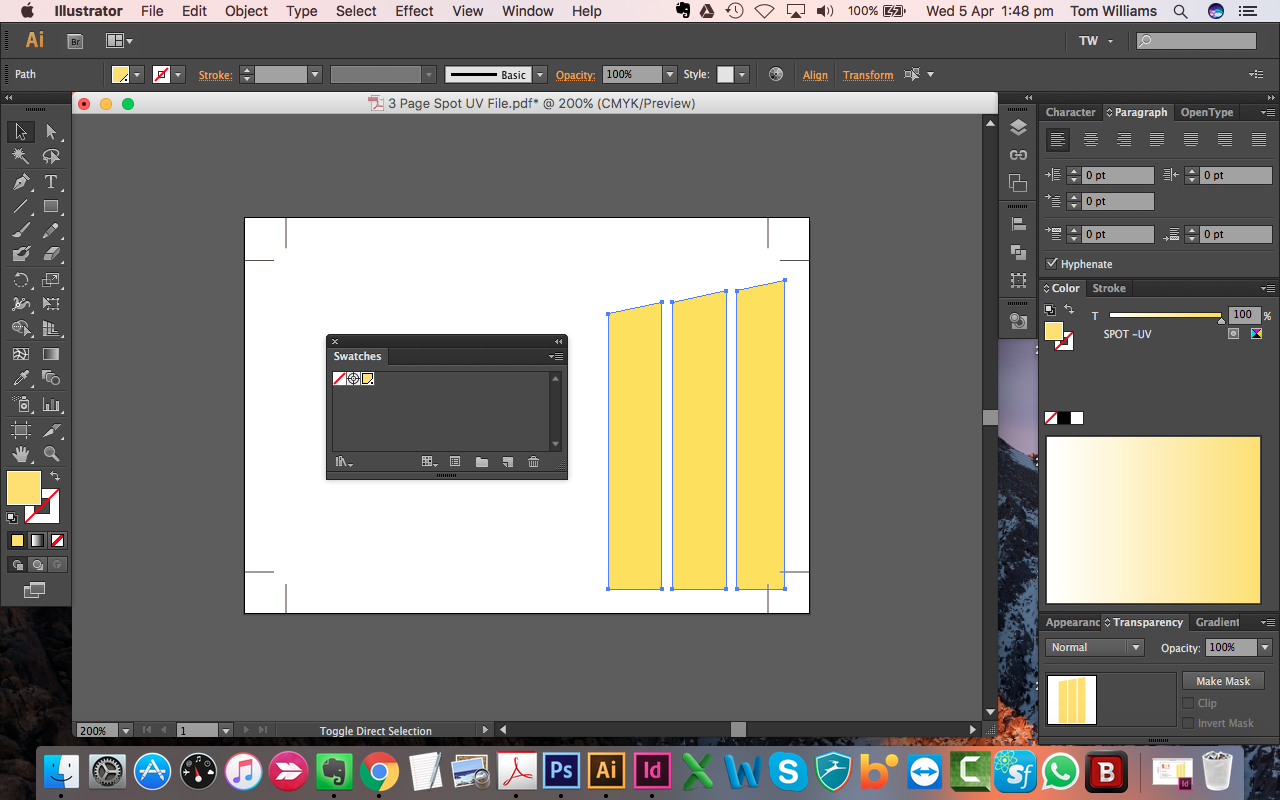
If you need to edit a vector element in a Client Supplied PDF you can drag the PDF file to open it in Adobe Illustrator.
If the PDF has multiple pages Illustrator will ask you which page you'd like to open. In the example below we are opening the 3rd page of a PDF which contains the Vector element we'll use to create the spot uv layer.
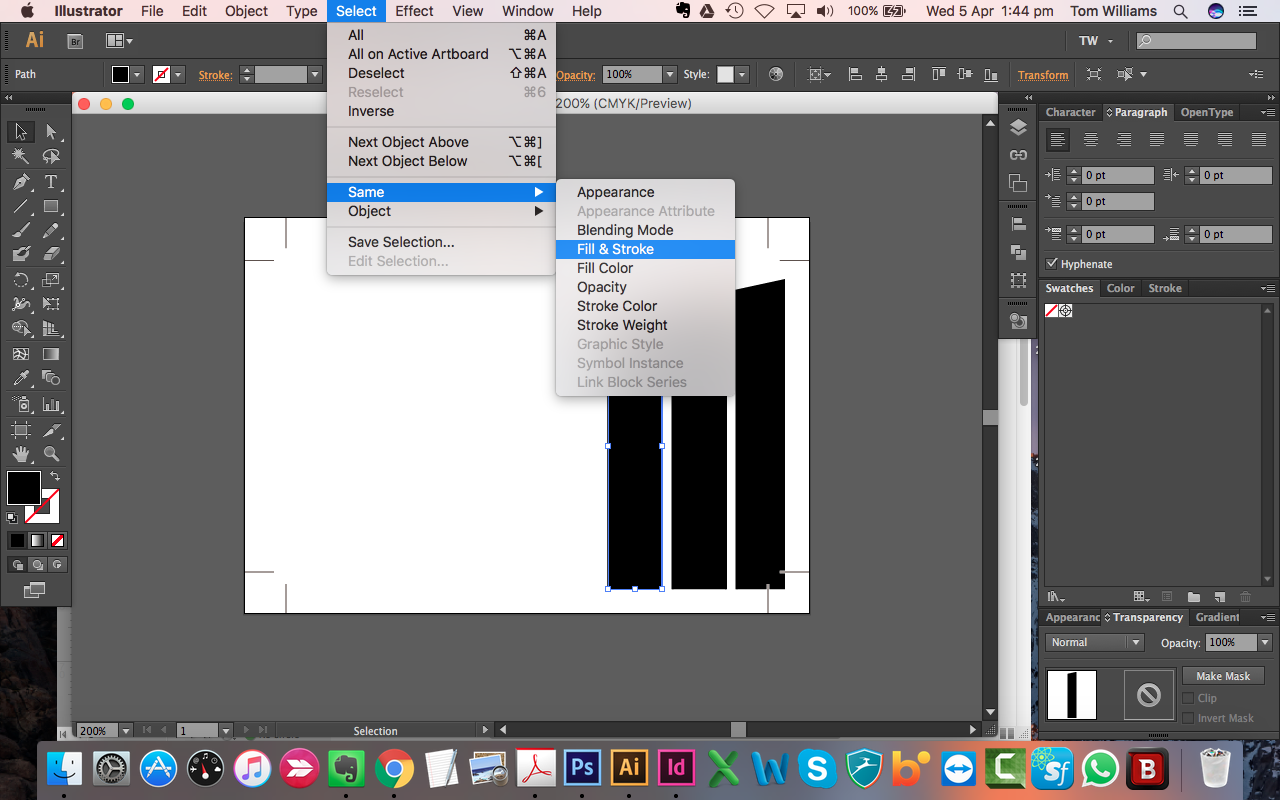
If the Vector element has been supplied using the same Swatch Colour we can use to select all elements.
Once the elements have been selected we can Create a new Colour Swatch for our Spot UV element.
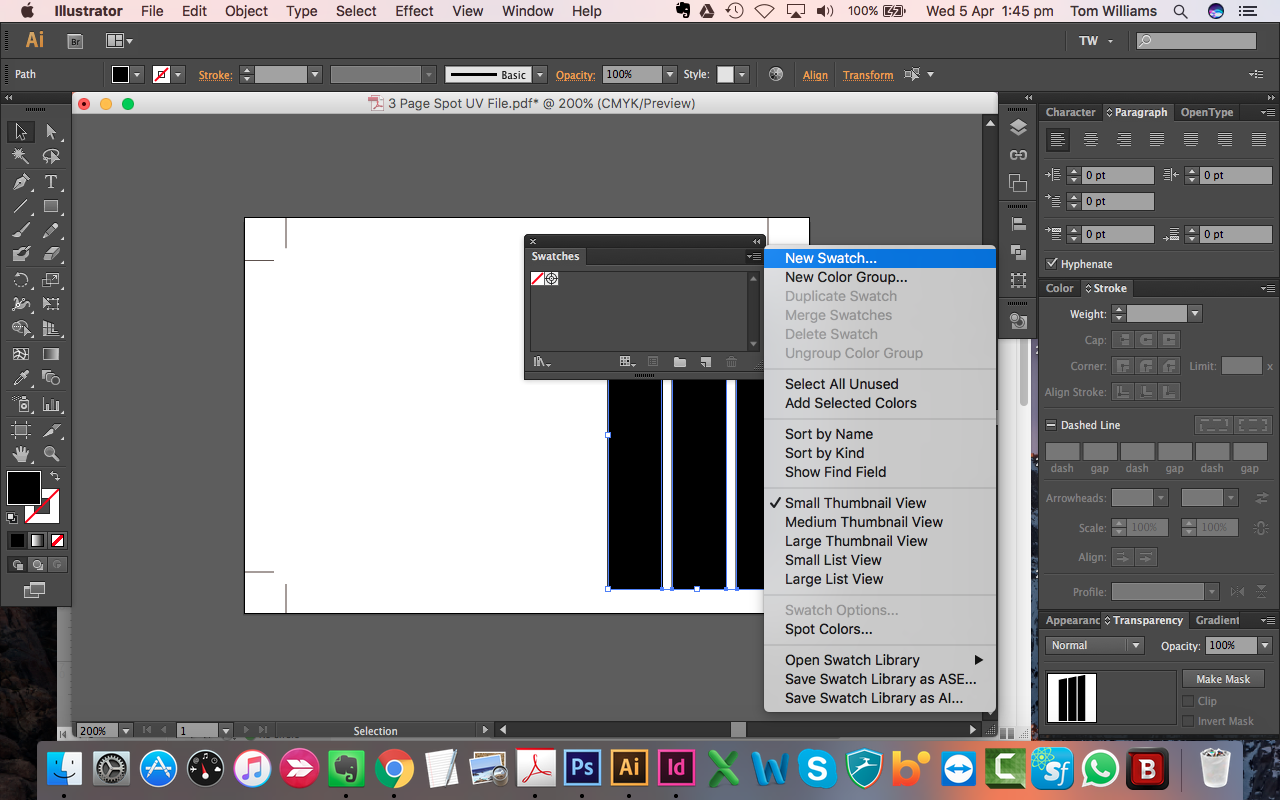
The colour swatch for Spot UV is:

The step above will colour our vector element in our special Spot UV finishing colour.
We also need to set this colour to Overprint.
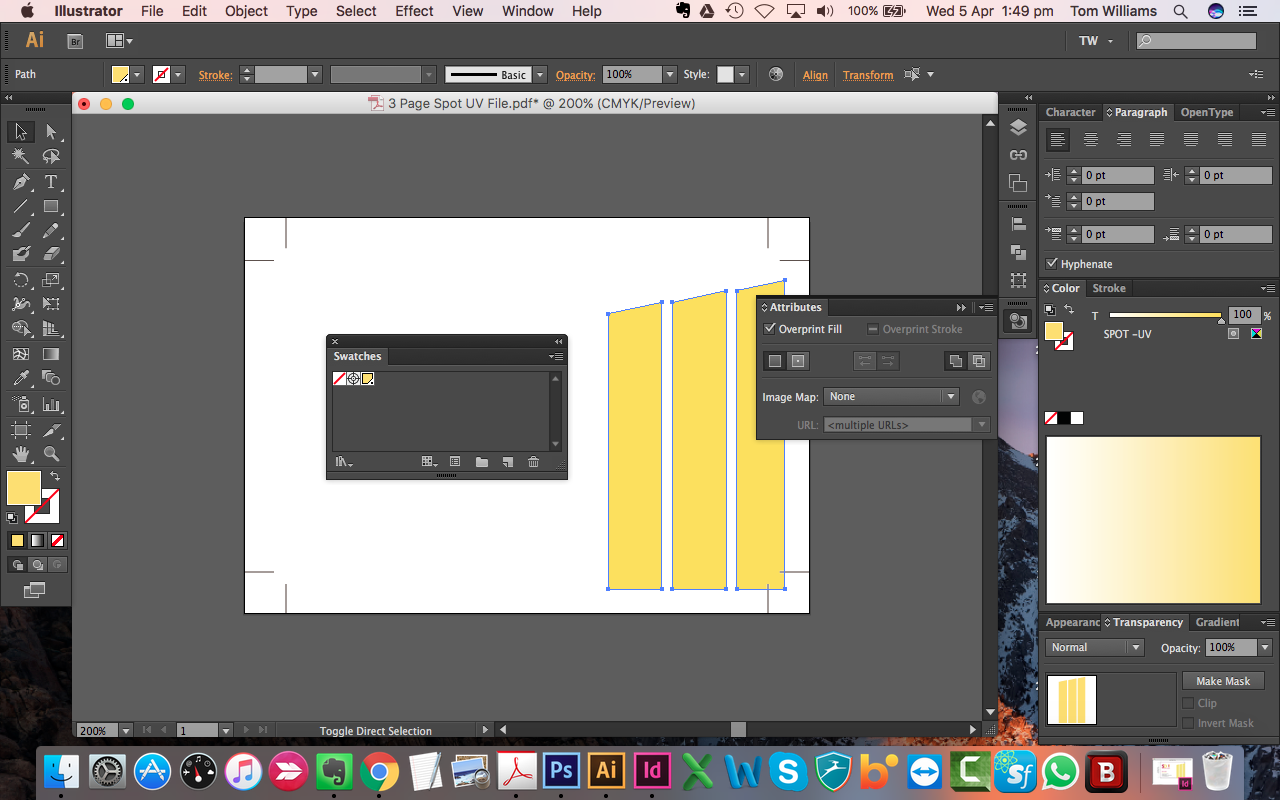
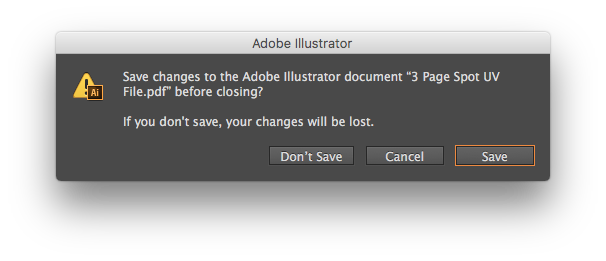
The final step is to Close the page and Save Changes before moving onto InDesign.
Alternatively you can copy this Spot UV element and paste it to page one of your PDF ready for printing.
If the Customer has supplied 3 pages to make a 2 page product (such as a 3rd page for Spot UV) you can Place a new PDF page directly above one that you've imported into InDesign previously.
Select , to place the PDF into InDesign.
Select your PDF file, ensure "Show import options" is selected.
Select your page number to place in, ensure crop Media is selected.
Use the Pathfinder tool to align the PDF to the centre of your page.
The final step is to as an Adobe PDF (Print), using "Press Quality", PDF version 1.4 settings.